
1. Introduction
This manual provides comprehensive instructions for the installation, operation, maintenance, and troubleshooting of your Samsung 32-inch QMC LFD (Large Format Display) with Dynamic Crystal Color technology, integrated with the VXT S-Series Cloud-Based Content Management Software. Please read this manual thoroughly before operating the device to ensure proper usage and to maximize its features.
The Samsung QMC LFD is designed for professional signage applications, offering an ultra-slim design and advanced display technologies for an immersive viewing experience. The VXT S-Series software provides robust tools for content creation, scheduling, and remote management.
2. Setup and Installation
2.1 Unboxing and Component Check
Carefully remove the display and all accessories from the packaging. Verify that all components listed below are present and undamaged. If any items are missing or damaged, contact your vendor immediately.
- Samsung 32-inch QMC LFD Display
- Power Cable
- Remote Control with Batteries
- Quick Setup Guide
- Warranty Card
2.2 Physical Installation
The QMC LFD features an ultra-slim 28.5mm depth, optimizing space. Ensure the installation location is stable, well-ventilated, and away from direct sunlight or heat sources. For wall mounting, use a VESA-compatible mount (sold separately) and follow the mount manufacturer's instructions carefully. Ensure adequate space around the display for ventilation and cable management.
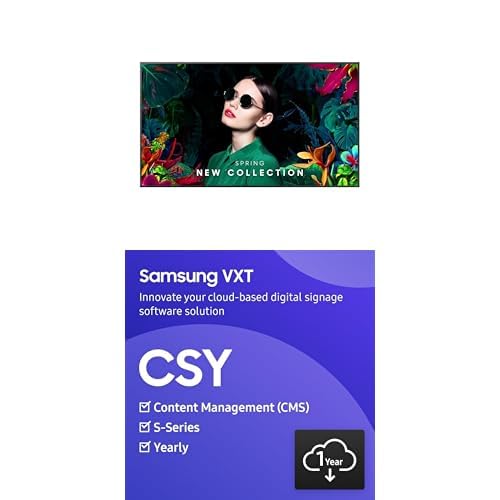
Figure 1: Front view of the Samsung 32-inch QMC LFD Display.
2.3 Connecting Cables
Connect the necessary cables to the display's input ports. The QMC LFD supports various connectivity options:
- Power: Connect the power cable to the display's power input and then to a grounded electrical outlet.
- Video Inputs: Connect your content source (e.g., PC, media player) to one of the available video input ports: HDMI, DisplayPort, DVI, or VGA.
- USB: Use the USB ports for connecting external devices or for firmware updates. The display includes two USB 3.0 ports.
- Network: For VXT S-Series cloud connectivity, connect an Ethernet cable to the LAN port or configure Wi-Fi settings.
2.4 Initial Power On and VXT S-Series Setup
- After connecting all cables, press the power button on the display or remote control.
- Follow the on-screen prompts for initial setup, including language selection and network configuration.
- To utilize the VXT S-Series Cloud-Based Content Management Software, ensure the display is connected to the internet.
- Access the VXT S-Series application on the display. You will need to provision the device to your VXT account. Refer to the VXT S-Series documentation for detailed steps on account creation and device provisioning.
- The VXT Player app can also be downloaded from the Google Play Store for managing content on Android-powered displays.
3. Operating Instructions
3.1 Basic Display Operation
- Power On/Off: Use the power button on the remote control or the display itself.
- Input Source Selection: Press the 'Source' button on the remote to cycle through available input sources (HDMI, DisplayPort, DVI, VGA).
- Menu Navigation: Use the arrow keys and 'Enter' button on the remote to navigate the on-screen display (OSD) menu for settings adjustments.
3.2 Display Features
- Dynamic Crystal Color: This feature delivers over one billion shades of color, providing an immersive and vibrant viewing experience. It is automatically optimized by the display's processing unit.
- Quantum Processor Lite 4K: This industry-leading technology enhances every piece of content to 4K resolution, ensuring clarity and consistency across various media types.
- SmartView+: Enables wireless screen sharing from compatible devices, facilitating easy collaboration and functional usability. Refer to the display's OSD menu for SmartView+ setup and connection instructions.
3.3 VXT S-Series Content Management
The VXT S-Series is a powerful cloud-based digital signage software that eliminates the need for external media players. It allows for seamless content management from anywhere.
- Content, Playlist, and Schedule Management: Use the intuitive user interface with drag-and-drop functions to create, edit, and schedule playlists. This allows for quick deployment of content and scheduled updates across all your VXT-connected digital displays.
- Free Templates on VXT Canvas: Select from over 170 templates available on VXT Canvas to create visually appealing content. These templates can be easily launched and updated from anywhere via the cloud network.
- Screen Compatibility: Samsung VXT CMS is compatible with any Samsung business screen. It supports content management on both Android and Windows-powered digital displays.
4. Maintenance
4.1 Cleaning the Display
- Screen: Gently wipe the screen with a soft, lint-free cloth. For stubborn marks, slightly dampen the cloth with water or a specialized screen cleaner. Never spray liquid directly onto the screen.
- Exterior: Wipe the display's frame and back panel with a soft, dry cloth.
- Do Not Use: Avoid using abrasive cleaners, alcohol, benzene, or thinners, as these can damage the display surface.
4.2 Environmental Considerations
To ensure optimal performance and longevity, operate the display within the recommended temperature and humidity ranges specified in the product's full technical documentation. Avoid exposing the display to extreme temperatures, high humidity, or dusty environments.
5. Troubleshooting
This section addresses common issues you might encounter. If the problem persists after following these steps, contact Samsung customer support.
| Problem | Possible Cause | Solution |
|---|---|---|
| Display does not power on. | Power cable disconnected; no power from outlet. | Ensure power cable is securely connected. Check if the power outlet is functional. |
| No signal displayed. | Incorrect input source selected; video cable loose or faulty; source device off. | Select the correct input source using the remote. Check video cable connections. Ensure the source device is powered on and outputting a signal. |
| Picture is distorted or colors are incorrect. | Video cable issue; display settings incorrect. | Check video cable for damage or loose connections. Reset display picture settings to default via the OSD menu. |
| VXT CMS content not updating. | No internet connection; incorrect VXT provisioning. | Verify the display's internet connection (wired or Wi-Fi). Recheck VXT S-Series provisioning steps. |
6. Specifications
Below are the key technical specifications for the Samsung 32-inch QMC LFD Display:
| Feature | Specification |
|---|---|
| Brand | Samsung |
| Model Name | QMC |
| Screen Size | 32 Inches |
| Display Technology | LED |
| Resolution | 4K UHD 2160p |
| Aspect Ratio | 16:9 |
| Image Contrast Ratio | 3000:1 |
| Special Features | Dynamic Crystal Color, Quantum Processor Lite 4K, Wireless Screen Sharing |
| Hardware Interface | DVI, DisplayPort, HDMI, VGA |
| Total HDMI Ports | 1 |
| Total USB 3.0 Ports | 2 |
| Screen Finish | Glossy |
| Picture Quality Enhancement Technology | Quantum Processor Lite 4K |
7. Warranty and Support
Your Samsung QMC LFD Display is covered by a manufacturer's warranty. Please refer to the warranty card included in your product packaging for specific terms, conditions, and duration. Keep your proof of purchase for warranty claims.
For technical support, service, or further inquiries, please visit the official Samsung support website or contact their customer service. You can typically find support contact information on the Samsung website or in your product documentation.
Online Support: https://www.samsung.com/us/support/


