
Important Safety Instructions
When using electrical appliances, basic safety precautions should be followed, including the following:
- Read all instructions before using the appliance.
- Do not allow children to use the microwave without close supervision.
- Do not heat sealed containers, as they may explode.
- Use caution when removing hot items to prevent burns.
- Ensure the appliance is properly grounded.
- Do not operate the microwave if the door is damaged or if the seals are broken.
- Only qualified service personnel should perform repairs.
Setup
Unpacking and Placement
1. Carefully remove the microwave oven from its packaging. Remove all packing materials, including any protective film or tape.
2. Place the microwave on a flat, stable surface that is strong enough to hold the oven and the food items you will place inside. Ensure there is adequate ventilation space around the unit (at least 4 inches on top, sides, and back).
3. Do not block air vents. Do not place the microwave near heat sources or in damp areas.
Turntable Assembly
1. Place the turntable ring inside the microwave cavity.
2. Position the glass turntable plate securely on top of the turntable ring, ensuring it sits properly on the center hub.
Operating Instructions
Control Panel Overview
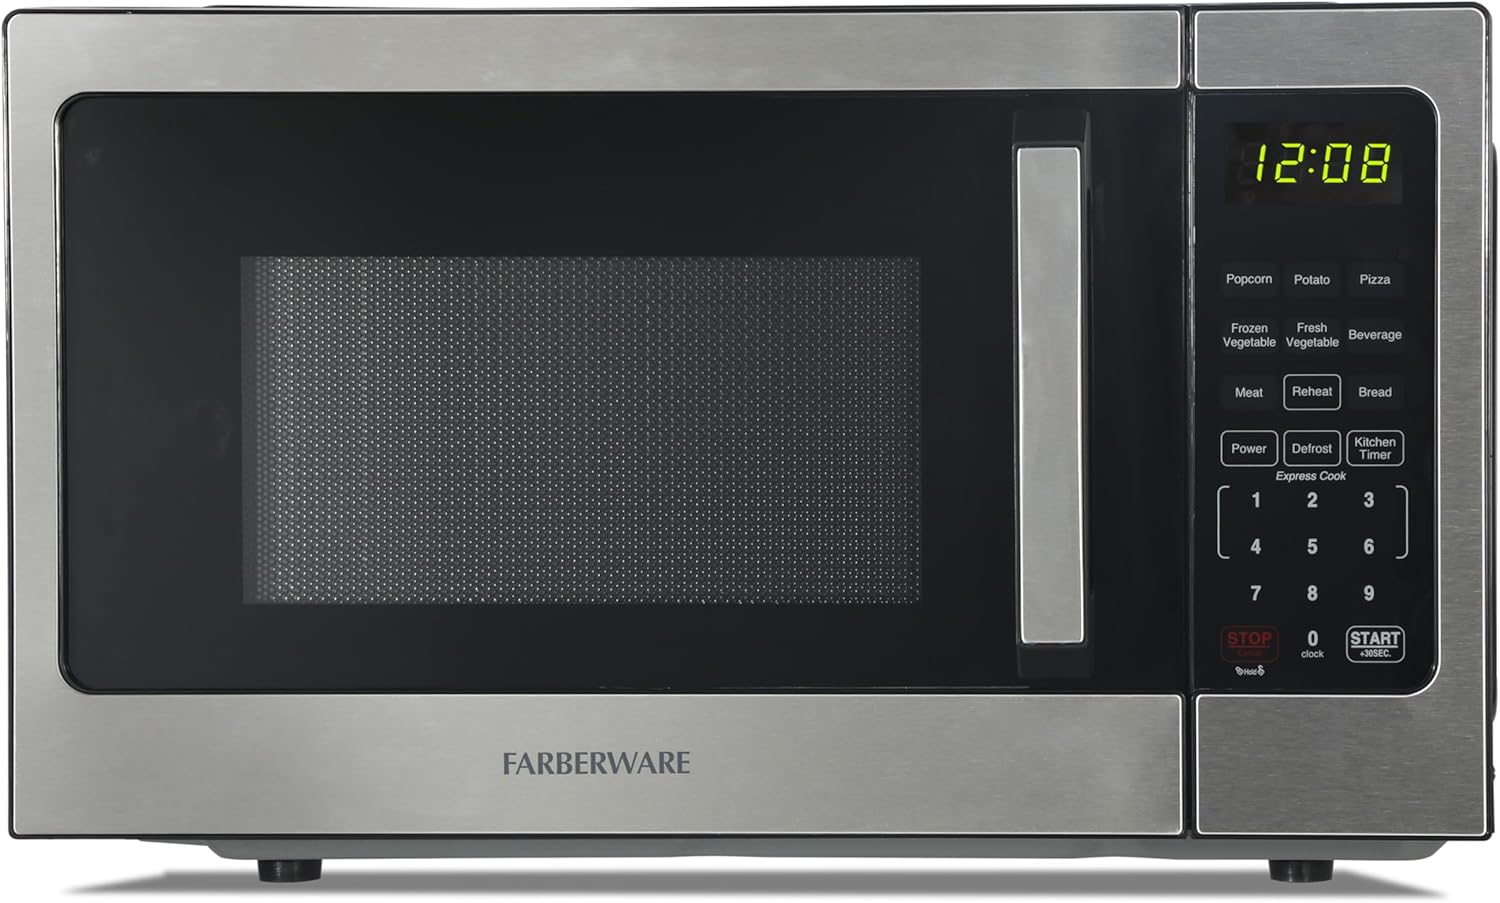
The microwave features an intuitive digital control panel for easy operation. It includes buttons for time cook, defrost, power levels, and various auto-cook settings.

Basic Cooking
- Place food in a microwave-safe container on the glass turntable.
- Close the microwave door securely.
- Press the 'Time Cook' button.
- Enter the desired cooking time using the number pad.
- Press 'Start' to begin cooking.
Power Levels
To adjust the cooking power:
- Press the 'Power' button after setting the cooking time.
- Select a power level from 1 to 10 using the number pad (10 being 100% power).
- Press 'Start'.
Auto-Cook Settings
The microwave includes 8 pre-programmed auto-cook menus for common items:
- Popcorn
- Potato
- Pizza
- Frozen Vegetable
- Beverage
- Dinner Plate
- Meat
- Bread
Simply press the corresponding button for the desired food item. The microwave will automatically set the optimal cooking time and power level.
Express Cook & +30 Second Function
- Express Cook: For quick cooking, press any number from 1 to 6 on the 'Express Cook' section of the keypad to instantly start cooking for that many minutes at 100% power.
- +30 Second: Press the 'Start/+30SEC' button to add 30 seconds to the current cooking time or to start cooking for 30 seconds at 100% power if no other settings are entered. Repeated presses will add 30 seconds each time.
Defrost Options
The microwave offers both time and weight defrost options for various frozen foods.
- Time Defrost: Press 'Time Defrost', enter the desired defrosting time, then press 'Start'.
- Weight Defrost: Press 'Weight Defrost', enter the weight of the food in ounces, then press 'Start'.
Child Safety Lock
To activate the child safety lock, press and hold the 'Stop/Cancel' button for 3 seconds. The display will show 'LOCK'. To deactivate, press and hold 'Stop/Cancel' again for 3 seconds.
Maintenance and Cleaning
Cleaning the Exterior
Wipe the exterior surface with a soft, damp cloth. Avoid using abrasive cleaners or harsh chemicals that could damage the finish.
Cleaning the Interior
Clean the inside of the microwave regularly. For spills, wipe immediately with a damp cloth. For stubborn stains, place a bowl of water with lemon slices inside and microwave for a few minutes until steam fills the cavity. This will loosen food particles, making them easier to wipe away.
Turntable Care
The glass turntable and turntable ring can be removed for cleaning. Wash them in warm, soapy water or in the dishwasher. Ensure they are completely dry before placing them back in the microwave.
Troubleshooting
| Problem | Possible Cause | Solution |
|---|---|---|
| Microwave does not start | Door not closed properly; Power cord unplugged; Circuit breaker tripped; Child lock activated. | Ensure door is firmly closed; Check power connection; Reset circuit breaker; Deactivate child lock. |
| Food not heating evenly | Food not stirred or rearranged; Incorrect power level or cooking time. | Stir or rearrange food halfway through cooking; Adjust power level and time as needed. |
| Display not working or unresponsive | Power interruption; Internal malfunction. | Unplug the unit for 1 minute, then plug back in. If issue persists, contact customer support. |
| Unusual noise during operation | Turntable not seated correctly; Foreign object in cavity. | Ensure turntable and ring are properly positioned. Remove any obstructions. |
Specifications
- Brand: Farberware
- Model Number: FM09WEISS
- Capacity: 0.9 Cubic Feet
- Wattage: 900 watts
- Product Dimensions: 18.62"D x 14.72"W x 10.7"H
- Item Weight: 34 pounds
- Installation Type: Countertop
- Color: Stainless Steel
- Special Feature: Defrost
- Controller Type: Button
Warranty Information
This Farberware microwave oven is covered by a manufacturer's warranty. Please refer to the warranty card included with your product for specific terms, conditions, and duration. Keep your proof of purchase for any warranty claims.
Customer Support
For further assistance, troubleshooting, or to inquire about replacement parts, please visit the official Farberware website or contact their customer service department. You can find more information at the Farberware Store on Amazon.


