Introduction
This manual provides detailed instructions for the setup, operation, maintenance, and troubleshooting of your CRUA 28-inch 4K UHD+ IPS 60Hz Monitor. Please read this manual thoroughly before using the product to ensure proper functionality and to prevent damage.
Key Features:
- Stunning 4K UHD+ Resolution & 178° Wide Viewing Angle: The 28-inch PC monitor features a 4K UHD+ 3840×2560 resolution with 178° wide viewing angles, providing ultra-sharp visuals and consistent brightness from any position. The 15:10 aspect ratio offers more screen space for professional design, gaming, and content creation.
- Exceptional Color Accuracy with 10-Bit IPS Panel: Enjoy vivid and accurate colors with 270cd/m² brightness, 1200:1 contrast ratio, and 120% sRGB color gamut. The 10-bit IPS panel ensures 1.07 billion colors, making this monitor suitable for graphic design, photo editing, and video editing.
- Built-in Speakers & Type-C Charging Port: Integrated speakers provide convenient audio output without external devices. The Type-C charging port offers a seamless power supply to compatible devices, reducing cable clutter.
- Versatile Connectivity & Wall Mount Compatibility: Equipped with HDMI 2.0 and DP 1.4 ports for fast, stable connections. The wall-mountable design (75x75mm VESA) saves desk space and provides flexible installation options.
1. Setup Instructions
1.1 Unpacking the Monitor
Carefully remove all components from the packaging. Ensure all items listed in the packing list are present and undamaged. Keep the original packaging for future transport or service needs.
1.2 Attaching the Stand
- Place the monitor face down on a soft, clean surface to prevent scratches.
- Align the stand base with the stand neck and secure it with the provided screw.
- Attach the assembled stand to the back of the monitor by aligning the mounting points and securing it firmly.

Figure 1: CRUA 28-inch monitor with its stand attached.
1.3 Connecting Cables
Connect the necessary cables to the appropriate ports on the back of the monitor and your computer or other devices.
- Power Cable: Connect the power adapter to the monitor's DC input port, then plug the power cable into an electrical outlet.
- Video Input: Choose one of the following options:
- HDMI: Connect an HDMI cable from your device to one of the monitor's HDMI 2.0 ports.
- DisplayPort: Connect a DisplayPort cable from your device to the monitor's DP 1.4 port.
- Type-C: Connect a Type-C cable from a compatible device to the monitor's Type-C port for video, data, and power delivery.
- Audio Output: If using external speakers or headphones, connect them to the monitor's 3.5mm audio output jack.

Figure 2: Rear view of the monitor displaying various input/output ports and the 75x75mm VESA wall mount bracket area.
1.4 Powering On
Press the power button located on the monitor to turn it on. The power indicator light will illuminate.
2. Operating Instructions
2.1 On-Screen Display (OSD) Menu
The OSD menu allows you to adjust various monitor settings. Use the control buttons (usually located on the back or bottom right of the monitor) to navigate and select options.
Common OSD Settings:
- Input Source: Select between HDMI 1, HDMI 2, DisplayPort, or Type-C.
- Brightness/Contrast: Adjust the display's brightness and contrast levels.
- Color Settings: Fine-tune color temperature, gamma, and other color-related parameters to achieve optimal visual quality. The 10-bit IPS panel provides exceptional color accuracy.
- Audio: Control the volume of the built-in speakers or select the audio input source.
- Picture Quality Settings: Adjust sharpness, aspect ratio (15:10 native), and other image enhancements.

Figure 3: Visual representation of the monitor's color precision capabilities, including 10-bit color depth and 120% sRGB.

Figure 4: Illustration demonstrating the superior color and viewing angles of IPS technology compared to VA panels.
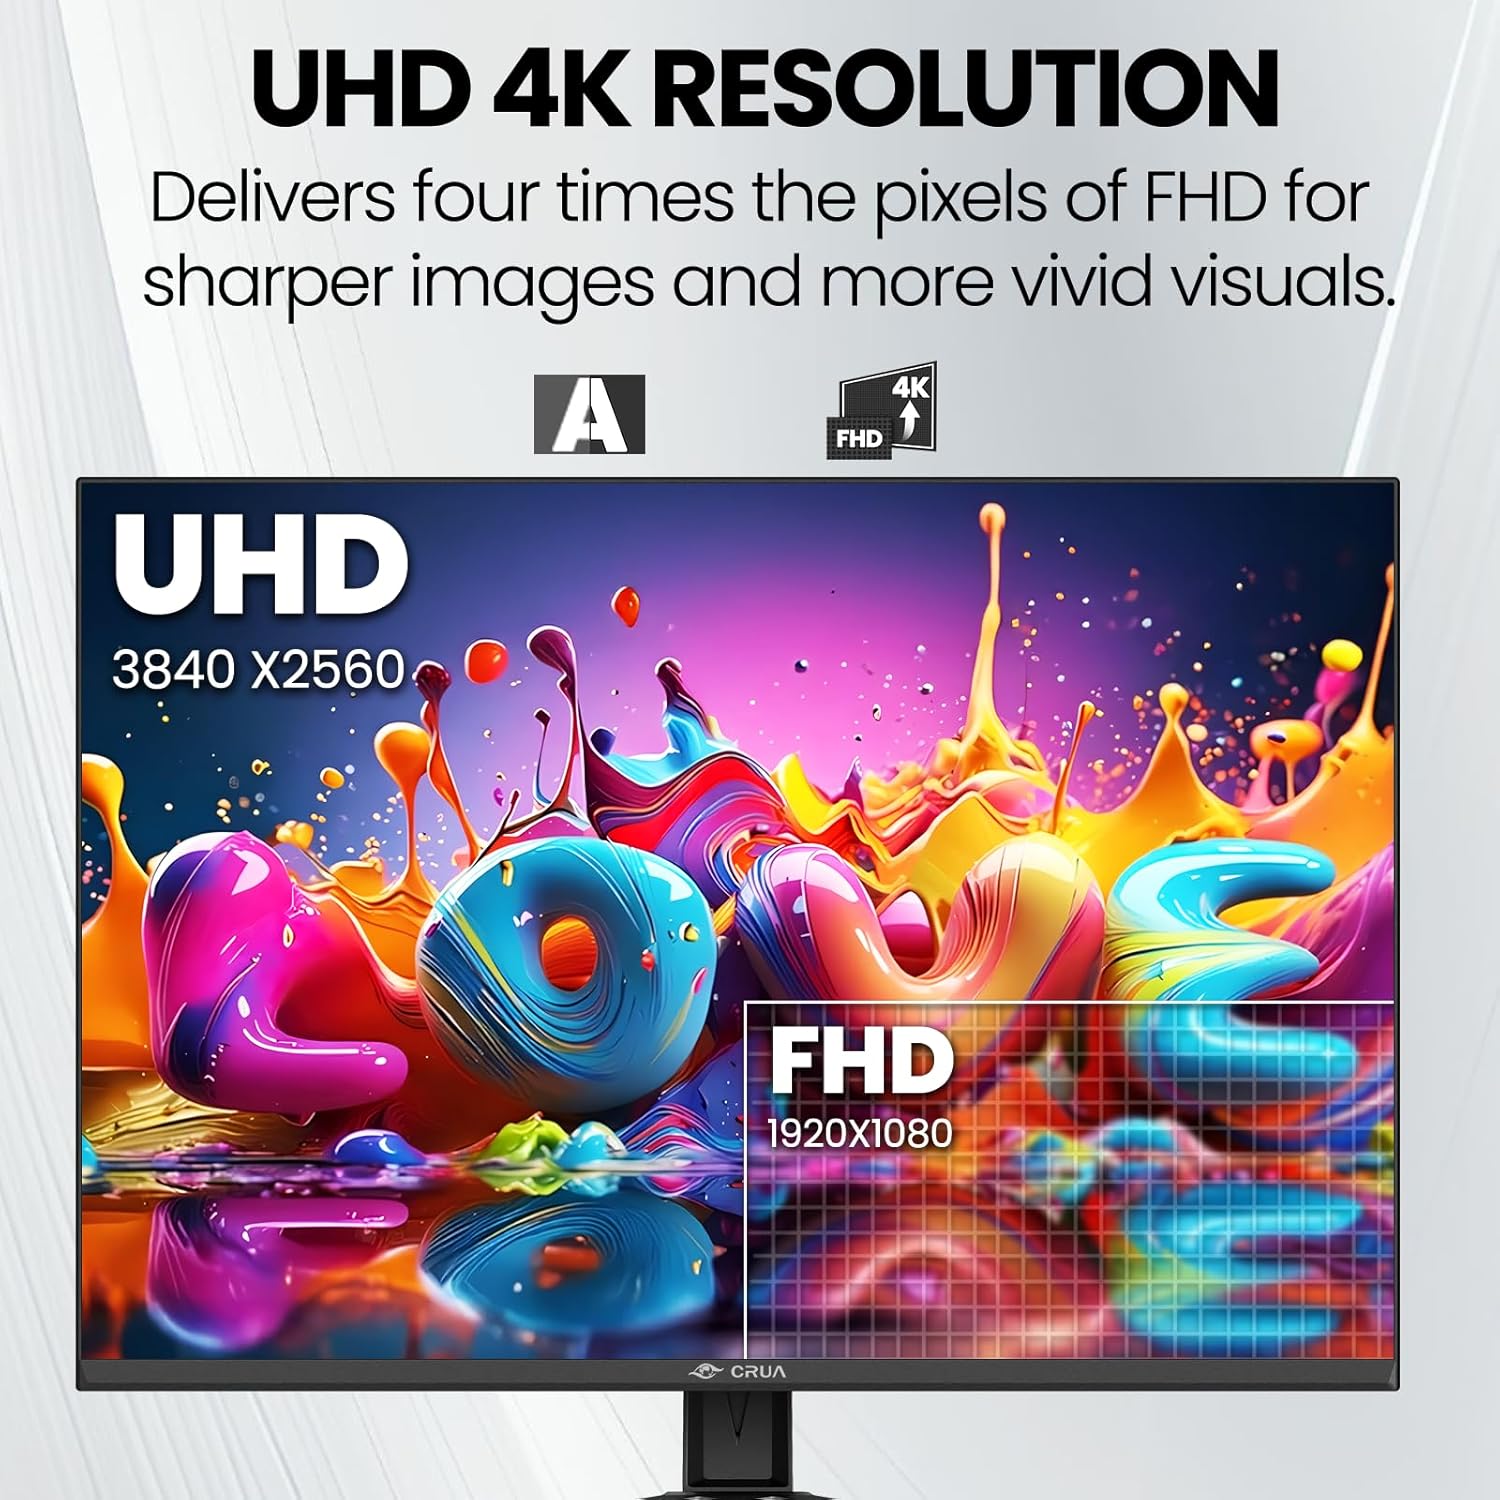
Figure 5: A visual comparison showcasing the clarity and detail of 4K UHD+ resolution (3840x2560) versus Full HD (1920x1080).
2.2 Using Built-in Speakers
The monitor includes built-in speakers for audio output. Adjust the volume through the OSD menu or your connected device's audio settings. For higher quality audio, external speakers or headphones are recommended via the 3.5mm audio jack.
2.3 Type-C Port Functionality
The Type-C port supports video signal transmission, data transfer, and power delivery to compatible devices. This allows for a single-cable solution for many modern laptops and devices.

Figure 6: The monitor seamlessly integrated into an office setup, demonstrating its use with a laptop via the Type-C connection.
3. Maintenance
3.1 Cleaning the Monitor
- Always unplug the monitor from the power outlet before cleaning.
- Use a soft, lint-free cloth lightly dampened with water or a non-abrasive screen cleaner.
- Do not use alcohol, ammonia, or abrasive cleaners, as these can damage the screen surface.
- Wipe the screen gently to remove dust and smudges.
3.2 General Care
- Avoid placing heavy objects on the monitor or its cables.
- Do not expose the monitor to direct sunlight, excessive heat, or extreme cold.
- Keep the monitor away from liquids and high humidity.
- Ensure adequate ventilation around the monitor to prevent overheating.
4. Troubleshooting
If you encounter issues with your monitor, please refer to the following common solutions. If the problem persists, contact customer support.
4.1 No Display / Black Screen
- Ensure the power cable is securely connected to both the monitor and the power outlet.
- Verify that the video cable (HDMI, DP, or Type-C) is firmly connected to both the monitor and your source device.
- Check if the correct input source is selected in the monitor's OSD menu.
- Confirm that your computer or source device is powered on and outputting a video signal.
4.2 No Sound from Built-in Speakers
- Check the volume level in the monitor's OSD menu and on your connected device.
- Ensure the monitor is not muted in the OSD settings.
- Verify that the audio output from your source device is directed to the monitor.
4.3 Image Quality Issues (Blurry, Distorted, Incorrect Colors)
- Ensure your source device's display resolution and refresh rate are set correctly (3840x2560 at 60Hz is recommended).
- Adjust the brightness, contrast, and color settings in the OSD menu.
- Try a different video cable to rule out cable issues.
5. Specifications
| Feature | Specification |
|---|---|
| Model Number | CR280HDU |
| Screen Size | 28.2 Inches |
| Panel Type | IPS |
| Resolution | 4K UHD+ (3840×2560 Pixels) |
| Refresh Rate | 60Hz |
| Aspect Ratio | 3:2 |
| Brightness | 270 cd/m² |
| Contrast Ratio | 1200:1 |
| Color Depth | 10-Bit (1.07 Billion Colors) |
| Color Gamut | 120% sRGB |
| Viewing Angle | 178° (Horizontal/Vertical) |
| Connectivity | 2x HDMI 2.0, 1x DisplayPort 1.4, 1x Type-C (Video, Data, Power), 1x 3.5mm Audio Out |
| Speakers | Built-in |
| Wall Mount | VESA 75x75mm |
| Product Dimensions (L x W x H) | 1.8 x 24 x 16 inches |
| Item Weight | 12.62 pounds |
| Screen Surface | Matte |
6. Warranty Information
CRUA provides a standard manufacturer's warranty for this product. For specific details regarding warranty coverage, duration, and terms, please refer to the warranty card included with your purchase or visit the official CRUA website. Keep your proof of purchase for warranty claims.
7. Customer Support
If you have any questions, require technical assistance, or need to report an issue, please contact CRUA Customer Support. Our team is dedicated to providing high-quality service and support.
- Manufacturer: CRUA
- Seller: CRUA Technology
- Online Store: Visit the CRUA Store on Amazon
- For further assistance, please refer to the contact information provided in your product packaging or on the official CRUA website.


