
PELONIS PSHO07JM1AWW
PELONIS Oil Filled Radiator Heater
Model: PSHO07JM1AWW
Important Safety Instructions
Please read and save these important safety instructions before using this heater. Failure to follow these instructions may result in fire, electric shock, or injury.
- Read All Instructions: Before operating this heater, read all instructions carefully.
- Placement: Always place the heater on a firm, level surface. Do not place on soft surfaces like beds or rugs where openings may be blocked.
- Clearance: Maintain a minimum distance of 3 feet (0.9 meters) from walls, furniture, curtains, and other combustible materials.
- Power Source: Connect the heater to a 120V, 15-amp (or greater) dedicated circuit. Do not overload circuits.
- Extension Cords: Avoid using extension cords. If an extension cord is necessary, ensure it is a heavy-duty cord (14 AWG or larger) with a rating not less than 1500W.
- Moisture: Do not use the heater in wet or moist locations such as bathrooms, laundry areas, or near sinks. Never immerse the heater in water.
- Supervision: Close supervision is necessary when any appliance is used by or near children or individuals with reduced physical, sensory, or mental capabilities.
- Moving the Heater: Always unplug the heater before moving it. Use the integrated handle for transport.
- Overheat Protection: This heater is equipped with an automatic overheat protection system that will shut off the unit if it becomes too hot. If this occurs, unplug the heater, allow it to cool, and then plug it back in.
- Tip-Over Protection: The heater includes a safety switch that automatically turns off the unit if it is accidentally tipped over. Place the heater upright on a flat surface to resume operation.
- Do Not Cover: Never cover the heater or block its air vents, as this can cause overheating and fire.
- Hot Surfaces: The heater's surfaces can become hot during operation. To avoid burns, do not touch hot surfaces directly. Use handles or knobs.
- Unplug When Not in Use: Always unplug the heater when not in use.
Package Contents
- PELONIS Radiator Heater (1 unit)
- User Manual (1 copy)
Product Overview
Familiarize yourself with the components and controls of your PELONIS Oil Filled Radiator Heater.
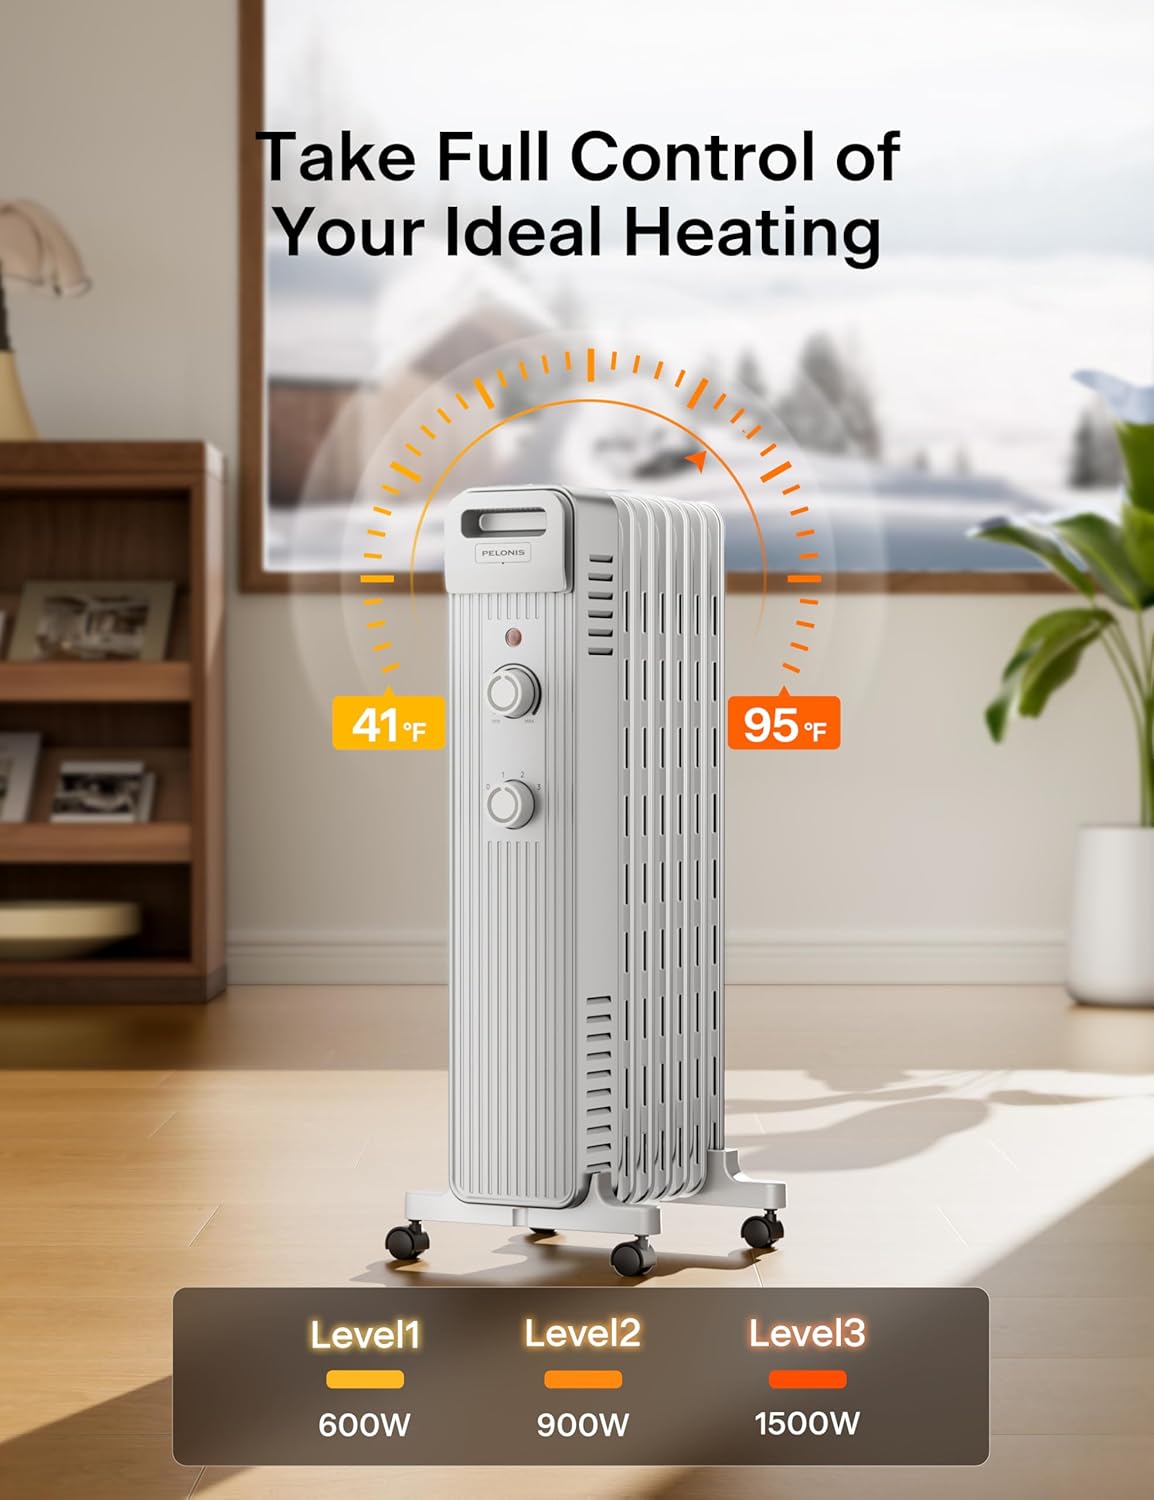
Image: Front view of the PELONIS Oil Filled Radiator Heater, highlighting the power indicator light, temperature control dial, and heating level control dial.
Components:
- Power Indicator Light: Illuminates when the heater is operating.
- Temperature Control Dial: Adjusts the desired room temperature.
- Heating Level Control Dial: Selects the power output (Low, Medium, High).
- Radiator Fins: Heat-emitting surfaces.
- Caster Wheels: For easy mobility.
- Integrated Handle: For safe transport of the unit.
- Cord Wrap: For neat storage of the power cord.
Setup
Follow these steps to prepare your heater for use.
- Unpack: Carefully remove the heater from its packaging. Retain packaging for future storage.
- Caster Wheel Assembly: The caster wheels may require minor assembly. Attach the caster wheel bases to the bottom of the heater by aligning them with the designated slots and securing them firmly. Ensure all wheels are securely attached before use.
- Placement: Place the heater upright on a stable, level surface. Ensure there is adequate clearance from walls and other objects as specified in the safety instructions.
- Power Connection: Unwind the power cord completely from the cord wrap. Plug the heater directly into a standard 120V AC electrical outlet. Do not use with extension cords or power strips.

Image: Full view of the PELONIS Oil Filled Radiator Heater, showing its upright position and attached caster wheels.
Operating Instructions
Learn how to operate your PELONIS Oil Filled Radiator Heater for optimal warmth.
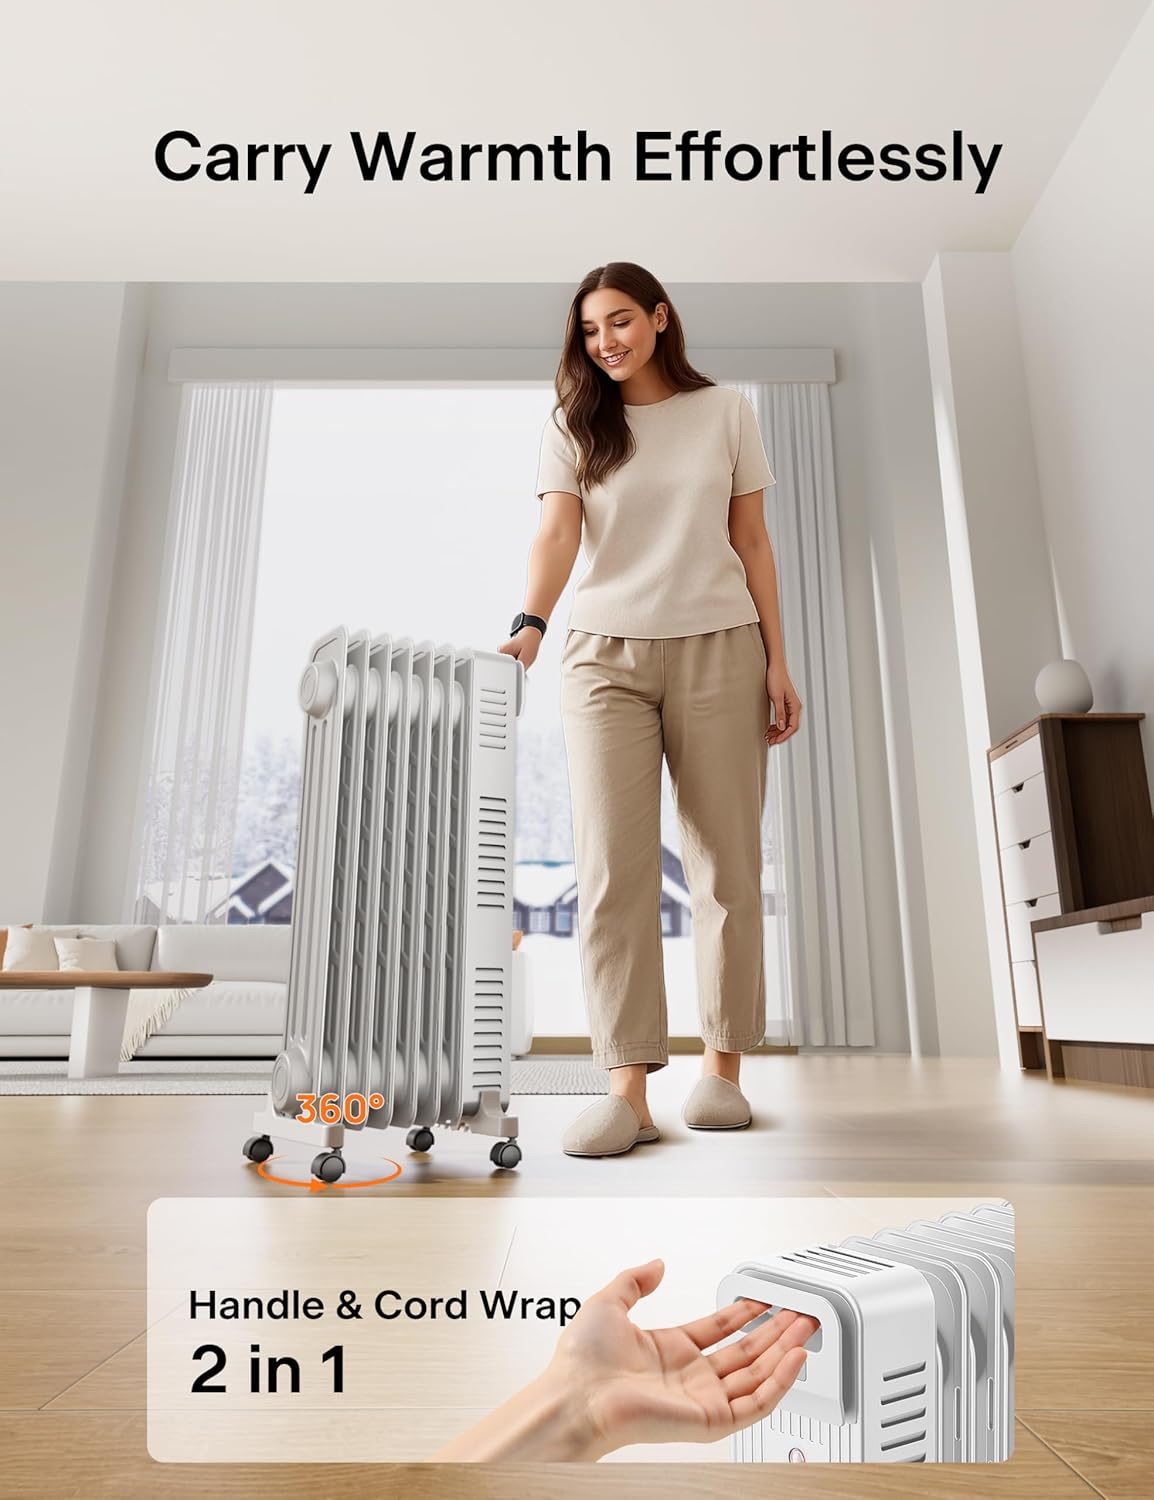
Image: Diagram illustrating the temperature control range (41°F to 95°F) and the three heating levels (Level 1: 600W, Level 2: 900W, Level 3: 1500W) on the PELONIS heater.
- Power On: Plug the heater into a suitable electrical outlet.
- Select Heating Level: Use the Heating Level Control Dial to choose your desired power output:
- Level 1 (Low): 600W for minimal heat or smaller spaces.
- Level 2 (Medium): 900W for moderate heat.
- Level 3 (High): 1500W for maximum heat output and faster warming of larger spaces.
- Set Temperature: Turn the Temperature Control Dial clockwise to increase the desired temperature or counter-clockwise to decrease it. The heater will cycle on and off to maintain the set temperature.
- Power Indicator: The power indicator light will illuminate when the heater is actively heating.
- Power Off: To turn off the heater, turn the Heating Level Control Dial to the 'OFF' position, then unplug the unit from the electrical outlet.
Maintenance
Regular maintenance ensures efficient and safe operation of your heater.
Cleaning:
- Before Cleaning: Always unplug the heater and allow it to cool completely before cleaning.
- Exterior: Wipe the exterior surfaces of the heater with a soft, damp cloth. Do not use abrasive cleaners or solvents, as these may damage the finish.
- Dust: Use a vacuum cleaner with a brush attachment to remove dust from the radiator fins and vents.
- Do Not Immerse: Never immerse the heater in water or allow water to drip into the interior of the heater.
Storage:
- When not in use, store the heater in its original packaging in a cool, dry place.
- Wrap the power cord neatly around the integrated cord wrap to prevent damage.
Troubleshooting
Refer to this section for common issues and their solutions.
| Problem | Possible Cause | Solution |
|---|---|---|
| Heater does not turn on. |
|
|
| Heater produces insufficient heat. |
|
|
| Heater makes unusual noises (popping/crackling). | Normal expansion/contraction of internal oil and metal components during heating/cooling. | This is normal during initial warm-up or cool-down and does not indicate a malfunction. If noises are excessive or continuous, contact customer support. |
| Heater emits a burning smell. | Dust accumulation on heating elements. | Unplug the heater and allow it to cool. Clean the exterior and fins as described in the Maintenance section. If the smell persists, discontinue use and contact customer support. |
Specifications
| Brand | PELONIS |
| Model Number | PSHO07JM1AWW |
| Power Output | 600W / 900W / 1500W |
| Voltage | 120V |
| Heating Coverage | Up to 250 sq. ft. |
| Product Dimensions (DxWxH) | 13.8" x 11" x 25.2" |
| Item Weight | 17.3 pounds |
| Safety Features | Overheat Protection, Tip-Over Protection, ETL Certified |
| Special Features | Energy Efficient, Quiet Operation, Adjustable Thermostat |
Warranty and Support
PELONIS products are manufactured to high-quality standards. For specific warranty information, please refer to the warranty card included with your product or visit the official PELONIS website.
If you encounter any issues or have questions regarding your PELONIS Oil Filled Radiator Heater, please contact PELONIS customer support for assistance. Contact information can typically be found on the product packaging or the official brand website.
Related documentsPSHO07JM1AWW


Ask a question about this manual
Ask about setup, troubleshooting, compatibility, parts, safety, or missing instructions. Manuals+ will review the question and use this page’s manual context to help answer it.