Introduction
This manual provides detailed instructions for the installation, operation, and maintenance of your PARKVISION Wireless Solar Backup Camera System. Please read this manual thoroughly before using the product to ensure proper function and safety. This system is designed to enhance your driving and parking experience by providing a clear view of your vehicle's rear surroundings.
What's in the Box
Verify that all components listed below are included in your package:
- 1x 5-inch FHD Monitor
- 1x Wireless Solar Backup Camera
- 1x Cigarette Lighter Power Cord
- 1x USB Power Extension Cable
- 1x Suction Cup Holder for Monitor
- 1x 2.4G Extend Antenna
- 1x User Manual
- Installation Tools (screws)
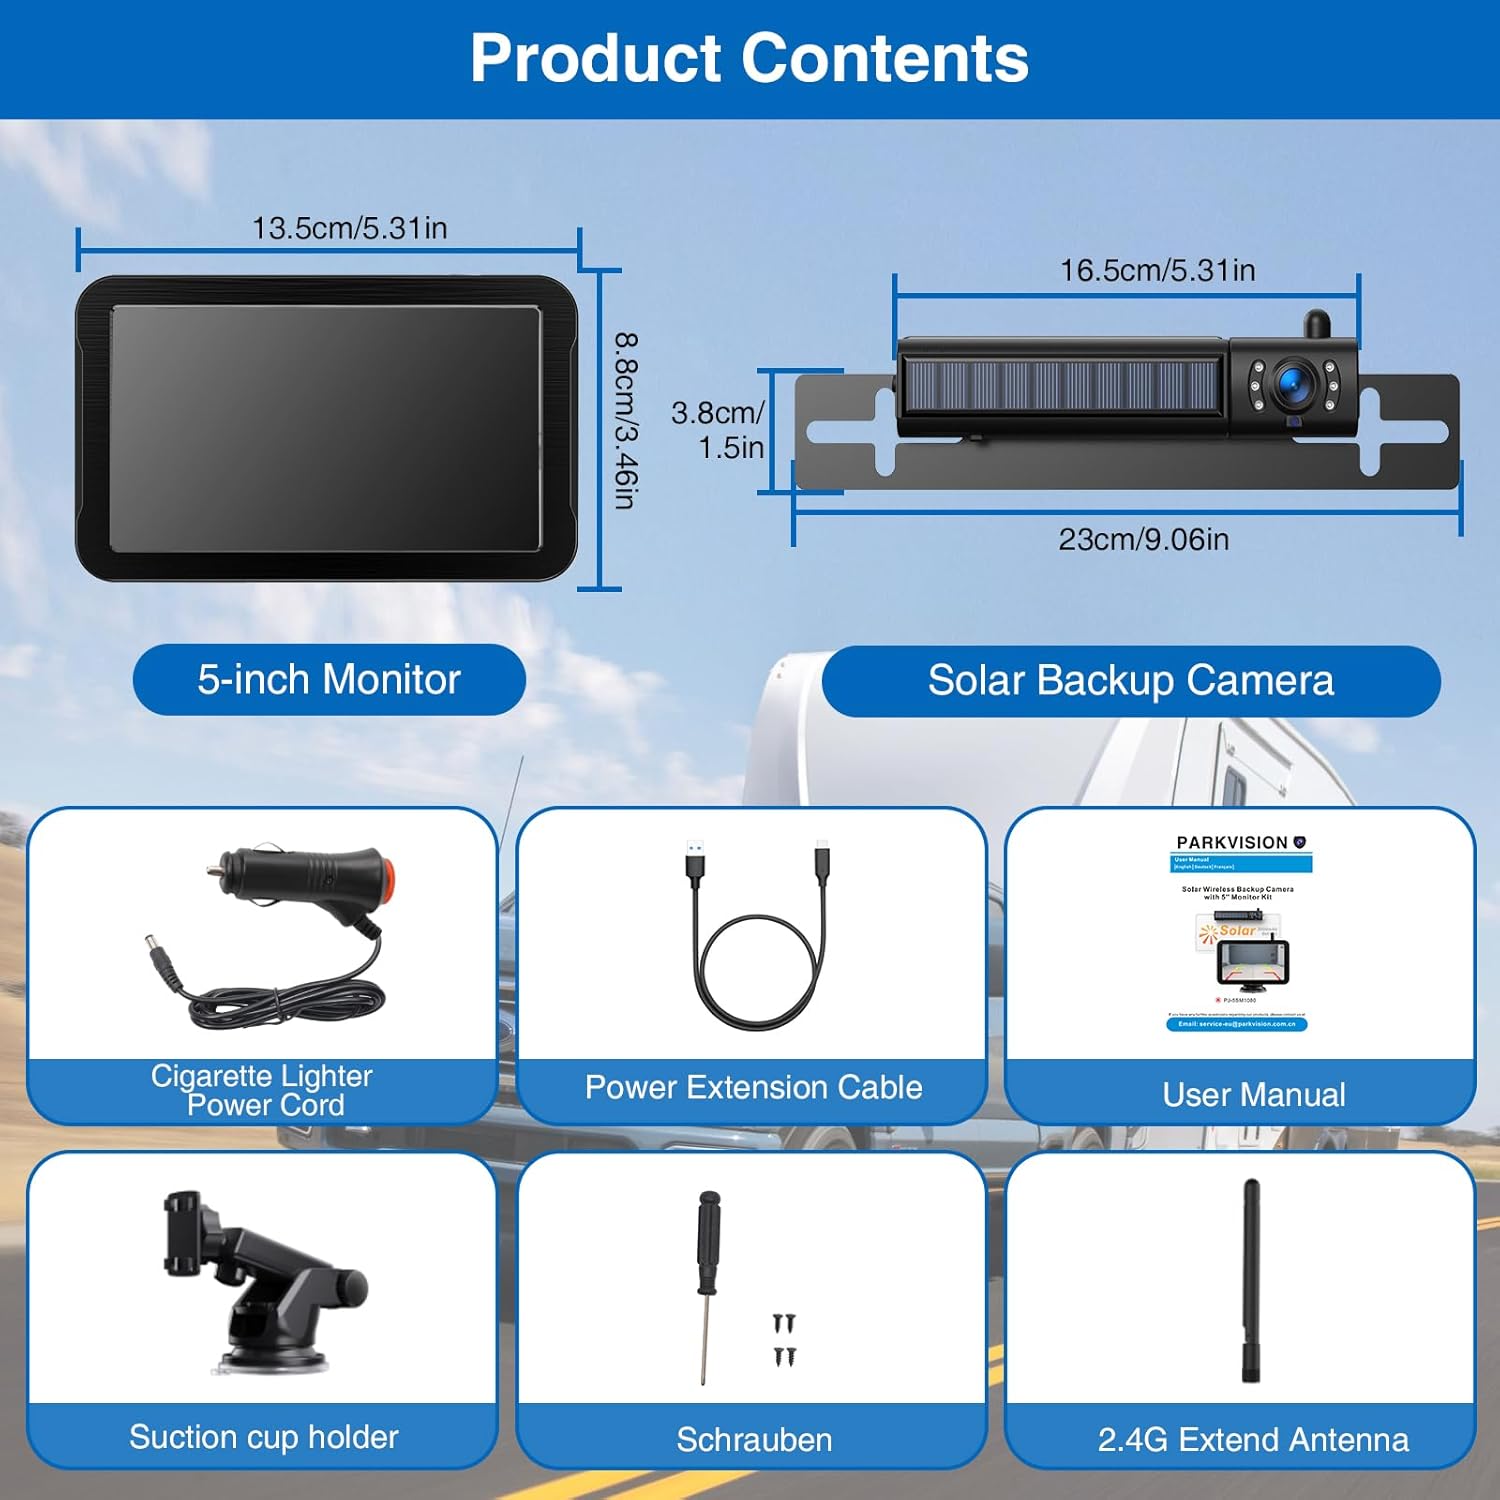
Figure 1: All components included in the PARKVISION Wireless Solar Backup Camera System package.
Setup and Installation
1. Camera Installation
The wireless solar backup camera offers flexible installation options. It can be mounted above or below your license plate. The camera features a built-in 5000mAh battery and a solar panel for auxiliary charging. For primary charging, use the provided USB cable.
- Magnetic Attachment: The camera can be magnetically attached to a metal surface on your vehicle, such as the bumper or tailgate. Ensure the surface is clean and dry for optimal adhesion.
- Screw Mounting: For a more permanent installation, use the provided screws to secure the camera bracket to your vehicle.
- Solar Charging: The integrated solar panel helps maintain the battery charge under direct sunlight. This is an auxiliary charging method; regular USB charging is recommended for full battery maintenance.
- USB Charging: Connect the camera to a 5V/2A USB power source using the provided USB cable for primary charging.
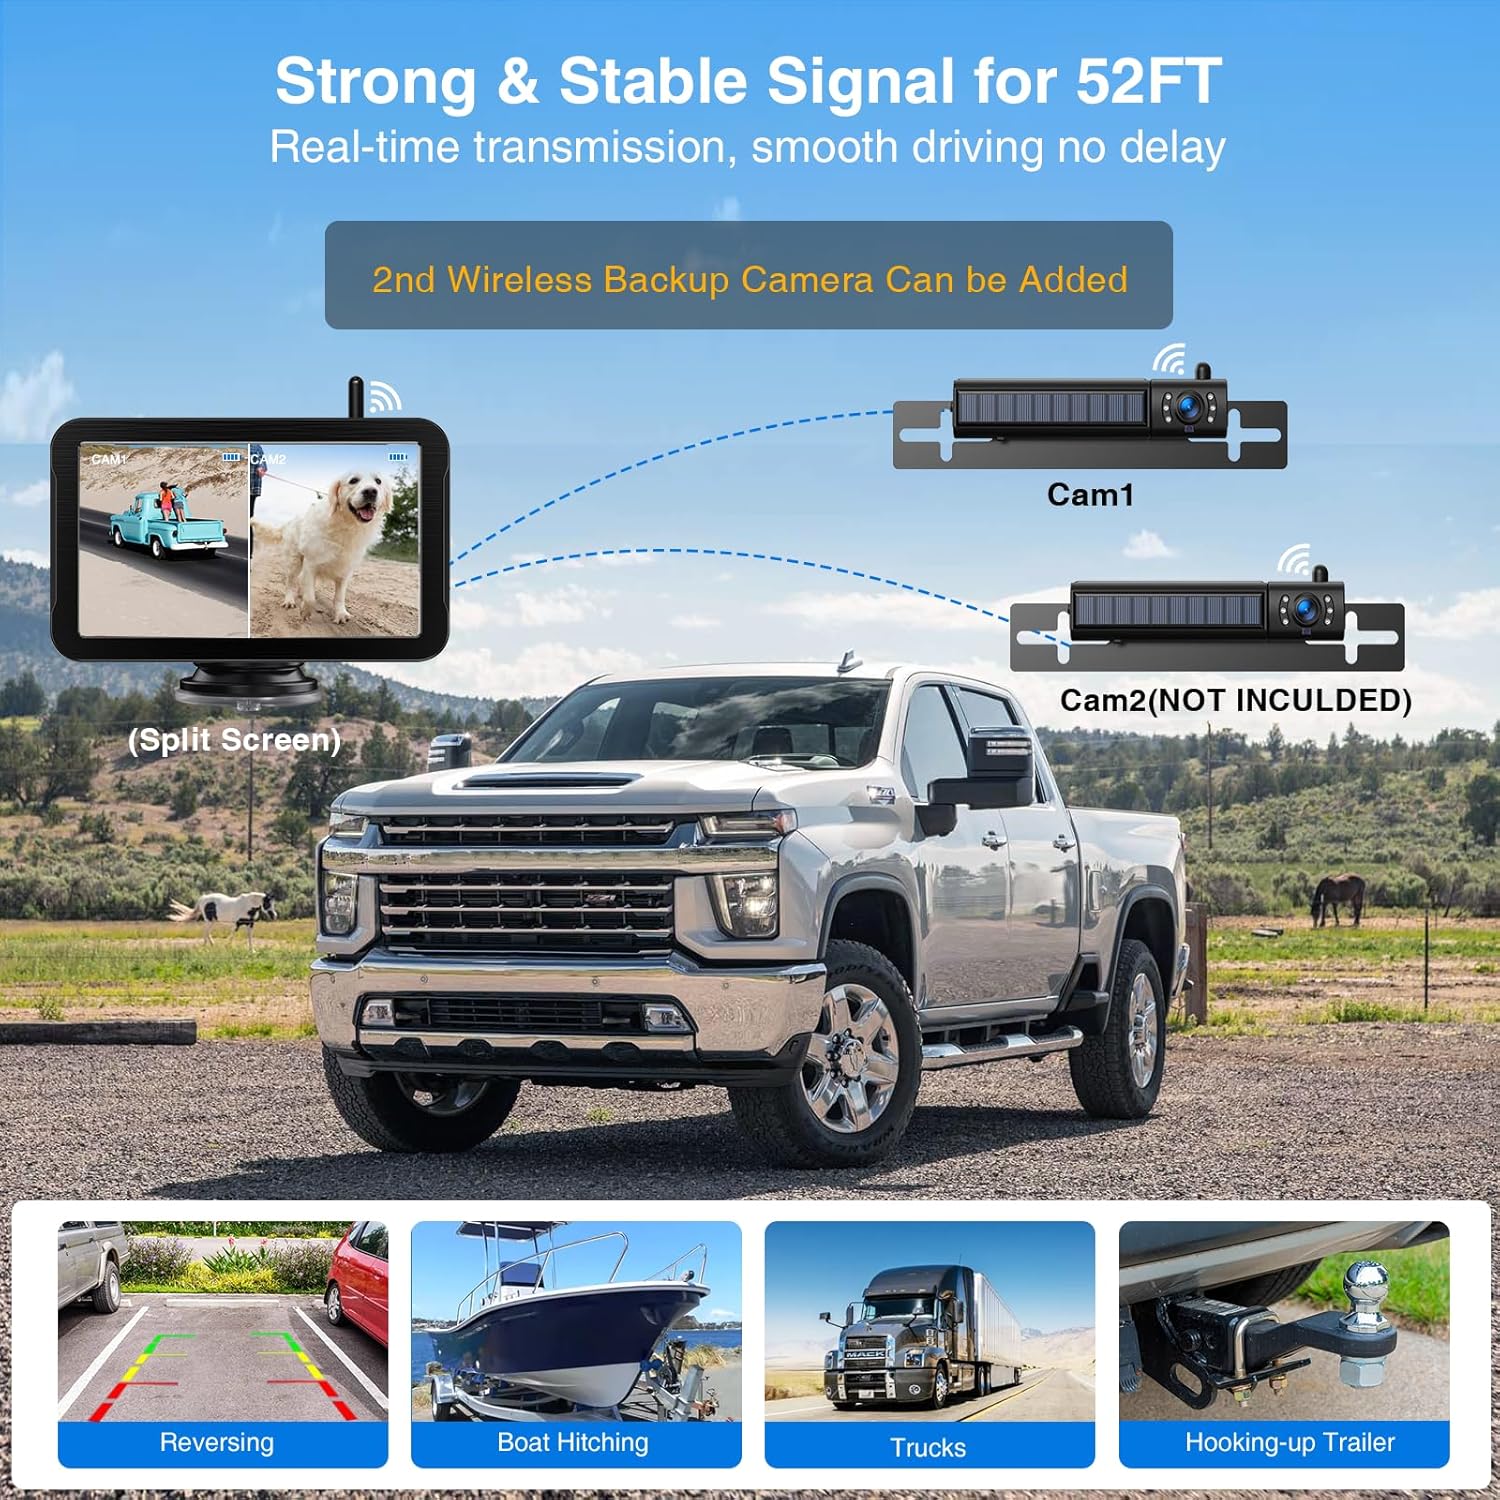
Figure 2: The solar-powered backup camera with its Type-C charging port and magnetic base.
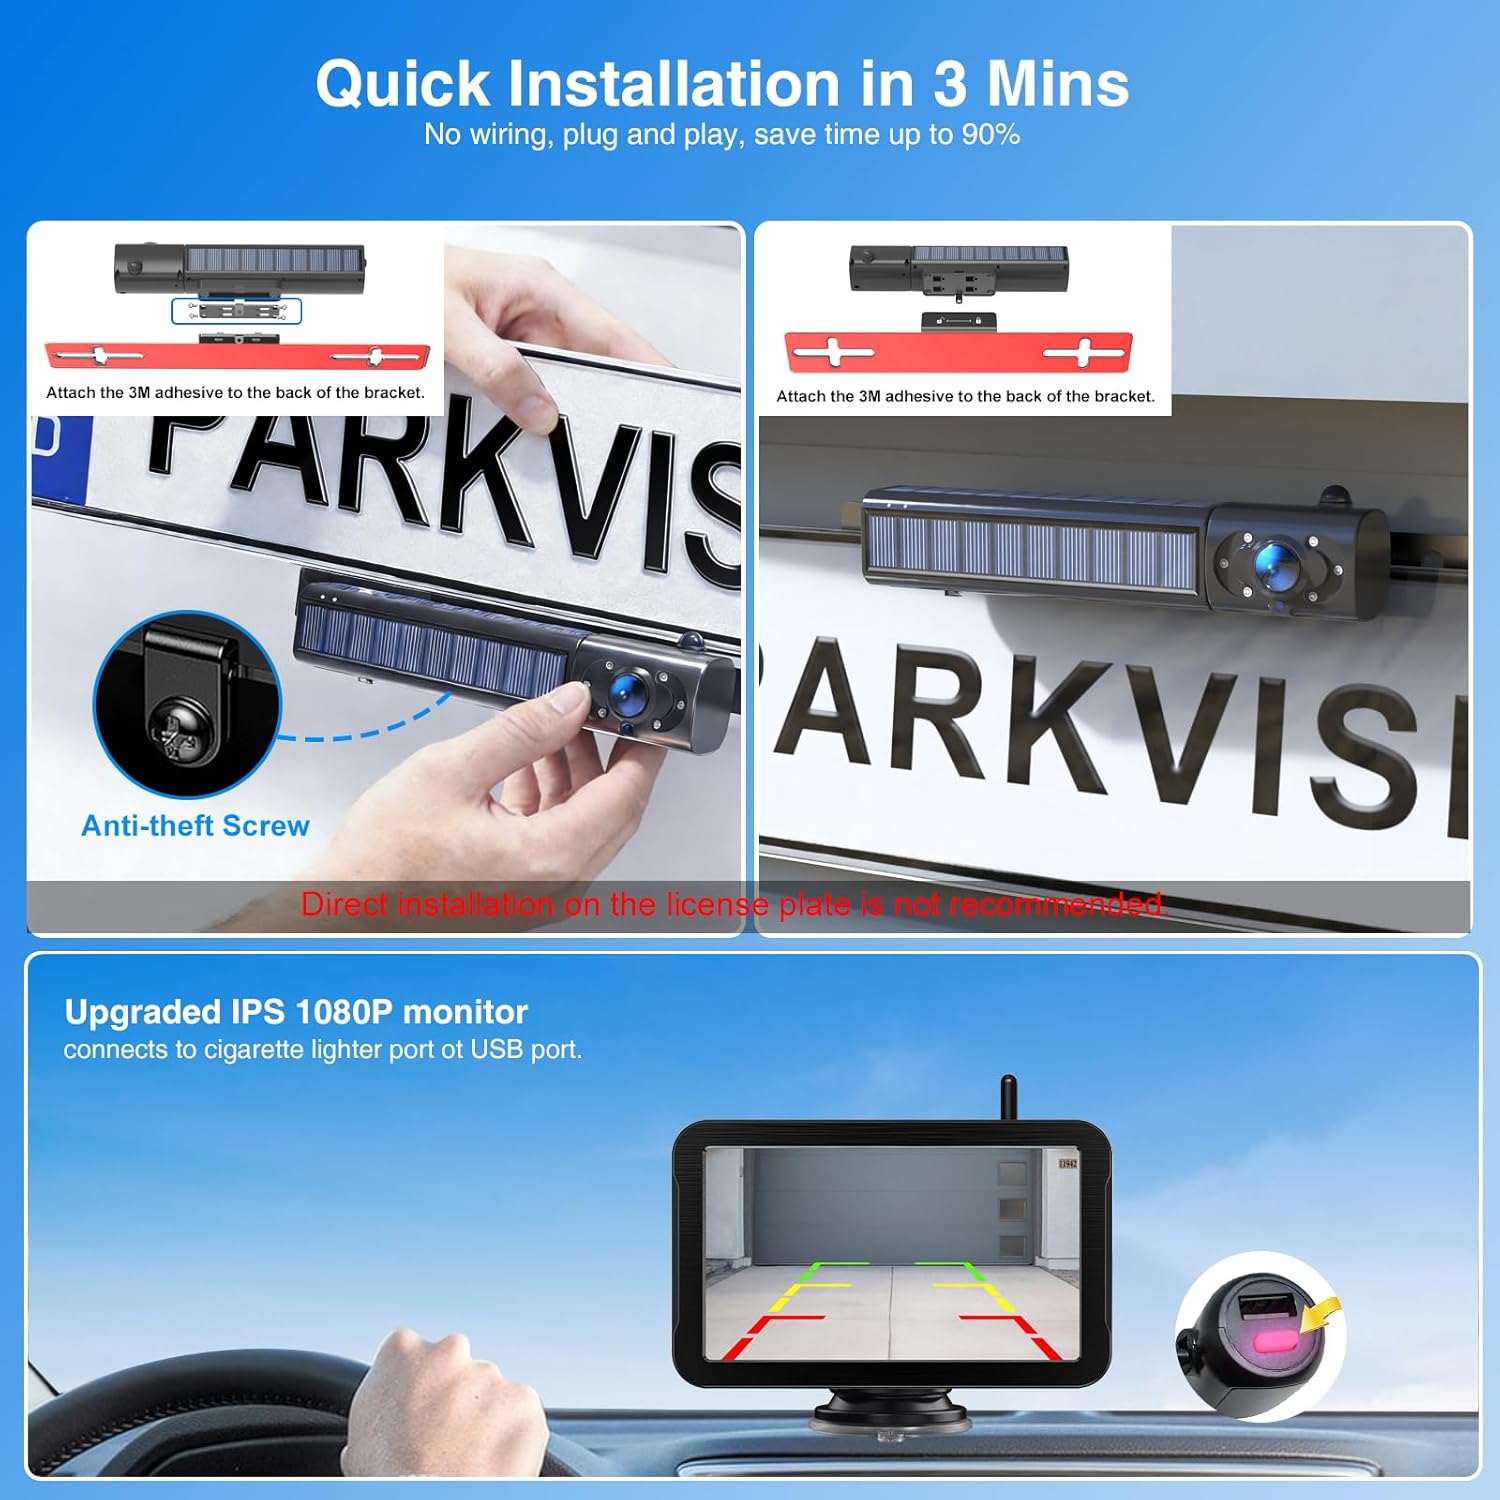
Figure 3: Examples of flexible camera installation, above and below the license plate.
2. Monitor Installation
The 5-inch FHD monitor can be easily installed on your dashboard or windshield using the suction cup holder.
- Attach the suction cup holder to a clean, smooth surface.
- Secure the monitor to the holder.
- Connect the monitor to your vehicle's cigarette lighter port using the provided power cord.
- Screw the 2.4G extend antenna into the designated port on the monitor for stable wireless signal reception.

Figure 4: The 5-inch FHD monitor with its adjustable display settings.
Installation Videos
Watch these videos for visual guidance on installation and features:
Video 1: Flexible Installation and Split Screen Functionality. This video demonstrates how to flexibly install the camera and use the split-screen feature.
Video 2: Solar Backup Camera: 150 Days Battery Life! Learn about the camera's long battery life and solar charging capabilities.
Video 3: VASTEND VS-7A Solar Wireless Backup Camera Recording. This video provides an unboxing and setup guide for a similar solar wireless backup camera system.
Video 4: IP69K Waterproof Backup Camera. Demonstrates the waterproof capabilities of the backup camera, ensuring durability in various weather conditions.
Operating Instructions
1. Powering On/Off
Once the monitor is connected to power and the camera is charged, the system will automatically activate when your vehicle is put into reverse, or it can be manually turned on.
2. Monitor Functions
The 5-inch FHD monitor provides a clear 120° view. Use the buttons on the monitor to adjust settings:
- Brightness, Contrast, Hue: Adjust these settings to optimize image quality based on lighting conditions.
- Image Flip Mode: Flip the image horizontally or vertically as needed for different mounting orientations.
- Parking Lines: The monitor displays adjustable parking guidelines to assist with precise parking maneuvers. These can be turned on or off.
- Night Vision: Integrated infrared LEDs on the camera automatically activate in low-light conditions, providing clear night vision for safe reversing.
- Recording Function: The 1080P FHD monitor supports recording. Ensure a compatible SD card is inserted to utilize this feature.
- Split Screen: If a second camera is added (sold separately), the monitor supports a split-screen view to display feeds from both cameras simultaneously.

Figure 5: Clear night vision capability of the backup camera system.
Maintenance
1. Battery Charging
The camera's built-in 5000mAh battery provides up to 8 hours of continuous use on a full charge. The solar panel acts as an auxiliary charging source. For optimal performance, regularly charge the camera using the provided USB cable.
2. Cleaning
Regularly clean the camera lens and monitor screen with a soft, damp cloth to ensure clear visibility. Avoid using harsh chemicals that may damage the surfaces.
Troubleshooting
- No Signal: Ensure the camera is powered on and within range of the monitor. Check the antenna connection on the monitor.
- Poor Image Quality: Adjust brightness, contrast, and hue settings on the monitor. Clean the camera lens. Ensure there are no obstructions between the camera and monitor.
- Battery Not Charging: Verify the USB cable is properly connected to a 5V/2A power source. Ensure the solar panel is exposed to direct sunlight.
- Interference: The system uses 2.4 GHz signals. While designed to minimize interference, other electronic devices operating on the same frequency might cause issues. Try repositioning the antenna or camera.
Specifications
| Brand | PARKVISION |
| Model Number | 726597469388 |
| Screen Size | 5 Inches |
| Display Resolution | 1080P FHD |
| Optical Sensor Technology | CMOS |
| Real Angle of View | 120 Degrees |
| Connectivity | Wireless Transmitter (2.4 GHz) |
| Battery Capacity | 5000 mAh (Camera) |
| Power Source | 12 Volts (Vehicle), Solar (Auxiliary), USB (Primary) |
| Compatible Devices | Most Motor Vehicles (RV, Caravans, Trucks, Vans, Trailers up to 15 meters) |
| Installation Type | Surface Mount |
Warranty and Support
This PARKVISION product comes with a 1-year manufacturer's warranty. For technical support or warranty claims, please refer to the contact information provided in the included user manual or visit the official PARKVISION website.


