1. Introduction
The VEVOR Emergency Weather Radio MD-091 is a multi-functional device designed for emergency preparedness, outdoor activities, and daily use. It integrates FM/AM/WB/NOAA radio reception, multiple power sources, a powerful flashlight, a reading light, and an SOS alarm. This manual provides detailed instructions for the safe and effective operation of your radio.

An overview of the VEVOR Emergency Weather Radio, showcasing its compact design, integrated flashlight, reading light, and connectivity options for charging a smartphone and using headphones.
2. Safety Instructions
- Do not expose the device to extreme temperatures, direct sunlight, or high humidity.
- Avoid dropping or subjecting the radio to strong impacts.
- Keep the device away from water. While it has an IPX3 rating for damp conditions, it is not waterproof for submersion.
- Do not attempt to disassemble or modify the radio. This will void the warranty and may cause damage or injury.
- Use only the provided USB cable or a certified equivalent for charging.
- Dispose of the battery and device according to local regulations.
3. Product Overview
Familiarize yourself with the various components and controls of your VEVOR Emergency Weather Radio.

A comprehensive diagram labeling the key features of the radio, such as the emergency power bank, Type-C input, reading light, survival bracelet with compass, headphone jack, dual USB output, flashlight, battery indicator, FM/AM/WB radio, weather alert radio, and SOS alarm.
Controls and Functions:
- Power/Volume Knob: Turn clockwise to power on and adjust volume.
- Band Selector: Switch between FM, AM, and WB (Weather Band).
- Tuning Knob: Adjust frequency to find radio stations.
- SOS Button: Press and hold to activate the emergency alarm and flashing light.
- Flashlight Button: Activate the front flashlight.
- Reading Light Switch: Turn on/off the top reading light.
- USB Output Ports: For charging external devices.
- Type-C Input Port: For charging the radio's internal battery.
- Headphone Jack: For private listening.
- Telescopic Antenna: Extend for better radio reception.
- Solar Panel: For supplementary charging.
- Hand Crank: For manual power generation.
4. Setup
4.1 Initial Charging
Before first use, fully charge the radio's internal 8000mAh battery using the provided USB-C cable. Connect the cable to the Type-C input port on the radio and a standard USB power adapter (not included) or a computer USB port. The battery indicator lights will show charging progress.
4.2 Antenna Extension
For optimal radio reception, fully extend the telescopic antenna when listening to FM or Weather Band (WB) broadcasts.
5. Operating Instructions
5.1 Powering On/Off and Volume Control
Rotate the Power/Volume Knob clockwise to turn on the radio and increase the volume. Rotate counter-clockwise to decrease volume and turn off the radio.
5.2 Radio Operation (FM/AM/WB)
- Select the desired band (FM, AM, or WB) using the Band Selector switch.
- Extend the telescopic antenna for better reception, especially for FM and WB.
- Rotate the Tuning Knob to scan for stations. The frequency will be displayed on the screen.
- For Weather Band (WB), tune to one of the 7 NOAA channels (162.400 MHz to 162.550 MHz).
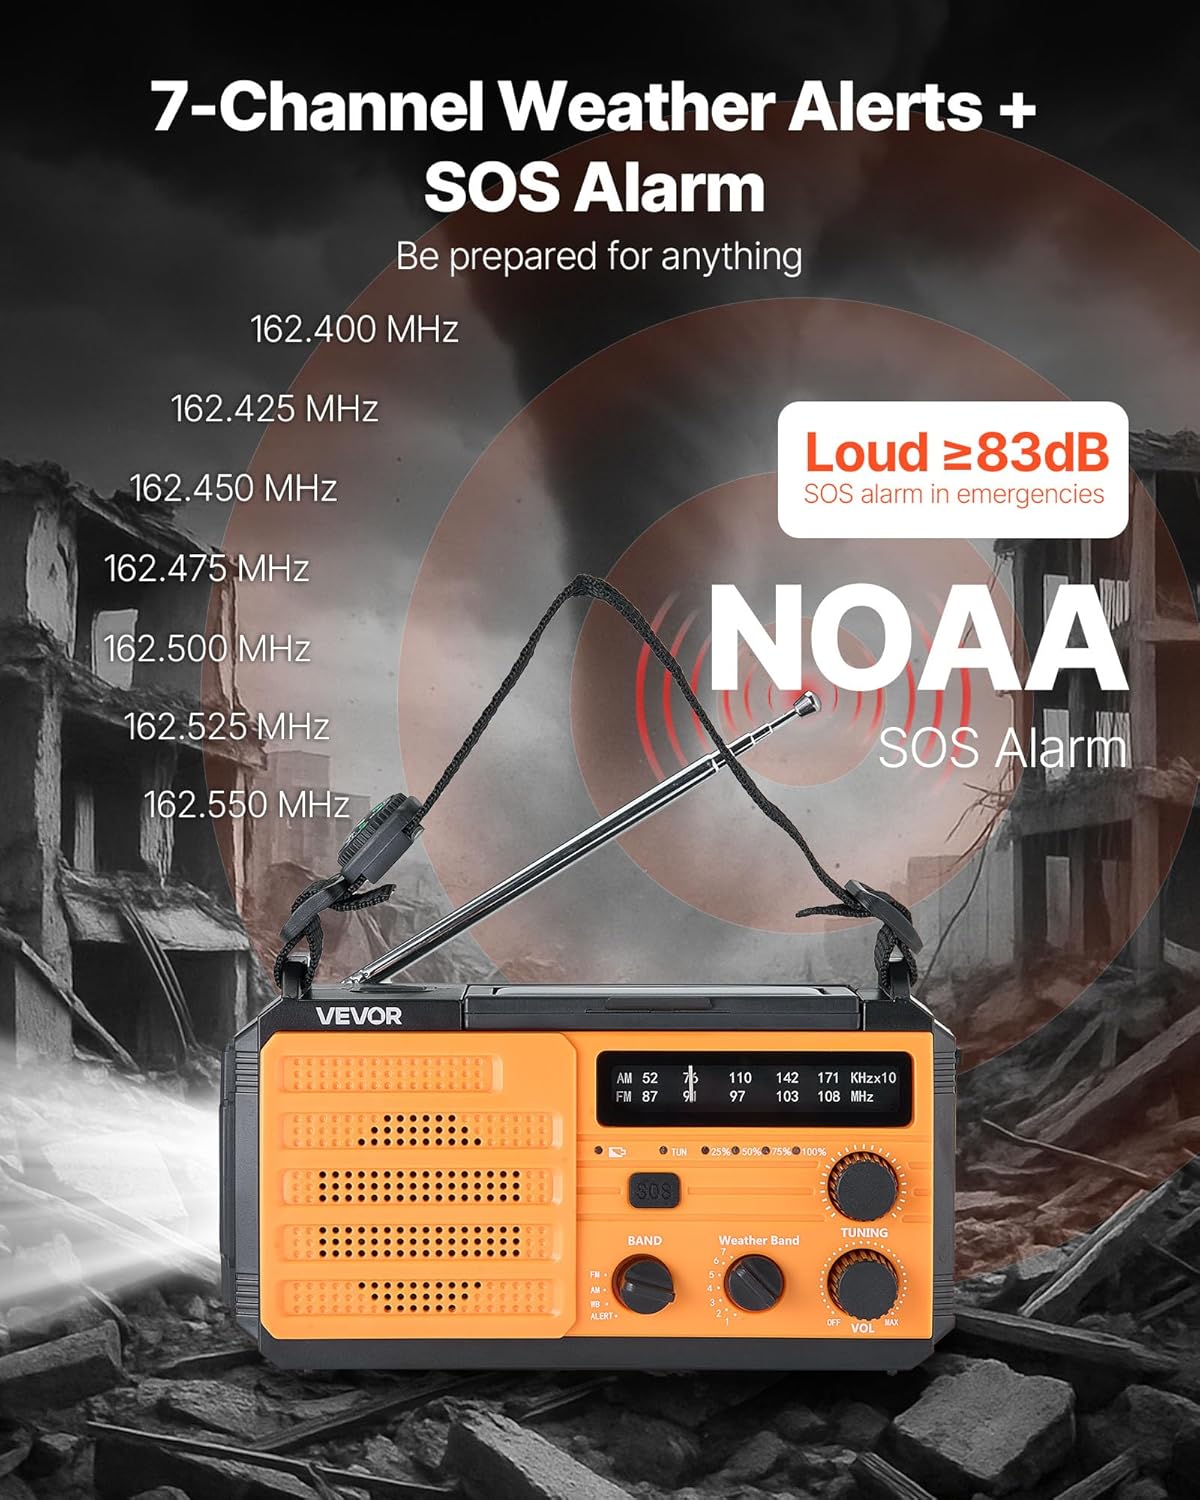
This image illustrates the radio's capability to receive 7 NOAA weather channels and activate a loud SOS alarm (over 83dB) during emergencies, with frequencies listed for reference.
5.3 NOAA Weather Alert Function
When the radio is set to the WB band, it can automatically detect and alert you to severe weather warnings from NOAA. A green light indicates normal operation, while a yellow light flashing with an alert sound warns of an impending weather event.
5.4 SOS Alarm
In an emergency, press and hold the SOS Button to activate a loud alarm (≥83dB) and a flashing light. This feature is designed to attract attention and signal for help. Press the button again briefly to deactivate.
5.5 Lighting Functions

This image displays the radio's versatile lighting features, including a soft 6500K reading light for tasks and a powerful flashlight for long-range illumination, suitable for various emergency and outdoor scenarios.
- Flashlight: Press the Flashlight Button on the side to turn on the 1W high-beam LED flashlight. Press again to cycle through modes (high, low, off).
- Reading Light: Flip up the solar panel to reveal the reading light. Use the Reading Light Switch to turn on/off the 6 COB LEDs for soft area lighting.
5.6 Charging External Devices (Power Bank)
The radio can act as a power bank to charge your mobile devices. Connect your device's USB charging cable to one of the USB Output Ports on the radio. Ensure the radio has sufficient battery charge for this function.
5.7 Multiple Power Sources

A visual guide to the various power sources available for the radio, including USB charging, solar panel, hand crank, built-in lithium battery, and Type-C input, ensuring continuous operation in diverse situations.
- USB-C Charging: Connect the provided USB-C cable to the Type-C Input Port and a power source. This is the primary method for a full charge.
- Solar Charging: Place the radio with the solar panel facing direct sunlight. This method is primarily for maintaining the battery charge or for emergency trickle charging, not for a full charge from empty.
- Hand Crank: Rotate the hand crank clockwise or counter-clockwise at a steady pace (approximately 130-150 RPM) to generate power. Cranking for 1 minute can provide several minutes of radio use or flashlight operation.
- Internal Battery: The built-in 8000mAh battery powers all functions. Monitor the battery indicator for charge level.
6. Maintenance
- Cleaning: Wipe the radio with a soft, damp cloth. Do not use abrasive cleaners or solvents.
- Storage: Store the radio in a cool, dry place away from direct sunlight and extreme temperatures. If storing for extended periods, charge the battery to at least 50% every 3-6 months to prolong battery life.
- Battery Care: Avoid fully discharging the battery frequently. Regular partial charges are better for lithium-ion battery longevity.
7. Troubleshooting
| Problem | Possible Cause | Solution |
|---|---|---|
| Radio does not turn on. | Battery is depleted. | Charge the radio using USB-C, solar, or hand crank. |
| Poor radio reception. | Antenna not extended; weak signal. | Fully extend the telescopic antenna. Try repositioning the radio. |
| External device not charging. | Radio battery too low; incorrect cable. | Ensure radio battery is sufficiently charged. Use a compatible USB cable. |
| Hand crank is stiff or not generating power. | Improper cranking speed; internal issue. | Crank at a steady, moderate pace. If issue persists, contact support. |
8. Specifications

This image provides the physical dimensions of the radio (6.89 x 3.15 x 3.86 inches) and a summary of its technical specifications, including model number, power, battery capacity, waterproof rating, and materials.
| Feature | Detail |
|---|---|
| Model Number | MD-091 |
| Battery Capacity | 8000mAh |
| Radio Bands Supported | FM, AM, WB (7-Band NOAA) |
| Power Source | Battery Powered (Internal), USB, Solar, Hand Crank |
| Connectivity Technology | USB (Type-C input, Dual USB output) |
| Special Features | Portable, SOS Alarm, Flashlight (1W), Reading Light (6 COB LEDs), Compass |
| Waterproof Rating | IPX3 |
| Product Dimensions | 6.89"L x 3.15"W x 3.86"H (175 x 80 x 98 mm) |
| Item Weight | 1.2 lbs (0.545 kg) |
| Shell Main Material | ABS |
| Included Components | 1 x Emergency Weather Radio, 1 x USB Cable, Owner's Manual |
9. Warranty and Support
For warranty information, technical support, or any questions regarding your VEVOR Emergency Weather Radio MD-091, please refer to the official VEVOR website or contact their customer service directly. Keep your purchase receipt for warranty claims.
VEVOR Official Website: www.vevor.com


