Introduction
This manual provides comprehensive instructions for the assembly, operation, and maintenance of your AODK 51-inch L-Shaped Gaming Desk with LED Lights. Please read this manual thoroughly before assembly and use to ensure proper setup and safe operation. Keep this manual for future reference.
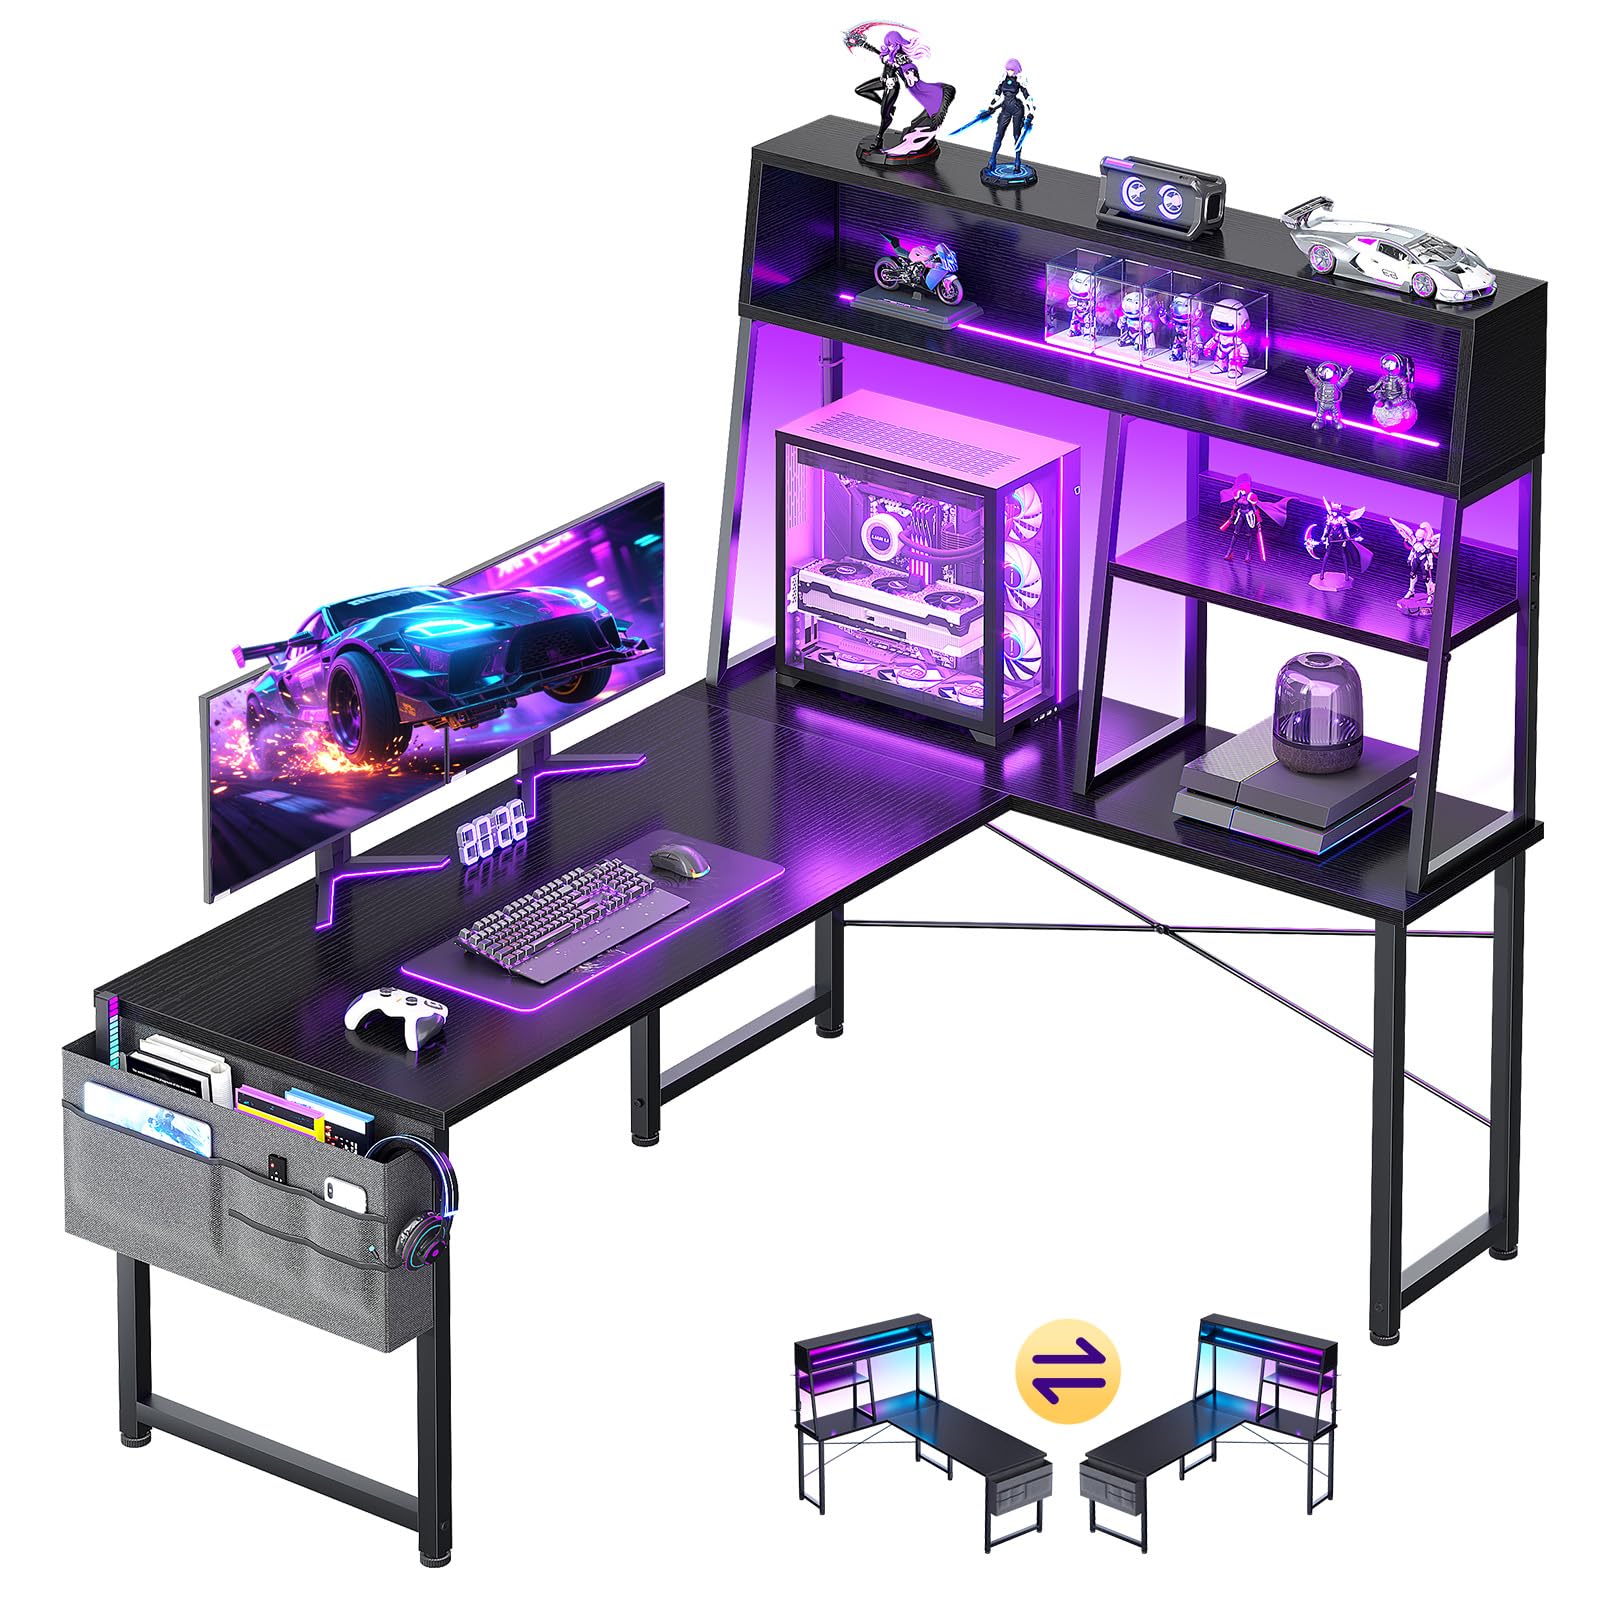
Image: The AODK 51-inch L-Shaped Gaming Desk, featuring its LED lights, display shelves, and side storage bag, set up in a modern gaming environment.
Safety Information
Important Safety Instructions:
- Always follow the assembly instructions provided in the package.
- Ensure all parts are securely fastened before using the desk.
- Keep the assembly area clear of obstructions and hazards to prevent accidents.
- Do not overload the shelves or desk surface beyond their intended capacity.
- Keep liquids away from electrical components, including the LED lights.
- Periodically check all connections and fasteners to ensure they remain tight.
Setup and Assembly
Before beginning assembly, ensure you have all components listed in your product packaging. It is recommended to assemble the desk with two people.
1. Unpacking and Component Identification
Carefully unpack all contents and lay them out on a clean, soft surface to prevent scratches. Identify each component using the parts list provided in your package.
2. Frame Assembly
Assemble the main desk frame and the hutch frame according to the detailed diagrams in your instruction manual. Ensure all screws are tightened securely but do not overtighten.

Image: A person assembling the desk frame, demonstrating the initial steps of construction.
3. Reversible Configuration
The AODK L-shaped gaming desk is designed to be reversible. You can configure the main desktop and the hutch on either the left or right side to best suit your room layout. Follow the specific instructions in your manual for your desired orientation.

Image: Visual representation of the desk's reversible design, showing both left and right configurations.
4. Attaching Desktop Panels and Shelves
Secure the desktop panels and the multi-layer display shelves to the assembled frame. Ensure they are aligned correctly and fastened firmly.
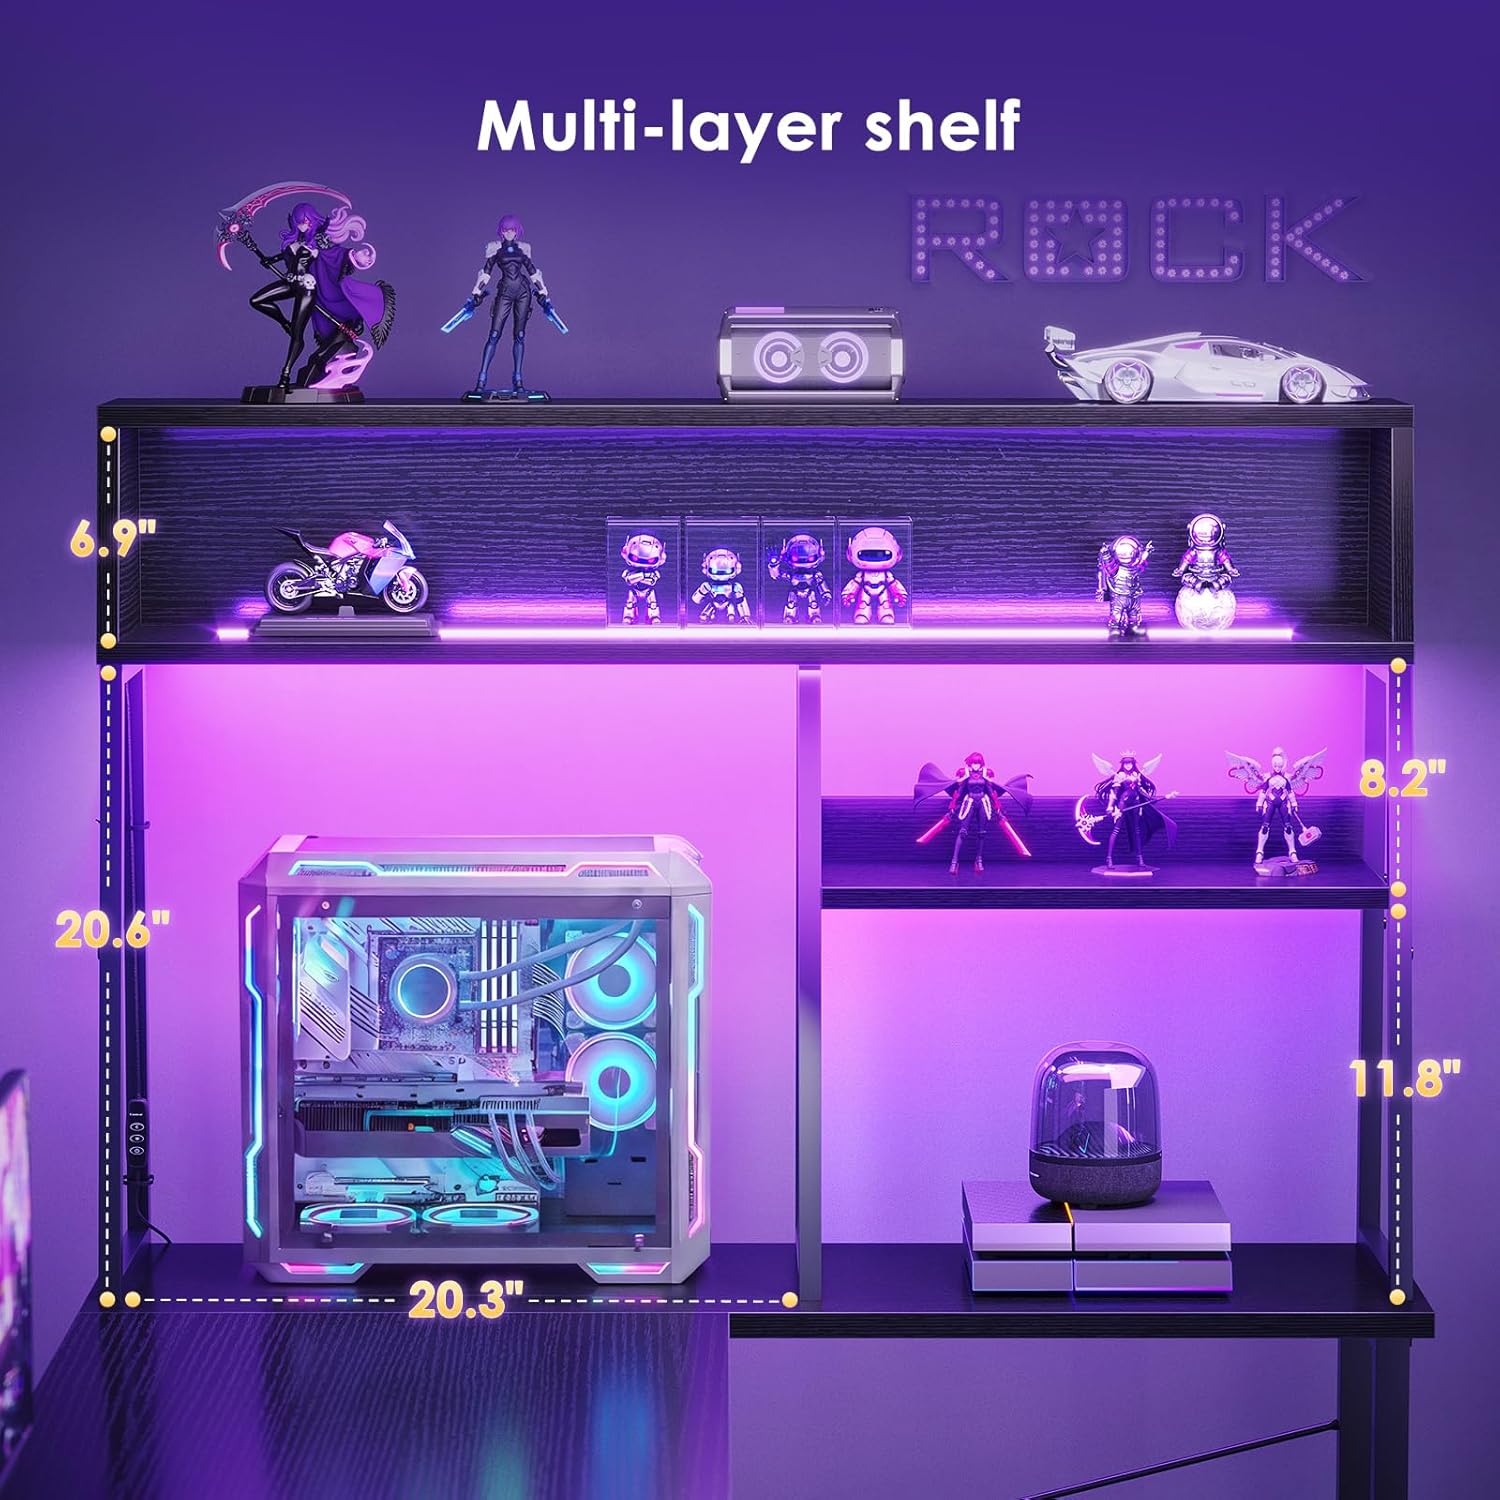
Image: The multi-layer shelves, highlighting the dedicated CPU display space and additional storage.
5. LED Light Installation
Install the built-in LED light strip into the designated groove on the top hutch. Connect the power cable as instructed in your manual. Ensure the connection is secure.

Image: The built-in LED light strip, demonstrating its placement and functionality with various color options.
6. Attaching the Side Storage Bag
Attach the side-mounted fabric storage bag to the side of the desk using the provided hooks or fasteners. This bag is designed for convenient storage of accessories.

Image: The side storage bag, illustrating its capacity for various gaming and office accessories.
7. Final Adjustments
Once assembled, ensure the desk is stable. Adjust the leveling feet if necessary to prevent wobbling. Double-check all connections.
Operating Instructions
LED Light Operation
The built-in LED light strip features multiple colors, brightness levels, and dynamic modes. Use the integrated controller (or remote, if included) to:
- Power On/Off: Press the power button.
- Change Colors: Cycle through available static colors.
- Adjust Brightness: Increase or decrease the light intensity.
- Select Dynamic Modes: Choose from various flashing, fading, or pulsing light patterns.
Refer to the specific LED controller instructions included in your package for detailed operation.
Utilizing Display Shelves
The multi-layer display shelves are designed to hold collectibles, figures, controllers, and other small items. The dedicated desktop CPU platform provides a safe and visible space for your computer tower, improving airflow and protecting it from floor-level dust and impacts.

Image: The elevated CPU area, demonstrating how a computer tower can be placed on the desk's hutch, providing more legroom.
Using the Side Storage Bag
The side storage bag offers convenient access to headsets, notebooks, cables, and other small accessories, helping to keep your main desktop surface clear and organized.
Maintenance
- Cleaning: Wipe the desk surfaces with a soft, damp cloth. Avoid harsh chemicals or abrasive cleaners that could damage the finish.
- LED Lights: Keep the LED strip free from dust. Do not attempt to disassemble or modify the LED components.
- Fasteners: Periodically check all screws and bolts to ensure they remain tight. Retighten as needed to maintain desk stability.
- Spills: Immediately wipe up any liquid spills to prevent damage to the engineered wood and electrical components.
Troubleshooting
| Problem | Possible Cause | Solution |
|---|---|---|
| Desk is wobbly | Loose fasteners; uneven floor. | Tighten all assembly screws. Adjust the leveling feet at the bottom of the desk legs. |
| LED lights not working | Power cable disconnected; faulty controller; power outlet issue. | Ensure the LED power cable is securely plugged into the strip and a working power outlet. Check the controller for damage. Try a different outlet. |
| Parts do not align during assembly | Incorrect orientation of parts; screws not fully loosened. | Review the assembly diagrams carefully. Ensure parts are oriented as shown. Loosen screws slightly to allow for adjustment, then retighten. |
Specifications
- Brand: AODK
- Model: B0FPCGTVXK
- Shape: L-Shape
- Product Dimensions (D x W x H): 39.37" x 51.18" x 29.92"
- Color: Black
- Style: Gaming
- Top Material Type: Engineered Wood
- Frame Material Type: Metal
- Special Feature: L Shaped, Built-in LED Light, Reversible Design, Display Shelves, Side Storage Bag, Desktop CPU Space
- Number Of Shelves: 2 (display shelves)
- Required Assembly: Yes

Image: Product dimensions diagram, providing detailed measurements of the desk.
Product Video Overview
Watch this official product video for a visual overview of the AODK L-Shaped Gaming Desk's features and design.
Video: A visual showcase of the AODK L-Shaped Gaming Desk, highlighting its LED lights, multi-layer shelves, CPU display space, storage bag, and reversible design.
Warranty and Support
This AODK product comes with a limited warranty. For specific warranty details, claims, or technical support, please refer to the warranty card included with your purchase or visit the official AODK website. You may also contact the seller, Hai Mai, for assistance.
Manufacturer/Seller: Hai Mai