
1. Introduction
Thank you for choosing the VCOROS VR2 Plus Motorcycle Bluetooth Intercom. This device is designed to enhance your riding experience by providing seamless communication, music playback, and navigation audio directly to your helmet. Featuring a robust IP56 waterproof and dustproof design, CVC and DSP noise reduction, and vibrant RGB lighting, the VR2 Plus ensures clear audio and reliable performance in various conditions. This manual will guide you through the installation, operation, and maintenance of your intercom system.
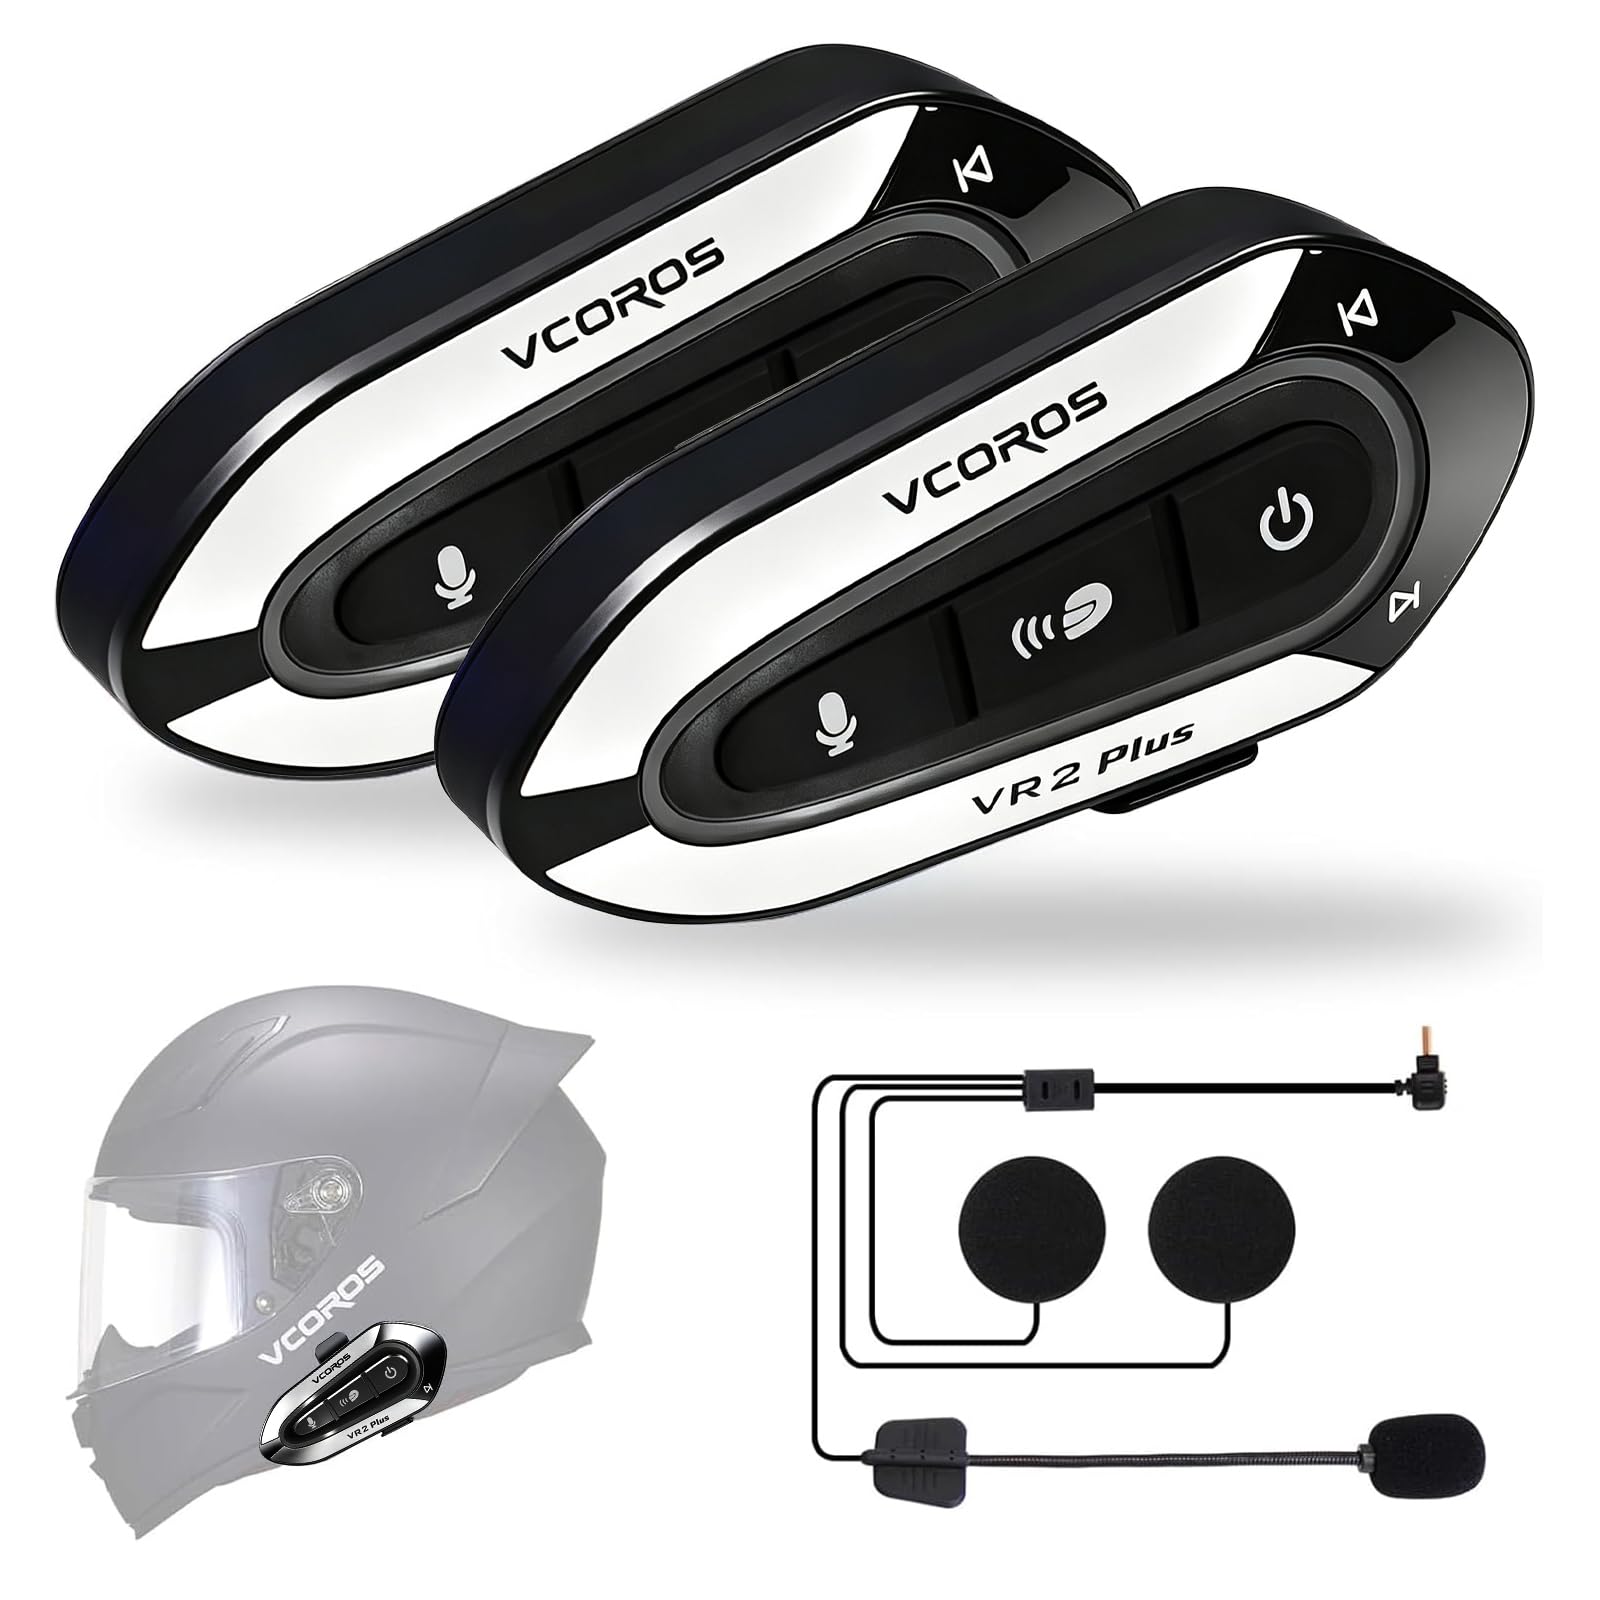
Image: The VCOROS VR2 Plus intercom unit, showcasing its sleek design and RGB lighting.
2. Package Contents
Before proceeding with installation, please verify that all items are present in your package:
- VR2 Plus Device (1 unit)
- TYPE-C Interface Hard Tube Mic Headset (1 unit)
- User Manual (1 unit)
- Type-C Charging Cable (1 unit)
- Clip-on Base (1 unit)
- Host Velcro (1 unit)
- Mic Stick Velcro (multiple pieces)
- Horn Velcro (multiple pieces)

Image: A visual representation of all items included in the VCOROS VR2 Plus product package.
3. Setup and Installation
3.1 Helmet Installation
The VR2 Plus intercom is compatible with all helmet types and offers two installation methods: adhesive and clip-on. For optimal stability, it is recommended to use both methods in conjunction. The integrated hard microphone is suitable for full-face, open-face, and modular helmets.
- Choose Mounting Location: Select a flat surface on the left side of your helmet for the intercom unit.
- Adhesive Mount: Clean the helmet surface thoroughly. Attach the Host Velcro to the intercom unit and then firmly press it onto the chosen helmet location.
- Clip-on Mount: Slide the clip-on base between the helmet shell and the inner padding. Secure the intercom unit to the clip.
- Speaker Installation: Attach the Horn Velcro to the back of the speakers. Place the speakers inside the helmet's ear pockets, ensuring they are aligned with your ears for best audio quality.
- Microphone Installation: Attach the Mic Stick Velcro to the microphone. Position the hard tube microphone inside the helmet, ensuring it is close to your mouth but not obstructing your vision or comfort.
- Connect Headset: Plug the headset cable into the Type-C port on the intercom unit.

Image: Illustration demonstrating the compatibility of the hard microphone with various helmet types.
3.2 Bluetooth Pairing (Phone)
The VR2 Plus supports Bluetooth V6.0 and can connect to two mobile phones simultaneously.
- Ensure the VR2 Plus is powered off.
- Press and hold the Power button until the RGB light flashes rapidly, indicating pairing mode.
- On your smartphone, enable Bluetooth and search for "VCOROS VR2 Plus".
- Select the device to pair. Once connected, the RGB light will slow its flashing or turn solid blue.
- To connect a second phone, repeat the process. You can switch between devices for music or calls.
3.3 Intercom Pairing (Two Units)
The VR2 Plus supports two-person intercom communication up to 500 meters. Intercom functionality is only compatible between two VR2 Plus units.
- Ensure both VR2 Plus units are powered off.
- On both units, press and hold the Intercom/Light button until the RGB light flashes rapidly, indicating intercom pairing mode.
- The units will automatically search and connect to each other. Once connected, the intercom indicator (blue) will illuminate.
- To initiate intercom communication, briefly press the Intercom/Light button on either unit.

Image: Diagram illustrating the intercom function between two VCOROS VR2 Plus units.
4. Operating Instructions
4.1 Button Functions Overview

Image: Detailed diagram showing the location and function of each button on the VCOROS VR2 Plus intercom.
- Power Button (Rightmost):
- Press and hold: Power On/Off
- Short press: Play/Pause music, Answer/Hang up calls
- Music Sharing / Voice Assistant Button (Leftmost):
- Short press: Activate Voice Assistant
- Long press: Initiate Music Sharing (with another VR2 Plus unit)
- Intercom / Light Button (Middle):
- Short press: Initiate/End Intercom call
- Long press: Change RGB lighting mode
- Volume Up / Next Song (Top edge): Short press for Volume Up, Long press for Next Song.
- Volume Down / Previous Song (Bottom edge): Short press for Volume Down, Long press for Previous Song.
4.2 Music Playback
Once paired with your smartphone, you can stream music wirelessly.
- Play/Pause: Short press the Power button.
- Next Song: Long press the Volume Up button.
- Previous Song: Long press the Volume Down button.
- Volume Adjustment: Short press the Volume Up or Volume Down buttons.
- Music Sharing: Long press the Music Sharing / Voice Assistant button to share your music with a paired VR2 Plus intercom.
4.3 Phone Calls
Manage your calls hands-free while riding.
- Answer Call: Short press the Power button.
- End Call: Short press the Power button.
- Reject Call: Press and hold the Power button.
- Redial Last Number: Double-press the Power button.
4.4 Voice Assistant
Activate your smartphone's voice assistant for navigation, calls, or other commands.
- Activate: Short press the Music Sharing / Voice Assistant button.

Image: The VCOROS VR2 Plus unit demonstrating its AI Voice Assistant capability, allowing connection to two mobile phones.
4.5 RGB Lighting
Customize your intercom's appearance with the integrated RGB lighting.
- Change Mode: Long press the Intercom / Light button to cycle through different RGB lighting modes.
5. Maintenance
5.1 Charging
The VR2 Plus is equipped with a 1000 mAh rechargeable battery.
- Charging Port: Use the provided Type-C charging cable to connect the intercom to a USB power source.
- Charging Time: Approximately 2.5 hours for a full charge.
- Battery Life:
- Bluetooth Headset: Up to 18 hours
- Intercom: Up to 15 hours
- Continuous Talk Time: Up to 18 hours
- Standby Time: Up to 270 hours
- Power Saving: The unit will automatically shut down after 10 minutes if not paired to save battery.

Image: Visual representation of the VCOROS VR2 Plus's 1000mAh battery capacity and its impressive battery life for various functions.
5.2 Cleaning and Care
To ensure longevity and optimal performance:
- Wipe the unit with a soft, damp cloth. Avoid harsh chemicals or abrasive cleaners.
- Ensure the Type-C port cover is securely closed when not charging to maintain IP56 water and dust resistance.
- Store the device in a cool, dry place when not in use.

Image: The VCOROS VR2 Plus intercom shown in scenarios highlighting its IP56 deep waterproof and dustproof capabilities.
6. Troubleshooting
If you encounter issues with your VCOROS VR2 Plus, please refer to the following common problems and solutions:
| Problem | Possible Cause / Solution |
|---|---|
| No Power | Battery might be depleted. Charge the unit for at least 30 minutes. Ensure the charging cable is properly connected. |
| Cannot Pair with Phone |
|
| Intercom Not Connecting |
|
| Poor Audio Quality / Noise |
|
| Buttons Unresponsive | Try restarting the device. If the issue persists, the battery might be critically low. |
7. Specifications
| Feature | Detail |
|---|---|
| Brand | VCOROS |
| Model Name | VR2 Plus |
| Connectivity Technology | Wireless (Bluetooth) |
| Bluetooth Version | 6.0 |
| Bluetooth Range | 10 Meters (for phone connection) |
| Intercom Range | Up to 500 Meters (2-person) |
| Battery Capacity | 1000 mAh |
| Charging Time | 2.5 hours |
| Battery Life (Bluetooth Headset) | 18 hours |
| Battery Life (Intercom) | 15 hours |
| Continuous Talk Time | 18 hours |
| Standby Time | 270 hours |
| Charging Port | USB-C |
| Water Resistance Level | IP56 (Waterproof and Dustproof) |
| Noise Control | Active Noise Cancellation (CVC and DSP) |
| Audio Driver Type | Dynamic (40mm speakers) |
| Frequency Range | 80 Hz ~ 18 KHz |
| Control Method | Voice, Button |
| Compatible Devices | Motorcycles, Smartphones, GPS, Music Players |
| Weight | 170 Grams |
| Material | Acrylonitrile Butadiene Styrene (ABS) |
8. Warranty and Support
8.1 Warranty Information
According to product specifications, there is no explicit warranty description provided. Please refer to your point of purchase or retailer for their specific return and warranty policies.
8.2 Customer Support
For further assistance, technical support, or inquiries not covered in this manual, please contact VCOROS customer service through the retailer where you purchased the product. You may also visit the official VCOROS website for additional resources and contact information.
