
Introduction
This manual provides detailed instructions for the safe and effective use of your YOHOOLYO Kids Instant Print Camera PC02. Please read this manual thoroughly before operating the camera and retain it for future reference.
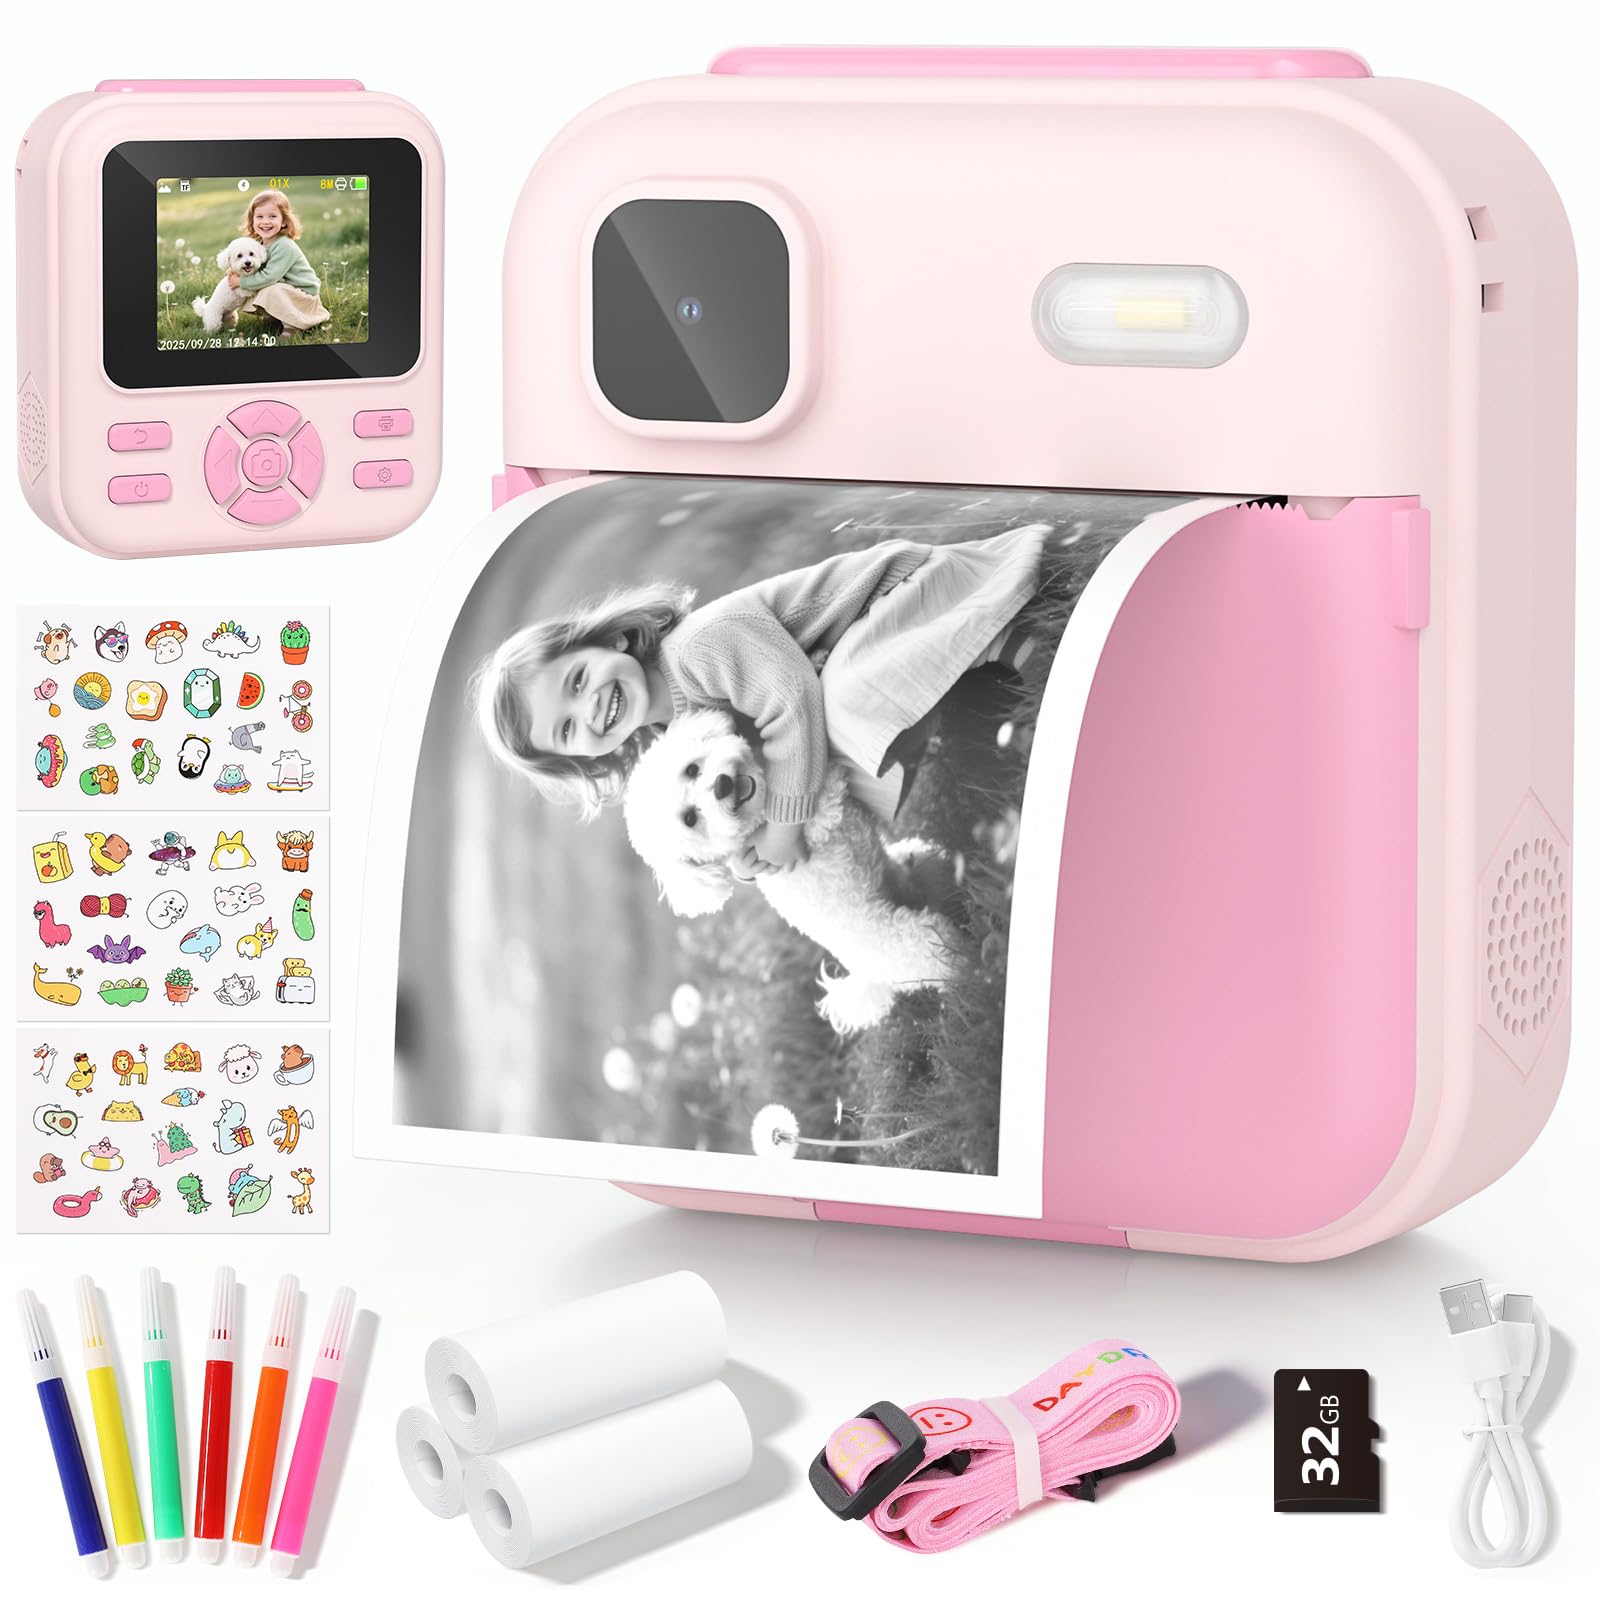
The YOHOOLYO Kids Instant Print Camera PC02, a digital camera designed for children, featuring instant thermal printing capabilities.
Important Safety Information
- Adult Supervision: This product is intended for use by children aged 3-12 under adult supervision.
- Choking Hazard: Small parts, such as the SD card and paper rolls, may pose a choking hazard. Keep them out of reach of very young children.
- Battery Safety: The camera contains a rechargeable lithium battery. Do not attempt to replace the battery yourself. Do not expose the camera to extreme temperatures, direct sunlight, or fire.
- Water Exposure: The camera is not water-resistant. Avoid contact with water or other liquids.
- Cleaning: Use a soft, dry cloth for cleaning. Do not use harsh chemicals.
- Disposal: Dispose of the camera and its accessories responsibly according to local regulations.
Package Contents
Verify that all items listed below are included in your package:

An image showing the camera, sticker sheets, colored pens, thermal paper rolls, lanyard, 32GB Micro SD card, user manual, and USB Type-C cable.
- YOHOOLYO Kids Instant Print Camera PC02 (1x)
- Thermal Printing Paper Rolls (3x, one pre-loaded)
- Colored Pens (6x)
- Lanyard (1x)
- 32GB Micro SD Card (1x)
- USB Type-C Cable (1x)
- User Manual (1x)
- Cute Sticker Sheets (3x)
Product Overview
Familiarize yourself with the main components of your camera.

The camera's front view, illustrating its multi-functionality including instant printing, time-lapse, burst mode, 1080P HD video, MP3 player, doodling, photo frames, games, flash, and 32GB SD card support.
- 2.4-inch IPS LCD Screen: For viewing photos, videos, and navigating menus.
- Lens: Captures images and videos.
- Flash: Provides illumination in low-light conditions.
- Print Output Slot: Where printed photos emerge.
- Control Buttons: Navigation, shutter, power, menu, and playback controls.
- SD Card Slot: For inserting the Micro SD card to store media.
- USB-C Port: For charging and data transfer.
Getting Started
1. Charging the Battery
The camera is equipped with a 1500mAh rechargeable battery. Before first use, fully charge the camera.
- Connect the provided USB Type-C cable to the camera's charging port.
- Connect the other end of the cable to a USB power adapter (not included) or a computer's USB port.
- The charging indicator will illuminate. Once fully charged, the indicator will change or turn off. A full charge provides approximately 2.5 to 5.5 hours of use.

The image illustrates the camera's 1500mAh battery capacity and provides a visual guide for replacing the thermal paper roll.
2. Inserting the Paper Roll
The camera uses thermal paper for instant printing. Follow these steps to load a new roll:
- Locate and open the paper compartment cover on the side of the camera.
- Insert a new thermal paper roll, ensuring the paper tip extends about 2.5-5 cm out of the exit slot.
- Close the compartment cover securely.
Note: One paper roll is pre-loaded in the camera.
3. Inserting the SD Card
The camera comes with a 32GB Micro SD card for storing photos and videos. It supports up to 128GB.
- Locate the SD card slot on the camera.
- Gently insert the Micro SD card into the slot until it clicks into place. Ensure the card is inserted in the correct orientation.
- To remove, gently press the card until it springs out.

The camera's 2.4-inch IPS LCD screen shows 1080P HD video recording, with an icon indicating the presence of a 32GB SD card.
Video Guide: Setup and Basic Functions
This video demonstrates the initial setup, including paper roll insertion, taking photos, printing, video recording, playing games, and connecting the camera to a computer for file transfer.
Basic Operation
1. Power On/Off
Press and hold the Power button for a few seconds to turn the camera on or off.
2. Taking Photos
Navigate to the photo mode using the directional buttons. Frame your shot on the 2.4-inch IPS screen and press the Shutter button to capture an image.
- Zoom Function: The camera features up to 16x digital zoom. Use the appropriate buttons (refer to camera interface) to adjust the zoom level.
- Flash: The built-in flash can be activated for better photos in dim lighting conditions.

The camera's zoom capability is shown with examples at 4x, 8x, and 16x magnification. Also depicted are time-lapse and burst shooting features.
3. Recording Videos
Switch to video recording mode. Press the Shutter button to start recording 1080P HD video. Press again to stop. The camera supports loop shooting.
4. Printing Photos
After taking a photo, you can choose to print it instantly. The camera uses ink-free thermal printing technology, producing black and white prints at 200DPI resolution.
- Print Density: The camera offers 7 levels of print density adjustment. Experiment to find your preferred setting.
- Print Modes: Choose between Grayscale Mode and Dot-Matrix Mode for different print textures.

This image demonstrates the camera's 200DPI black and white thermal printing capability, showcasing Grayscale and Dot-Matrix modes, along with 7 adjustable levels of print density.
5. Creative Features
Enhance your photos with various built-in creative options:
- Photo Frames: Select from 18 different photo frames to add a decorative border to your pictures.
- Filters: Apply 6 color filters to change the mood and style of your photos.
- Mirror Effects: Experiment with 6 mirror effects for unique selfies.
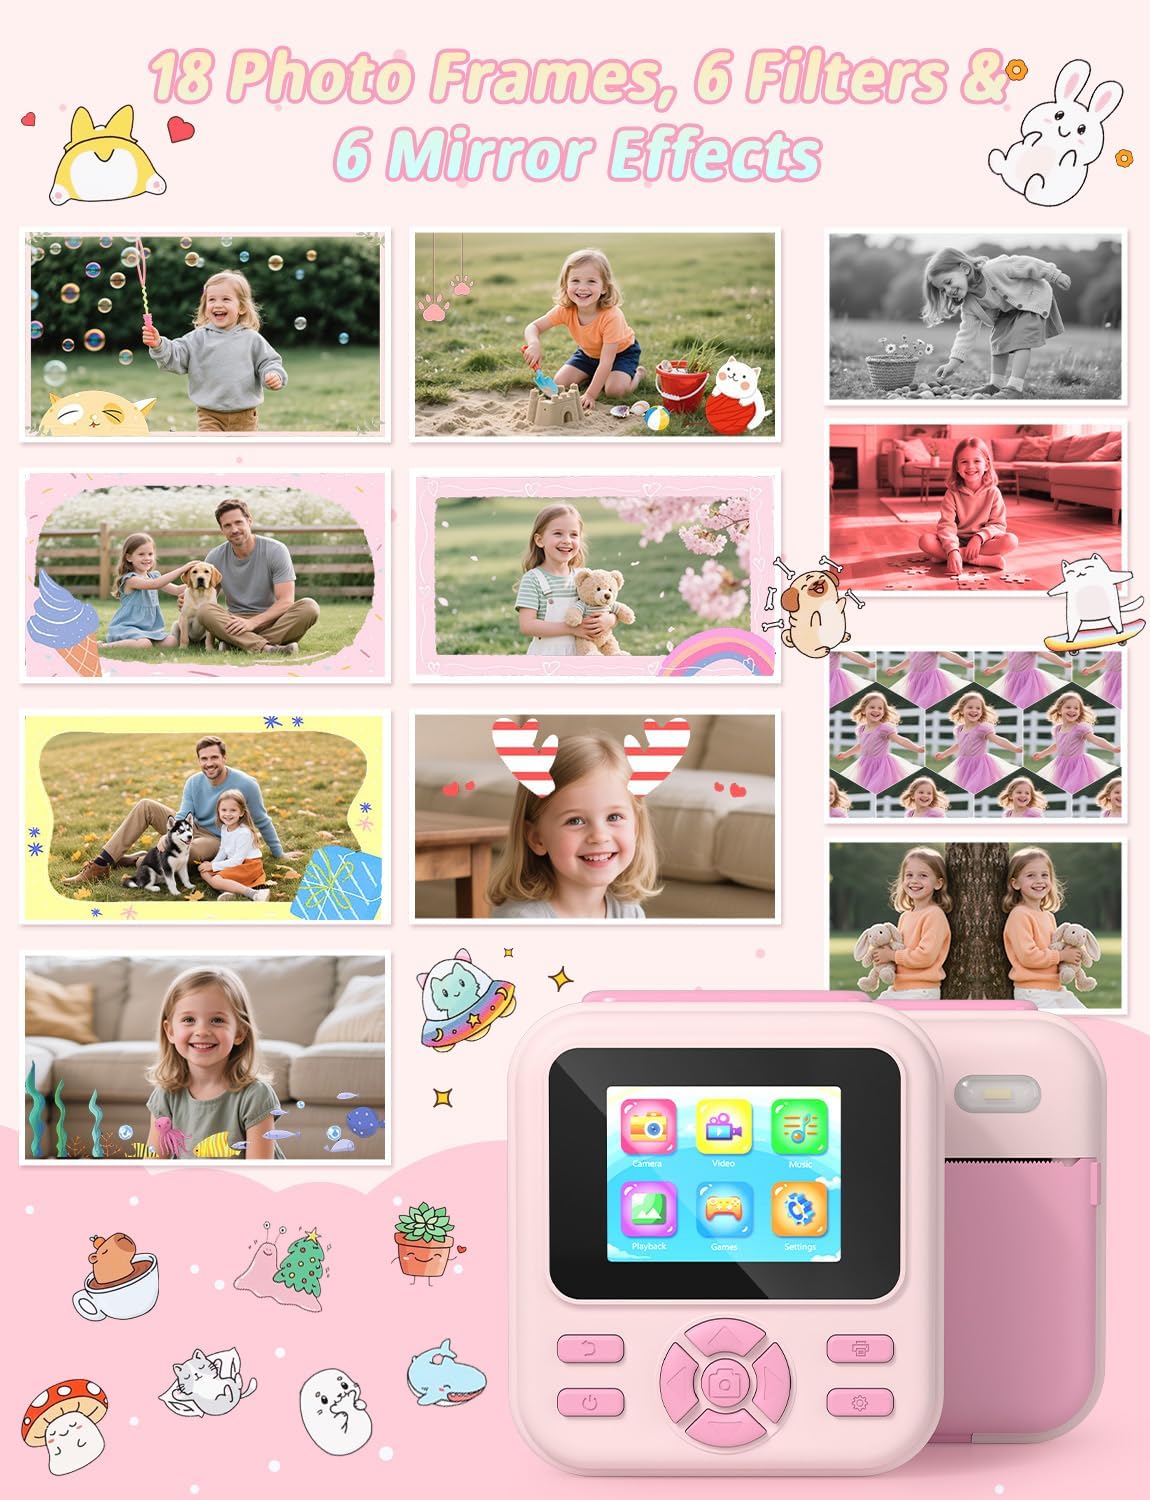
A visual representation of the 18 photo frames, 6 filters, and 6 mirror effects available on the camera for creative photo customization.
After printing, use the included colored pens to doodle and color your black and white photos, and personalize your camera or other items with the cute stickers.

A child engages in coloring black and white photos printed from the camera, bringing them to life with colored pencils.
6. Time-lapse and Burst Shooting
- Time-lapse: Set a delay of 3, 5, or 10 seconds before the photo is taken, allowing time to pose.
- Burst Shooting: Capture a sequence of 3 or 5 photos with a single press of the shutter button, ideal for capturing action.
Entertainment Features
1. Puzzle Games
The camera includes 5 educational puzzle games for entertainment when not taking photos. Navigate to the games menu and select a game to play.

The camera's screen shows icons for 5 puzzle games and an MP3 music player, indicating its multi-functional entertainment capabilities.
2. MP3 Player
The camera features a built-in MP3 player. You can load music files onto the SD card and play them through the camera's speaker. Volume is adjustable with 10 levels.
Connecting to a Computer
To transfer photos and videos to a computer or upload music files to the camera:
- Ensure the camera is powered on.
- Connect the camera to your computer using the provided USB Type-C cable.
- The camera will appear as a removable disk drive on your computer.
- You can now access the files on the SD card to copy, delete, or add media.

The camera is shown connected to a laptop, illustrating the process of uploading and sharing photos and videos stored on the 32GB SD card.
Maintenance and Care
- Cleaning: Wipe the camera body with a soft, dry cloth. For the lens, use a specialized lens cleaning cloth. Avoid abrasive materials or chemical cleaners.
- Battery Care: To prolong battery life, avoid fully discharging the battery frequently. Charge the camera regularly, even if not in use, to prevent deep discharge.
- Storage: Store the camera in a cool, dry place away from direct sunlight and extreme temperatures. Remove the SD card if storing for extended periods.
- Paper Rolls: Keep thermal paper rolls in a cool, dark place to prevent premature fading.
Troubleshooting
| Problem | Possible Cause / Solution |
|---|---|
| Camera does not power on. | Battery is depleted. Charge the camera fully. Ensure the power button is pressed and held for a few seconds. |
| Photos are too dark when printed. | Adjust the print density settings in the camera menu. Ensure adequate lighting when taking photos, or use the flash. The quality of thermal paper can also affect print darkness; ensure you are using suitable paper. |
| Cannot print photos. | Check if the paper roll is inserted correctly and has enough paper. Ensure the paper compartment cover is securely closed. |
| SD card not recognized. | Ensure the SD card is inserted correctly. Try reinserting it. If the issue persists, try formatting the SD card (this will erase all data) or use a different SD card. |
| Camera freezes or becomes unresponsive. | Press and hold the Power button for 10 seconds to force a restart. If the issue continues, ensure the battery is charged and try again. |
Product Specifications
| Feature | Detail |
|---|---|
| Model Name | PC02 |
| Brand | YOHOOLYO |
| Display Size | 2.4 Inches (IPS LCD) |
| Effective Still Resolution | 12 MP |
| Video Resolution | 1920 x 1080 (1080P HD) |
| Zoom | 16x Digital Zoom |
| Printing Technology | Thermal Printing (Ink-Free, Black & White, 200DPI) |
| Battery | 1500mAh Rechargeable Lithium Battery |
| Battery Average Life | 2.5 - 5.5 Hours |
| Storage | 32GB Micro SD Card (included), supports up to 128GB |
| Special Features | Thermal Printing, MP3 Player, Educational Games, 16x Zoom, 1080P HD Video Recording, Photo Frames, Filters, Mirror Effects, Time-lapse, Burst Shooting |
| Connectivity | USB Type-C |
| Dimensions | 14.2 x 13.1 x 6.4 cm |
| Weight | 370 g |
| Country of Origin | China |
Warranty and Support
The YOHOOLYO Kids Instant Print Camera PC02 comes with a 1-year warranty from the date of purchase. This warranty covers manufacturing defects under normal use.
For technical support, warranty claims, or any questions regarding your product, please contact YOHOOLYO customer service through the retailer where you purchased the camera or visit the official YOHOOLYO website for contact information.