1. Introduction
This manual provides comprehensive instructions for the installation, configuration, and operation of your WAVLINK AC1200 Outdoor WiFi Long Range Extender (Model WN572HP3-B). This device is designed to extend your wireless network coverage outdoors, offering dual-band connectivity and multiple operating modes to suit various networking needs. Please read this manual thoroughly before use to ensure proper setup and optimal performance.
2. Package Contents
Verify that all items listed below are present in your package. If any items are missing or damaged, please contact your retailer.
- 1 × AC1200 WiFi Outdoor Extender
- 4 × Detachable Omni-directional Antennas
- 1 × PoE Converter/Adapter
- 1 × RJ45 Ethernet Cable
- 1 × Power Adapter
- Mounting Kit (straps, screws, anchors)
- Quick Start Guide

Figure 2.1: Contents of the WAVLINK AC1200 Outdoor WiFi Extender package.
3. Product Overview
The WAVLINK AC1200 Outdoor WiFi Extender is a robust device designed for outdoor wireless network expansion. It features a weatherproof enclosure and supports various operating modes.
3.1 Device Components
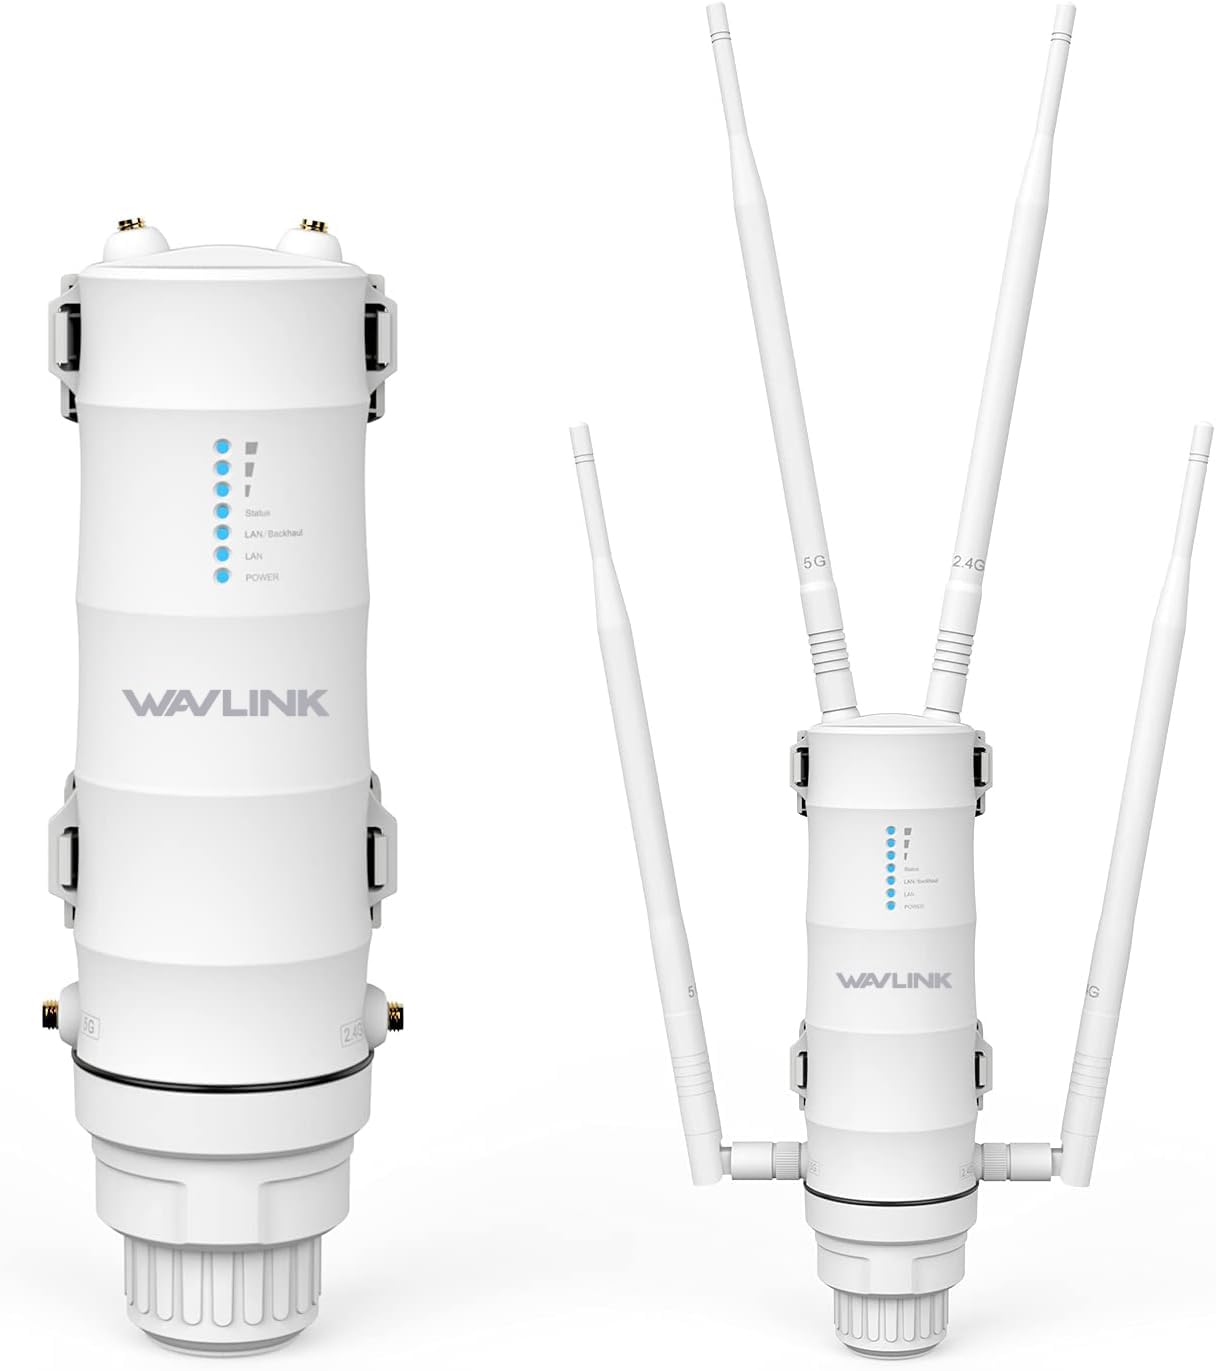
Figure 3.1: Front view of the WAVLINK AC1200 Outdoor WiFi Extender, showing the device with and without its detachable antennas.
- LED Indicators: Display status for Power, LAN/WAN, 2.4G WiFi, and 5G WiFi.
- Antenna Ports: Four ports for connecting the detachable omni-directional antennas.
- Ethernet Ports: Dual Gigabit (10/100/1000Mbps) LAN/WAN Ethernet Ports.
- Reset Button: Used to restore factory default settings.
- Grounding Terminal: For connecting a grounding wire.
3.2 Key Features

Figure 3.2: Overview of the WAVLINK AC1200's key features, including antenna type, protection, speed, and operating modes.
- Dual-Band AC1200 Speed: Provides up to 867Mbps on 5GHz and 300Mbps on 2.4GHz.
- High-Gain Omni-directional Antennas: Four 7dBi detachable antennas for extended range.
- Power over Ethernet (PoE): Supports integrated PoE for power and data transmission via a single Ethernet cable (CAT5E or above, up to 100m/328ft).
- Weatherproof Design (IP65): Enclosure is resistant to rain, snow, wind, thunder, and frost. Note: The PoE converter is not waterproof and must be protected from elements.
- Advanced Protection: Includes 15kV ESD protection and 6kV lightning protection.
- Multiple Operating Modes: Supports AP, Repeater, Router, and WISP modes.
- Power Amplifiers (PA) and Low Noise Amplifiers (LNA): Enhance signal transmission power and reception sensitivity.
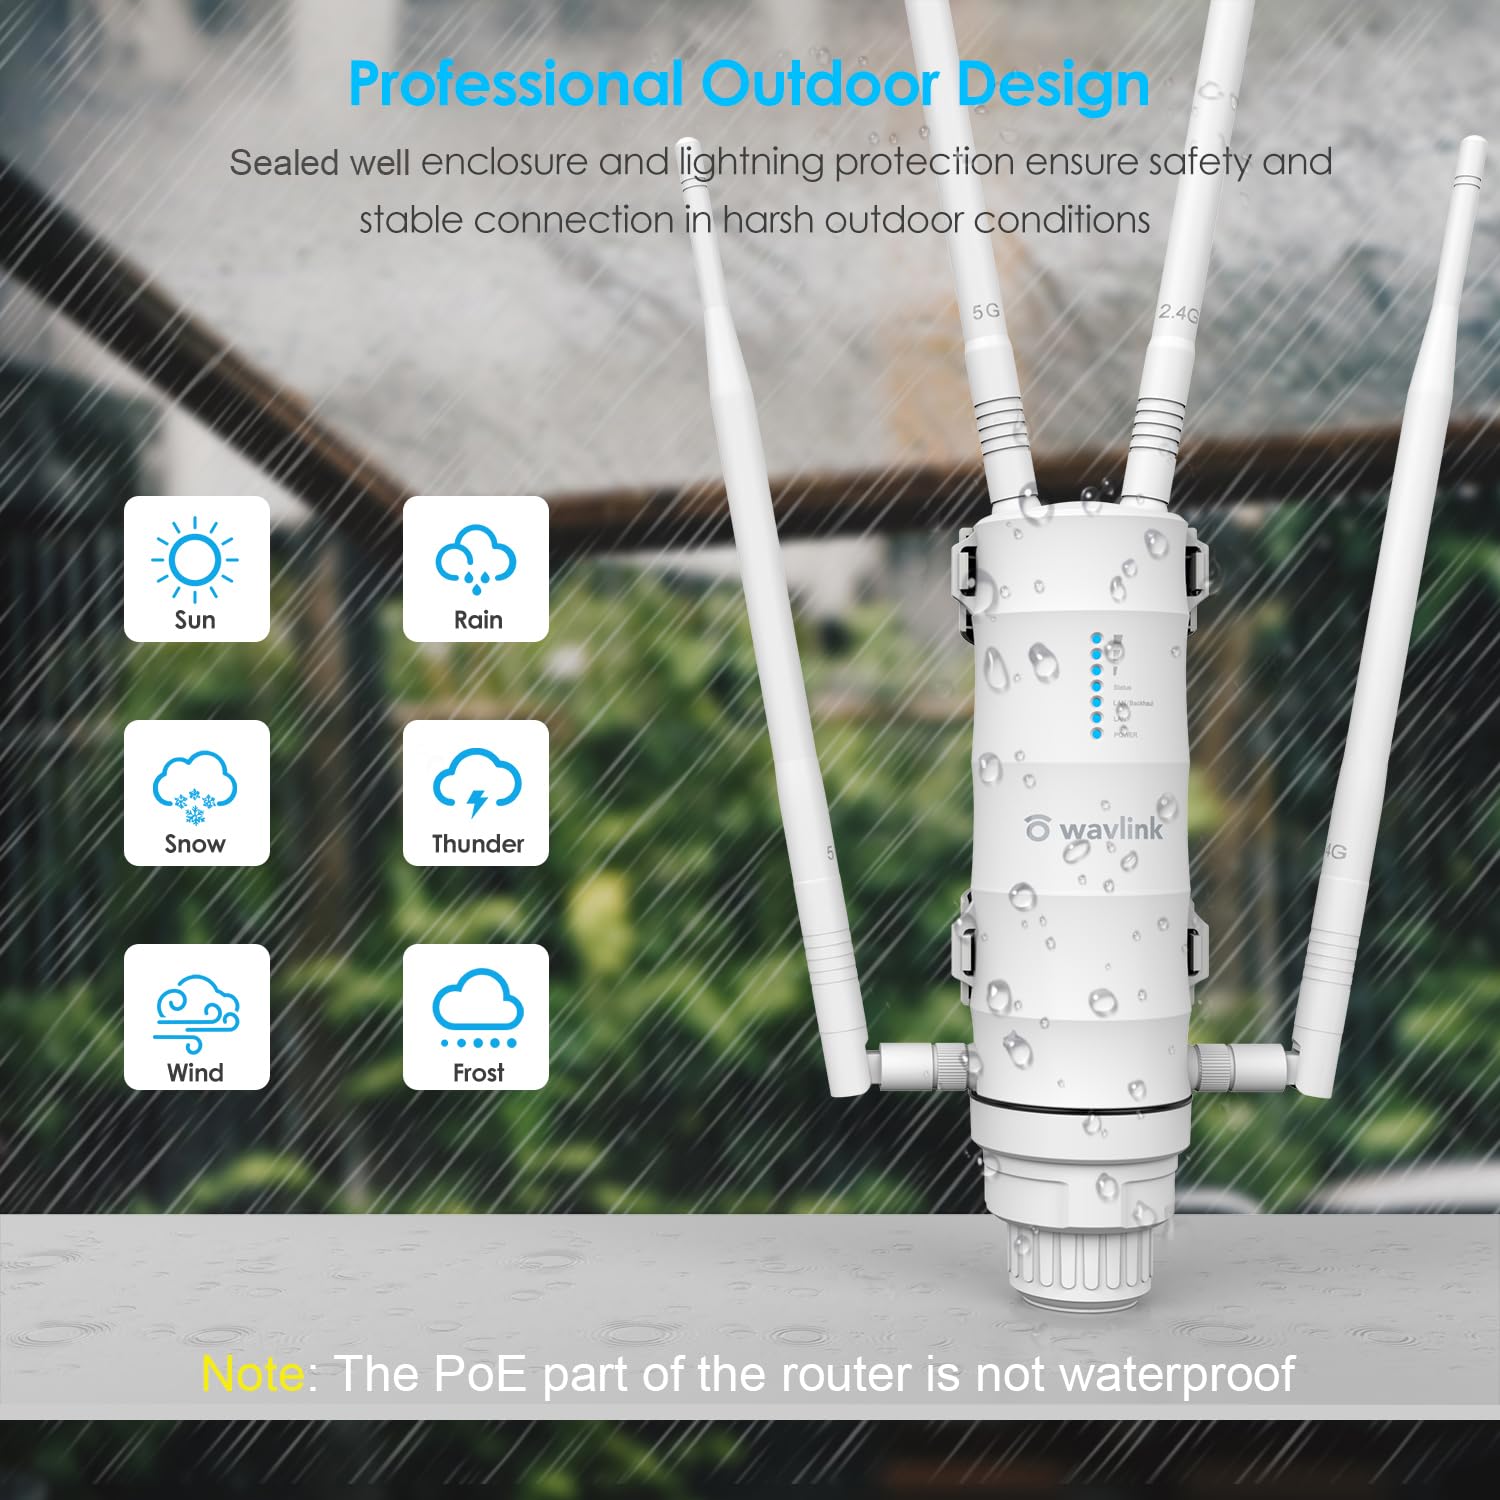
Figure 3.3: Illustration of the device's professional outdoor design, highlighting its resistance to various weather conditions like sun, rain, snow, thunder, wind, and frost.
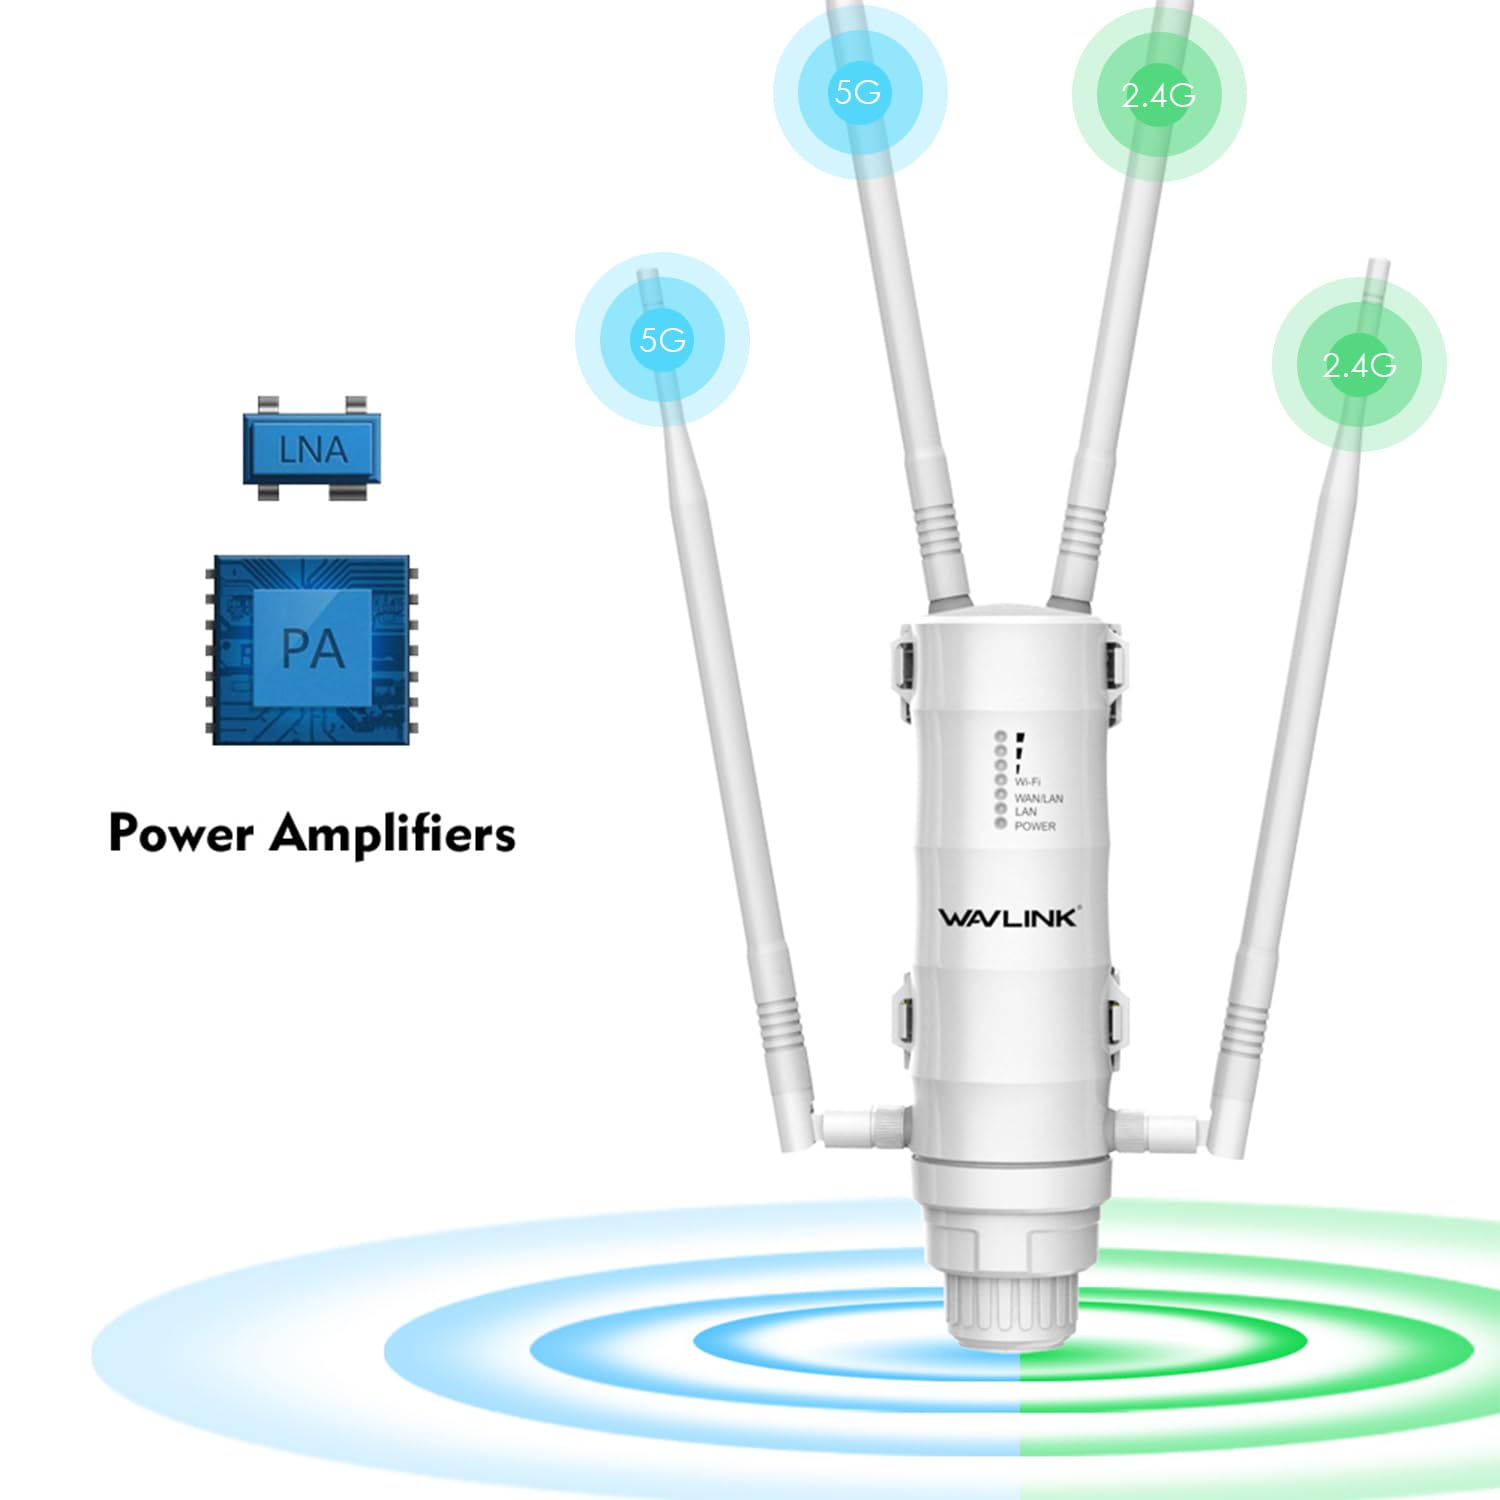
Figure 3.4: Diagram illustrating the function of Power Amplifiers (PA) and Low Noise Amplifiers (LNA) in extending the 2.4G and 5G WiFi signal range.
4. Setup and Installation
4.1 Physical Installation
The WAVLINK AC1200 is designed for flexible outdoor installation.
- Attach Antennas: Carefully screw the four detachable omni-directional antennas onto their respective ports on the device. Ensure they are securely fastened.
- Mounting Location: Choose a suitable outdoor location that provides optimal signal coverage and is within range of your existing network. Consider mounting it on a pole or wall.
- Mounting the Device:
- Pole Mounting: Use the provided mounting straps to secure the device to a pole.
- Wall Mounting: Use the provided screws and anchors to attach the device to a wall.
- Grounding: Connect a grounding wire to the grounding terminal on the device for lightning protection.

Figure 4.1: Examples of versatile mounting solutions, including locking the holder, pole mounting, and wall mounting.

Figure 4.2: Device dimensions and an illustration of flexible installation methods.
4.2 Power Over Ethernet (PoE) Connection
The device is powered using Power over Ethernet (PoE), which simplifies installation by combining power and data into a single cable.
- Connect one end of an Ethernet cable (CAT5E or above) to the LAN(PoE) port on the outdoor extender.
- Connect the other end of this Ethernet cable to the "PoE" port on the PoE converter/adapter.
- Connect another Ethernet cable from the "LAN" port on the PoE converter/adapter to your router or network switch.
- Connect the power adapter to the PoE converter/adapter and plug it into an electrical outlet.
Important: The PoE converter/adapter is not waterproof. Ensure it is installed indoors or in a protected, dry environment. The maximum recommended cable length for PoE is 100 meters (328 feet).

Figure 4.3: Diagram illustrating the Power Over Ethernet (PoE) connection setup, showing the PoE adapter, cables, and the outdoor unit.
4.3 Initial Configuration
After physical installation and power-up, configure the device via a web browser or the WAVLINK app.
- Connect your computer or mobile device to the extender's default Wi-Fi network (SSID and password typically found on a label on the device or in the Quick Start Guide).
- Open a web browser and enter the default IP address (e.g.,
192.168.10.1) or the setup URL provided in the Quick Start Guide. - Follow the on-screen instructions to set up your desired operating mode (AP, Repeater, Router, or WISP) and configure network settings, including SSID and password.
- Alternatively, download and use the official WAVLINK app for guided setup.
5. Operating Modes
The WAVLINK AC1200 supports several operating modes to meet different networking requirements.
5.1 Access Point (AP) Mode
In AP mode, the device connects to a wired network and transforms it into a wireless network, allowing wireless devices to connect.

Figure 5.1: Diagram illustrating the setup for Access Point (AP) Mode, where the device creates a wireless network from a wired connection to a router.
5.2 Repeater Mode
Repeater mode extends the coverage of an existing wireless network by receiving the signal and re-transmitting it.

Figure 5.2: Diagram illustrating the setup for Repeater Mode, where the device wirelessly extends the range of an existing router's signal.
5.3 Router Mode
In Router mode, the device acts as a primary router, connecting to an internet source (e.g., modem) and creating a new private network.

Figure 5.3: Diagram illustrating the setup for Router Mode, where the device connects to a WAN source and provides both wired and wireless network access.
5.4 WISP Mode (Wireless Internet Service Provider)
WISP mode allows the device to connect wirelessly to an ISP's access point and share that internet connection with local wired and wireless clients.

Figure 5.4: Diagram illustrating the setup for WISP Mode, where the device connects wirelessly to a WISP signal and provides local network access.
6. Maintenance
To ensure the longevity and optimal performance of your outdoor WiFi extender, follow these maintenance guidelines:
- Regular Inspection: Periodically check the device and its cables for any signs of damage, wear, or loose connections.
- Cleanliness: Keep the device free from excessive dirt, dust, and debris. Use a soft, dry cloth for cleaning. Do not use liquid cleaners.
- PoE Adapter Protection: Ensure the PoE converter/adapter remains in a dry, protected indoor environment, as it is not waterproof.
- Firmware Updates: Check the WAVLINK official website for firmware updates. Keeping the firmware updated can improve performance and security.
- Environmental Considerations: While the device is weatherproof, extreme conditions can still impact performance. Ensure proper grounding is maintained.
7. Troubleshooting
If you encounter issues with your WAVLINK AC1200 Outdoor WiFi Extender, refer to the following common problems and solutions.
- No Power:
- Ensure the power adapter is securely connected to the PoE converter and plugged into a working electrical outlet.
- Verify the Ethernet cable from the PoE converter to the extender is properly connected and not damaged.
- No Internet Access:
- Check the connection between the PoE converter's LAN port and your main router/modem.
- Confirm your main router/modem has an active internet connection.
- Reconfigure the extender's operating mode and settings via the web interface or app.
- Weak Signal or Slow Speed:
- Adjust the position of the extender and its antennas for better line-of-sight to your main router or desired coverage area.
- Ensure there are no major obstructions (e.g., thick walls, metal objects) between the extender and client devices.
- Check for interference from other wireless devices.
- Verify that the Ethernet cable used for PoE is CAT5E or above and within the 100m length limit.
- Cannot Access Web Management Page:
- Ensure your device is connected to the extender's Wi-Fi network or directly via Ethernet.
- Verify you are using the correct default IP address or URL.
- Try clearing your browser's cache or using a different browser.
- If all else fails, perform a factory reset by pressing and holding the reset button for approximately 10 seconds while the device is powered on. Note: A factory reset will erase all custom settings.
8. Specifications
| Feature | Description |
|---|---|
| Model Number | WN572HP3-B |
| Wireless Standard | 802.11ac |
| Data Transfer Rate | Up to 867 Mbps (5GHz), 300 Mbps (2.4GHz) |
| Frequency Band Class | Dual-Band (2.4GHz & 5GHz) |
| Antennas | 4 × 7dBi Detachable Omni-directional Antennas |
| Ethernet Ports | 2 × Gigabit (10/100/1000Mbps) LAN/WAN Ports |
| Power Supply | Integrated Power over Ethernet (PoE) |
| Weather Protection | IP65 Weatherproof Enclosure, 15kV ESD, 6kV Lightning Protection |
| Operating Modes | AP, Repeater, Router, WISP |
| Item Weight | 1.87 pounds (approx. 0.85 kg) |
| Dimensions | 14.33 x 7.32 x 2.95 inches (approx. 36.4 x 18.6 x 7.5 cm) |
9. Warranty and Support
WAVLINK products are designed for reliability and performance. For warranty information, technical support, or further assistance, please refer to the warranty card included in your package or visit the official WAVLINK website.
WAVLINK Official Website: www.wavlink.com


