1. Introduction
This manual provides detailed instructions for the installation, operation, and maintenance of your darkFlash TH285 ATX Mid-Tower PC Gaming Case. The TH285 is designed for optimal airflow and component compatibility, featuring a full-view tempered glass design and pre-installed ARGB PWM fans.
Please read this manual thoroughly before beginning assembly to ensure correct installation and safe operation.

Image 1.1: The darkFlash TH285 case showcasing its internal layout and RGB fans.
2. Safety Information
Observe the following safety precautions during installation and use:
- Always disconnect the power supply from the wall outlet before installing or removing any components.
- Handle tempered glass panels with care to prevent breakage. Avoid impacts or dropping the panels.
- Wear an anti-static wrist strap or frequently touch a grounded metal object to prevent electrostatic discharge (ESD) damage to components.
- Keep small parts and screws away from children.
- Ensure proper ventilation around the case to prevent overheating.
3. Package Contents
Verify that all items are present in the package:
- darkFlash TH285 ATX Mid-Tower PC Gaming Case
- 4x darkFlash Air12X 120mm ARGB PWM Fans (pre-installed)
- Accessory Box (containing screws, cable ties, and other small parts)
- User Manual (this document)
4. Specifications
| Feature | Specification |
|---|---|
| Brand | darkFlash |
| Model Number | TH285 |
| Case Type | ATX Mid-Tower |
| Motherboard Compatibility | ATX, Micro-ATX (M-ATX), Mini-ITX (ITX) |
| Material | Metal, Plastic, Tempered Glass |
| Color | Black |
| Item Weight | 21.3 pounds |
| Package Dimensions | 20.27 x 17.79 x 14.09 inches |
| GPU Clearance (Max) | 415mm |
| CPU Cooler Height (Max) | 160mm |
| Power Supply Mounting Type | Bottom Mount |
| Expansion Slots | 7 |
| Drive Bays | 2x 3.5" HDD (Max), 3x 2.5" SSD (Max) |
| I/O Ports | 1x USB 3.0, 2x USB 2.0, HD Audio |
| Included Fans | 4x darkFlash Air12X 120mm ARGB PWM Fans |
| Fan Support | Side: 3x 120mm or 2x 140mm; Bottom: 3x 120mm; Rear: 1x 120mm |
| Radiator Support | Side: 240mm/280mm; Bottom: 240mm/360mm |

Image 4.1: Detailed specifications for the darkFlash TH285 case.
5. Setup and Component Installation
Follow these steps to install your PC components into the darkFlash TH285 case.
5.1. Preparing the Case
- Place the case on a flat, stable surface.
- Carefully remove the tempered glass side panels. The TH285 features a full-view tempered glass design on the front, top, and side panels. Handle them gently to avoid damage.

Image 5.1: Removing the tempered glass side panel for component access.
5.2. Motherboard Installation
- Install the I/O shield (if applicable) into the rear opening of the case.
- Align your ATX, Micro-ATX, or Mini-ITX motherboard with the standoffs inside the case.
- Secure the motherboard with the appropriate screws from the accessory box.
5.3. Power Supply Unit (PSU) Installation
The TH285 features an innovative dual-chamber design, separating the PSU and cable management area from the main hardware compartment.
- Locate the PSU mounting area at the bottom rear of the case.
- Slide the PSU into position and secure it with screws from the rear of the case.
5.4. Storage Drive Installation
The case supports up to 2x 3.5" HDDs and 3x 2.5" SSDs.
- Locate the drive bays for 3.5" HDDs and 2.5" SSDs. These are typically found in the rear chamber or dedicated mounting points.
- Mount your drives using the provided screws.

Image 5.2: Internal layout highlighting storage drive bay locations.
5.5. Graphics Card (GPU) Installation
The TH285 supports flagship GPUs up to 415mm in length and features 7 PCI expansion slots.
- Remove the necessary PCI slot covers from the rear of the case.
- Insert your graphics card into the appropriate PCIe slot on the motherboard.
- Secure the graphics card with screws.

Image 5.3: Rear view illustrating the 7 GPU PCI slots.
5.6. Cooling System Installation (Fans & Radiators)
The case comes with 4x darkFlash Air12X ARGB PWM fans pre-installed for high airflow performance. It also supports various fan and radiator configurations.
- Fan Support: Side: 3x 120mm or 2x 140mm; Bottom: 3x 120mm; Rear: 1x 120mm.
- Radiator Support: Side: 240mm/280mm; Bottom: 240mm/360mm.
Ensure fans are oriented correctly for optimal airflow (intake/exhaust).

Image 5.4: Fan installation suggestions for superior heat dissipation.

Image 5.5: Radiator support and component clearance diagram.
5.7. Cable Management
Utilize the ample cable routing options and the dual-chamber layout to maintain a clean interior and improve airflow.
- Route power cables and data cables through the designated cutouts.
- Use cable ties (provided in the accessory box) to bundle and secure cables in the rear chamber.
5.8. Connecting Front I/O Ports
The convenient top-mounted I/O panel includes USB ports and audio jacks.
- Connect the front panel cables (USB 3.0, USB 2.0, HD Audio, Power Switch, Reset Switch, Power LED, HDD LED) to the corresponding headers on your motherboard. Refer to your motherboard manual for header locations.
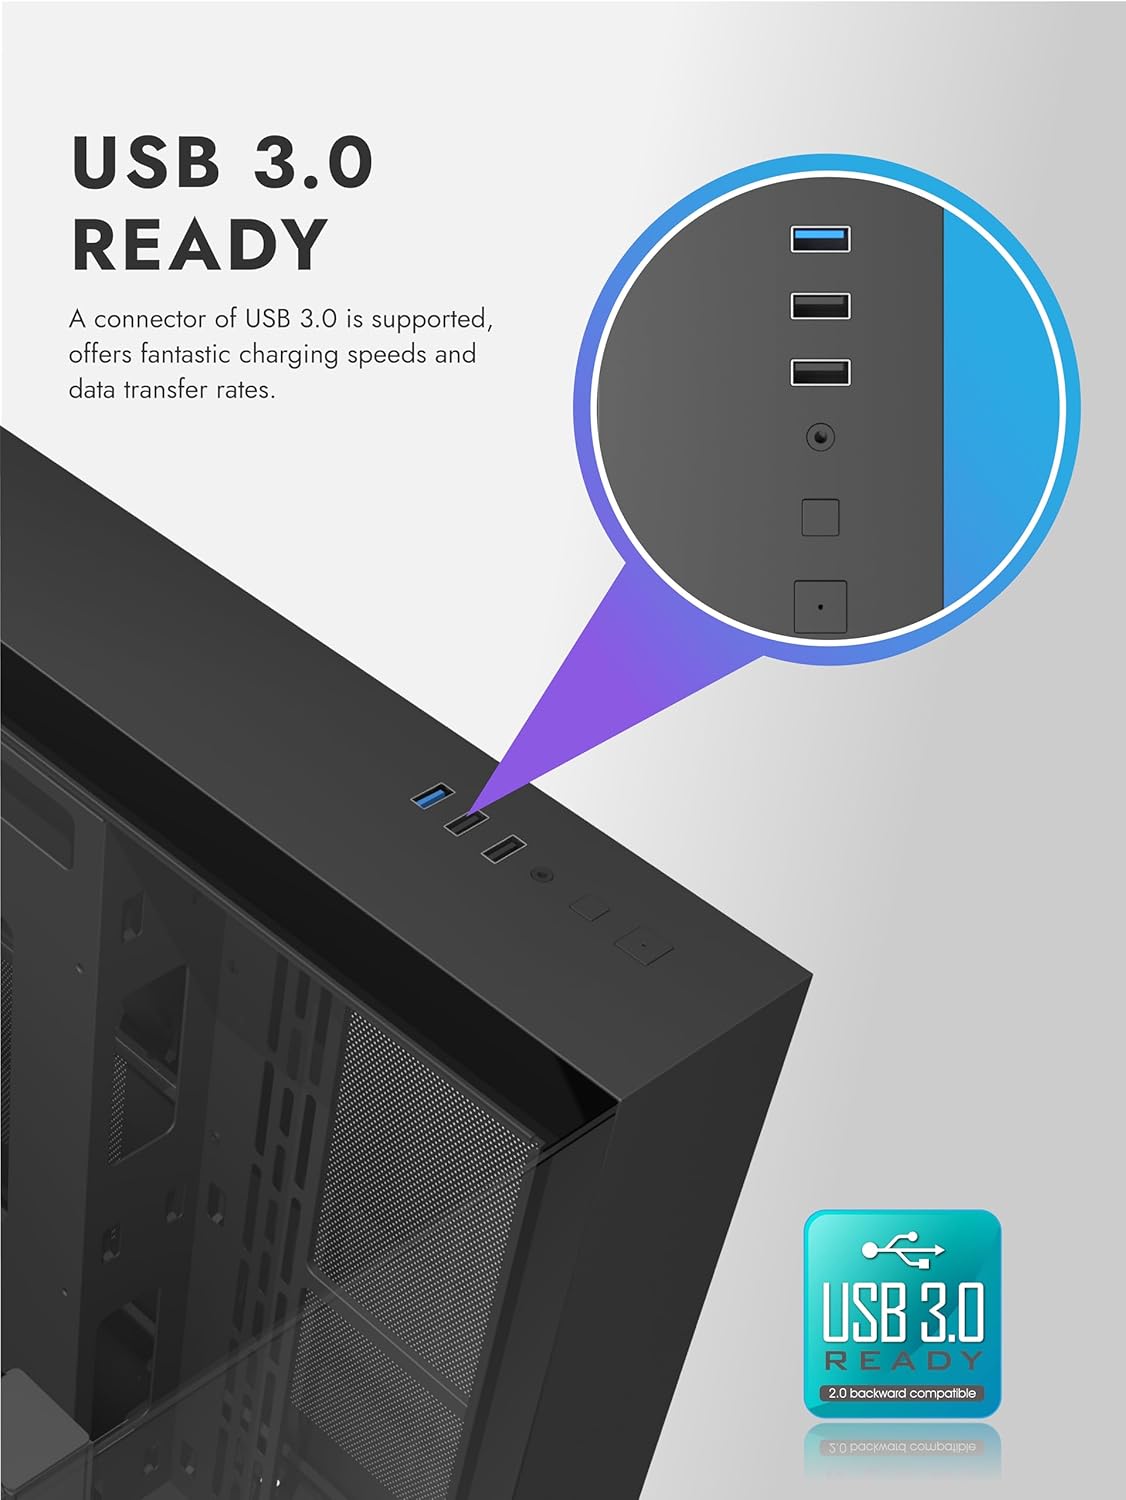
Image 5.6: Top I/O panel featuring USB 3.0 and other ports.
6. Operating Instructions
6.1. Powering On Your System
Once all components are installed and cables are connected, replace the side panels and connect the power cable to your PSU and a wall outlet. Press the power button on the top I/O panel to start your system.
6.2. ARGB Fan Control
The pre-installed darkFlash Air12X ARGB PWM fans offer brilliant lighting effects and precise speed control. Connect the ARGB and PWM cables from the fans to your motherboard's compatible headers. Use your motherboard's software or BIOS settings to customize fan speed and RGB lighting effects.
7. Maintenance
Regular maintenance helps ensure optimal performance and longevity of your PC components.
7.1. Dust Filter Cleaning
The TH285 includes removable dust filters for practical maintenance. Periodically remove and clean these filters to prevent dust buildup, which can restrict airflow and increase component temperatures.
- Locate the dust filters (typically on the top, front, or bottom of the case).
- Gently remove the filters.
- Clean them using compressed air or by rinsing with water (ensure they are completely dry before reinstallation).
- Reinstall the dust filters.
7.2. General Cleaning
- Use a soft, dry cloth to wipe down the exterior of the case, including the tempered glass panels.
- For stubborn smudges on glass, use a glass cleaner applied to a cloth, not directly to the panel.
- Use compressed air to clear dust from internal components and fan blades.
8. Troubleshooting
If you encounter issues during or after assembly, consider the following common troubleshooting steps:
- System not powering on: Ensure all power cables (24-pin ATX, 8-pin CPU, GPU power) are securely connected. Verify the PSU switch is in the 'ON' position. Check front panel power button connections to the motherboard.
- No display output: Confirm the graphics card is fully seated in its PCIe slot and power cables are connected. Ensure the monitor cable is connected to the graphics card, not the motherboard's integrated graphics port (unless using integrated graphics).
- Fans not spinning or RGB not working: Check fan PWM and ARGB headers are correctly connected to the motherboard. Verify fan control software or BIOS settings.
- Overheating: Ensure all fans are oriented correctly for optimal airflow. Clean dust filters and internal components. Verify CPU cooler installation.
- Loose components: Double-check all screws and connections for components like the motherboard, GPU, and storage drives.
9. Warranty Information
Warranty information for the darkFlash TH285 PC Gaming Case is not provided within this manual. Please refer to the official darkFlash website or your point of purchase for detailed warranty terms and conditions.
10. Customer Support
For further assistance or technical support, please visit the official darkFlash website or contact their customer service department. Contact details are typically available on the manufacturer's website.
Official darkFlash Website: www.darkflash.com


