1. Introduction
This manual provides essential instructions for the safe and effective use of your Jueion T4913 Walkie Talkies. Please read this manual thoroughly before operating the devices and retain it for future reference.

Image 1.1: Jueion T4913 Walkie Talkies (4-pack) with accessories.
2. Safety Information
- Do not expose the walkie talkies to water or excessive moisture. These devices are not water-resistant.
- Keep batteries away from small children. If swallowed, seek immediate medical attention.
- Use only recommended AAA rechargeable batteries. Non-rechargeable batteries should not be charged.
- Avoid extreme temperatures. Do not leave devices in direct sunlight or very cold environments.
- Do not attempt to disassemble or modify the walkie talkies. This may void the warranty and cause damage.
- Supervise children during use to ensure safe operation.
3. Package Contents
The Jueion T4913 Walkie Talkie set includes:
- 4 x Jueion T4913 Walkie Talkies (Blue, Pink, Yellow, Green)
- 4 x Lanyards
Note: AAA rechargeable batteries, USB-C charging cables, and a charger are NOT included and must be purchased separately.
4. Product Features
- Long Range Communication: Up to 3 miles in open areas.
- Multiple Channels: 10 available channels for private communication.
- Integrated Flashlight: For use in low-light conditions.
- Rechargeable Design: Compatible with USB-C charging (requires 3xAAA rechargeable batteries per unit).
- Battery Saver Mode: Extends battery life during standby.
- Lightweight and Durable: Child-friendly construction.
- Keypad Lock: Prevents accidental setting changes.
- Clear Sound: Designed for clear audio transmission.

Image 4.1: Communication range capabilities.
5. Setup
5.1 Battery Installation
- Locate the battery compartment cover on the back of the walkie talkie.
- Gently slide the cover downwards to open.
- Insert 3 AAA rechargeable batteries into the compartment, ensuring correct polarity (+/-).
- Replace the battery compartment cover and slide it upwards until it clicks securely into place.

Image 5.1: Battery compartment for AAA batteries.
5.2 Charging the Batteries
The walkie talkies are designed to be used with rechargeable AAA batteries. While the devices have a USB-C port, charging cables and a power adapter are not included.
- Ensure rechargeable AAA batteries are installed in the walkie talkie.
- Connect a USB-C charging cable (not included) to the USB-C port on the side of the walkie talkie.
- Connect the other end of the USB-C cable to a compatible USB power adapter (not included).
- The battery indicator on the screen will show charging status.
- Once fully charged, disconnect the charging cable.
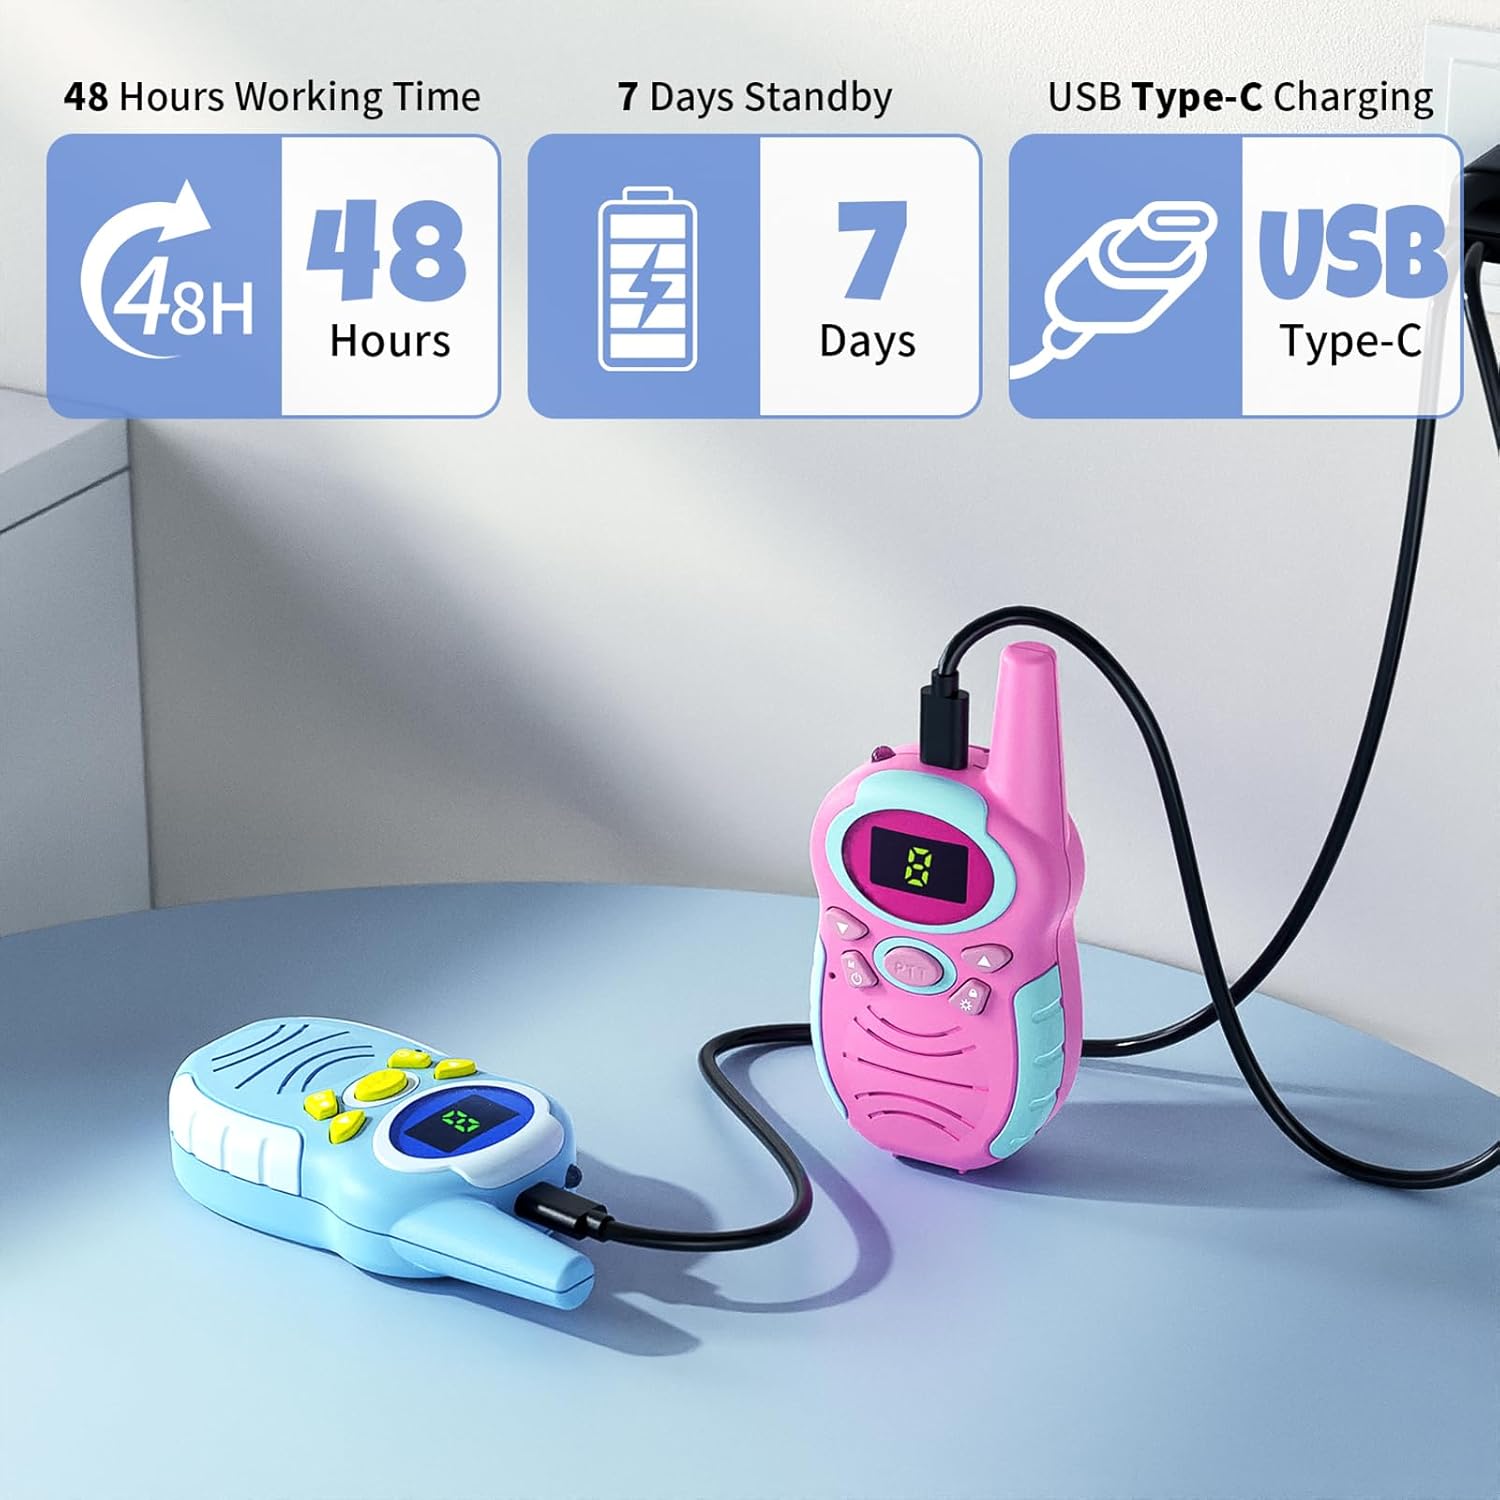
Image 5.2: Walkie talkies connected for USB-C charging.
5.3 Attaching Lanyards
Attach the provided lanyards to the designated loop on the top of each walkie talkie for convenient carrying and to prevent loss.
6. Operating Instructions

Image 6.1: Walkie Talkie Components and Controls.
6.1 Power On/Off
- To power on, press and hold the Menu/Power button until the screen illuminates.
- To power off, press and hold the Menu/Power button until the screen turns off.
6.2 Adjusting Volume
- Press the Up button to increase the volume.
- Press the Down button to decrease the volume.
6.3 Channel Selection
- Press the Menu/Power button once to enter channel selection mode. The channel number on the display will flash.
- Use the Up or Down buttons to select your desired channel (1-10).
- Press the Menu/Power button again to confirm your selection and exit channel selection mode. Ensure all walkie talkies intended for communication are set to the same channel.
6.4 Transmitting (Push-to-Talk)
- To speak, press and hold the PTT (Push-to-Talk) button located on the side of the walkie talkie.
- Speak clearly into the MIC (microphone) at a normal speaking volume.
- Release the PTT button when you are finished speaking to allow others to respond.
6.5 Flashlight Function
- To turn on the flashlight, press the dedicated Flashlight button (often marked with a light icon).
- Press the Flashlight button again to turn it off.
6.6 Keypad Lock
- To activate the keypad lock, press and hold the Key Lock button (often marked with a lock icon). A lock icon will appear on the display.
- To deactivate the keypad lock, press and hold the Key Lock button again. The lock icon will disappear.
Video 6.1: Demonstration of Jueion Walkie Talkies in use, highlighting features and ease of operation.
7. Maintenance
- Cleaning: Wipe the walkie talkies with a soft, dry cloth. Do not use abrasive cleaners or solvents.
- Storage: Store the devices in a cool, dry place when not in use. If storing for extended periods, remove the batteries to prevent leakage.
- Battery Care: Always use rechargeable AAA batteries. If the devices are not used frequently, charge the batteries periodically to maintain their lifespan.
8. Troubleshooting
| Problem | Possible Cause | Solution |
|---|---|---|
| Walkie talkie does not power on. | Batteries are dead or incorrectly installed. | Check battery polarity. Replace or recharge batteries. |
| Cannot communicate with other walkie talkies. | Different channels selected. Out of range. Low battery. | Ensure all devices are on the same channel. Move closer to the other device. Recharge batteries. |
| Poor sound quality or static. | Interference. Out of range. Obstructions. | Move to an open area. Reduce distance between devices. Avoid large metal objects or buildings. |
| Keypad buttons are unresponsive. | Keypad lock is active. | Deactivate keypad lock by pressing and holding the Key Lock button. |
9. Specifications
- Model: T4913
- Brand: Jueion
- Item Weight: 10.8 ounces (per 4-pack)
- Product Dimensions: 1.4 x 2.2 x 4.7 inches (per unit)
- Number of Channels: 10
- Talking Range Maximum: 3 Miles (in optimal conditions)
- Voltage: 3.7 Volts (per unit, with rechargeable AAA batteries)
- Water Resistance Level: Not Water Resistant
- Power Source: 3 x AAA rechargeable batteries (not included)
- Charging Port: USB-C
10. Warranty and Support
Specific warranty information is not provided in the product details. For any product inquiries, technical support, or warranty claims, please contact the seller directly through your purchase platform or visit the official Jueion store on Amazon: