
1. Introduction
Thank you for purchasing the EasySMX X05PRO Wireless PC Game Controller. This manual provides detailed instructions on how to set up, operate, and maintain your controller. Please read this manual carefully before use to ensure optimal performance and a satisfying gaming experience.
Product overview video showcasing the EasySMX X05PRO controller's design and key features.
2. Product Overview
The EasySMX X05PRO is a versatile wireless game controller designed for a wide range of platforms including PC, Nintendo Switch, iOS, and Android devices. It features advanced technologies such as Hall effect joysticks and triggers, a 1000Hz polling rate, and customizable RGB lighting to enhance your gaming sessions.
Package Contents:
- EasySMX X05PRO Wireless Game Controller
- USB-C Charging Cable
- 2.4G Wireless Receiver (USB Dongle)
- User Manual

An image displaying the EasySMX X05PRO controller with its main features such as wireless/wired connection, silent buttons, RGB lighting, 1000Hz polling rate, TURBO function, vibration adjustment, and 1000mAh battery.
3. Setup and Connection
The X05PRO controller supports multiple connection methods for various devices.
3.1. 2.4G Wireless Connection (for PC Windows)
- Insert the 2.4G wireless receiver into an available USB port on your PC.
- Press and hold the Home button on the controller until the indicator light flashes rapidly, indicating pairing mode.
- Once connected, the indicator light will become solid. The controller is now ready for use.
3.2. Bluetooth Connection (for Switch, iOS, Android)
- On your device (Switch, iOS, or Android), navigate to the Bluetooth settings and enable Bluetooth.
- On the EasySMX X05PRO controller, press and hold the Bluetooth Pairing button (refer to the diagram in Section 2 for button layout) until the indicator light flashes rapidly.
- Select "EasySMX X05PRO" from the list of available devices on your screen.
- Once paired, the indicator light on the controller will become solid.
3.3. Wired Connection (for PC, Switch, and charging)
- Connect one end of the USB-C cable to the controller and the other end to your device (PC or Switch).
- The controller will automatically switch to wired mode. This mode also charges the controller.

An image illustrating the wireless connection capabilities of the EasySMX X05PRO controller, highlighting its compatibility with PC and other devices.
4. Key Features
4.1. Silent Buttons
The X05PRO features a redesigned full button structure with silicone dampers, ensuring ultra-quiet operation. This design is optimized for late-night gaming sessions, preventing disturbance to family, roommates, or neighbors.

A detailed view of the controller's buttons, illustrating the silicone damper mechanism for reduced noise during gameplay.
4.2. Dual-Stage Hall Effect Triggers
Experience precise control with adjustable trigger locks, allowing for short (3mm) or long (9mm) stroke distances. The 2+2 built-in rumble motors provide realistic haptic feedback for immersive racing and FPS experiences.
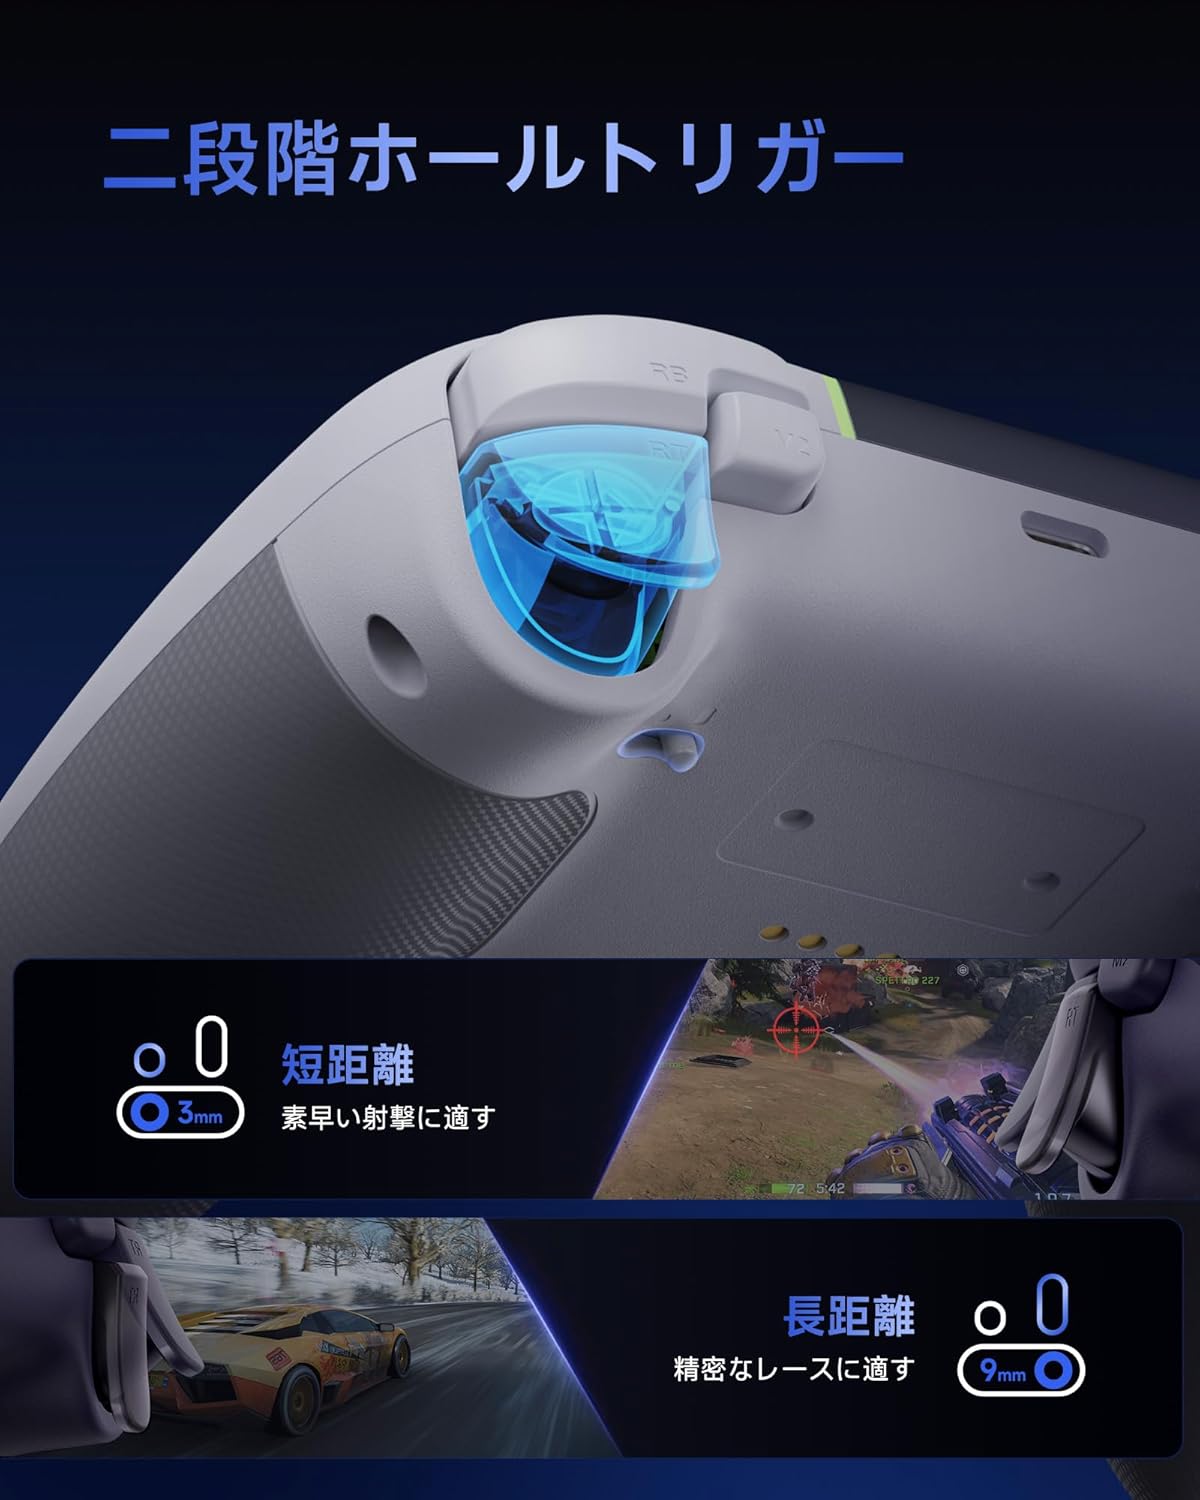
An image demonstrating the dual-stage Hall effect triggers, highlighting the short travel distance for quick shots and long travel for precise racing control.
4.3. Upgraded 8-Way D-Pad
The D-pad incorporates a dome switch and concave pivot structure, enabling smooth diagonal inputs and precise 8-way control. This design is particularly beneficial for fighting games and retro titles requiring accurate directional commands.

An exploded diagram showing the internal components of the upgraded 8-way D-pad, emphasizing its improved design for seamless and precise operation.
4.4. 4-Zone Vibration Feedback
The controller features a 2+2 motor structure that provides immersive 4-zone vibration feedback, enhancing tactile immersion during gameplay. Note: Trigger vibration requires in-game support and may only be available in certain titles.

An illustration of the controller's 4-zone vibration feedback system, depicting the internal motors and their effect on tactile immersion.
4.5. Dynamic RGB Backlight
Personalize your gaming experience with customizable RGB lighting effects. Choose from 7 color combinations and 5 diverse lighting modes (Brightness, Breathing, Colorful, Fade, Off) to match your style or mood.

An image showcasing two controllers with different dynamic RGB lighting effects, illustrating the customizable illumination options.
4.6. Two Programmable Buttons
The controller includes two additional programmable buttons located on the top, designed to prevent accidental presses during intense gameplay, a common issue with traditional back paddles.

A view of the controller's top side, highlighting the two programmable buttons (M1 and M2) and their programming settings.
4.7. 1000Hz Polling Rate & Hall Effect Joysticks
Achieve virtually no input lag with a 1000Hz polling rate in both wired and 2.4G wireless modes. The high-precision 11-bit Hall effect sensors in the joysticks ensure drift-free accuracy and a long operational lifespan.

A diagram illustrating the 1000Hz polling rate and the internal mechanism of the Hall effect joystick, emphasizing drift-free high precision.
4.8. Ergonomic Grip & Long-Life Battery
The controller features a soft-touch silicone coating for a sweat-resistant, non-slip grip, ensuring comfort during extended gaming sessions. A built-in 1000mAh rechargeable battery provides prolonged playtime.

An image highlighting the ergonomic, skin-friendly grip texture and the 1000mAh battery capacity of the controller.
5. Operation
5.1. Changing RGB Lighting Modes
To cycle through the 5 RGB lighting modes (Brightness, Breathing, Colorful, Fade, Off) and 7 color combinations, refer to the detailed instructions in the full product manual or the manufacturer's website. Typically, a dedicated button or a combination of buttons is used for this function.
5.2. Programming Buttons (M1/M2)
The M1 and M2 buttons can be programmed to replicate other button inputs. To program:
- Press and hold the M button (usually located near the D-pad) and the desired programmable button (M1 or M2) simultaneously.
- The indicator light will flash, indicating programming mode.
- Press the button you wish to map (e.g., A, B, X, Y, LB, RB, LT, RT, L3, R3).
- Press the M button again to save the mapping. The indicator light will return to solid.
5.3. Adjusting Trigger Modes
The dual-stage triggers can be adjusted for different travel distances. Consult the full product manual for specific button combinations or switches to toggle between short (3mm) and long (9mm) trigger strokes, optimizing for quick actions or precise control.
6. Charging the Controller
The EasySMX X05PRO controller is equipped with a built-in 1000mAh rechargeable Lithium-ion battery.
Charging Procedure:
- Connect the USB-C charging cable to the controller's charging port.
- Connect the other end of the USB-C cable to a USB power source (e.g., PC, USB wall adapter, power bank).
- The indicator light on the controller will show the charging status (e.g., breathing light, solid light when fully charged). Refer to the controller's LED indicators for specific charging status details.
- A full charge typically takes approximately 2-3 hours.
7. Specifications
| Feature | Detail |
|---|---|
| Model Number | X05PRO |
| Battery Type | 1 Lithium Ion battery (included) |
| Battery Capacity | 1000mAh |
| Connectivity | 2.4G Wireless, Bluetooth, Wired (USB-C) |
| Polling Rate | 1000Hz (Wired & 2.4G Wireless), 125Hz (Bluetooth) |
| Trigger Type | Dual-Stage Hall Effect Triggers |
| Joystick Type | Hall Effect Joysticks (11-bit precision) |
| D-Pad | Upgraded 8-Way D-Pad (Dome switch, concave pivot) |
| Vibration | 4-Zone Vibration Feedback (2+2 motors) |
| Lighting | Dynamic RGB Backlight (7 colors, 5 modes) |
| Programmable Buttons | 2 (M1, M2) |
| Dimensions | 17.9 x 14.7 x 7.4 cm |
| Weight | 400 g |
| Country of Origin | China |

Image showing the EasySMX X05PRO controller and its technical compliance certifications for the Japanese market.
8. Troubleshooting
8.1. Controller Not Connecting
- Check Battery: Ensure the controller is sufficiently charged. Connect it via USB-C cable to charge.
- Re-pair: For wireless connections, try re-pairing the controller with your device. Follow the steps in Section 3.
- Check Receiver (2.4G): Ensure the 2.4G wireless receiver is securely plugged into a working USB port on your PC. Try a different USB port.
- Bluetooth Interference: If using Bluetooth, ensure no other devices are causing interference. Try disconnecting other Bluetooth devices.
- Wired Connection: If wireless connection fails, try connecting the controller directly via USB-C cable to confirm functionality.
8.2. Input Lag or Unresponsive Buttons/Joysticks
- Polling Rate: Ensure you are using 2.4G wireless or wired mode for the optimal 1000Hz polling rate. Bluetooth mode operates at 125Hz, which may feel less responsive in competitive gaming.
- Interference: For 2.4G wireless, ensure the receiver is not obstructed and is close to the controller. Avoid areas with high electromagnetic interference.
- Firmware Update: Check the EasySMX official website for any available firmware updates for your controller.
- Recalibration: Some operating systems or game platforms allow for controller calibration. Refer to your device's settings for this option.
8.3. Vibration Not Working
- In-Game Support: Verify that the game you are playing supports vibration feedback.
- Game Settings: Check the in-game settings to ensure vibration is enabled.
- Driver Installation: For PC, ensure the correct drivers are installed.
9. Maintenance
- Cleaning: Use a soft, dry cloth to clean the controller. Do not use harsh chemicals or abrasive materials.
- Storage: Store the controller in a cool, dry place away from direct sunlight and extreme temperatures.
- Battery Care: Avoid fully discharging the battery frequently. Charge the controller regularly, even if not in use for extended periods, to maintain battery health.
- Avoid Drops: Protect the controller from drops and impacts, which can damage internal components.
10. Safety Information
- Do not attempt to disassemble or modify the controller. This may void your warranty and cause damage.
- Keep the controller away from water, moisture, and high temperatures.
- Do not expose the battery to fire or extreme heat.
- Dispose of the product and its battery responsibly according to local regulations.
- This product is not a toy. Keep out of reach of small children.
11. Warranty and Support
EasySMX products come with a standard warranty. For specific warranty terms, duration, and to register your product, please visit the official EasySMX website or contact customer support.
If you encounter any issues not covered in this manual or require further assistance, please contact EasySMX customer support through their official website or the contact information provided with your purchase.
EasySMX Official Website: www.easysmx.com


