
1. Introduction
Thank you for choosing the EasySMX X05PRO PC Controller. This manual provides detailed instructions for setting up, operating, and maintaining your controller. The X05PRO offers versatile connectivity options, advanced features, and multi-platform compatibility for an enhanced gaming experience.
2. Package Contents
- EasySMX X05PRO PC Controller
- 2.4G Wireless Receiver
- USB-C Charging/Data Cable
- User Manual (this document)
3. Product Layout
Familiarize yourself with the buttons and components of your EasySMX X05PRO controller.
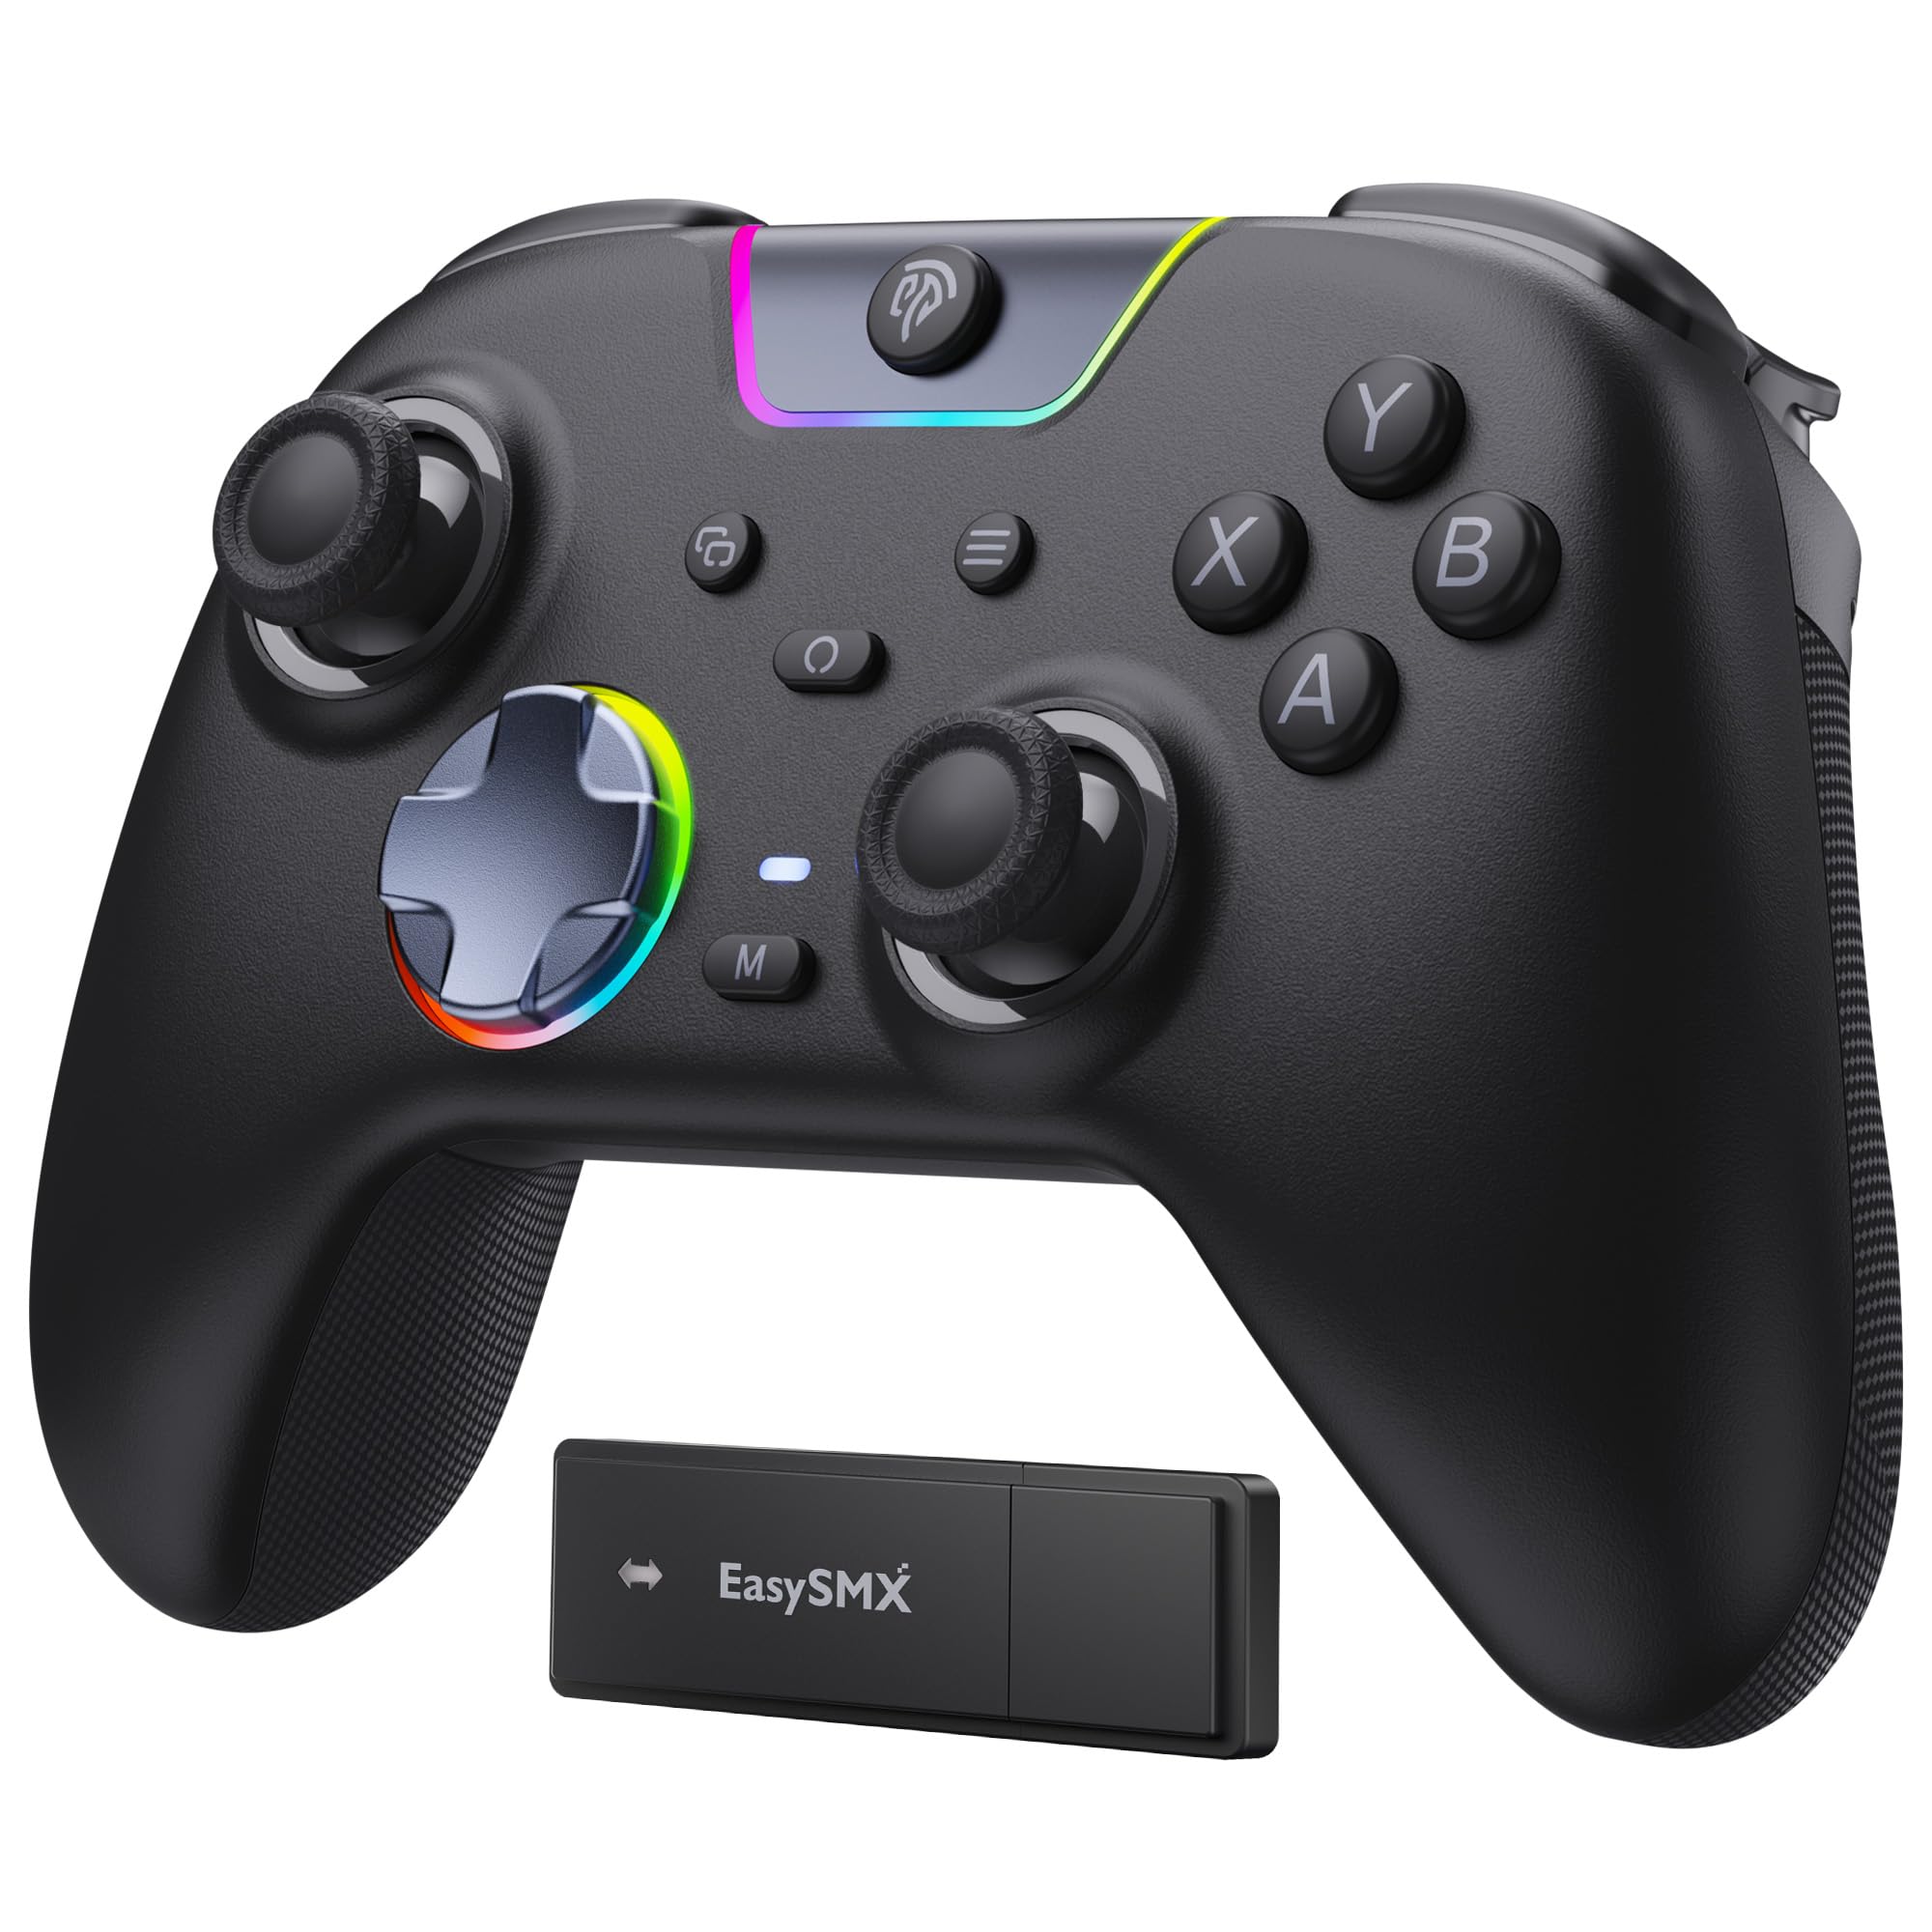
Figure 1: EasySMX X05PRO Controller Overview
- A/B/X/Y Buttons: Standard action buttons.
- D-Pad: 8-direction digital input.
- Left/Right Analog Sticks: For precise movement and camera control.
- LB/RB Buttons: Left and Right Bumper buttons.
- LT/RT Triggers: Left and Right Analog Triggers with two-stage functionality.
- HOME Button: Powers on/off the controller and accesses system menus.
- START/SELECT Buttons: Game-specific functions.
- M1/M2 Buttons: Programmable buttons on the top of the controller.
- USB-C Port: For wired connection and charging.
- Mode Switch: For selecting connection modes (if applicable).
4. Setup & Connection
4.1. 2.4G Wireless Connection (PC Windows)
- Insert the 2.4G wireless receiver into an available USB port on your PC.
- Press and hold the HOME button on the controller until the indicator lights turn on, indicating it's powered on.
- The controller will automatically connect to the receiver. Once connected, the indicator light will stabilize.
4.2. Bluetooth Connection (Switch, Android, iOS)
- Ensure your device's Bluetooth is enabled.
- On the controller, press and hold the HOME button along with the appropriate mode button (refer to the controller's specific button combination for Bluetooth pairing, usually a small button near the USB port or a combination with HOME).
- The indicator lights will flash rapidly, indicating pairing mode.
- On your device, search for new Bluetooth devices and select "EasySMX X05PRO" (or similar) to pair.
- Once paired, the indicator light on the controller will stabilize.
4.3. Wired Connection (PC, Switch, Steam Deck)
- Connect the USB-C end of the cable to the controller and the USB-A end to your device (PC, Switch dock, Steam Deck).
- The controller will automatically be recognized by your device and switch to wired mode.
- This mode is ideal for competitive gaming due to minimal input lag and also allows charging while playing.

Figure 2: Multi-platform Connectivity
5. Operating Instructions
5.1. Silent Buttons
The X05PRO features a redesigned full-button structure with silicone dampers, providing ultra-quiet operation. This is ideal for late-night gaming sessions without disturbing others.

Figure 3: Silent Button Design
5.2. Two-Stage Hall Triggers
The adjustable trigger locks allow you to switch between short (3mm) and long (9mm) trigger strokes. Short strokes are optimized for rapid firing in FPS games, while long strokes provide precise control for racing games.

Figure 4: Two-Stage Hall Triggers
5.3. Upgraded 8-Direction D-Pad
The D-pad features a dome switch and concave pivot design, enabling smooth diagonal inputs and precise 8-direction operation, ideal for fighting games and retro titles.

Figure 5: Upgraded 8-Direction D-Pad
5.4. Dynamic RGB Backlight
Customize your gaming experience with dynamic RGB lighting effects. The controller offers various lighting modes and 7 color combinations. Refer to the manual for detailed settings.

Figure 6: Dynamic RGB Lighting
5.5. Programmable Buttons (M1/M2)
The two additional customizable buttons (M1 and M2) located on the top of the controller are designed to prevent accidental presses during intense gameplay, a common issue with back paddles. These buttons can be programmed to various functions. Consult the full manual for programming instructions.

Figure 7: Programmable M1/M2 Buttons
5.6. 1000Hz Polling Rate & Hall Effect Sticks
Experience virtually no input delay with a 1000Hz polling rate in both wired and 2.4G wireless modes. The high-precision 11-bit Hall effect sensors ensure drift-free accuracy and extended lifespan for the joysticks and triggers.

Figure 8: Hall Effect Technology and 1000Hz Polling Rate
5.7. Vibration Feedback
The controller features a 2+2 internal rumble motor system, providing realistic feedback for impacts, drifts, and collisions. Vibration intensity can be adjusted to your preference.

Figure 9: 4-Zone Vibration Feedback
5.8. Turbo Function
The controller supports a manual Turbo function for rapid, repeated button presses. This feature can be configured for specific action buttons (A/B/X/Y/LB/RB/LT/RT) and offers 3 speed levels.
5.9. Ergonomic Grip
The soft-touch silicone coating provides a sweat-resistant, non-slip grip, ensuring comfort during extended gaming sessions.

Figure 10: Ergonomic Grip
6. Charging
The controller is equipped with a built-in 1000mAh rechargeable battery, ensuring long playtimes. To charge, connect the controller to a power source using the provided USB-C cable. Charging typically takes approximately 3 hours. An indicator light will show charging status (e.g., red for charging, green for fully charged).
7. Specifications
| Feature | Description |
|---|---|
| Model Number | X05PRO |
| Connectivity | Wired (USB-C), 2.4G Wireless, Bluetooth |
| Polling Rate | 1000Hz (Wired & 2.4G), 125Hz (Bluetooth) |
| Battery Capacity | 1000mAh Lithium-ion |
| Charging Time | Approx. 3 hours |
| Vibration | 4-zone adjustable rumble motors |
| Triggers | Two-stage Hall Effect Triggers (3mm/9mm) |
| Joysticks | Hall Effect Joysticks |
| D-Pad | Upgraded 8-direction with dome switch and concave pivot |
| Lighting | Dynamic RGB Backlight (customizable) |
| Programmable Buttons | M1, M2 |
| Dimensions | 18.1 x 14.4 x 7.4 cm |
| Weight | 390 g |
| Supported Platforms | PC (Windows), Steam Deck, Switch, Android, iOS |
8. Maintenance
- Keep the controller clean by wiping it with a dry, soft cloth.
- Avoid exposing the controller to extreme temperatures, humidity, or direct sunlight.
- Do not attempt to disassemble the controller, as this may void the warranty.
- Store the controller in a safe place when not in use to prevent damage.
9. Troubleshooting
- Controller not connecting:
Ensure the controller is charged. For 2.4G, verify the receiver is properly inserted. For Bluetooth, ensure the device's Bluetooth is on and the controller is in pairing mode. Try restarting both the controller and the device. - Input lag in wireless mode:
Ensure there are no obstructions between the controller and the receiver/device. Move closer to the receiver/device. For critical gaming, consider using a wired connection. - Buttons or joysticks unresponsive:
Check if the controller is properly connected. If using wired, try a different USB port or cable. If the issue persists, perform a factory reset (refer to the full manual for specific instructions, usually a small reset button or button combination). - Vibration not working:
Ensure vibration is enabled in the game settings and on the controller. Some games may require specific in-game support for trigger vibration. - RGB lights not working/customizing:
Refer to the full manual for specific button combinations to adjust RGB modes and colors. Ensure the controller is powered on. - D-Pad diagonal inputs are difficult:
The upgraded D-pad is designed for precision. Practice with the new design. If issues persist, ensure the controller firmware is up to date (check EasySMX support website).
10. Warranty and Support
EasySMX products come with a standard warranty. For specific warranty terms, technical support, or any issues not covered in this manual, please contact EasySMX customer service or visit the official EasySMX website. Please have your product model (X05PRO) and purchase information ready when contacting support.

Figure 11: Technical Compliance Information


