
Important Safety Instructions
Please read and understand all instructions before assembly and use. Keep this manual for future reference.
- Ensure all components are present and undamaged before assembly. Do not use if any parts are missing or broken.
- Assemble the chair on a soft, clean surface to prevent scratches.
- Do not overtighten screws during assembly.
- The maximum weight capacity for this sleeper chair is 500 lbs (227 kg). Do not exceed this limit.
- Keep hands and fingers clear of moving parts during conversion to prevent injury.
- Do not allow children to play on or around the sleeper chair unsupervised.
- Place the chair on a level surface to ensure stability.
Package Contents
Verify that all the following components are included in your package:
- Main Chair Frame with Pull-Out Mechanism
- Backrest Cushion
- Armrests (Left and Right)
- Foldable Side Table (integrated into one armrest)
- USB & Type-C Charging Module (integrated into one armrest)
- Cup Holder (integrated into one armrest)
- Assembly Hardware (bolts, washers, Allen wrench - if applicable, though described as tool-free)

Setup and Assembly
This sleeper chair is designed for tool-free assembly. Follow these steps to set up your chair:
- Unpack all components from the packaging and place them on a clean, flat surface.
- Identify the main chair frame, backrest, and two armrests.
- Attach the backrest to the main chair frame. Ensure the connection points align and secure firmly.
- Slide the armrests onto the sides of the main chair frame. Ensure they click into place or are secured according to the design. The armrest with the foldable table and the armrest with the USB/cup holder are distinct.
- Confirm all connections are secure before use.

Operating Instructions
Transforming the Chair (3-in-1 Functionality)
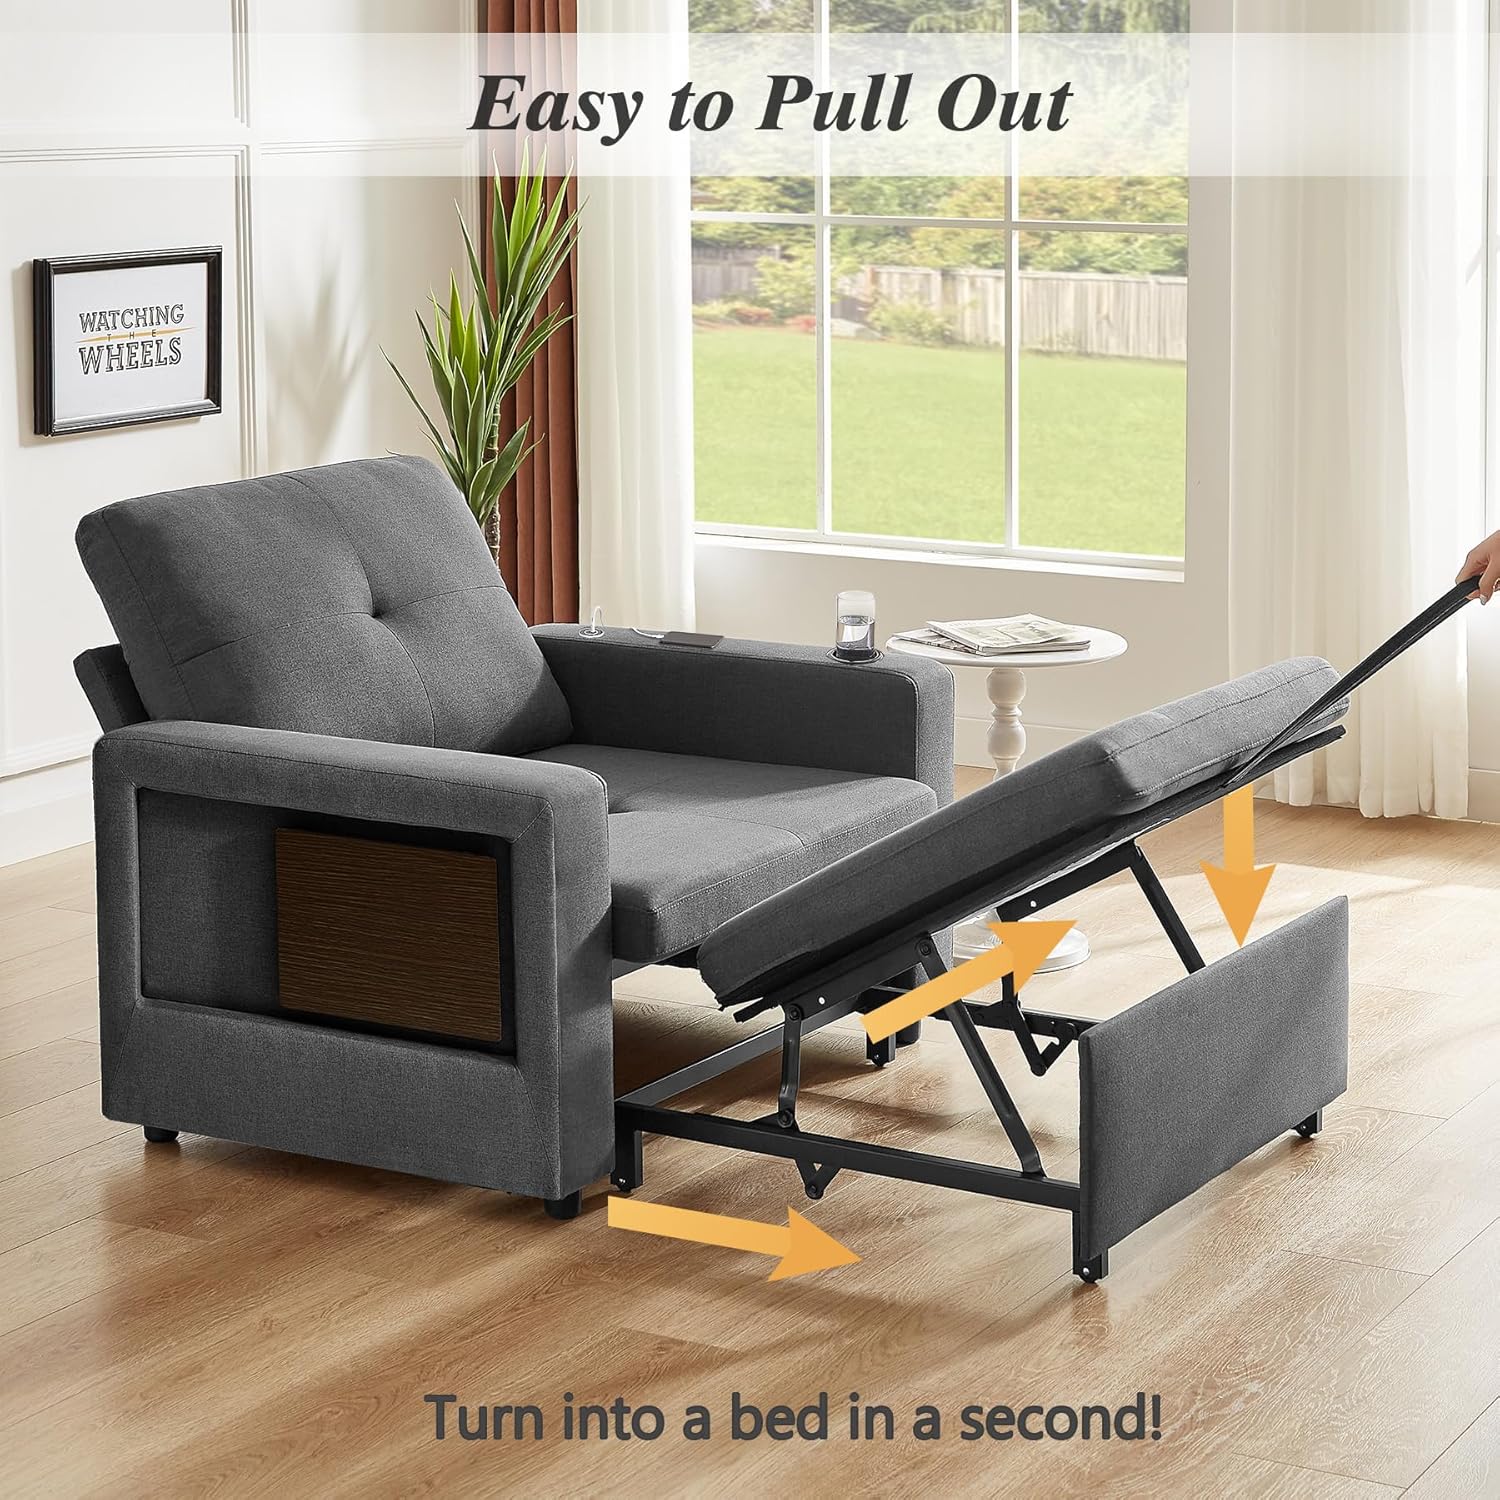
The WEUP Sleeper Chair Bed can be easily converted between an accent chair, a chaise lounge, and a sofa bed.
- Accent Chair: In its default upright position, the unit functions as a comfortable accent chair.
- Chaise Lounge: To convert to a chaise lounge, gently pull the hidden footrest mechanism from beneath the seat. The footrest will extend forward, providing leg support.
- Sofa Bed: To convert to a sofa bed, first extend the footrest to the chaise lounge position. Then, fully recline the backrest to a flat, horizontal position. The pull-out bed mechanism will fully extend to create a sleeping surface.

Adjusting the Backrest
The backrest offers 5 adjustable reclining levels to suit various activities:
- To adjust, gently push the backrest forward slightly, then recline it to your desired angle.
- The available angles are approximately 100° (chatting), 120°, 140° (lounging), 160°, and 180° (sleeping).
- Ensure the backrest locks securely into place at each chosen angle.

Using Integrated Features
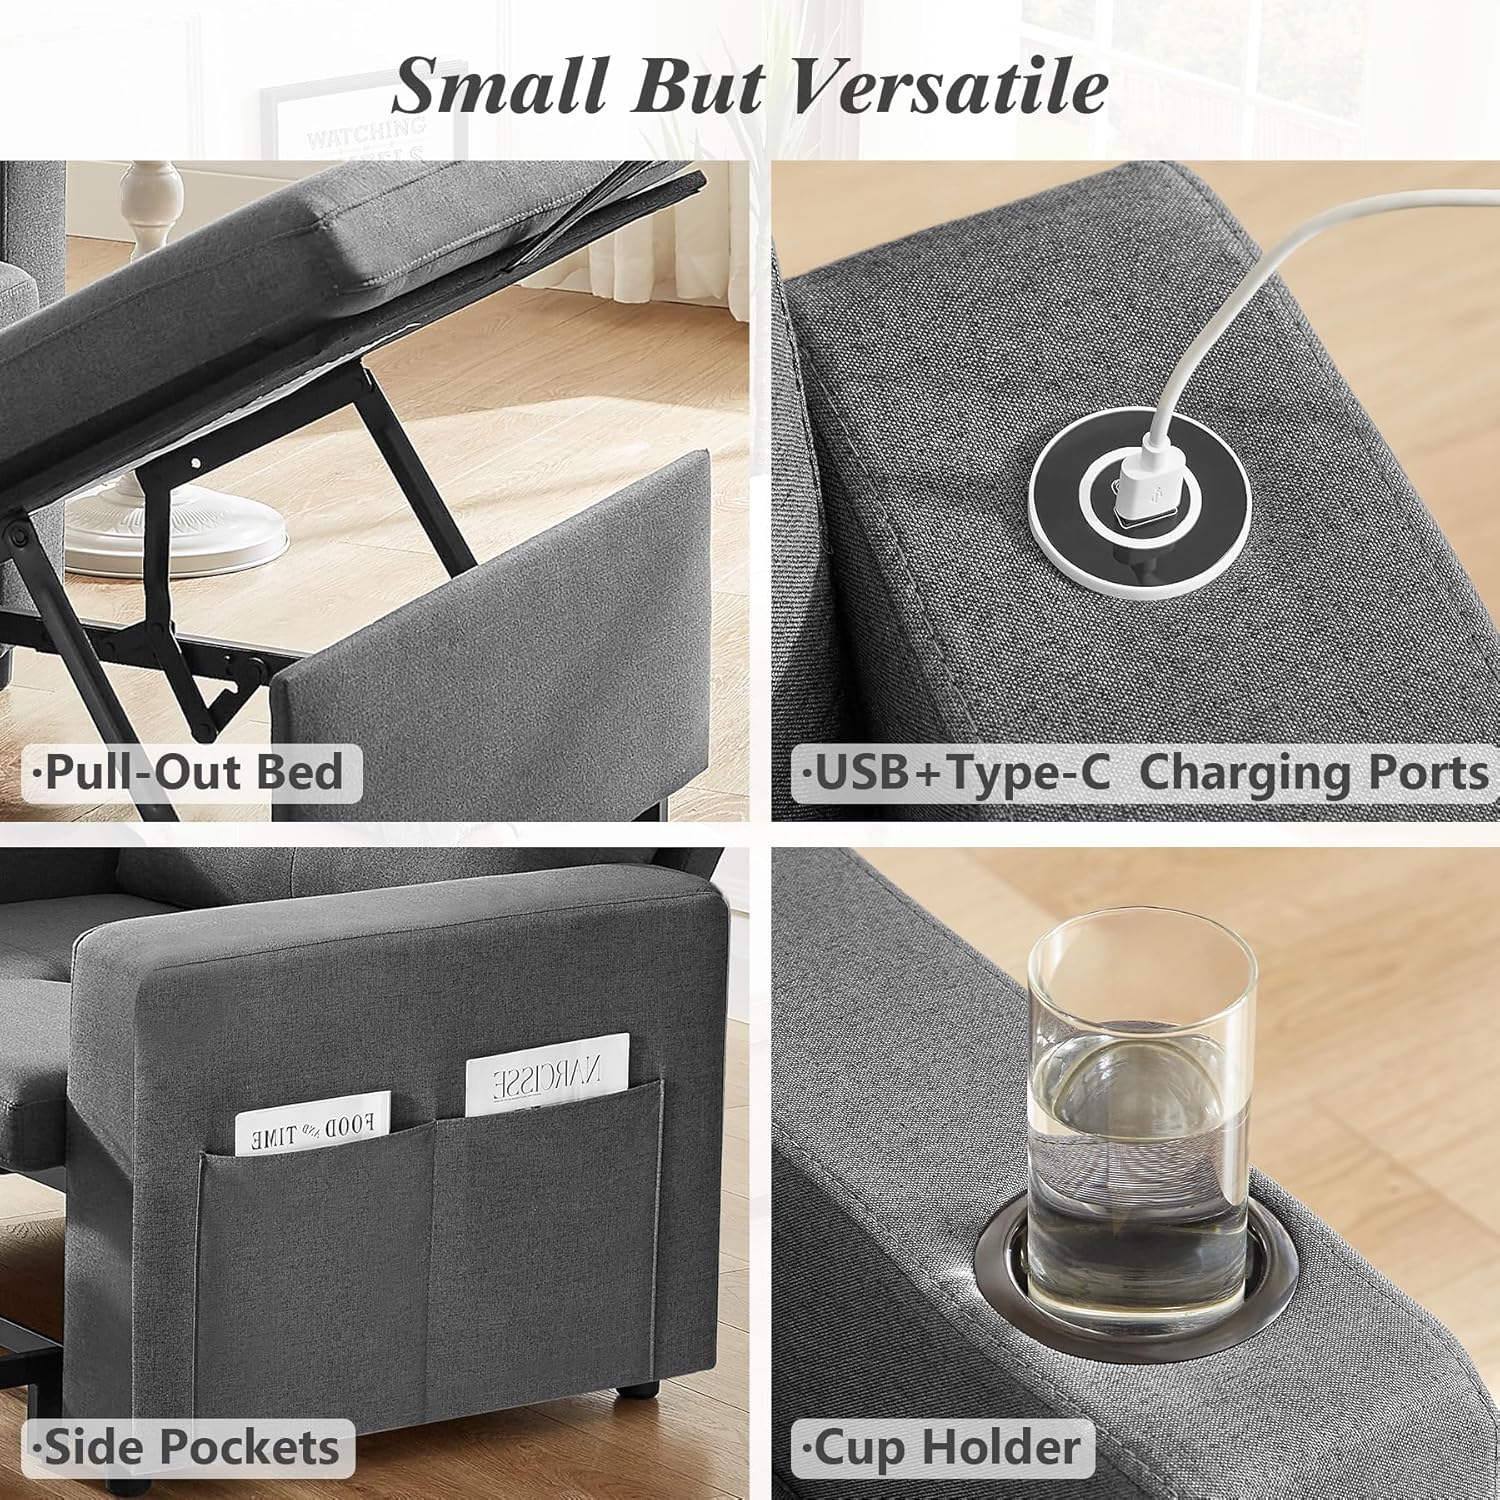
- Foldable Side Table: Located on one armrest, this table can be unfolded for use as a surface for drinks or small items. When not in use, it folds neatly back into the armrest.
- USB & Type-C Charging Ports: Integrated into the other armrest, these ports allow you to charge your electronic devices conveniently. Connect your device's charging cable to the appropriate port.
- Cup Holder: A recessed cup holder is also located on the armrest with the charging ports, designed to securely hold beverages.
- Side Pockets: Two side pockets are provided on the exterior of the armrests for storing magazines, remote controls, or other small items.
Maintenance and Care
Proper care will extend the life and appearance of your sleeper chair.
- Cleaning Fabric: For general cleaning, vacuum the fabric regularly using a soft brush attachment to remove dust and debris. For spills, blot immediately with a clean, dry cloth. For stubborn stains, use a mild fabric cleaner according to its instructions, testing on an inconspicuous area first.
- Cleaning Frame: Wipe the metal frame and wooden elements (like the side table) with a soft, damp cloth. Avoid harsh chemicals or abrasive cleaners.
- General Care: Avoid placing the chair in direct sunlight for prolonged periods to prevent fading. Keep sharp objects away from the fabric to prevent tears. Periodically check all bolts and connections to ensure they remain tight.
Troubleshooting
If you encounter any issues, refer to the following common problems and solutions:
- Difficulty Converting: Ensure no obstructions are blocking the pull-out mechanism or backrest. Apply gentle, even pressure when converting. Check if any parts are misaligned.
- Wobbly Chair: Verify that all assembly connections are securely tightened. Ensure the chair is placed on a flat, even surface.
- USB Ports Not Charging: Confirm the chair is properly connected to a power source (if applicable, though typically USB ports on furniture are passive and require an external power brick or connection to a wall outlet). Ensure your device's charging cable is functional.
- Backrest Not Locking: Ensure the backrest is fully engaged at one of the 5 adjustment levels. Push it slightly forward and then recline to reset the locking mechanism.
Specifications
| Brand | WEUP |
| Model | B0FNVVJLNS |
| Color | Dark Gray |
| Product Dimensions (Chair) | 33.9"D x 42.5"W x 36.2"H |
| Seat Width | 42.5" |
| Weight Capacity | Up to 500 lbs |
| Special Features | Adjustable Backrest (5 levels), Cup Holders, Reclining, 3-in-1 Convertible, USB & Type-C Charging Ports, Foldable Side Table, Side Pockets |
Warranty and Support
For warranty information or technical support, please contact the manufacturer directly. Details regarding specific warranty periods and coverage are typically provided at the point of purchase or on the manufacturer's official website.
Please retain your proof of purchase for any warranty claims.
For further assistance, please refer to the contact information provided with your product packaging or visit the WEUP official support channels.