
Introduction
The Magcubic Mini Portable Projector HY300GT is designed to provide a versatile and immersive home theater experience. Featuring Google TV, instant autofocus, automatic vertical keystone correction, and a 180-degree rotatable stand, this projector offers ease of use and high-quality visuals. This manual provides essential information for setting up, operating, maintaining, and troubleshooting your projector.

Image: The Magcubic Mini Portable Projector HY300GT, a compact white device with a lens on the front and ventilation on the sides.
What's in the Box
Please check the package contents to ensure all items are present:
- Magcubic Mini Portable Projector HY300GT
- Remote Control
- Power Adapter
- User Manual (this document)
Product Overview
Familiarize yourself with the projector's components and ports.

Image: Rear view of the Magcubic HY300GT projector, indicating the Power input, Ventilation, USB port, HDMI port, and Power button.
Ports and Controls:
- Power Input: Connect the included power adapter here.
- USB Port: For connecting USB storage devices or other peripherals.
- HDMI Port: For connecting external video sources such as laptops, game consoles, or TV sticks.
- Power Button: To turn the projector on or off.
- Ventilation: Ensures proper airflow to prevent overheating.
- Lens: Projects the image onto the screen.
- 180° Rotatable Stand: Allows for flexible projection angles, including ceiling projection.
Setup
1. Powering On
- Connect the power adapter to the projector's power input port.
- Plug the power adapter into a wall outlet.
- Press the power button on the projector or the remote control to turn it on.
2. Initial Configuration
Upon first use, the projector will guide you through the initial setup process, including language selection and network connection.
3. Focus and Keystone Correction
The HY300GT features instant autofocus and automatic vertical keystone correction for a clear, rectangular image.
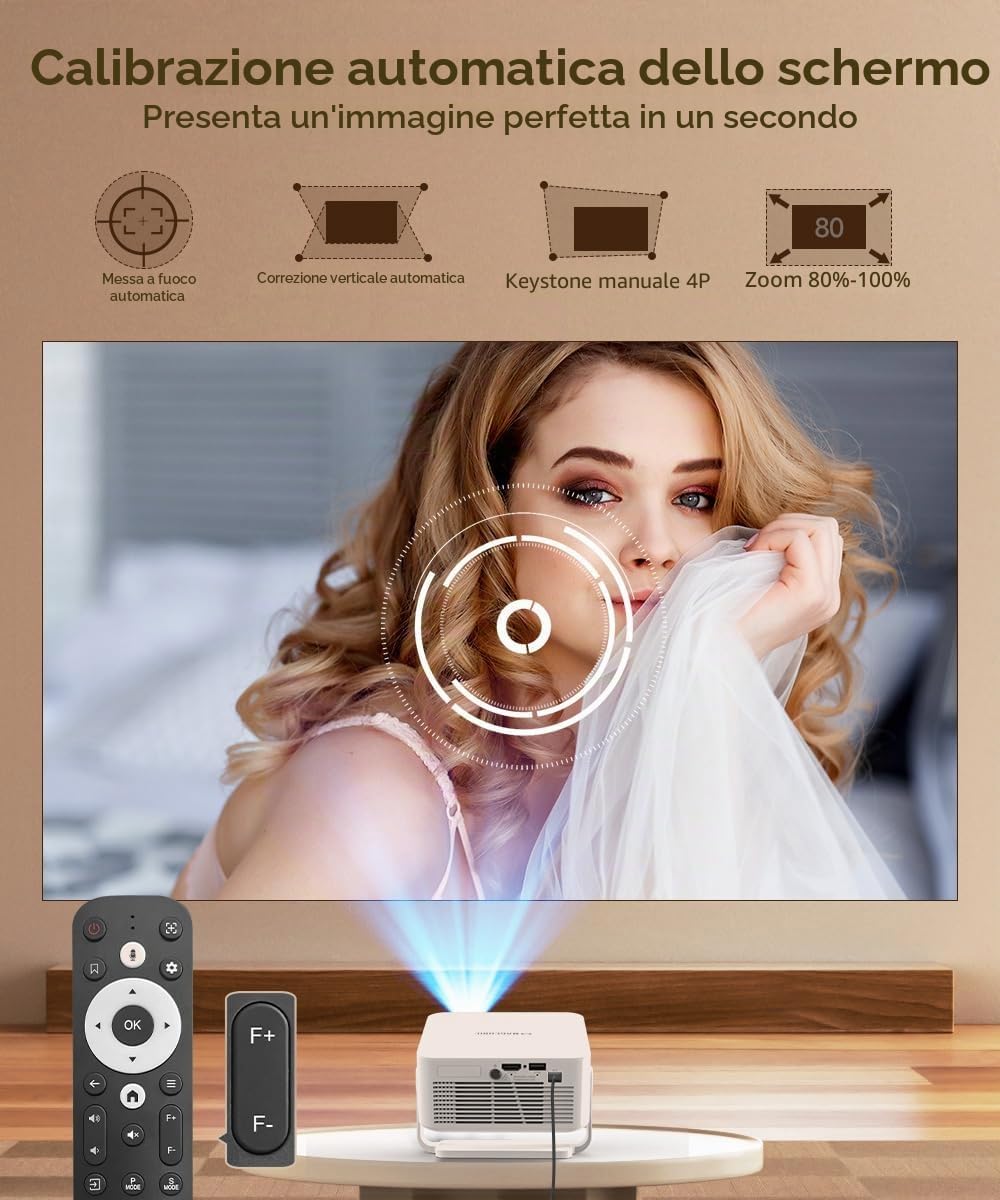
Image: The projector automatically adjusts focus and corrects vertical distortion for a perfect image.
- Autofocus: The projector will automatically adjust the image clarity.
- Automatic Vertical Correction: The projector will automatically correct vertical image distortion.
- Manual Keystone (4P) & Zoom (80-100%): For fine-tuning, these options are available in the settings menu.
4. Positioning the Projector
The 180° rotatable stand allows for flexible placement.

Image: The compact projector with its 180-degree flexible stand, demonstrating its ability to project onto walls or ceilings.
- Place the projector on a stable surface.
- Adjust the stand to achieve the desired projection angle (wall, ceiling, floor).
- Ensure the projection surface is flat and clear for optimal image quality.

Image: A diagram showing various projection distances and corresponding screen sizes (e.g., 2.5m for 355.6cm, 2m for 254cm, 1.6m for 203.2cm).
Operating Instructions
1. Google TV Interface
The projector comes with Google TV, consolidating your favorite content and offering personalized recommendations.

Image: The Google TV home screen on the projector, showing various streaming applications like Netflix, YouTube, Disney+, and more.
- Navigate the interface using the remote control.
- Access streaming apps, movies, shows, and personalized content.
2. Using Google Assistant
Control your projector and find content using voice commands.

Image: The Google Assistant interface on the projector, demonstrating voice commands for searching movies, apps, music, and weather.
- Press the Google Assistant button on your remote control.
- Speak your command, such as "Find action movies," "Open Netflix," or "Play music."
3. Casting Content (Google Cast)
Stream content wirelessly from your smartphone or tablet.

Image: A smartphone screen being cast wirelessly to the projector, displaying the Google TV interface.
- Ensure your mobile device and projector are connected to the same Wi-Fi network.
- Open a compatible app on your phone/tablet and tap the Cast icon.
- Select your HY300GT projector from the list of devices.
4. Connecting External Devices
- HDMI: Connect a laptop, game console, or other HDMI-enabled device using an HDMI cable. Select the HDMI input source from the projector's menu.
- USB: Insert a USB flash drive or external hard drive into the USB port to play media files directly.
5. Audio Output
The projector has an integrated speaker. For enhanced audio, you can connect external Bluetooth speakers.
- Go to the projector's settings menu.
- Navigate to Bluetooth settings and pair with your desired Bluetooth audio device.
Maintenance
1. Cleaning the Lens
- Use a soft, lint-free cloth specifically designed for optical lenses.
- Gently wipe the lens in a circular motion. Avoid using abrasive cleaners or excessive force.
2. Cleaning the Vents
- Regularly check the ventilation openings for dust accumulation.
- Use a soft brush or compressed air to carefully remove any dust from the vents. Ensure the projector is turned off and unplugged before cleaning.
3. Storage
- When not in use, store the projector in a cool, dry place.
- Protect the lens from dust and scratches by using a lens cap or storing it in its original packaging.
Troubleshooting
| Problem | Possible Cause | Solution |
|---|---|---|
| No image displayed | Power not connected; Incorrect input source; Lens cap on. | Check power connection; Select correct HDMI/USB input; Remove lens cap. |
| Image is blurry | Out of focus; Incorrect projection distance. | Allow autofocus to adjust; Manually adjust focus if needed; Ensure projector is within optimal projection distance. |
| Image is distorted (trapezoid shape) | Projector not perpendicular to screen. | Allow automatic keystone correction to adjust; Manually adjust 4P keystone in settings if necessary. |
| No sound | Volume too low; Muted; Incorrect audio output selected; External device audio issue. | Increase volume; Unmute; Check audio output settings (internal speaker/Bluetooth); Verify audio on source device. |
| Wi-Fi/Bluetooth connectivity issues | Incorrect password; Out of range; Interference. | Re-enter password; Move projector closer to router/device; Reduce interference from other devices. |
Specifications
| Brand | Magcubic |
| Model Number | HY300GT |
| Recommended Uses | Educational, Home Cinema, Video Games |
| Special Features | Autofocus, Automatic Keystone, Google TV, Google Assistant, Google Cast, 180° Rotation, 1080P Full HD LED Support, Dual 2.4/5G WiFi, Bluetooth |
| Connectivity Technology | Bluetooth, HDMI, USB, Wi-Fi |
| Native Screen Resolution | 1280 x 720 pixels |
| Maximum Display Resolution | 3840 x 2160 pixels (2K Support) |
| Display Type | LED |
| Product Dimensions | 14.9L x 14.7W x 6.8H cm |
| Form Factor | Portable Projector |
| Mounting Type | Ceiling Mount, Tabletop Stand |
| Brightness | 260 ANSI Lumens |
| Color | White |
| Compatible Devices | Laptop, Game Console, Smartphone, Tablet, Television |
| Contrast Ratio | 2000:1 |
| Maximum Projection Distance | 2.5 Meters |
| Light Source Lifespan | 20000 Hours |
| Maximum Image Size | 135 Inches |
| Hardware Interface | 802.11 ac/b/g/n, Bluetooth 5, HDMI, USB |
| Minimum Image Size | 35 Inches |
| Video Encoding | H.264, H.265 |
| Weight | 575 Grams |
Warranty and Support
Magcubic products are designed for reliability and performance. For warranty information, please refer to the documentation included with your purchase or contact Magcubic customer support.
Customer Support:
If you encounter any issues or have questions not covered in this manual, please contact Magcubic customer support through the retailer's platform or the official Magcubic website. Please have your model number (HY300GT) and purchase details ready.


