
1. Introduction and Overview
The PG 18,000 BTU Mini-Split Inverter+ Heat Pump is a high-efficiency single-zone AC system designed for comprehensive climate control. This unit provides both robust heating and cooling for spaces up to 850 sq. ft. It features advanced variable-speed DC inverter technology for optimal energy efficiency and quiet operation. Built-in Wi-Fi connectivity allows for smart control via the 'Smart Life' app, compatible with Google Home and Alexa.
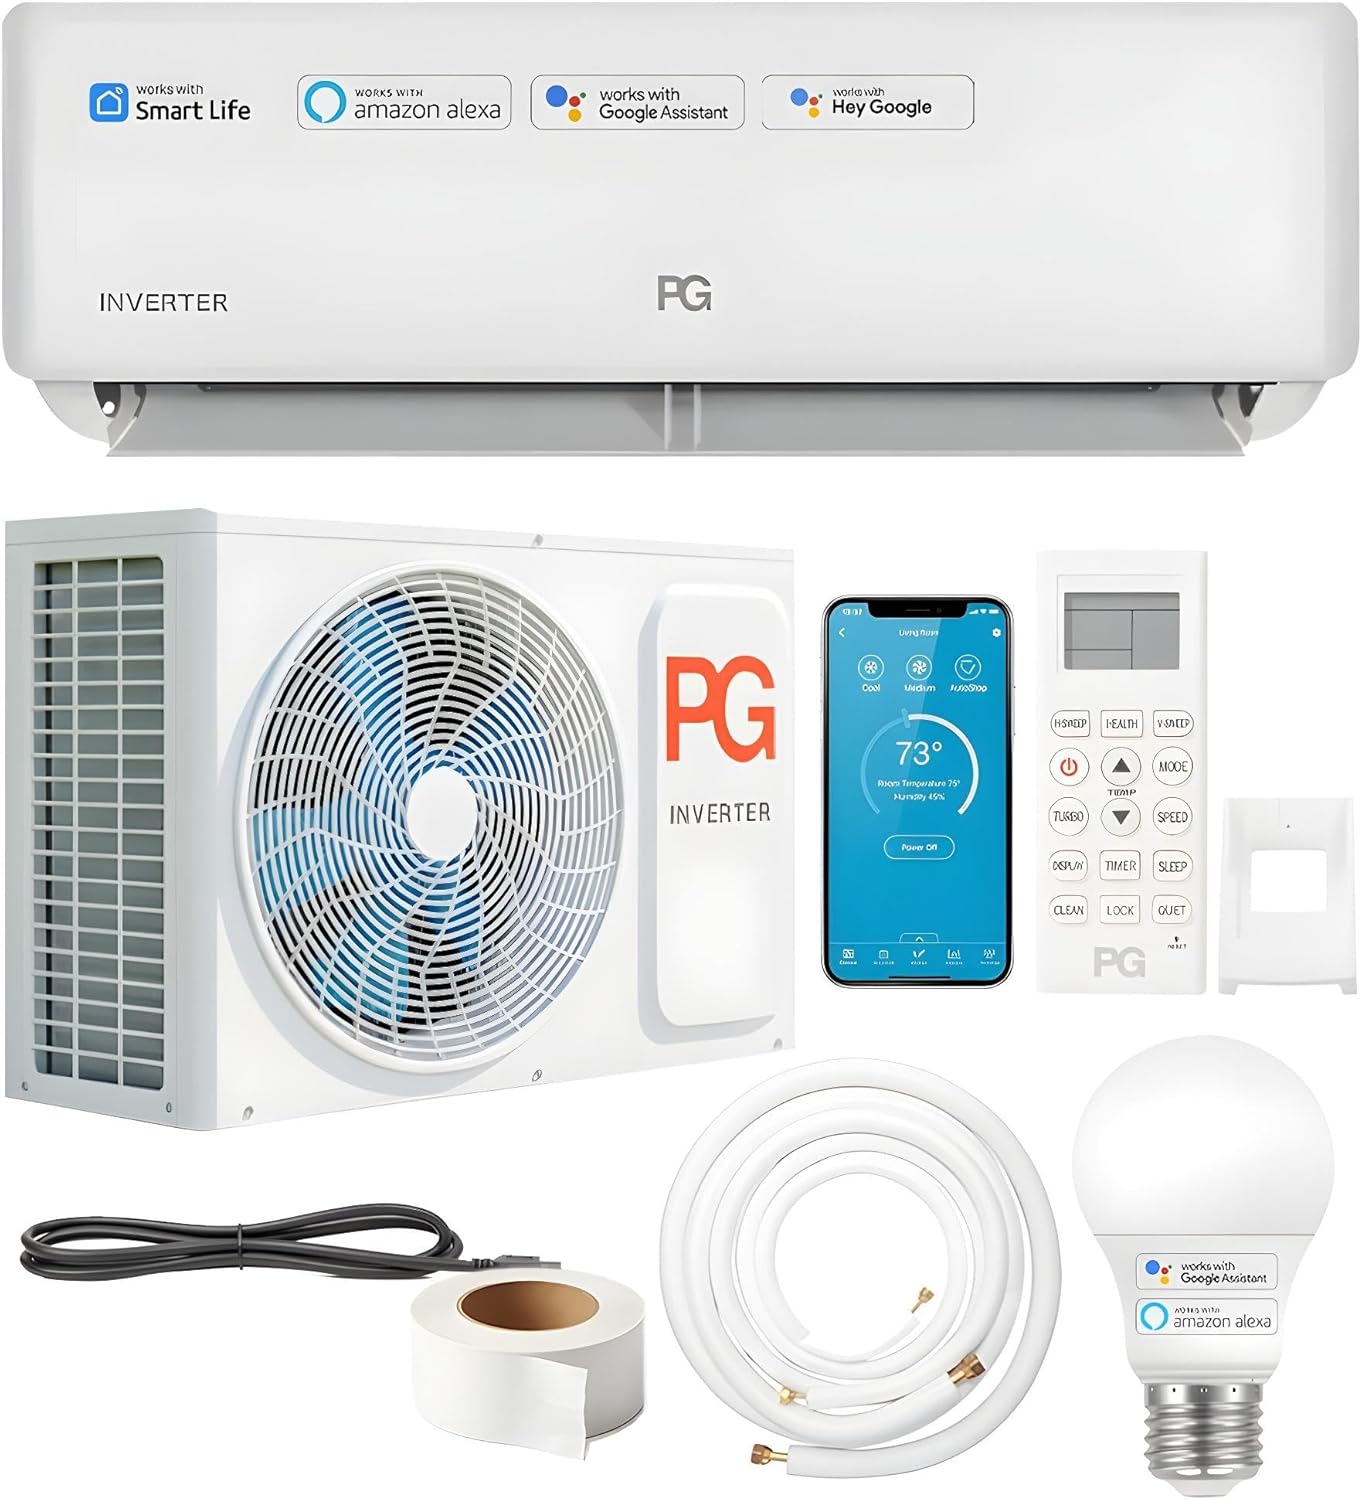
Figure 1: Overview of the PG 18,000 BTU Mini-Split system, including indoor unit, outdoor unit, remote, smart LED bulb, and installation accessories.
The Inverter+ Technology continuously adjusts its output to maintain consistent temperatures, reducing energy consumption and noise. This system is pre-charged with eco-friendly R-32 refrigerant and includes a complete installation kit for professional setup.
2. What's in the Box
Your PG Mini-Split system is shipped in two main boxes, containing the indoor unit, outdoor unit, and all necessary accessories for installation and operation.
- Indoor Unit (with remote control, USB adapter for smart home connectivity, small filter, screws, and various installation parts)
- Outdoor Unit (with manufacturer's warranty certificate and rubber pads)
- Drainage Hose
- Cables and Connections (including power cable and refrigerant tubing)
- Insulating Tape (2 rolls)
- Plastic Wall Hole Cover and Sealing Clay
- Smart LED Bulb 60-Watt A19 (Tunable with Voice Control, Works with Google and Alexa via Wi-Fi or Bluetooth)

Figure 2: The included Smart LED Bulb, which integrates with smart home systems.
3. Setup and Installation
Proper installation is crucial for the efficient and safe operation of your mini-split system. It is strongly recommended to hire a certified professional for installation. Self-installation may void the warranty.
3.1 Site Selection
- Indoor Unit: The wall for the indoor unit should be hard, flat, and firm to prevent vibration and noise. Ensure adequate clearance: >15cm to ceiling, >20cm to obstacles on sides, and 230-260cm from floor.
- Outdoor Unit: Must be installed in a firm and flat place to prevent vibration and noise. Ensure adequate clearance: >20cm above, >10cm on air-in side, >30cm on air-out side and other sides. Avoid locations near heat/steam sources, obstructions around inlet/outlet, or flammable/corrosive gases.
3.2 Installation Steps (Overview)
- Mounting Plate: Fix the mounting plate on the wall using expansion screw kits. Use a level to ensure it is horizontal.
- Drill Wall Hole: After determining where the pipes will go, drill a wall hole inclined outward by 5-10 degrees, with a diameter of 60-80mm. Use an anti-dust bag.
- Connect Cables: Pass the power cable out from the back of the indoor unit and fix it on the terminal board according to the wiring diagram.
- Connect Refrigerant Piping: Aim at the pipe center, tighten the taper nut with fingers, then tighten with two wrenches. Use a torque wrench for precise tightening (refer to manual for torque specs based on pipe size).
- Install Drain Hose: Connect the drain hose with the water outlet pipe, ensuring the length is more than 5cm to prevent water leakage. Fix it firmly with adhesive tape.
- Wrap Piping: Wrap refrigerant piping, wires, and drain pipe with wrapping tape.
- Mount Indoor Unit: Put the refrigerant piping out of the wall hole, then mount the indoor unit on the mounting plate. Push the lower part until a 'click' sound is heard.
- Pipe Protecting Ring and Putty: Install a pipe protecting ring and seal with putty to protect piping and wires.
- Install Outdoor Unit Bracket: If mounting on a wall, use a level to ensure the bracket is horizontal and vertical. Use at least 6 expansion bolts.
- Fix Outdoor Unit: Place the outdoor unit on the bracket or a stable base. Use 4 screws to fix the feet.
- Connect Outdoor Refrigerant Piping: Remove the nut from stop valves, aim at the pipe center, tighten the taper nut with fingers, then tighten with two wrenches.
- Fix Outdoor Cables: Remove the electrical box cover and fix cables to the terminal board according to the wiring diagram on the E-parts cover.
- Vacuumize: Before vacuuming, check all nuts are tightened. Connect stop valve, charging hose, manifold valve, and vacuum pump. Vacuum for at least 15 minutes until the pressure gauge value is ≤0.1MPa. Keep pressure for 3-5 minutes after vacuumizing to ensure no springback.
- Release Refrigerant: Open 1/4 liquid valve, then remove charging hose. Open all liquid and gas valves. Screw all caps and tighten up.
Video 1: Detailed installation guide for a split air conditioner, demonstrating steps for both indoor and outdoor unit setup, including piping and electrical connections.
4. Operating Instructions
The PG Mini-Split system offers various modes and smart control options for optimal comfort.
4.1 Remote Control
The unit comes with a digital LCD remote for easy control. You can adjust temperature, switch modes (Cool, Heat, Dry, Fan), change fan speeds, and set timers directly from the remote.

Figure 3: The indoor unit displaying temperature, with the remote control and a smartphone showing the control app.
4.2 Smart Home Integration
With built-in Wi-Fi and the included USB adapter, the system is compatible with smart home ecosystems like Google Home and Alexa via the 'Smart Life' app. This allows for convenient control from your smartphone, including adjusting temperature, switching modes, changing fan speeds, setting timers, and turning the unit on/off remotely.

Figure 4: The indoor unit seamlessly integrated with smart home assistants for hands-free control.
4.3 Operating Modes
- Cooling: Provides robust cooling for spaces up to 850 sq. ft.
- Heating: Offers effective heating, making it a reliable all-season solution.
- Dry: Dehumidifies the air, improving comfort.
- Fan: Circulates air without heating or cooling.
- Sleep Mode: Adjusts temperature for comfortable sleep and energy saving.
- Auto-Restart: Automatically resumes operation with previous settings after a power outage.

Figure 5: Visual representation of the different operating modes available for the PG Mini-Split system.
5. Maintenance
Regular maintenance ensures optimal performance and longevity of your PG Mini-Split system.
- Filter Cleaning: Regularly clean the air filters in the indoor unit to maintain air quality and efficiency. Refer to the owner's manual for specific instructions on filter removal and cleaning frequency.
- Outdoor Unit Inspection: Periodically check the outdoor unit for any debris, leaves, or obstructions that might block airflow. Keep the area around the unit clear.
- Drainage Hose: Ensure the drainage hose is free from kinks or blockages to prevent water accumulation and leaks.
- Professional Servicing: It is recommended to have a certified HVAC technician perform annual maintenance checks to ensure all components are functioning correctly and to check refrigerant levels.
6. Troubleshooting
If you encounter issues with your mini-split system, refer to the owner's manual for a detailed troubleshooting guide. Below are some common issues and general advice:
- Unit Not Turning On: Check power supply, circuit breaker, and ensure the remote control batteries are functional.
- Insufficient Cooling/Heating: Verify temperature settings, clean air filters, check for obstructions around indoor/outdoor units, and ensure windows/doors are closed.
- Unusual Noises: Minor operational noises are normal. Excessive or unusual noises may indicate a problem requiring professional inspection.
- Water Leaks: Check the drainage hose for blockages or improper slope. Ensure the indoor unit is correctly mounted with a slight downward tilt for proper drainage.
- Error Codes: If an error code appears on the display, consult the owner's manual for its meaning and recommended actions.
7. Specifications
| Brand Name | PG |
| Model Info | PG-18S18E-HP/PG-18S18C-HP |
| Item Weight | 35 pounds |
| Product Dimensions | 40 x 11 x 15 inches |
| Efficiency | High Efficiency |
| Capacity | 850 Cubic Feet (for cooling/heating area) |
| Annual Energy Consumption | 500 Kilowatt Hours Per Year |
| Noise Level | 45 Decibels |
| Installation Type | Split System |
| Form Factor | Mini-Split |
| Special Features | Inverter+ Technology, Built-in WiFi, R-32 Refrigerant, Sleep Mode, Auto-Restart, Year-Round Climate Control |
| Color | White |
| Voltage | 220 Volts |
| Wattage | 220 watts |
| Seasonal Energy Efficiency Ratio (SEER) | 18 |
8. Warranty and Support
The PG Mini-Split Inverter+ Heat Pump comes with a manufacturer's warranty. Please refer to the warranty certificate included in your product packaging for detailed terms and conditions. For technical support, troubleshooting assistance, or warranty claims, please contact PG customer service.