1. Introduction
This manual provides detailed instructions for the installation, operation, and maintenance of your RAINPOT Saker 4-Channel Car Dashcam System. Please read this manual thoroughly before using the device to ensure proper functionality and to maximize its benefits. This system is designed to provide comprehensive vehicle surveillance with its multi-camera setup and advanced recording features.
2. Product Overview
2.1 Package Contents
- Main Dashcam Unit (with integrated front, left, and right cameras)
- Rear Camera
- Suction Cup Mount
- Car Power Adapter
- 64GB Micro SD Card (pre-installed or included)
- User Manual (this document)
2.2 Component Identification
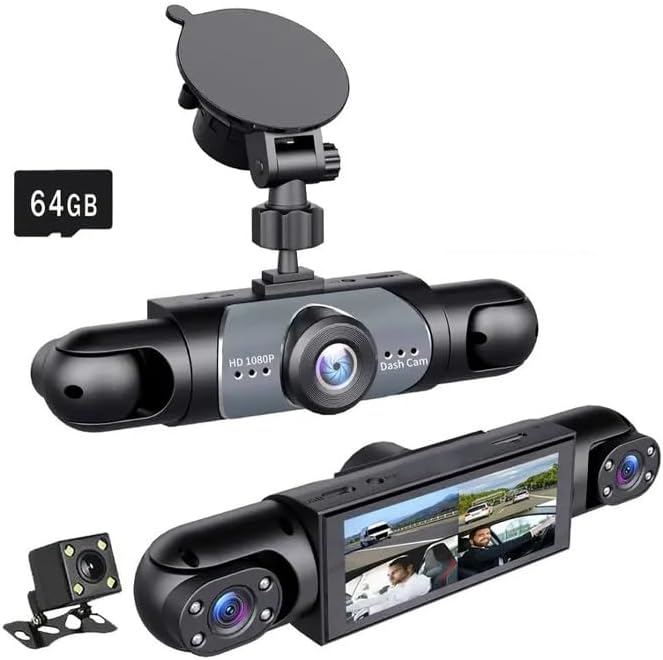
Image 2.2.1: The RAINPOT Saker 4-Channel Car Dashcam System, showcasing the main unit with its integrated cameras, the suction cup mount, and the separate rear camera. The main unit features a central front camera and two adjustable side cameras for left and right views. A '64GB' label indicates the included memory card capacity.
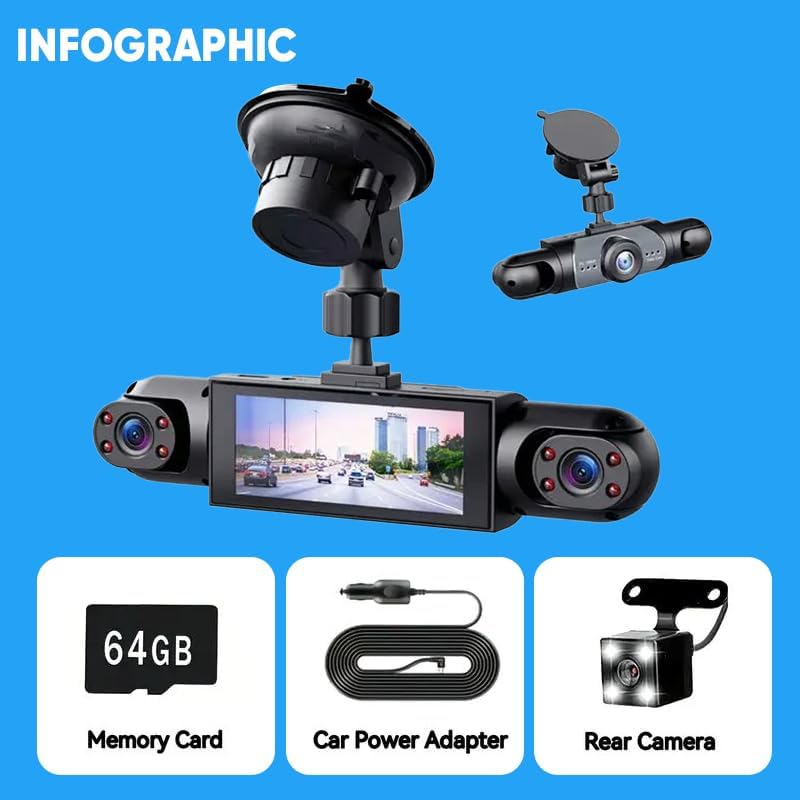
Image 2.2.2: An infographic detailing the key components included with the dashcam system: a 64GB memory card for storage, a car power adapter for continuous power, and the external rear camera for comprehensive coverage.
The main dashcam unit houses the primary front-facing camera, a display screen, and two adjustable side cameras for recording the left and right interior/exterior views. The rear camera is a separate unit designed for external mounting to capture the rear view of the vehicle. The suction cup mount secures the main unit to the windshield, and the car power adapter provides power from the vehicle's 12V outlet.
3. Setup
3.1 Inserting the Micro SD Card
Locate the Micro SD card slot on the main dashcam unit. Gently insert the provided 64GB Micro SD card into the slot until it clicks into place. Ensure the card is inserted correctly to avoid damage. The system supports up to a 64GB memory card for optimal performance.
3.2 Mounting the Main Unit
- Clean the desired area on your windshield where the dashcam will be mounted. Ensure it does not obstruct your view.
- Attach the suction cup mount to the main dashcam unit.
- Press the suction cup firmly against the windshield and engage the locking mechanism to secure it.
- Adjust the angle of the main unit to ensure the front camera has a clear view of the road ahead. The side cameras can be rotated for optimal interior or side-window coverage.
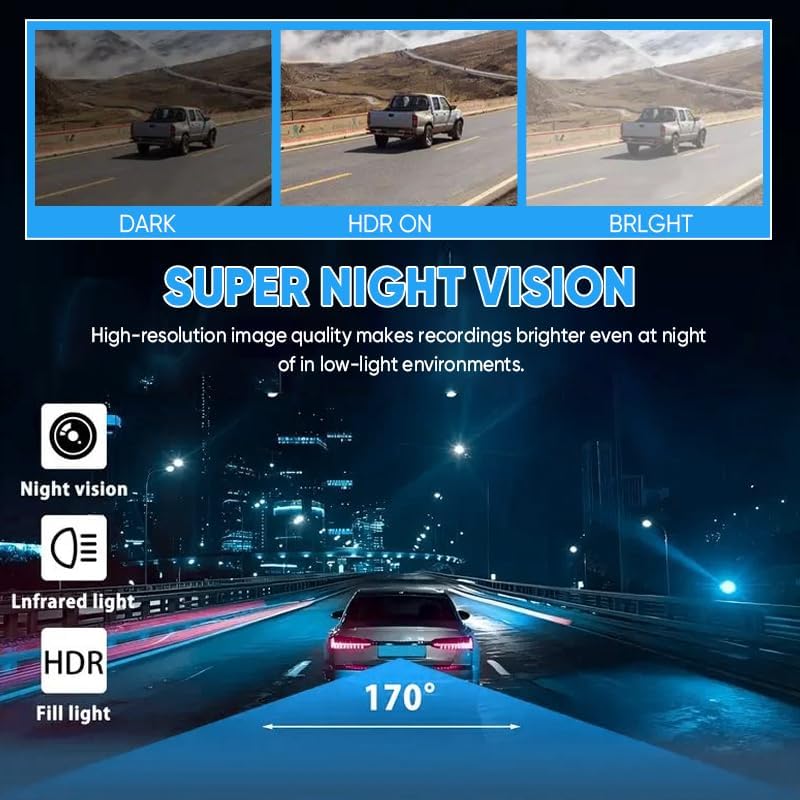
Image 3.2.1: The main dashcam unit attached to its suction cup mount, ready for installation on the vehicle's windshield. This image highlights the compact design and the adjustable nature of the mount.
3.3 Installing the Rear Camera
The rear camera is typically mounted on the rear windshield or near the license plate. Connect the rear camera cable to the designated port on the main dashcam unit. Route the cable discreetly along the vehicle's interior trim to avoid interference with driving. Ensure the rear camera has a clear view and is securely fastened.
3.4 Connecting Power
Connect the car power adapter to the main dashcam unit's power input port. Plug the other end of the adapter into your vehicle's 12V power outlet (cigarette lighter socket). The dashcam will typically power on automatically when the vehicle's ignition is turned on and power is supplied.
4. Operating Instructions
4.1 Power On/Off
- Automatic: The dashcam powers on and begins recording automatically when the vehicle's ignition is turned on.
- Manual: Press and hold the power button (if available) to manually turn the device on or off.
4.2 Basic Recording
Upon powering on, the dashcam will automatically start recording. The system records simultaneously from all four channels (front, rear, left, and right). The display screen will show live feeds from the cameras, often in a split-screen view.

Image 4.2.1: A visual representation of the dashcam's capability to display and record four camera feeds simultaneously, providing a comprehensive view of the vehicle's surroundings and interior.
4.3 Menu Navigation and Settings
Use the physical buttons on the dashcam unit to navigate through the menu options. Common settings include:
- Resolution: Adjust video recording quality (e.g., 1080P for all channels).
- Loop Recording: Set the duration of video segments (e.g., 1, 3, or 5 minutes).
- G-Sensor Sensitivity: Adjust the sensitivity for collision detection.
- Parking Monitor: Enable or disable parking surveillance.
- Date/Time: Set the correct date and time for accurate timestamps on recordings.
- Format SD Card: Periodically format the Micro SD card to maintain optimal performance.
4.4 Playback
To review recorded footage, access the playback mode through the menu. You can select specific video files by date and time. Alternatively, remove the Micro SD card and insert it into a computer or compatible device for viewing.
5. Key Features
5.1 Simultaneous 4-Channel Recording
The system records from the front, rear, left, and right cameras concurrently, providing a comprehensive 360-degree view around and within your vehicle. This ensures maximum coverage for incident recording and surveillance.
5.2 Night Vision
Equipped with infrared (IR) technology, the interior and rear cameras deliver clear video recordings even in low-light conditions or complete darkness. This feature enhances safety during nighttime driving and provides crucial details in dimly lit environments.
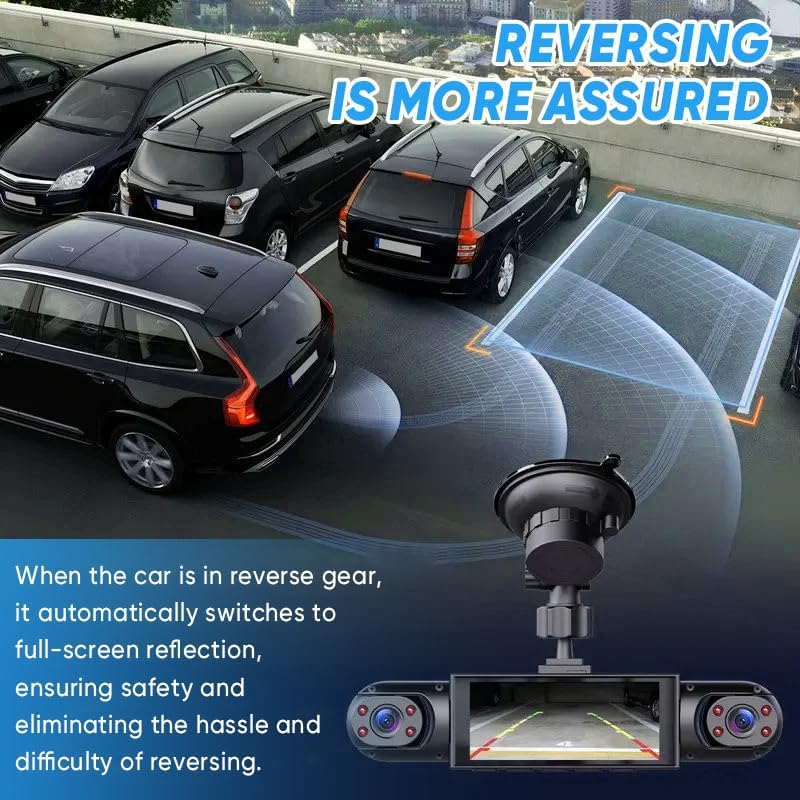
Image 5.2.1: This graphic demonstrates the effectiveness of the dashcam's Super Night Vision feature, showing how high-resolution image quality improves recordings in dark and low-light environments compared to standard conditions.
5.3 Loop Recording
When the Micro SD card reaches its storage capacity, the loop recording function automatically overwrites the oldest unlocked video files with new recordings. This ensures continuous recording without the need for manual card management. Important files protected by the G-sensor will not be overwritten.

Image 5.3.1: A visual representation of the loop recording process, where older, unprotected video files are automatically replaced by new recordings once the memory card is full, ensuring continuous operation.
5.4 G-Sensor (Collision Lock Feature)
The built-in G-sensor detects sudden impacts or collisions. Upon detection, it automatically locks the current video segment, preventing it from being overwritten by loop recording. These protected files serve as crucial evidence in case of an accident.
5.5 24-Hour Parking Surveillance
With the parking monitor feature enabled, the dashcam can automatically activate and begin recording if it detects motion or an impact while your vehicle is parked. This provides continuous surveillance and protection against vandalism or hit-and-runs when the vehicle is unattended.

Image 5.5.1: This graphic illustrates the 24-hour parking surveillance feature, showing how the dashcam automatically records upon detecting motion or impact, providing security for your parked vehicle.
5.6 Reversing Aid
When the vehicle is shifted into reverse gear, the dashcam automatically switches its display to a full-screen view of the rear camera, often with parking guidelines. This assists the driver in safely maneuvering the vehicle during backing up.

Image 5.6.1: A graphic demonstrating the reversing aid feature, where the dashcam display automatically shows the rear camera feed with superimposed parking guidelines when the vehicle is in reverse, enhancing safety and ease of parking.
5.7 HDR Function
The High Dynamic Range (HDR) function optimizes video quality by balancing exposure in scenes with both very bright and very dark areas. This results in clearer, more detailed recordings, especially in challenging lighting conditions such as entering or exiting tunnels, or driving against strong sunlight.

Image 5.7.1: This graphic illustrates the HDR function, showing how it enhances image clarity by optimizing exposure in scenes with varied lighting, making details visible in both dark and bright areas.
6. Maintenance
6.1 Cleaning the Device
- Use a soft, dry cloth to clean the dashcam unit and lenses.
- Do not use abrasive cleaners or solvents, as they may damage the device.
- Ensure lenses are free of dust and smudges for optimal recording quality.
6.2 Micro SD Card Management
- It is recommended to format the Micro SD card every 2-4 weeks to prevent data corruption and ensure smooth operation.
- Always format the card using the dashcam's menu settings.
- Replace the Micro SD card if you experience frequent errors or degraded performance.
7. Troubleshooting
7.1 Dashcam Not Powering On
- Check if the car power adapter is securely connected to both the dashcam and the vehicle's 12V outlet.
- Ensure the vehicle's 12V outlet is receiving power (e.g., by testing with another device).
- Try a different power adapter if available.
7.2 Recording Issues (e.g., Stops Recording, Corrupted Files)
- Format the Micro SD card using the dashcam's menu.
- Ensure the Micro SD card is a high-speed Class 10 or U3 card.
- Replace the Micro SD card if formatting does not resolve the issue.
- Check G-sensor sensitivity settings; very high sensitivity can lead to many locked files, filling the card quickly.
7.3 Poor Image Quality
- Clean the camera lenses thoroughly.
- Ensure the protective film (if any) has been removed from the lenses.
- Check video resolution settings in the menu.
- Adjust camera angles to avoid glare or obstructions.
7.4 Dashcam Freezes or Crashes
- Perform a soft reset by pressing the reset button (if available) or by disconnecting and reconnecting the power.
- Format the Micro SD card.
- Ensure the firmware is up to date (check manufacturer's website for updates).
8. Specifications
| Brand | RAINPOT |
| Model | Saker Full View Car Dashcam System |
| ASIN | B0FNQZ4MVM |
| Video Capture Resolution | 1080p (for all 4 channels simultaneously) |
| Connectivity Technology | HDMI (for display output) |
| Special Feature | 360 Degree Coverage, Night Vision, Loop Recording, G-Sensor, Parking Monitor, HDR |
| Mounting Type | Dashboard Mount (Suction Cup) |
| Product Dimensions | 8"D x 4.72"W x 7.13"H |
| Included Components | Main Unit, Rear Camera, Suction Mount, Car Power Adapter, User Manual, 64GB Micro SD Card |
9. Warranty and Support
For warranty information and technical support, please refer to the contact details provided with your purchase documentation or visit the official RAINPOT website. Keep your proof of purchase for warranty claims. Do not attempt to repair the device yourself, as this may void the warranty.


