1. Introduction
Thank you for choosing the VONZOY 8x10 FT Resin Outdoor Storage Shed. This manual provides essential information for the safe assembly, operation, and maintenance of your new storage shed. Please read all instructions carefully before beginning assembly and retain this manual for future reference.
1.1 Safety Information
Observe the following safety precautions during assembly and use:
- Two-Person Assembly: Assembly requires at least two adults. Do not attempt to assemble alone.
- Level Surface: Ensure the shed is assembled on a flat, hard, and level surface (concrete or wood foundation recommended). An uneven surface will prevent proper assembly and stability.
- Protective Gear: Wear appropriate protective gear, including gloves and eye protection, during assembly.
- Component Handling: Handle all components carefully to avoid damage or injury.
- Ventilation: Ensure adequate ventilation during assembly if using adhesives or sealants.
- Secure Fasteners: Ensure all screws and fasteners are securely tightened according to instructions.
- Weight Limits: Do not exceed the shed's stated wind load capacity (up to 30 MPH) or snow load capacity (15 PSF).
- Children and Pets: Keep children and pets away from the assembly area.
2. Package Contents
Before beginning assembly, verify that all components listed in your packing list are present and undamaged. If any parts are missing or damaged, contact customer support immediately.
Typical components include:
- Wall panels (double-wall resin)
- Roof panels (waterproof resin)
- Floor panels (impact-resistant)
- Door panels and hardware (hinges, lockable latch)
- Window panels
- Ventilation components
- Frame components and connectors
- Fasteners (screws, bolts, nuts)
- Assembly instructions
3. Assembly Instructions
3.1 Before You Begin
- Site Preparation: Select a location that is flat, level, and free from obstructions. A concrete slab or wooden deck is recommended for the foundation.
- Tools Required (Not Included): You will need a screwdriver, hammer, measuring tape, level, and possibly a drill for pilot holes.
- Unpack Components: Carefully unpack all boxes and lay out components in an organized manner, grouping similar parts.
3.2 Step-by-Step Assembly
Follow the detailed diagrams and instructions provided in your specific assembly manual. The following is a general overview:
Step 1: Prepare the Base
Position the floor panels on your prepared level surface. Ensure they are correctly aligned and interlocked according to the instructions. The impact-resistant floor is designed to support heavy items.

Image: Detail of the shed's pitched roof for drainage and the impact-resistant floor.
Step 2: Assemble Wall Panels
Begin attaching the double-wall resin panels to the base, following the numerical sequence in your manual. Ensure panels are securely connected and vertical. The building block-like installation method simplifies this process. Install window panels as indicated.
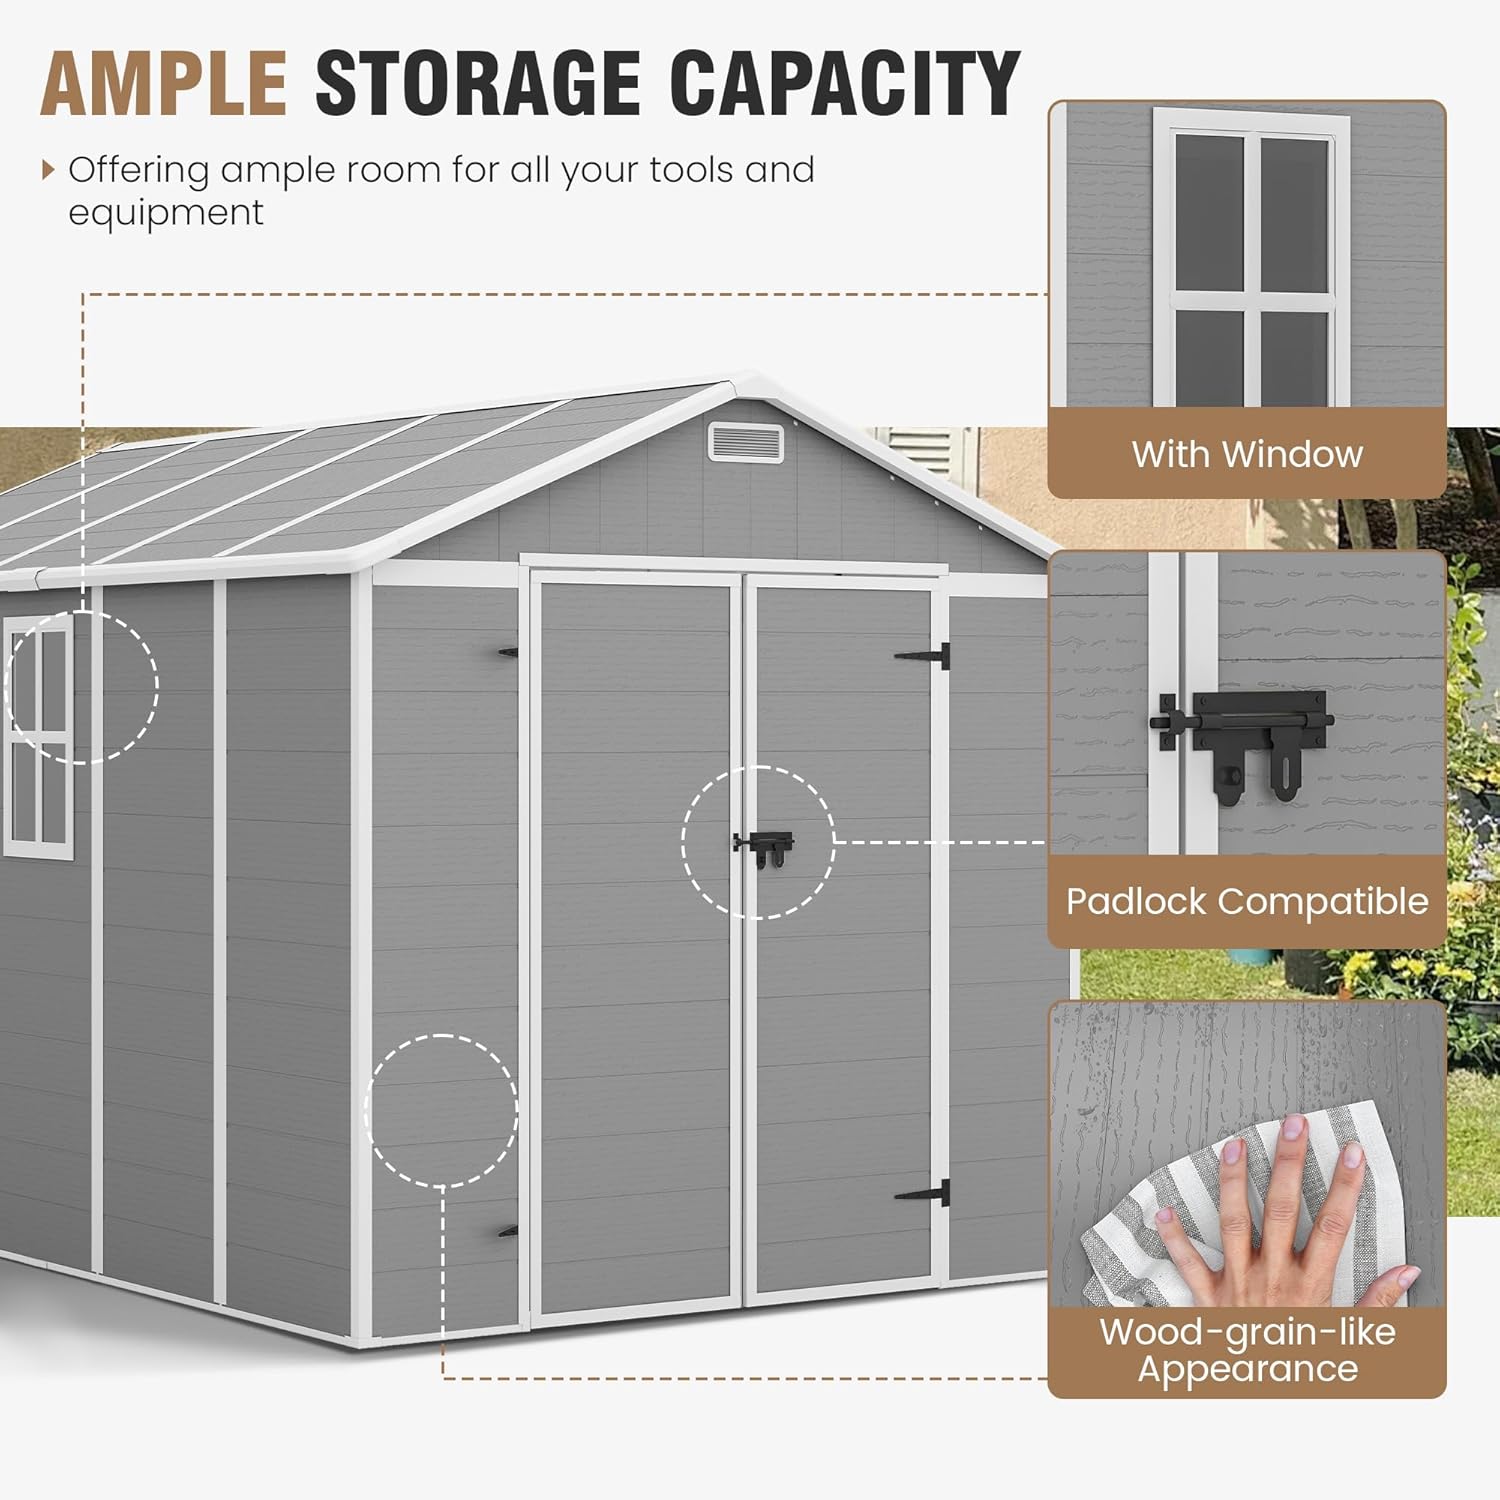
Image: Details of the shed's window, lockable door, and wood-grain panel texture.
Step 3: Install Roof Structure
Assemble the roof frame and then attach the waterproof resin roof panels. Ensure all roof components are tightly secured to prevent water ingress. The sloped roof design aids in water runoff.

Image: The shed's all-weather resistant features, including wind and snow load capacities and ventilation.
Step 4: Attach Doors and Hardware
Mount the door panels using the provided hinges. Install the lockable latch mechanism. Ensure doors open and close smoothly and align correctly.

Image: The VONZOY 8x10 FT Resin Outdoor Storage Shed with doors open, showcasing interior storage.
Step 5: Final Checks
Review all connections and fasteners to ensure they are tight and secure. Check door operation and ensure the shed is stable. The embedded screws contribute to both aesthetics and safety.

Image: Interior of the shed demonstrating its spacious storage capacity for various items.
4. Operation
4.1 Door Operation
The shed features double doors for easy access. To open, unlatch the lockable mechanism and pull the doors outwards. To close, push the doors firmly together and engage the latch. For added security, a padlock (not included) can be used with the integrated padlock-compatible design.
4.2 Ventilation
The shed includes vents to promote air circulation. This helps prevent moisture buildup and keeps stored items dry. Ensure vents are not obstructed by stored items or debris.
5. Maintenance
Regular maintenance will extend the life and appearance of your VONZOY storage shed.
- Cleaning: Clean the shed exterior periodically with mild soap and water. Avoid abrasive cleaners or harsh chemicals, which can damage the resin material. Rinse thoroughly with clean water.
- Inspection: Annually inspect all fasteners, hinges, and panels for tightness and damage. Tighten any loose screws and address any damage promptly.
- Drainage: Ensure the area around the shed is clear of debris to allow for proper water drainage from the pitched roof.
- UV Protection: The resin material is UV protected to resist fading and degradation. However, prolonged exposure to extreme sunlight may still cause some wear over many years.
6. Troubleshooting
This section addresses common issues you might encounter during or after assembly.
| Issue | Possible Cause | Solution |
|---|---|---|
| Difficulty during assembly | Incorrect part identification; attempting assembly alone; uneven foundation. | Carefully review the instruction manual and diagrams. Ensure all parts are correctly identified before proceeding. Always assemble with at least two adults. Verify the foundation is perfectly flat and level. |
| Shed feels unstable or not sturdy | Loose fasteners; uneven foundation; panels not fully engaged. | Check all screws and connections, ensuring they are tightened securely. Re-verify the levelness of the foundation. Ensure all wall and roof panels are fully interlocked and seated. |
| Doors do not close or align properly | Uneven foundation; hinges incorrectly installed; frame not square. | Confirm the shed's base is level. Check hinge installation and adjust if necessary. Ensure the overall shed frame is square and plumb. |
| Water leakage inside the shed | Roof panels not properly sealed or overlapped; damaged panels; obstructed drainage. | Inspect roof panels for proper overlap and secure fastening. Check for any cracks or damage to panels. Clear any debris from the roof and surrounding area that might impede water runoff. |
7. Specifications
Key technical details for the VONZOY 8x10 FT Resin Outdoor Storage Shed:
| Feature | Detail |
|---|---|
| Brand | VONZOY |
| Model | 8x10 FT Resin Outdoor Storage Shed |
| Product Dimensions (Base) | 85.8"D x 123.6"W x 88.9"H |
| Material | Polypropylene Resin |
| Color | Grey & White |
| Water Resistance Level | Waterproof |
| Door Style | Lockable Double Door |
| Assembly Required | Yes |
| Item Weight | 280 pounds |
| Wind Load Capacity | Up to 30 MPH |
| Snow Load Capacity | 15 PSF |

Image: Dimensional diagram of the 8x10 FT Resin Shed.
8. Warranty and Customer Support
8.1 Warranty Information
Please refer to your purchase documentation or contact the retailer for specific warranty details regarding your VONZOY storage shed. Warranties typically cover manufacturing defects under normal use conditions.
8.2 Customer Support
For assistance with assembly, missing parts, or any other inquiries, please contact VONZOY customer support through the retailer where the product was purchased or visit the official VONZOY website for contact information.


