Introduction
This manual provides detailed instructions for the installation, operation, and maintenance of your diymore 8-100V Battery Meter. This device is designed to accurately monitor the voltage, capacity, and temperature of various battery types, including ternary lithium, iron lithium, and lead-acid batteries, within an 8-100V range. It features a clear LCD display, automatic calibration, power-off memory, and voltage alarm reminders for enhanced safety and convenience.
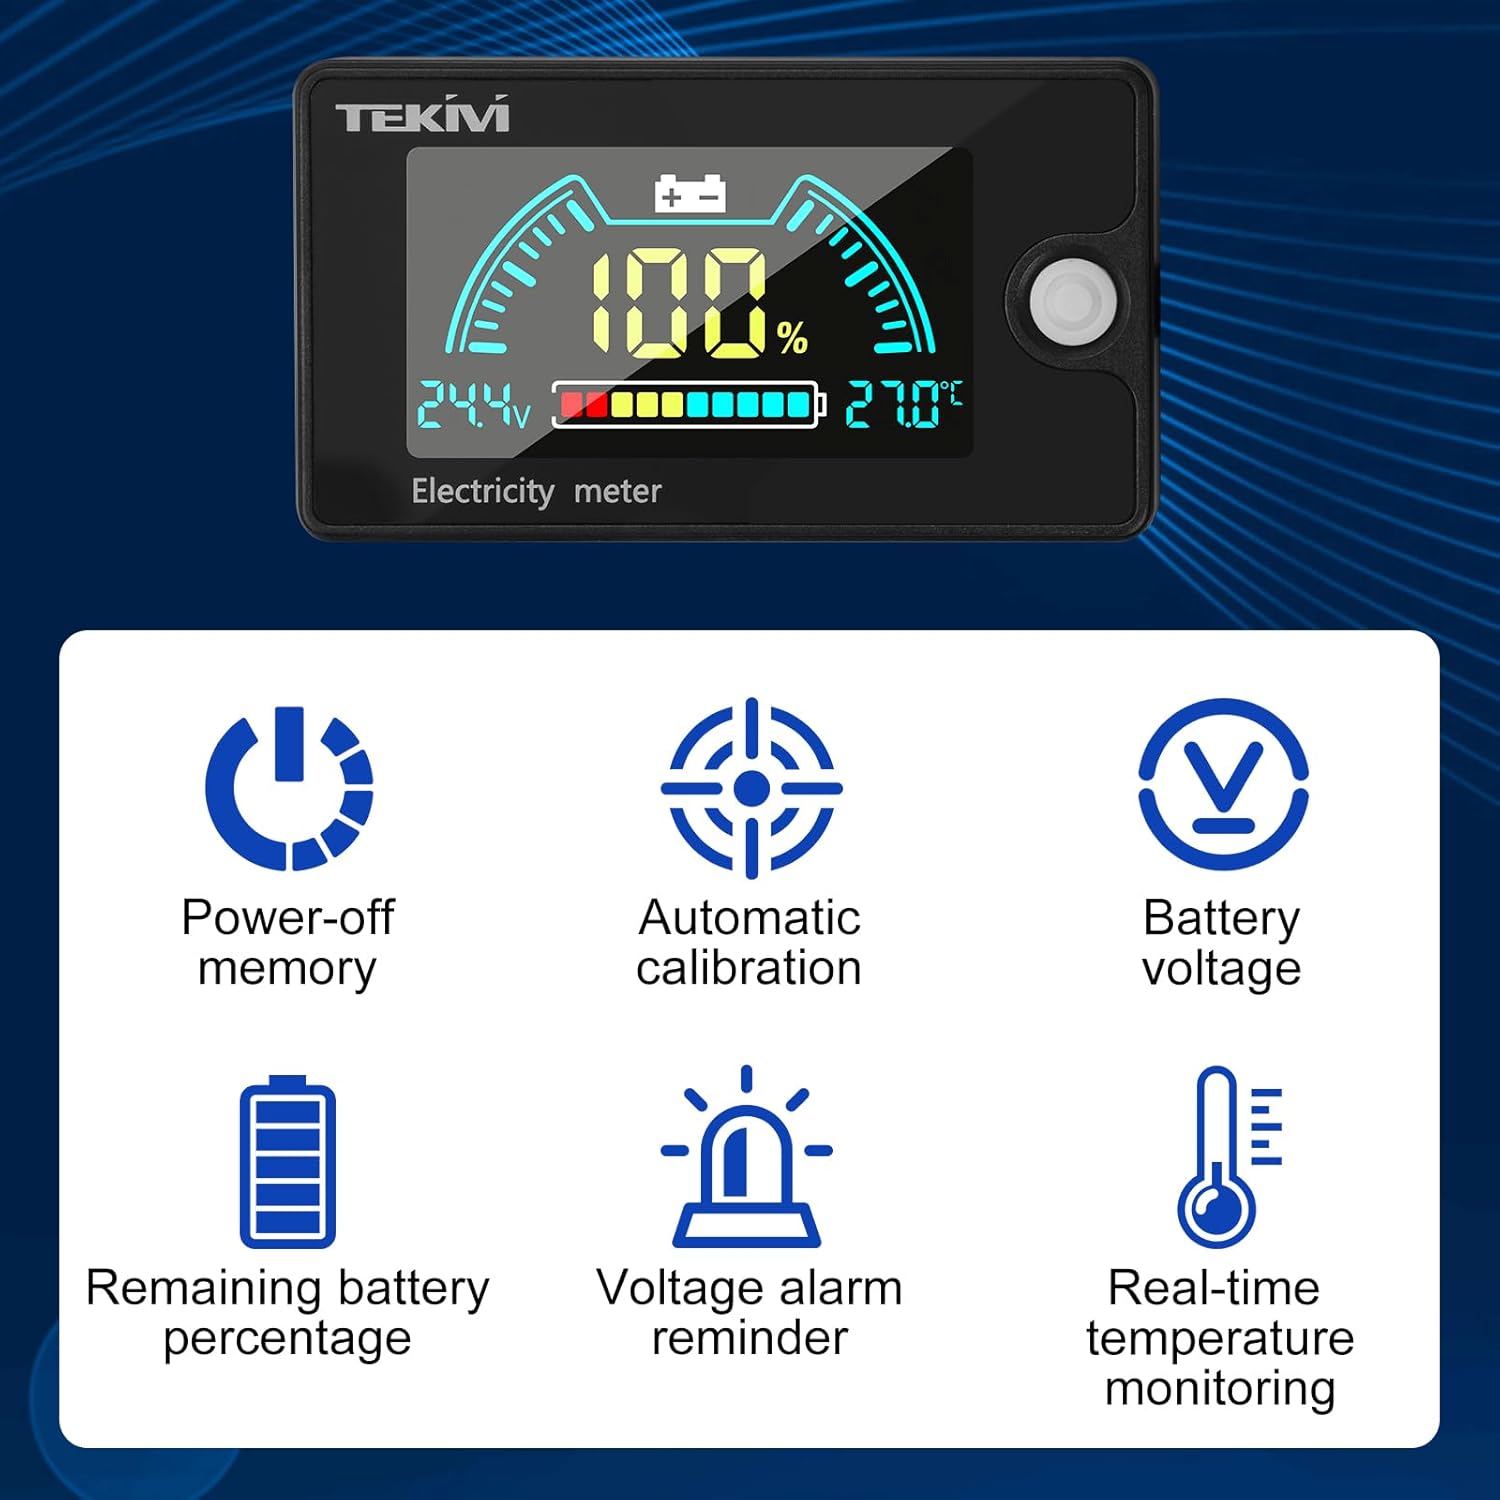
Product Features
- Wide Battery Compatibility: Supports 3-22 series lithium batteries, 3-26 series iron lithium batteries, and 12V, 24V, 36V, 48V, 60V, 72V, 84V lead-acid batteries. Also supports custom voltage settings in the 8-100V range.
- High and Low Voltage Alarm: Activates an alarm when battery energy is below 10% or above 100% (overcharge/over-discharge).
- Clear LCD Display: Simultaneously shows battery voltage, remaining capacity, and temperature.
- Adjustable Backlight: Configurable backlight brightness and duration.
- High Accuracy & Low Power Consumption: Utilizes a precise measurement algorithm and intelligent SOC algorithm for accurate data. Operating current is less than 20mA, and less than 2mA in power-saving mode.
- Power-Off Memory: Retains settings after power loss.
- Automatic Calibration: Ensures consistent accuracy.
- Versatile Applications: Suitable for computer rooms, RVs, electric vehicles, energy storage devices, and more.


Specifications
| Specification | Value |
|---|---|
| Manufacturer | diymore |
| Product Model Number | B0FNJ5C171 |
| Product Weight | 50 g |
| Product Dimensions (L x W x H) | 6.8 x 3.9 x 1.5 cm |
| Material | Acrylonitrile Butadiene Styrene (ABS) |
| Power Source | Battery |
| Measurement Accuracy | +/-0.5 % |
| IP Rating | IP 67 |
| Minimum Operating Voltage | 8 Volts (DC) |
| Voltage Range | DC 8-100V |
| Detection Temperature Range | -20 to 80°C |
| Resolution | 0.01V |
| Operating Current | ≤20mA |

Setup and Installation
The diymore battery meter is designed for straightforward installation. Ensure the power source is disconnected before proceeding with any wiring.
Wiring Instructions:
- Identify the positive (+) and negative (-) terminals of your battery or power system.
- Connect the red wire from the battery meter to the positive (+) terminal of your battery.
- Connect the black wire from the battery meter to the negative (-) terminal of your battery.
- Ensure all connections are secure and properly insulated to prevent short circuits.
Initial Configuration:
After connecting the meter, it will power on. You will need to configure the battery type and series count to ensure accurate readings. Refer to the 'Operating Instructions' section for details on navigating the settings menu.
Operating Instructions
The diymore battery meter features a user-friendly interface with multiple operating modes and settings.
Display Interpretation:
The LCD screen simultaneously displays:
- Battery Voltage: Current voltage of the connected battery.
- Remaining Capacity: Percentage of battery charge remaining.
- Temperature: Real-time ambient temperature (if sensor is active).
Mode Selection and Settings:
The meter offers six primary modes for configuration:

- Ternary Lithium Battery Settings (L-): Configure for ternary lithium batteries by selecting the number of series (e.g., L-03 for 3 series).
- Iron Lithium Battery Settings (F-): Configure for iron lithium batteries by selecting the number of series (e.g., F-03 for 3 series).
- Lead Acid Battery Settings (P-): Configure for lead-acid batteries by selecting the nominal voltage (e.g., P-12 for 12V).
- Custom Voltage Settings (C-): Allows manual input of voltage range for specific battery types not covered by presets.
- Backlight Settings (bL): Adjust backlight brightness and duration.
- High and Low Voltage Alarm Settings (AL): Set the thresholds for overcharge and over-discharge alarms.
Use the button on the side of the meter to cycle through modes and adjust settings. Long press the button to enter setting mode, short press to change values, and long press again to save and exit.
Alarm Functionality:
The meter provides visual and potentially audible alarms for critical battery states.

When the battery capacity exceeds 100% (overcharge) or drops below 10% (over-discharge), the meter will display a warning and activate an alarm to alert the user.
Maintenance
To ensure the longevity and accurate performance of your diymore battery meter, follow these maintenance guidelines:
- Cleaning: Wipe the display and casing with a soft, dry cloth. Avoid using abrasive cleaners or solvents that could damage the screen or plastic.
- Environmental Conditions: Store and operate the meter within its specified temperature range (-20 to 80°C). Avoid exposure to extreme temperatures, direct sunlight for prolonged periods, and high humidity.
- Water Resistance: The meter has an IP67 rating, meaning it is protected against dust and temporary immersion in water. However, it is not designed for continuous underwater use. Ensure the connections are dry before operation.
- Connection Integrity: Periodically check the wiring connections to ensure they are secure and free from corrosion.
Troubleshooting
If you encounter issues with your diymore battery meter, refer to the following common problems and solutions:
- No Display:
- Check power connections: Ensure the red and black wires are correctly and securely connected to the battery terminals.
- Verify battery voltage: Confirm the battery voltage is within the meter's operating range (8-100V DC).
- Inaccurate Readings:
- Incorrect battery type/series setting: Ensure the meter is configured for the correct battery type (Ternary Lithium, Iron Lithium, Lead Acid) and the correct number of series or voltage. Refer to 'Operating Instructions'.
- Recalibration: The meter features automatic calibration, but if readings seem consistently off, re-check settings.
- Alarm Not Functioning:
- Check alarm settings: Verify that the high and low voltage alarm thresholds are set correctly in the 'AL' mode.
- Battery state: Ensure the battery's charge level is actually outside the set thresholds to trigger the alarm.
- Display Flickering:
- Unstable power supply: Check for loose connections or fluctuations in the battery voltage.
If problems persist after attempting these troubleshooting steps, please contact diymore customer support for further assistance.
Warranty and Support
For warranty information and technical support, please refer to the documentation provided with your purchase or visit the official diymore website. Keep your proof of purchase for any warranty claims. If you require assistance, please contact the seller or manufacturer directly.