1. Introduction
This manual provides detailed instructions for the installation, operation, and maintenance of your IRONZON Smart Keyless Entry Door Lock with Knob Set. This automatic door lock combines modern convenience with enhanced security features, making it an ideal solution for any front door. Please read this manual thoroughly before installation and use to ensure proper function and safety.
2. Product Overview and Components
The IRONZON Smart Keyless Entry Door Lock system includes a keypad deadbolt, a door knob set, and various installation hardware. Familiarize yourself with all components before beginning installation.

Figure 2.1: Overview of the IRONZON Smart Keyless Entry Door Lock components, showing the exterior keypad, interior lock unit, door knob, and physical keys.
Key Features:
- Multiple Unlock Options: App control, fingerprint recognition, password entry, and traditional physical keys.
- App Control: Remotely manage access, generate temporary codes, and share keys.
- Easy Installation: Designed for straightforward installation on US-standard doors.
- Smart Home Integration: Compatible with IRONZON gateway (sold separately) for advanced smart home features.
- Auto-Locking Deadbolt: Enhances security by automatically locking after a set period.
3. Installation Guide
This section provides step-by-step instructions for installing your IRONZON Smart Keyless Entry Door Lock. Ensure your door dimensions are compatible (fits both left-handed and right-handed US-standard doors).
3.1. Preparation
- Verify all components are present.
- Ensure the door is properly prepped for a standard deadbolt and knob installation.
- Gather necessary tools (screwdriver, measuring tape).
3.2. Step-by-Step Installation
For a visual guide, please refer to the installation video below.
Video 3.1: Detailed installation guidance for the IRONZON Smart Door Lock. This video covers preparing the door, installing the latch, keypad, backplate, and interior assembly.
- Install the Latch: Adjust the latch to fit your door's backset (60mm or 70mm). Secure it with screws.
- Install the Keypad: Insert the spindle and connecting wire through the latch. Ensure the wire passes under the latch.
- Install the Mounting Plate: Secure the mounting plate to the door, ensuring the connecting wire passes through the designated opening.
- Install the Interior Assembly: Connect the wire from the keypad to the circuit board port on the interior assembly. Align the spindle with the interior assembly. Secure with screws.
- Install the Lower Handle: Insert the spindle of the lower handle through the door. Secure the interior and exterior handle components.
- Install Batteries: Open the battery cover on the interior assembly and insert 4 AAA alkaline batteries (not included).
- Test Operation: After installation, test the lock and unlock functions using the physical key and the interior thumb turn.
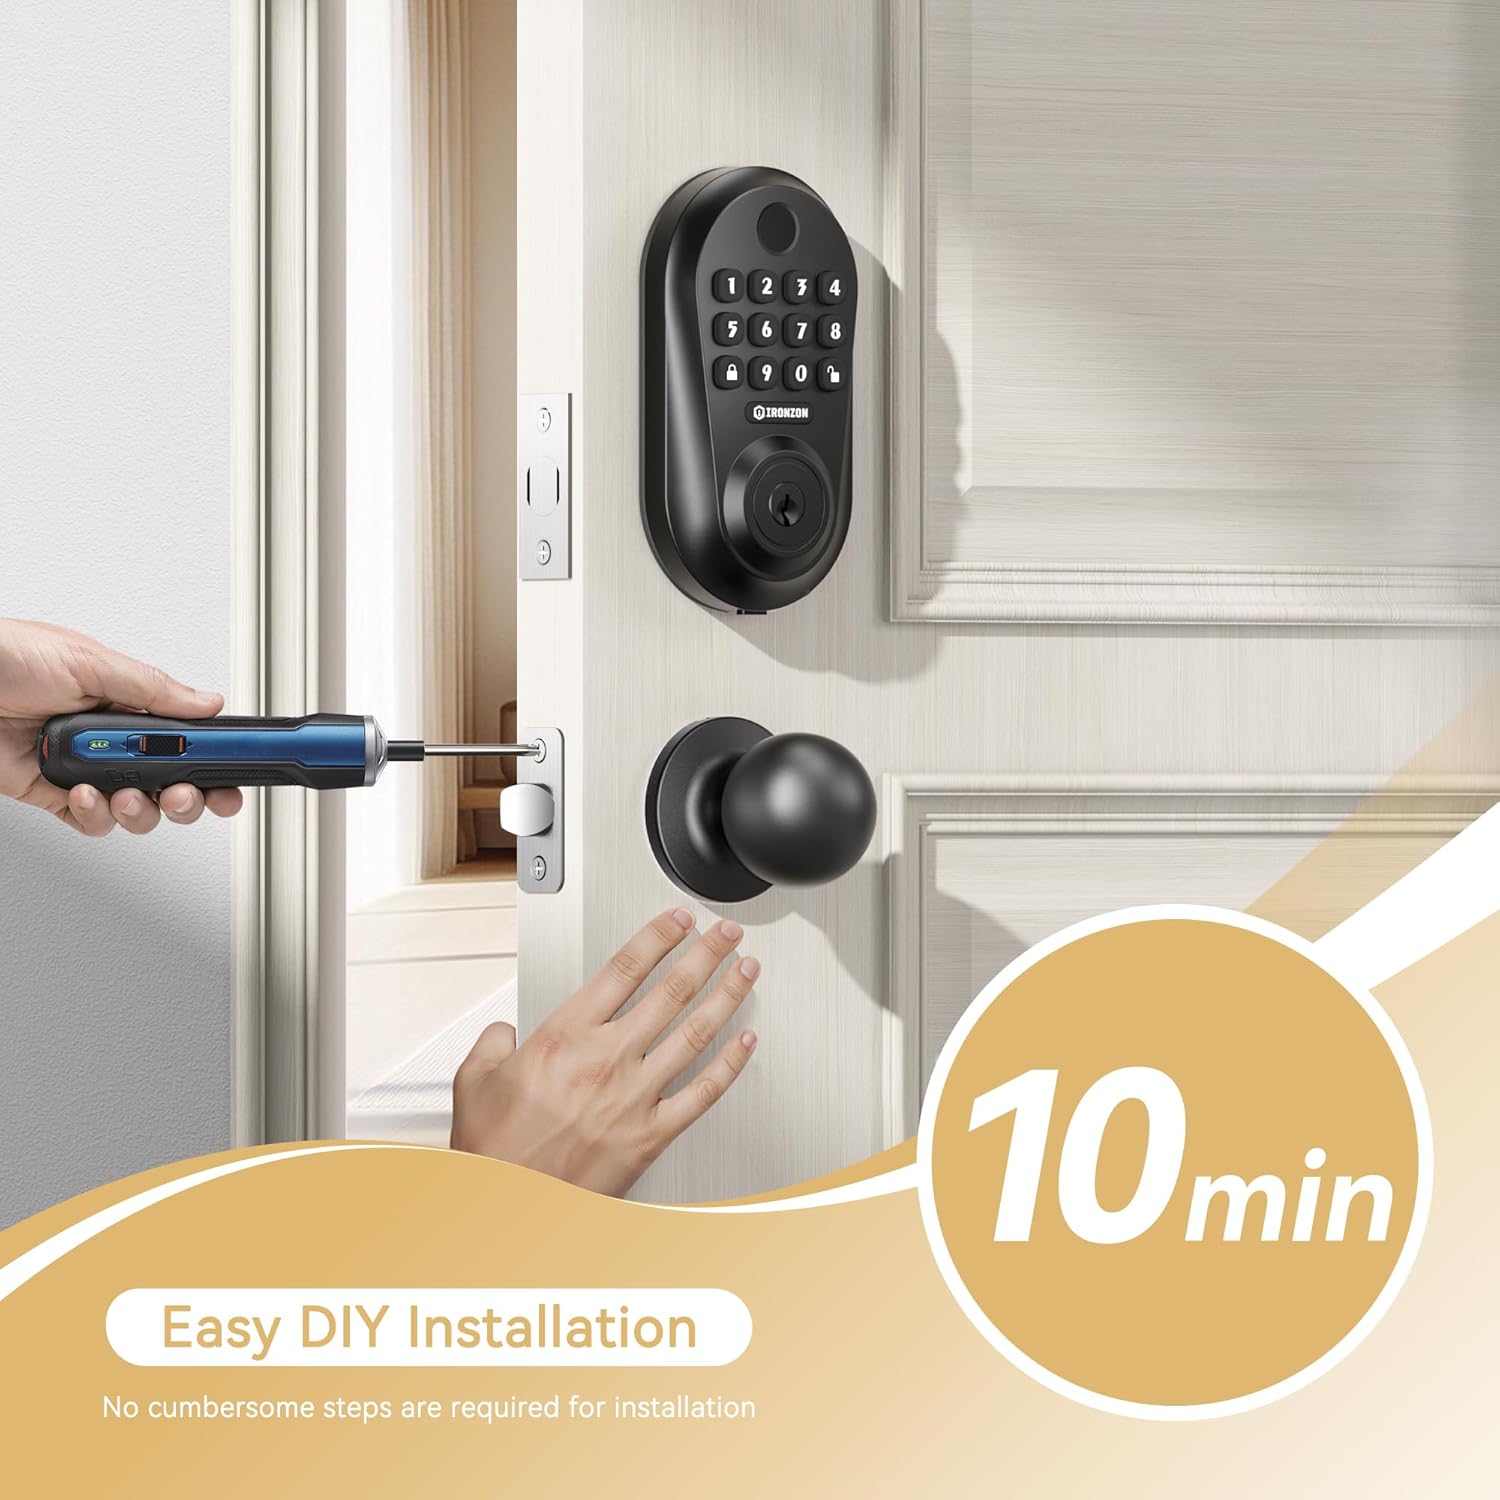
Figure 3.1: Easy DIY installation process for the smart door lock.
4. Operating Instructions
Your IRONZON Smart Keyless Entry Door Lock offers multiple ways to access your home.
4.1. Unlocking and Locking Methods

Figure 4.1: Multiple access methods including fingerprint, passcode, and physical key.
- Fingerprint: Place your registered fingerprint on the sensor for quick access.
- Passcode: Enter your programmed numerical passcode on the keypad.
- Physical Key: Use the provided physical keys as a traditional backup.
- Mobile App: Unlock and lock your door remotely using the dedicated mobile application.
4.2. Automatic Locking
The lock features an automatic locking function for added security. After the door is closed, the deadbolt will extend automatically after a set delay.
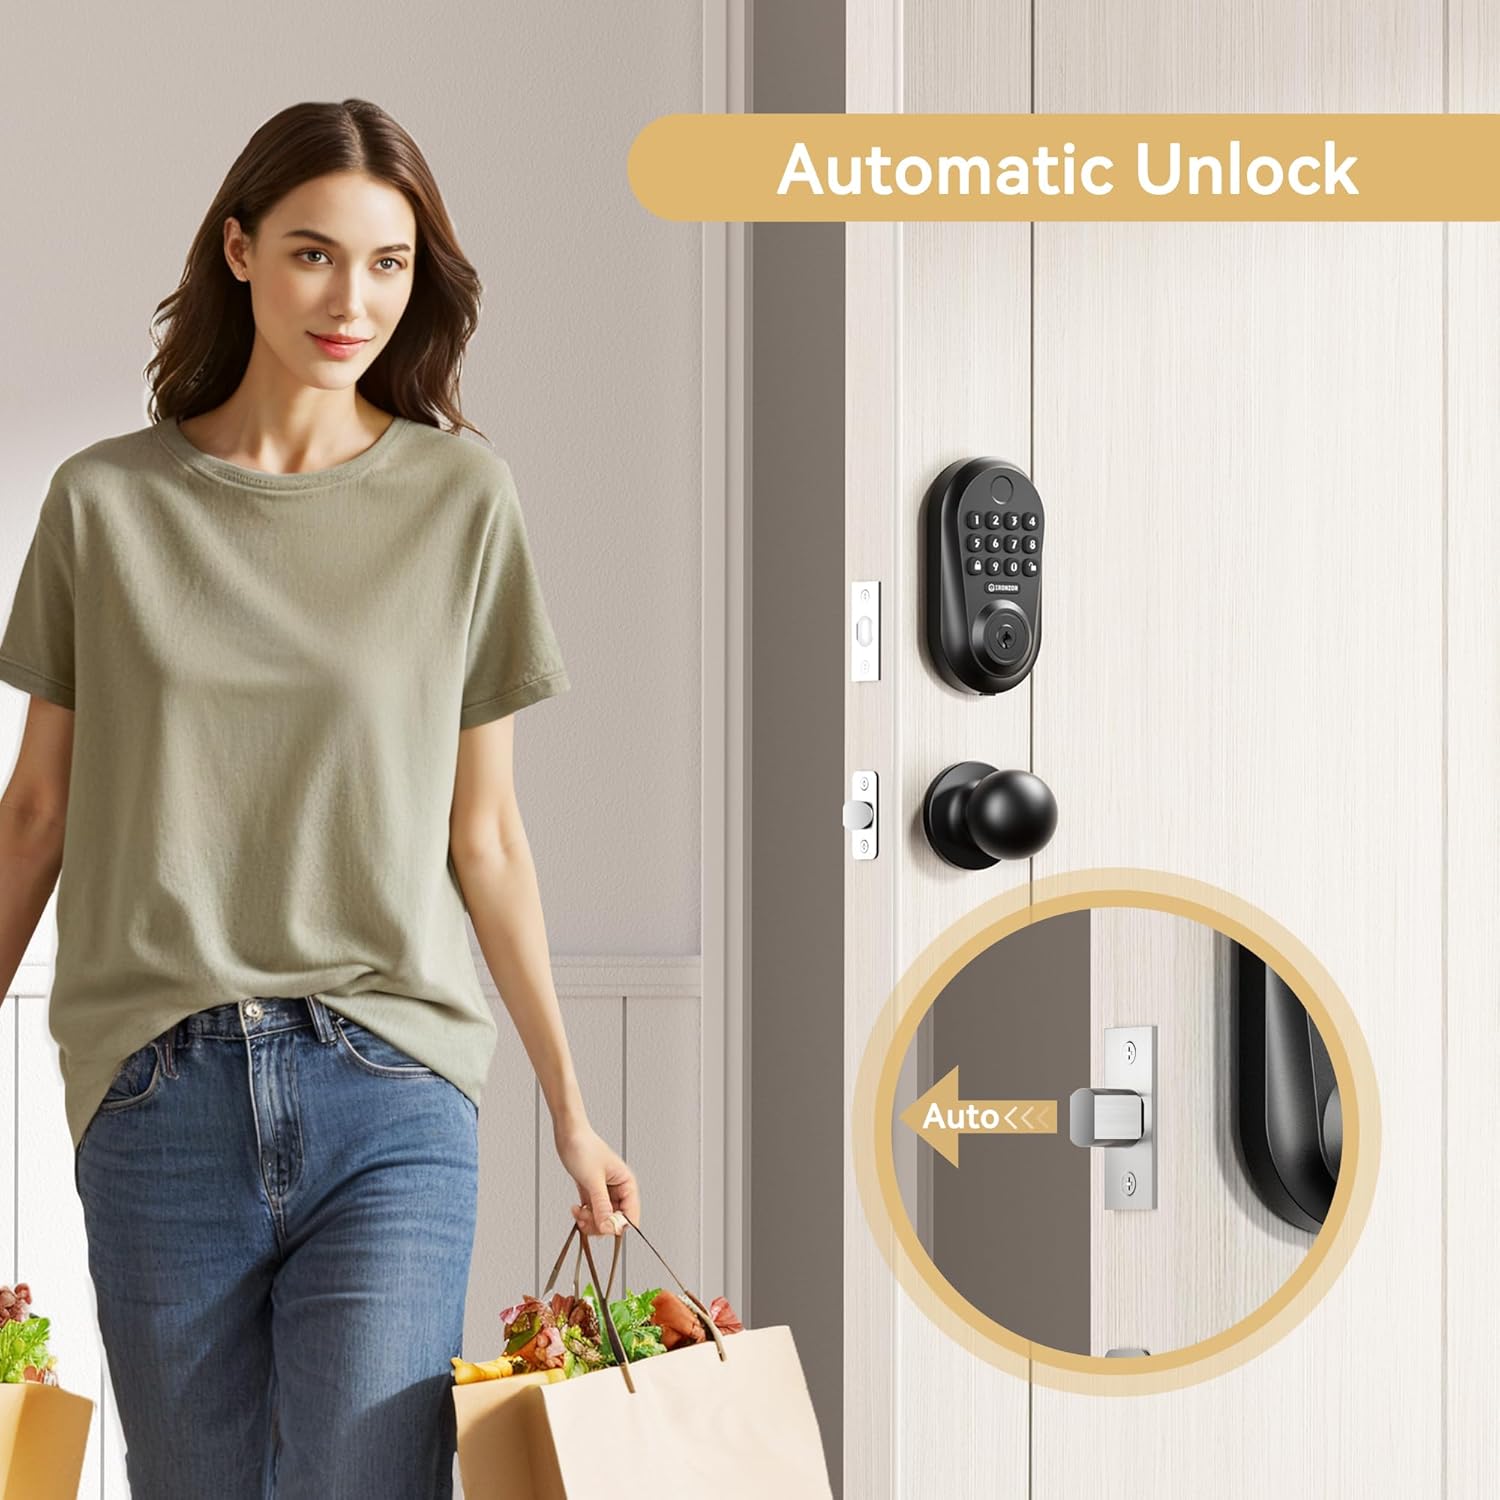
Figure 4.2: The automatic unlock feature allows for convenient entry.
4.3. One-Touch Locking
For quick locking from the exterior, simply press the one-touch lock button on the keypad.
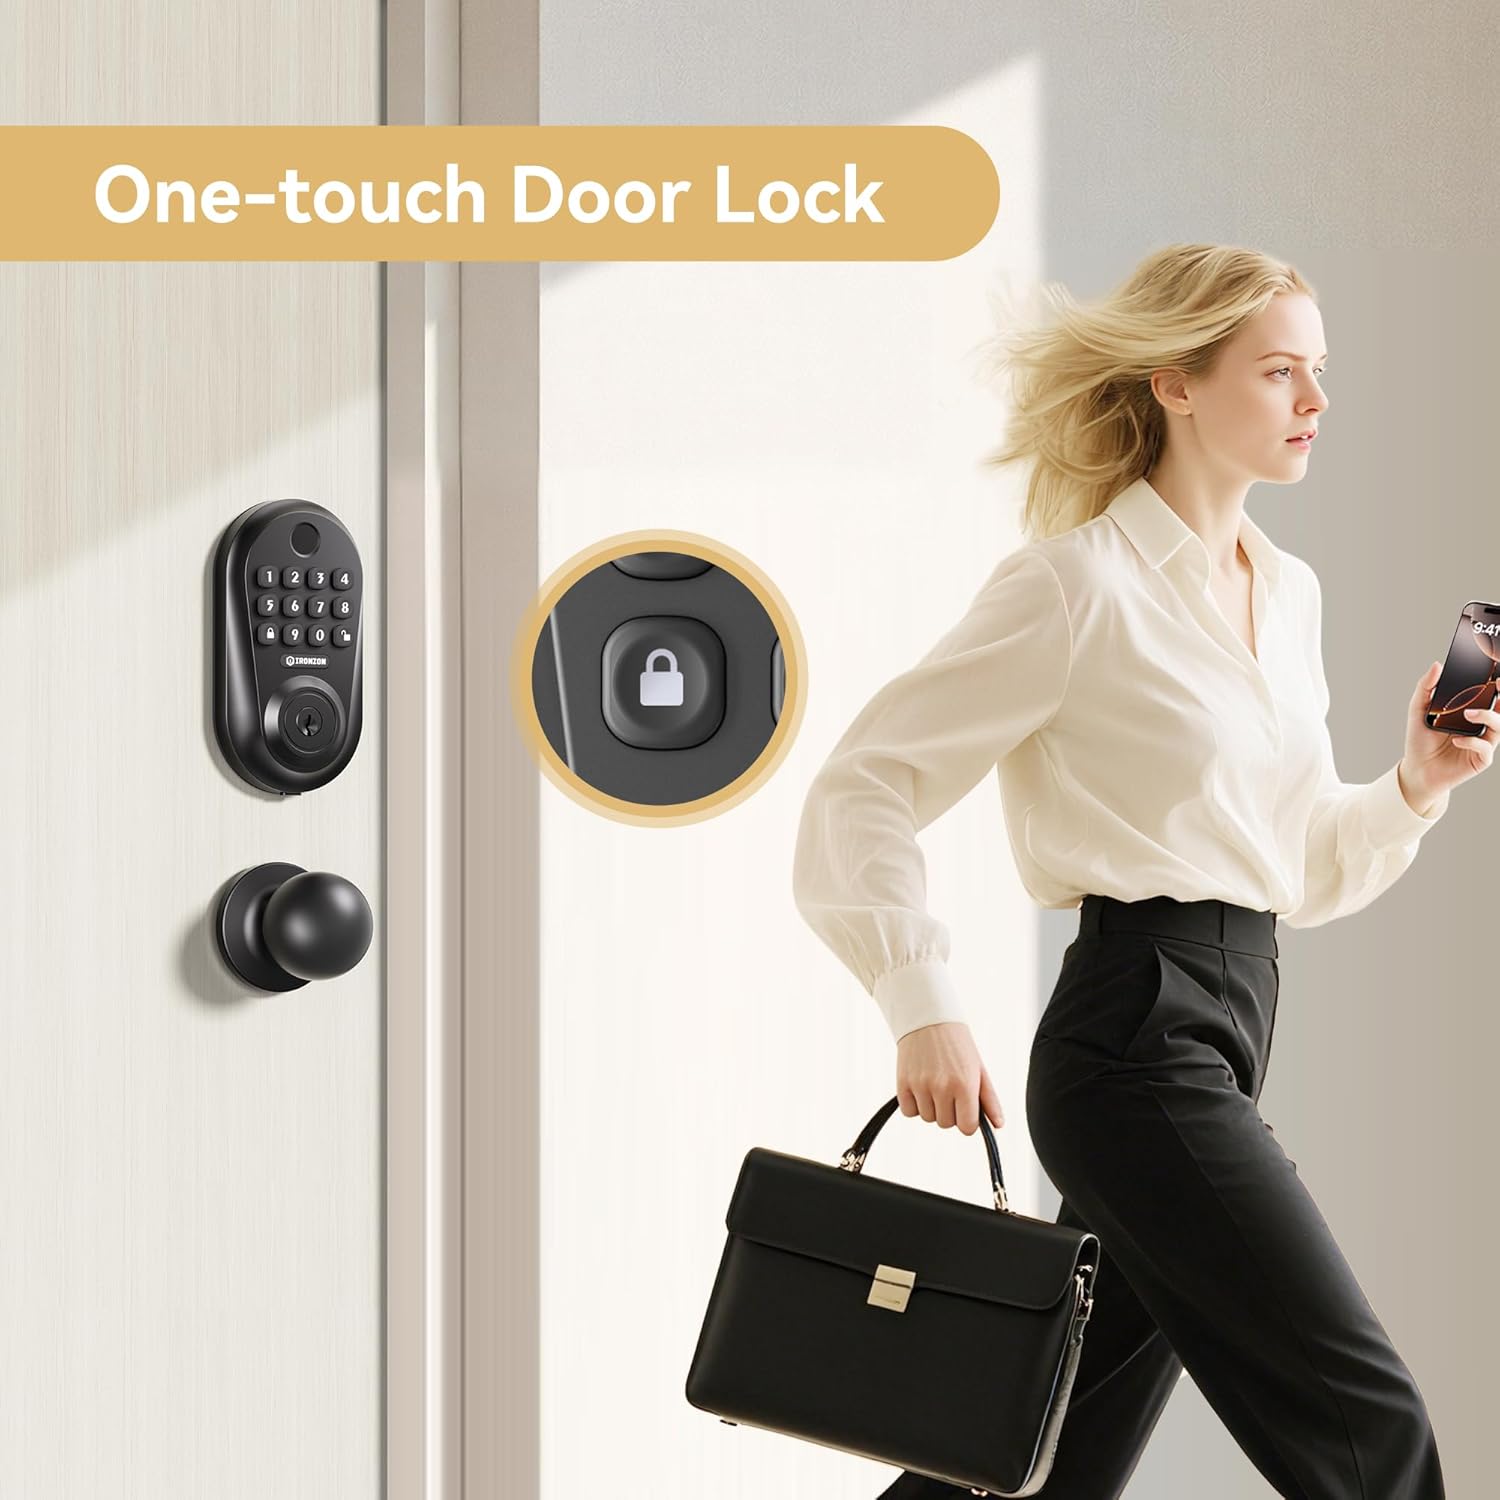
Figure 4.3: One-touch locking for convenience when leaving.
Video 4.1: Demonstration of keyless entry door lock functions, including fingerprint, app, and keypad unlocking, and one-click locking.
5. Mobile App Setup and Usage
Manage your lock conveniently through the mobile application. The following steps guide you through app setup and key features.
5.1. Downloading the App
Scan the QR code below to download the "Tuya Smart" app. Follow the in-app prompts to register or log in.

Figure 5.1: QR code to download the Tuya Smart App.
5.2. Connecting Your Door Lock to the App
- Turn on Bluetooth on your phone.
- In the app, click "Add Device" and wake up the lock.
- Click into the door lock management page once detected.
5.3. Unlocking with the Mobile App
On the lock management page, right-slide the unlock icon to unlock the door.
5.4. Sharing Access with Family Members
- Click "Member Management".
- Click "+", then "Share".
- Input the name and account of the recipient.
- Select the effectiveness type (e.g., permanent, single, limit).
- Choose whether to allow Offline unlocking.
- Click "Share".
5.5. Adding a Fingerprint
- Click "Member Management".
- Select your account.
- Click "+", then "Add" under Fingerprint.
- Enter your fingerprint from different angles 8 times as prompted by the app.
- Name the fingerprint and click "OK".
5.6. Adding a Password
- Click "Member Management".
- Select your account.
- Click "Add" under Code.
- Enter the desired 6-9 digit password.
- Name your password (optional).
- Click "Save".
5.7. Deleting a Password
- Click "Member Management".
- Select your account.
- Select the name of the password you want to delete.
- Click "delete", then "OK" to confirm.
5.8. Unlocking with Temporary Code
- Click "Temporary Password". Select the type of temporary password you want to create (e.g., Custom, Time-Limited, One-Time, Dynamic, Clearing).
- Select the password effective time and expiration time.
- Give a name to the code.
- Auto-generated password, click "OK".
5.9. Adjusting Lock Volume
- Click "More".
- Click "Lock Volume".
- Select "Normal" and "OK" to silence the lock or adjust volume level.
6. Maintenance
- Cleaning: Use a soft, dry cloth to clean the lock's exterior. Avoid abrasive cleaners or solvents.
- Battery Replacement: Replace all four AAA batteries when the low battery indicator appears or when the lock's performance degrades. Do not mix old and new batteries.
- Lubrication: Do not lubricate the lock cylinder with oil-based lubricants. Use a graphite-based lubricant if necessary, but typically smart locks do not require lubrication.
- Firmware Updates: Regularly check the mobile app for available firmware updates to ensure optimal performance and security.
7. Troubleshooting
| Problem | Possible Cause | Solution |
|---|---|---|
| Lock does not respond or works intermittently. | Low batteries; improper installation; software glitch. | Replace batteries. Recheck installation steps, especially spindle alignment and wire connection. Perform a factory reset (hold button on rear handle for 8 seconds) and re-pair with the app. |
| Auto-locking feature is not working. | Incorrect settings in the app; sensor obstruction; latch misalignment. | Check auto-lock settings in the Tuya Smart app. Ensure the door frame and strike plate are clear of obstructions. Verify the latch is fully extending and retracting smoothly. |
| Fingerprint not recognized. | Fingerprint not properly registered; dirty sensor; dry/wet finger. | Ensure your finger is clean and dry. Re-register your fingerprint, trying different angles. Clean the fingerprint sensor with a soft cloth. |
| Keypad not responding. | Low batteries; keypad malfunction. | Replace batteries. If the issue persists, contact customer support. |
| Cannot connect to mobile app. | Bluetooth off; lock not in pairing mode; app issues. | Ensure Bluetooth is enabled on your phone. Follow app instructions to put the lock into pairing mode. Restart the app or your phone. |
8. Specifications
| Feature | Detail |
|---|---|
| Brand | IRONZON |
| Model Name | LOC350YbBUSIR |
| Lock Type | Biometric, Keypad |
| Special Feature | Fingerprint |
| Material | Metal, Zinc |
| Color | Black |
| Product Dimensions (L x W x H) | 6 x 3.5 x 10 inches |
| Item Weight | 3.14 pounds |
| Power Source | 4 x AAA Batteries (not included) |
| Connectivity Protocol | Bluetooth |
| Recommended Uses | Entry Door, Exterior Door, Front Door |
9. Warranty and Support
For warranty information or technical support, please contact IRONZON customer service. Refer to your product packaging or the official IRONZON website for contact details.