
Introduction
This manual provides comprehensive instructions for the installation, operation, and maintenance of the ProSelect PSTSN21A Programmable Digital Thermostat. This thermostat is designed for use with conventional heating and cooling systems, supporting up to 2 Heat and 1 Cool stages. Please read this manual thoroughly before installation and operation to ensure proper functionality and safety.
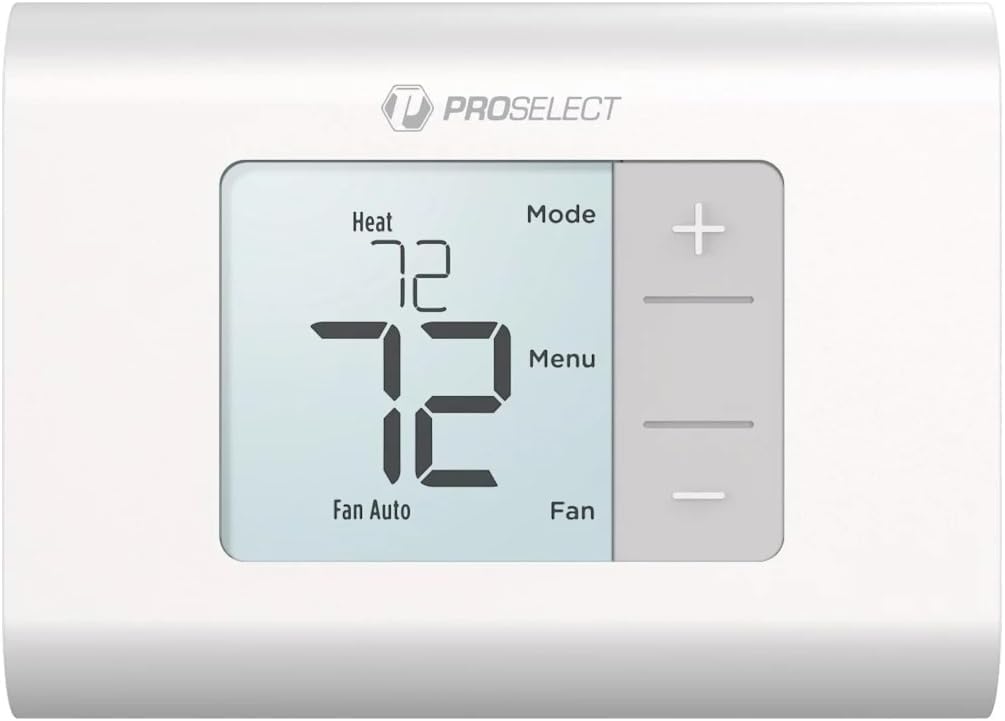
Figure 1: Front view of the ProSelect PSTSN21A Programmable Digital Thermostat, showing its backlit display and control buttons.
Setup and Installation
Safety Precautions
- Turn off power to the heating and cooling system at the main fuse or circuit breaker panel before beginning installation to prevent electrical shock and equipment damage.
- Ensure all wiring complies with local electrical codes and ordinances.
- If you are unsure about any part of the installation process, consult a qualified HVAC technician or electrician.
Tools Required
- Phillips screwdriver
- Wire stripper/cutter
- Drill (if new mounting holes are needed)
- Level (optional, for aesthetic alignment)
Removing the Old Thermostat
- Turn off power to the HVAC system at the circuit breaker.
- Remove the cover of the old thermostat.
- Take a picture of the existing wiring connections for reference.
- Carefully disconnect each wire, noting the terminal label it was connected to. Use labels if necessary.
- Unscrew and remove the old thermostat base from the wall.
Mounting the New Thermostat
- Separate the front cover from the thermostat base.
- Position the new thermostat base on the wall where the old thermostat was located.
- Mark the new mounting holes if they do not align with existing ones.
- Drill pilot holes if necessary (typically 3/16 inch for drywall).
- Feed the thermostat wires through the opening in the new base.
- Secure the thermostat base to the wall using the provided screws. Ensure it is level for best appearance.
Wiring the Thermostat
The ProSelect PSTSN21A is designed for 2 Heat / 1 Cool conventional systems and requires a hardwired connection. Refer to the wiring diagram provided with your thermostat for specific connections. Below is a general guide for common terminal designations:
- R/Rc: 24VAC Power (Commonly Red wire)
- C: 24VAC Common (Commonly Blue or Black wire)
- W/W1: Heat Stage 1 (Commonly White wire)
- W2: Heat Stage 2 (Commonly Brown or Orange wire)
- Y/Y1: Cool Stage 1 (Commonly Yellow wire)
- G: Fan (Commonly Green wire)
Connect each wire to its corresponding terminal on the thermostat base. Ensure wires are securely fastened and no bare wire is exposed beyond the terminal block.
Completing Installation
- Once wiring is complete, carefully push any excess wire back into the wall opening.
- Align the thermostat front cover with the base and snap it into place.
- Restore power to the HVAC system at the circuit breaker.
- The thermostat display should illuminate.
Operating Instructions
Display Overview
The ProSelect PSTSN21A features a clear, backlit digital display that shows the current room temperature, set temperature, system mode, fan mode, and program schedule information. The backlight activates when a button is pressed and remains on for a short period.
Control Buttons
The thermostat is operated using intuitive digital controls. Common buttons include:
- UP/DOWN Arrows (▲ / ▼): Adjust temperature settings, navigate menu options, or change time/date.
- MODE: Cycles through system modes (HEAT, COOL, OFF).
- FAN: Cycles through fan modes (AUTO, ON).
- PROGRAM/HOLD: Accesses programming menu or holds current temperature.
- RUN/SET: Initiates program schedule or confirms settings.
Setting the Current Time and Day
- Press the SET button (or similar button as per specific model instructions).
- Use the UP/DOWN arrows to adjust the hour, then press SET to confirm.
- Repeat for minutes and AM/PM.
- Use the UP/DOWN arrows to select the current day of the week, then press SET to confirm.
- Press RUN to exit time/day setting.
Setting System Mode
Press the MODE button to cycle through the available system modes:
- HEAT: The system will operate to maintain the heating setpoint.
- COOL: The system will operate to maintain the cooling setpoint.
- OFF: The heating and cooling system is turned off. The fan may still operate if set to ON.
Setting Fan Mode
Press the FAN button to cycle through the available fan modes:
- AUTO: The fan runs only when the heating or cooling system is actively operating.
- ON: The fan runs continuously, regardless of whether the heating or cooling system is active.
Adjusting Temperature
In HEAT or COOL mode, press the UP or DOWN arrow buttons to adjust the desired temperature setpoint. The new setpoint will be displayed and the system will adjust accordingly.
Programming a Schedule
The PSTSN21A allows for personalized comfort through programmable settings. The exact programming steps may vary slightly, but generally involve:
- Press the PROGRAM button.
- Use the UP/DOWN arrows to select the day or group of days you wish to program (e.g., Mon-Fri, Sat-Sun, or individual days).
- For each period (e.g., Wake, Leave, Return, Sleep), use the UP/DOWN arrows to set the desired time and temperature for both heating and cooling.
- Press PROGRAM or SET to move to the next period or day.
- Once all desired periods are programmed, press RUN to activate the schedule.
To temporarily override the schedule, simply adjust the temperature using the UP/DOWN arrows. The thermostat will maintain this temperature until the next programmed period begins. To permanently hold a temperature, press the HOLD button (if available) after adjusting the temperature.
Maintenance
Cleaning the Thermostat
To maintain the appearance and functionality of your thermostat, clean it periodically:
- Wipe the exterior with a soft, damp cloth.
- Do not use abrasive cleaners, solvents, or chemical sprays, as these can damage the display or plastic components.
- Ensure no moisture enters the internal components.
General Checks
- Ensure that furniture, curtains, or other objects do not obstruct airflow around the thermostat, as this can affect temperature readings.
- Keep the area around the thermostat free from dust and debris.
Troubleshooting
If you experience issues with your ProSelect PSTSN21A thermostat, refer to the following common problems and solutions:
| Problem | Possible Cause | Solution |
|---|---|---|
| Display is blank or no power. | No power to the thermostat; tripped circuit breaker; loose wiring. | Check the circuit breaker for your HVAC system and reset if tripped. Verify all wiring connections are secure at the thermostat and HVAC unit. |
| Heating/Cooling system not responding. | Incorrect system mode; fan mode set to OFF; wiring issue; system lockout. | Ensure the thermostat is set to the correct mode (HEAT or COOL). Check fan mode is AUTO or ON. Verify wiring. Some systems have a time delay (5 minutes) before restarting. |
| Temperature reading seems inaccurate. | Thermostat exposed to direct sunlight, drafts, or heat sources; obstructed airflow. | Ensure the thermostat is not in direct sunlight or near heat-emitting appliances. Check for drafts from windows or doors. Ensure no objects are blocking the thermostat's vents. |
| Programmed schedule not running. | Thermostat is in HOLD mode; incorrect time/day setting; program not saved. | Press the RUN button to exit HOLD mode. Verify the current time and day are set correctly. Re-enter and save your program schedule. |
If problems persist after attempting these solutions, contact a qualified HVAC service technician.
Specifications
| Feature | Detail |
|---|---|
| Model | PSTSN21A |
| System Compatibility | Conventional Systems (2 Heat / 1 Cool) |
| Power Source | Hardwired (30 Volts) |
| Display | Backlit Digital Display |
| Height | 3-7/8 inches |
| Width | 5-3/16 inches |
| Depth | 1-1/8 inches |
| Weight | 0.8 Pounds |
| Color | White |
Warranty and Support
Specific warranty information for the ProSelect PSTSN21A thermostat is typically provided with the product packaging or can be obtained directly from the retailer or manufacturer at the time of purchase. Please retain your proof of purchase for warranty claims.
For technical support or further assistance, please contact your authorized ProSelect dealer or the point of purchase. Ensure you have your model number (PSTSN21A) and purchase details available when seeking support.
