1. Introduction
This manual provides essential instructions for the assembly, operation, maintenance, and troubleshooting of your Creality Ender 3 3D Printer. Please read this manual thoroughly before operating the printer to ensure proper function and safety.
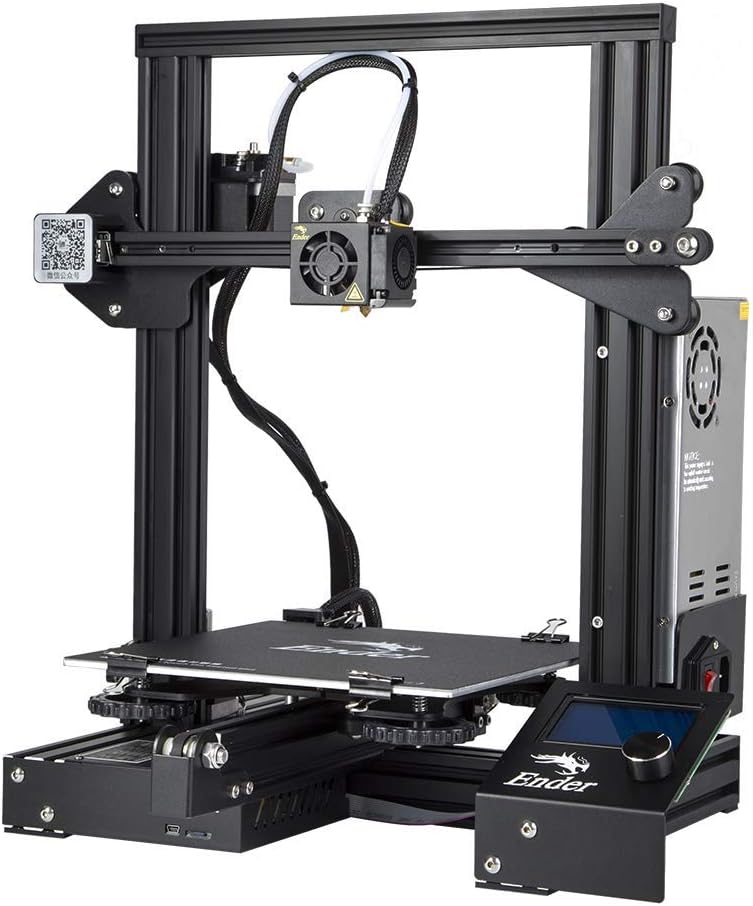
Image 1.1: The Creality Ender 3 3D Printer, a FDM (Fused Deposition Modeling) printer designed for high-precision printing.
2. Setup and Assembly
The Creality Ender 3 is designed for DIY assembly, offering an engaging experience for enthusiasts. Follow the steps below for proper setup.
2.1 Unpacking and Component Identification
Carefully unpack all components and verify against the packing list. Ensure all parts are present and undamaged.

Image 2.1: Exploded view of the Creality Ender 3 components for DIY assembly. Key components include the base frame, power supply, display screen, motors, profiles, screw rod, Z passive block, X/Z kit, and filament holder.
2.2 Assembly Steps
Refer to the detailed Installation Manual (PDF) for step-by-step assembly instructions. General assembly involves:
- Mounting the Z-axis and X-axis profiles to the base.
- Installing the hotend assembly and extruder.
- Connecting the wiring for motors, endstops, and the hotend/heated bed.
- Attaching the display screen and filament holder.
2.3 Initial Bed Leveling
Accurate bed leveling is crucial for successful prints. The printer comes with a slightly unleveled bed, requiring manual adjustment. Use the provided wrenches to adjust the eccentric spacers on the Delrin wheels. Ensure the wheels are tight enough to prevent play but loose enough to roll smoothly along the rails. A common method involves using a piece of paper between the nozzle and the print bed to set the correct gap at multiple points.

Image 2.2: The heated print bed of the Ender 3, which requires careful leveling for optimal print adhesion.
3. Operating Instructions
3.1 Filament Loading
- Heat the hotend to the appropriate temperature for your filament type (e.g., 200°C for PLA).
- Insert the filament into the extruder's intake hole.
- Press the extruder lever to open the gear and push the filament through the Bowden tube until it exits the nozzle.

Image 3.1: Close-up of the extruder mechanism, responsible for feeding filament into the hotend. The upgraded extruder design minimizes clogging.
3.2 Printing Process
- Prepare your 3D model using slicing software (e.g., Cura, Repetier-Host, Simplify3D) and save it as an STL, OBJ, or AMF file.
- Transfer the sliced G-code file to the printer via SD card.
- Select the file from the printer's display menu and initiate the print.
- Monitor the first layer for proper adhesion and adjust bed leveling if necessary.

Image 3.2: The control screen and rotary knob for navigating menus and controlling printer functions.
3.3 Resume Printing Function
The Ender 3 features a resume printing function. In the event of a power interruption, the printer can resume printing from the last recorded position once power is restored. This feature helps prevent print failures and reduces material waste.

Image 3.3: Illustration of the resume printing function, showing a print continuing after a power outage.
4. Maintenance
Regular maintenance ensures optimal performance and longevity of your 3D printer.
4.1 Cleaning the Print Bed
After each print, allow the print bed to cool and carefully remove the printed object. Clean the print surface with isopropyl alcohol to remove any residue and ensure good adhesion for subsequent prints.
4.2 Nozzle Maintenance
Periodically check the nozzle for clogs. If a clog occurs, heat the hotend to printing temperature and use the provided needle or a thin wire to clear the obstruction. For severe clogs, the nozzle may need to be replaced.
4.3 Lubrication and Tightening
Inspect and lubricate the Z-axis lead screw regularly. Check all belts and screws for proper tension and tightness. The Delrin wheels on the X and Z axes should be adjusted to eliminate any wobble without causing excessive friction.
5. Troubleshooting
This section addresses common issues encountered during 3D printing.
5.1 Poor First Layer Adhesion
- Solution: Re-level the print bed. Ensure the nozzle-to-bed distance is correct (paper test). Increase bed temperature if necessary. Clean the print surface thoroughly.
5.2 Filament Not Extruding or Clogging
- Solution: Check hotend temperature. Clear any nozzle clogs. Ensure the extruder gear is gripping the filament. Verify the Bowden tube is not kinked.
5.3 Prints Detaching from Bed Mid-Print
- Solution: Improve bed adhesion (re-level, clean, use adhesive aids like glue stick or hairspray). Ensure the heated bed reaches and maintains the correct temperature.
5.4 Noisy Operation
- Solution: The stepper drivers can be a source of noise. Consider upgrading the mainboard to one with silent stepper drivers (e.g., Creality 4.2.7 board or SKR Mini E3) if noise is a significant concern.
5.5 Warped Bed or Bent Rails
- Solution: If you suspect a warped bed, manual mesh bed leveling in firmware can compensate. For bent rails, contact Creality support for a replacement as this is a manufacturing defect.
6. Specifications
Detailed technical specifications for the Creality Ender 3 3D Printer.

Image 6.1: A visual representation of the Creality Ender 3's key specifications.
| Feature | Detail |
|---|---|
| Machine Model | Ender-3 |
| Molding Technology | FDM (Fused Deposition Modeling) |
| Printing Size | 220 x 220 x 250 mm (8.66 x 8.66 x 9.84 inches) |
| Printing Speed | ≤180mm/s (Normal: 30-60mm/s) |
| Printing Precision | ±0.1mm |
| Nozzle Diameter | Standard 0.4mm (can be 0.3 or 0.2mm) |
| Hotbed Temperature | ≤110°C |
| File Transfer | Online or SD Card Offline |
| File Format | STL, OBJ, AMF |
| Slicing Software | Cura, Repetier-Host, Simplify3D |
| Power Supply | Input: AC 115V/230V, Output: DC 24V 270W |
| Filament Compatibility | PLA, ABS, TPU, Wood, Copper, Gradient, etc. |
| Net Weight (N.W.) | 6.62 kg (14.59 lbs) |
| Gross Weight (G.W.) | 8.1 kg (17.86 lbs) |
| Machine Size | 440 x 440 x 465 mm |
| Packaging Size | 570 x 380 x 205 mm |
7. Warranty and Support
For detailed warranty information, please refer to the official Creality website or the documentation included with your product. Warranty terms typically cover manufacturing defects for a specified period.
7.1 Additional Resources
- Official User Manual (PDF)
- Official Safety Information (PDF)
- Creality Support and Product Information: http://l.ead.me/bat9cr
- General Creality QR Code for product information: https://qr.creality.com


