Introduction
This manual provides detailed instructions for the installation, operation, and maintenance of your Loniko U5-1-WK Smart Toilet. Please read this manual thoroughly before installation and use to ensure proper function and safety. Keep this manual for future reference.
Important Safety Information
Always follow basic safety precautions when using electrical products to reduce the risk of fire, electric shock, or injury. This smart toilet is designed for indoor use only. Ensure proper grounding and electrical connections. Do not immerse the product in water or spray water directly onto electrical components. Disconnect power before performing any maintenance or cleaning.
The toilet lid may contain a safety information sticker. Please review all warnings and instructions provided on the product itself.
Setup and Installation
Proper installation is crucial for the optimal performance and longevity of your smart toilet. It is recommended to have a qualified plumber perform the installation.
1. Unboxing and Component Check
Carefully open the packaging and remove all components. Verify that all parts listed in the packing list are present and undamaged. The package includes the smart toilet, installation accessories, user manual, and wireless remote.
Video: Loniko 945B Tankless Smart Toilet Installation Demonstration. This video provides a visual guide to the installation process, from unboxing to final connections.

Image: All components for the Loniko Smart Toilet installation, including the toilet, remote, and various fittings.
2. Pre-installation Requirements
- Ensure the wall socket is 16-20 inches above the ground.
- The angle valve should be 10-16 inches above the ground.
- The center of the sewage outlet must be 11.81 inches away from the wall.
- The sewage outlet diameter is 3.94 inches.

Image: A diagram illustrating the required distances for the wall socket, angle valve, and sewage outlet from the floor and wall for proper installation.
3. Floor Flange and Wax Ring Installation
Clean the area around the sewage outlet. Use the provided template to mark drilling points for the floor flange. Drill holes and secure the floor flange. Install the wax ring onto the toilet's base or directly onto the floor flange, ensuring a tight seal.
4. Toilet Placement and Securing
Carefully align the toilet with the installed floor flange and lower it into place. Ensure the toilet is level. Secure the toilet to the floor using the provided mounting brackets and screws. Cover the screw heads with decorative caps.
5. Water and Power Connections
Connect the water supply hose to the angle valve and the toilet's water inlet. Ensure all connections are tight to prevent leaks. Plug the power cord into a grounded electrical outlet. Turn on the water supply.
6. Remote Control Setup
Install batteries into the wireless remote control. Mount the remote control holder to a convenient wall location using the adhesive backing or screws.
Operating Instructions
Your Loniko Smart Toilet offers a range of automated and customizable features for enhanced comfort and hygiene.
1. Automatic Lid and Seat Functions
- Auto Open/Close: The lid automatically opens as you approach and closes after you leave (typically after 2 minutes of inactivity).
- Foot Sensor: A foot sensor at the base of the toilet allows for hands-free lid opening and flushing. Place your foot near the sensor to activate.

Image: Visual guide to the automatic lid and flushing features, including foot sensor and remote control options.
2. Flushing Options
- Dual Flush: Choose between 0.92 GPF (Gallons Per Flush) for light waste and 1.28 GPF for a full flush, promoting water efficiency.
- Auto-Flush: The toilet can automatically flush after you leave the seat.
- Foot Sensor Flush: Activate a flush by using the foot sensor.
- Remote Control Flush: Use the wireless remote to initiate a flush.
- Side Button Flush: A manual flush button is located on the side of the toilet.

Image: An illustration of the powerful and efficient siphonic flush system, showing how it cleans the ceramic wall and uses a main jet.
3. Bidet and Drying Functions
- Multiple Wash Modes: Select from Posterior wash, Feminine wash, and Massage wash.
- Adjustable Settings: Customize water pressure and temperature to your preference.
- Warm Air Dryer: After washing, use the warm air dryer with adjustable temperature levels for a comfortable and paperless experience.

Image: An overview of the multiple bidet wash modes and temperature settings available on the smart toilet.
4. Comfort Features
- Heated Seat: Enjoy a heated seat with four adjustable temperature levels (Normal, 93°F, 96°F, 99°F).
- LED Night Light: A soft LED night light illuminates the bowl for safe navigation in the dark.
- Real-time LCD Display: The integrated LCD shows current water, seat, and dryer temperatures.

Image: A visual representation of the heated seat, warm air drying, and night light features, highlighting temperature adjustability.
5. Control Options
- Wireless Remote Control: Access all functions, including flush, wash modes, temperature adjustments, and more, from the wireless remote.
- One-Touch Knob: A convenient knob on the side of the toilet provides quick access to frequently used functions like women's wash, bottom wash, drying, and flushing.

Image: The wireless remote control displaying buttons for flush, dryer, wash modes, temperature settings, and other features.
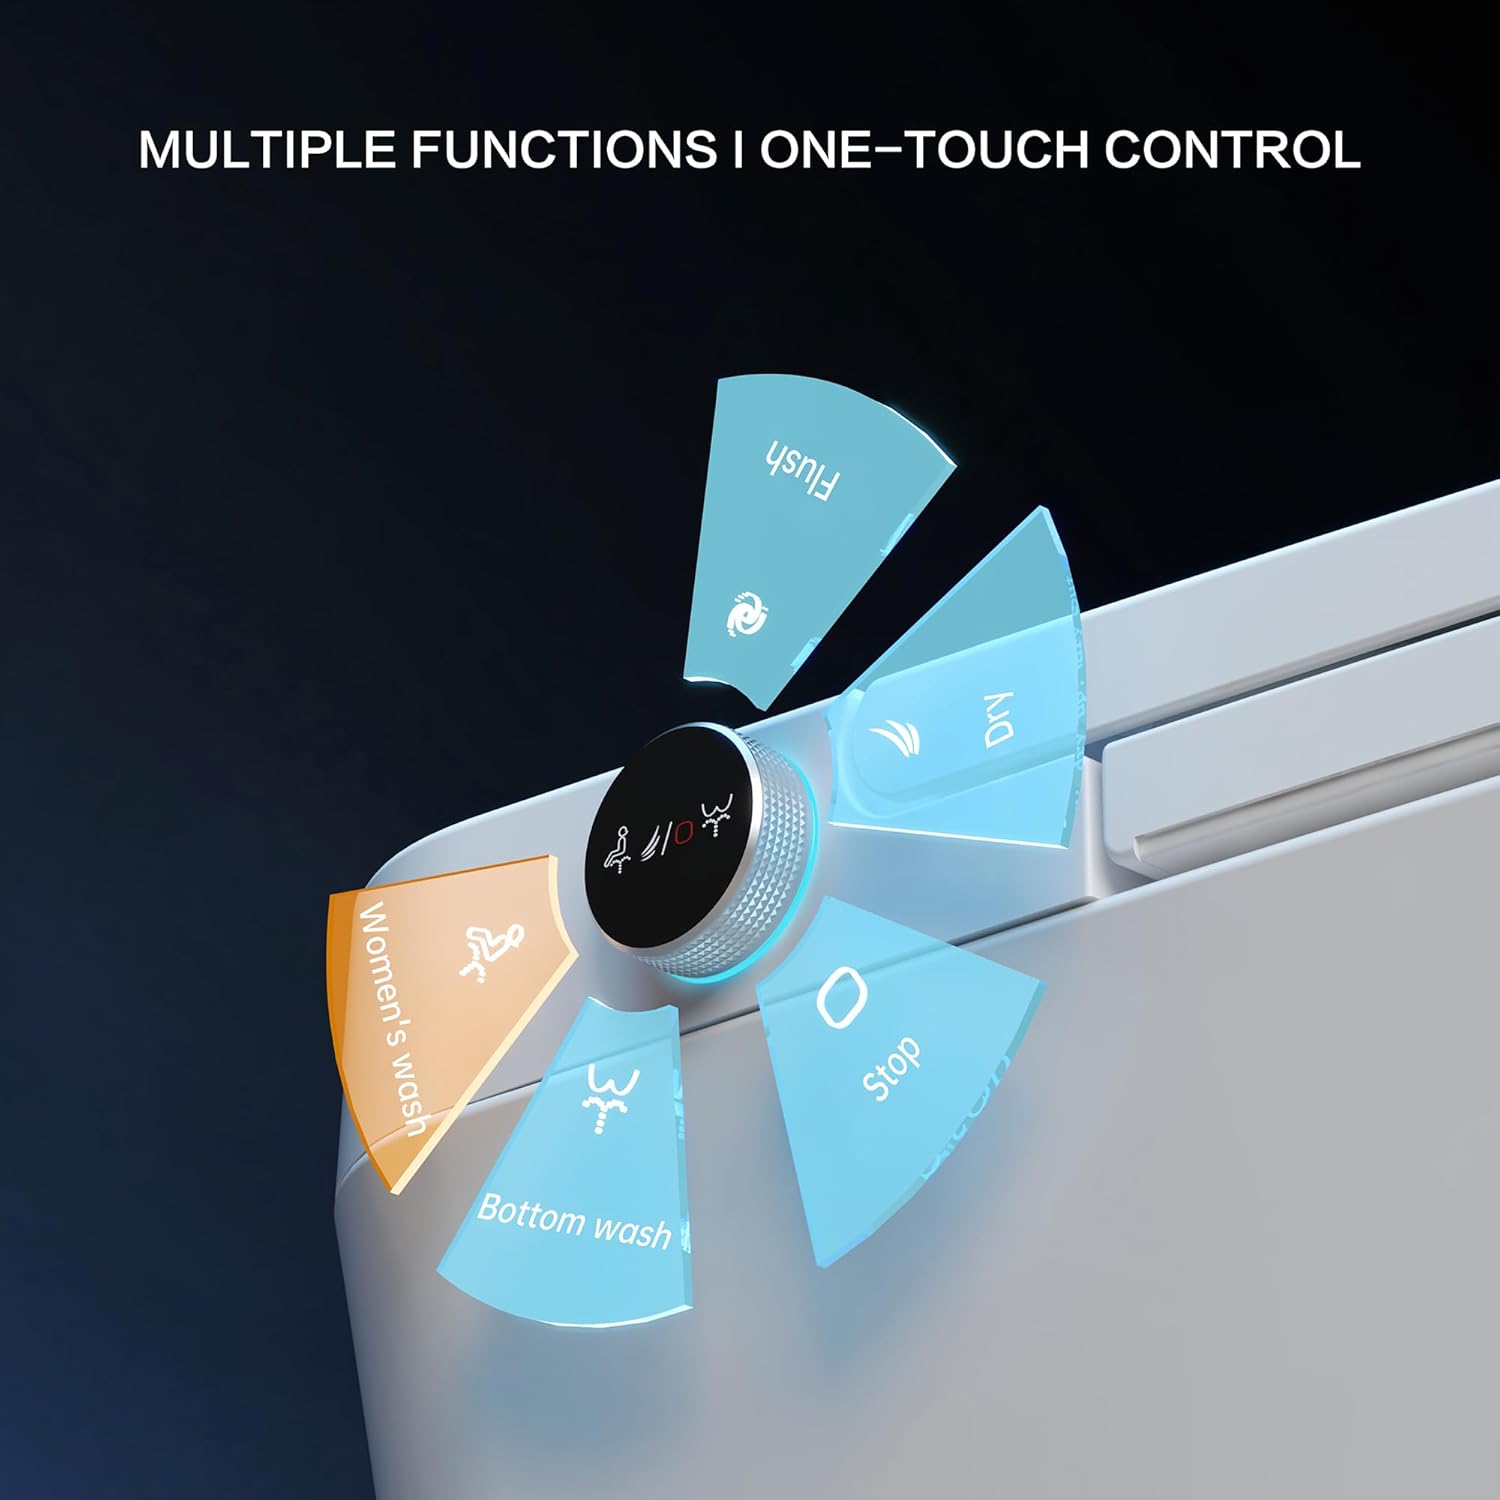
Image: A close-up of the one-touch knob, indicating its rotational and press functions for various wash and flush operations.
Video: Loniko 945B NEW Luxury Comfort Smart Toilet. This video provides an overview of the smart toilet's features and operation.
Maintenance
Regular cleaning and maintenance will ensure the longevity and hygienic operation of your smart toilet.
- General Cleaning: Use a soft cloth and mild, non-abrasive cleaner to wipe down the exterior surfaces. Avoid harsh chemicals that may damage the finish.
- Nozzle Cleaning: The bidet nozzles feature a self-cleaning function. Refer to the remote control or side knob for activating this feature. Periodically inspect the nozzles for any buildup and gently clean with a soft brush if necessary.
- Bowl Cleaning: Clean the toilet bowl regularly with a toilet brush and appropriate cleaner.
- Power Disconnection: Always unplug the toilet from the power outlet before performing extensive cleaning or maintenance.
Troubleshooting
If you encounter issues with your Loniko Smart Toilet, refer to the following common solutions. For problems not listed here, please contact customer support.
| Problem | Possible Cause | Solution |
|---|---|---|
| Toilet does not flush or flushes weakly. | Low water pressure; clogged nozzle; power issue. | Check water supply valve is fully open. Ensure power is connected. Clean bidet nozzles. |
| Lid/Seat auto-open/close not working. | Sensor obstruction; power issue; sensor malfunction. | Ensure the sensor area is clear. Check power connection. Restart the toilet by unplugging and replugging. |
| Bidet functions (wash/dry) not working. | Nozzle obstruction; water supply issue; remote control battery. | Clean bidet nozzles. Check water supply. Replace remote control batteries. |
| Heated seat not warming. | Temperature setting too low; power issue. | Adjust seat temperature settings via remote. Ensure power is connected. |
| Water leakage during installation. | Improper connection of T-valve or water hose; faulty wax ring. | Ensure all water connections are tightened correctly. Re-seat the wax ring or replace if damaged. Consult a plumber if issues persist. |
Specifications
| Feature | Detail |
|---|---|
| Brand | Loniko |
| Model Number | U5-1-WK |
| Product Dimensions | 26.77"D x 15.95"W x 17.72"H |
| Item Weight | 86 Pounds |
| Material | ABS, Ceramic |
| Installation Type | Floor Mounted |
| Shape | U-Shape |
| Seat Material Type | ABS |
| Flush Score (MAP) | 1000g |
| Water Consumption | 0.92 GPF (light), 1.28 GPF (full) |
| UPC | 701915159004 |
Warranty and Support
Your Loniko Smart Toilet is backed by a 24-month warranty. For any questions, technical assistance, or warranty claims, please contact our 24/7 customer support. Refer to your purchase documentation for specific contact details.


