
DreamQuest Mini PC
DreamQuest Mini PC N95 User Manual
Model: DreamQuest Mini PC N95
1. Introduction
Thank you for choosing the DreamQuest Mini PC N95. This compact and powerful desktop computer is designed for efficiency and versatility, featuring an Intel N95 processor, 12GB DDR5 RAM, and a 512GB SSD, pre-installed with Windows 11 Pro. This manual provides essential information for setting up, operating, maintaining, and troubleshooting your new Mini PC to ensure optimal performance and longevity.

Image 1.1: The DreamQuest Mini PC N95, showcasing its compact design and transparent top panel.
2. Package Contents
Please verify that all items listed below are included in your package. If any items are missing or damaged, please contact customer support.
- DreamQuest Mini PC N95
- User Manual
- HD Cables (HDMI)
- Power Adapter (US Plug)
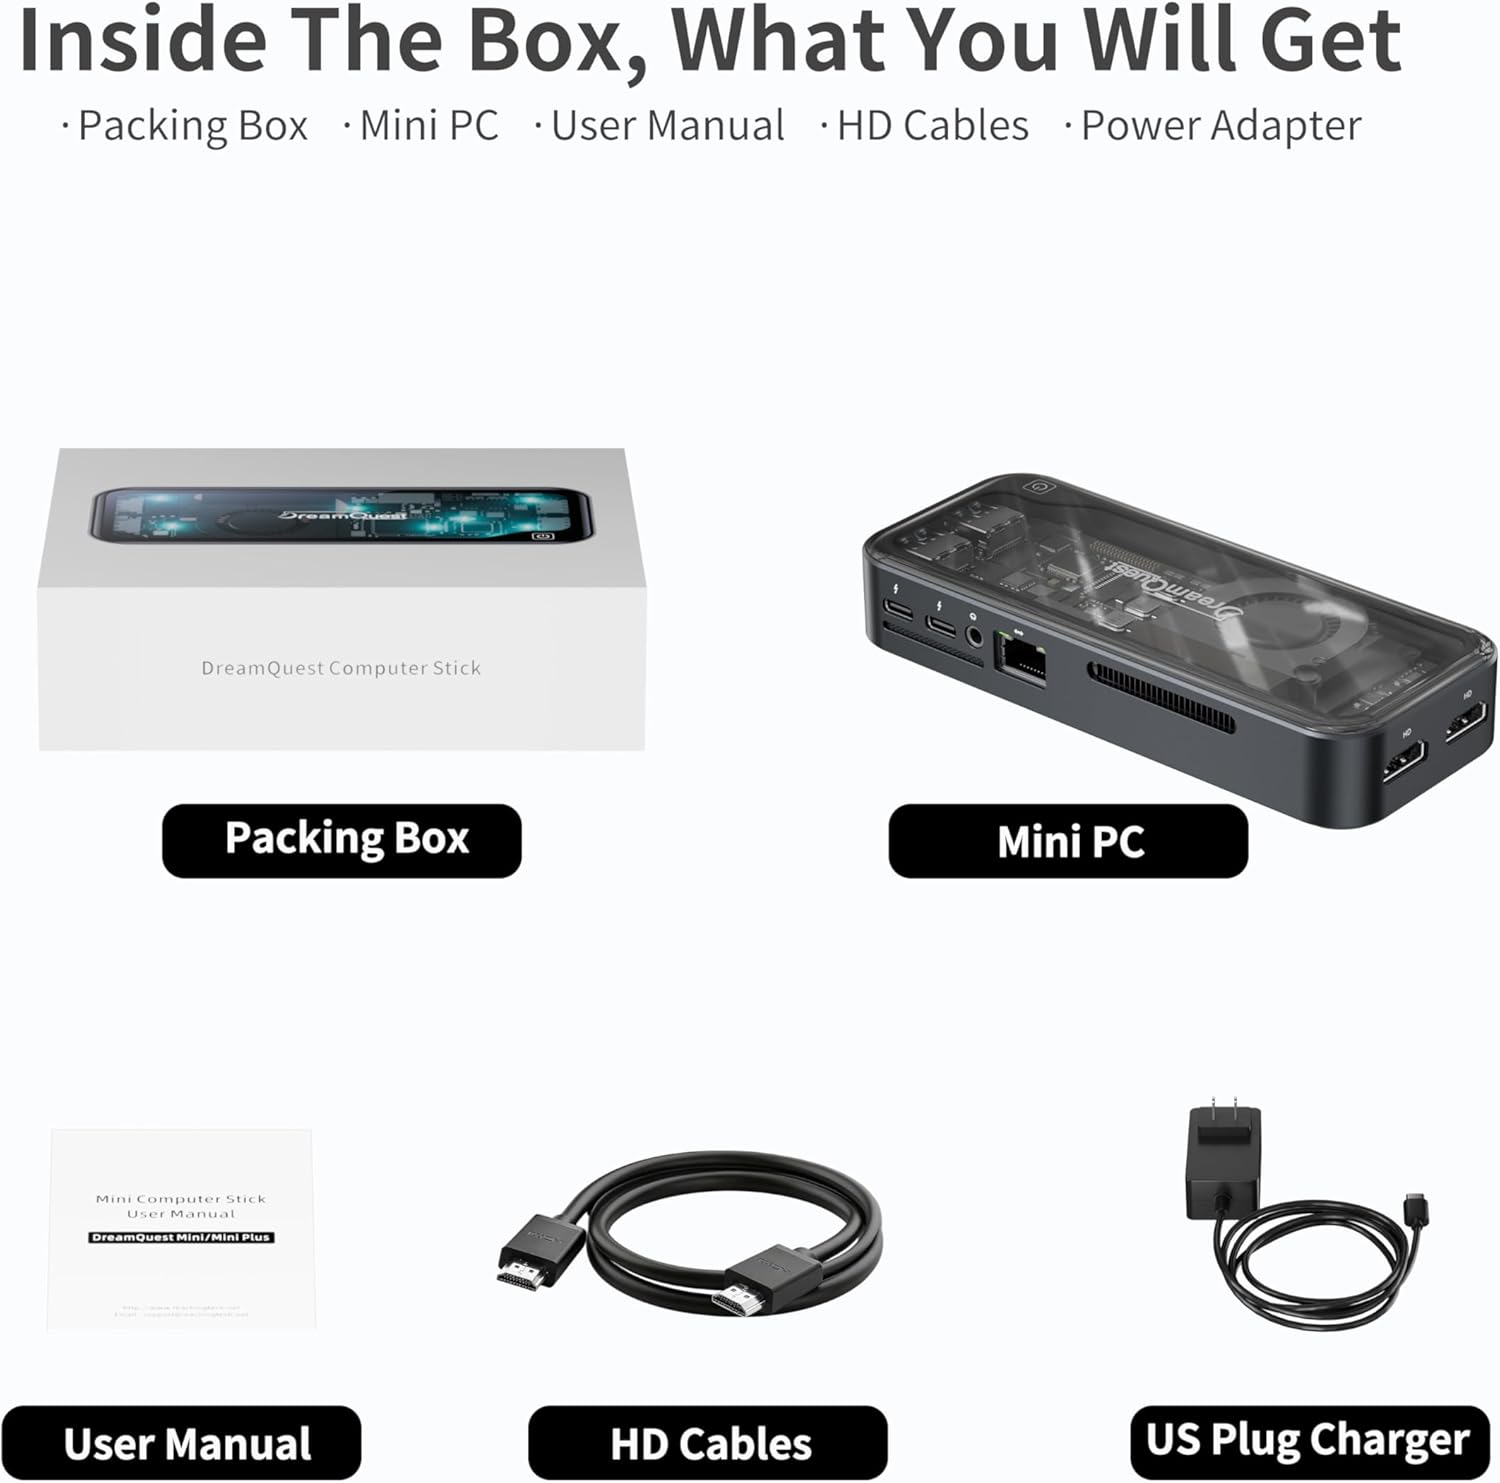
Image 2.1: Contents of the DreamQuest Mini PC N95 package, including the Mini PC, user manual, HD cables, and power adapter.
3. Product Overview
The DreamQuest Mini PC N95 is designed with a comprehensive set of ports for connectivity and expansion. Familiarize yourself with the port layout for easy setup.

Image 3.1: Detailed view of the DreamQuest Mini PC N95 ports, including HDMI, USB, USB-C, Audio, and Gigabit Ethernet.
3.1 Front Panel
- Power Button: To turn the device on or off.
- USB 3.2 Ports (x4): For connecting peripherals such as keyboards, mice, and external storage.
3.2 Rear Panel
- HDMI Ports (x2): For connecting to displays, supporting up to 4K@60Hz.
- Full-Function USB-C Ports (x2): Supports fast charging, data transfer (10Gb/s), and 4K video output.
- 3.5mm Audio Jack: For connecting headphones or speakers.
- Gigabit Ethernet Port: For wired network connection (1000Mbps).
- DC Power Input: For connecting the power adapter.
4. Initial Setup
Follow these steps to set up your DreamQuest Mini PC N95 for the first time.
- Connect to a Display: Connect your monitor or TV to one of the HDMI ports or a USB-C port using an appropriate cable. The Mini PC supports up to three displays simultaneously.
- Connect Peripherals: Plug in your USB keyboard and mouse into the available USB 3.2 ports.
- Connect to Power: Insert the power adapter into the DC power input port on the Mini PC, then plug the adapter into a power outlet.
- Power On: Press the power button on the front panel of the Mini PC. The power indicator light will illuminate.
- Initial Windows Setup: Follow the on-screen instructions to complete the Windows 11 Pro setup, including language, region, network connection, and user account creation.
5. Operating Instructions
5.1 Power On/Off
- To Power On: Press the power button once.
- To Shut Down: Click the Windows Start button, then select Power > Shut down. Alternatively, press and hold the power button for 4 seconds.
- To Restart: Click the Windows Start button, then select Power > Restart.
5.2 Network Connectivity
- Wi-Fi: The Mini PC supports Wi-Fi 6. After initial setup, connect to your preferred wireless network through Windows settings.
- Ethernet: For a stable wired connection, plug an Ethernet cable into the Gigabit Ethernet port on the rear panel.
5.3 Multi-Display Setup
The DreamQuest Mini PC N95 supports up to three displays simultaneously at 4K@60Hz via its two HDMI ports and two full-function USB-C ports.
- Connect your displays to the available HDMI and USB-C ports.
- In Windows, right-click on the desktop and select 'Display settings' to configure display arrangement, resolution, and orientation.

Image 5.1: Example of the DreamQuest Mini PC N95 supporting a triple-screen display setup for enhanced productivity.
5.4 Supported Operating Systems
While pre-installed with Windows 11 Pro, the Mini PC also supports other operating systems.
- Windows 11 Pro (Pre-installed)
- Linux (e.g., Ubuntu, CentOS)

Image 5.2: Overview of supported external devices and operating systems for the DreamQuest Mini PC N95.
6. Maintenance
Proper maintenance ensures the longevity and optimal performance of your Mini PC.
- Cleaning: Use a soft, dry cloth to clean the exterior of the Mini PC. Avoid liquid cleaners. For dust in vents, use compressed air.
- Ventilation: Ensure the Mini PC is placed in a well-ventilated area. Do not block the ventilation openings.
- Software Updates: Regularly update Windows and drivers to maintain system stability and security.
- Storage: The 512GB M.2 SSD can be replaced with a larger capacity SSD (up to 2TB) if more storage is required. This process should be performed by a qualified technician.

Image 6.1: Internal view highlighting the smart fan system designed for efficient and quiet cooling.
7. Troubleshooting
This section addresses common issues you might encounter with your Mini PC.
| Problem | Possible Solution |
|---|---|
| No power | Ensure the power adapter is securely connected to both the Mini PC and a working power outlet. Test the outlet with another device. |
| No display on monitor | Verify that the HDMI or USB-C cable is securely connected to both the Mini PC and the monitor. Ensure the monitor is powered on and set to the correct input source. Try a different cable or monitor if possible. |
| Keyboard/Mouse not working | Check USB connections. Try different USB ports. For wireless devices, ensure batteries are charged and the receiver is properly connected. |
| No internet connection | For Wi-Fi, check network settings in Windows and ensure you are connected to the correct network with the right password. For Ethernet, ensure the cable is properly connected to both the Mini PC and the router/modem. Restart your router/modem. |
| System is slow or unresponsive | Close unnecessary applications. Check Task Manager for processes consuming high CPU or memory. Ensure Windows and drivers are up to date. Consider running a disk cleanup. |
8. Specifications
Detailed technical specifications for the DreamQuest Mini PC N95.
| Feature | Detail |
|---|---|
| Processor | 12th Gen Intel Alder Lake N95 (up to 3.4GHz) |
| Operating System | Windows 11 Pro (Pre-installed), Supports Linux, PXE, Ubuntu |
| Memory | 12GB DDR5 |
| Storage | 512GB M.2 2280 SSD (Expandable up to 2TB) |
| Graphics | Intel UHD Graphics |
| Video Output | 2x HDMI, 2x USB-C (Supports 4K@60Hz Triple Display) |
| USB Ports | 4x USB 3.2, 2x Full-Function USB-C |
| Networking | Wi-Fi 6, Bluetooth 5.3, Gigabit Ethernet (1000Mbps) |
| Audio | 3.5mm Audio Jack |
| Dimensions | Approximately 5.5 x 2.3 x 0.9 inches (145mm x 60mm x 22mm) |
| Weight | Approximately 14.4 ounces (0.9 lbs) |
| Special Features | Wake On LAN, RTC Wake, Auto Power On, PXE Boot |
9. Warranty and Support
The DreamQuest Mini PC N95 comes with a 1-year warranty. For warranty service or technical support, please follow these steps:
- Log in to your Amazon account.
- Navigate to 'My Orders'.
- Locate the order ID for your DreamQuest Mini PC.
- Click 'Contact Seller' to reach DreamQuest customer support.
Our support team is available to assist you with any questions or issues you may have.
Related documentsMini PC


Ask a question about this manual
Ask about setup, troubleshooting, compatibility, parts, safety, or missing instructions. Manuals+ will review the question and use this page’s manual context to help answer it.