Introduction
Thank you for choosing the ONBRILL 30 Inch Floating Bathroom Vanity with Sink Combo. This manual provides essential information for the safe and efficient installation, operation, and maintenance of your new bathroom vanity. Please read all instructions carefully before assembly and use.
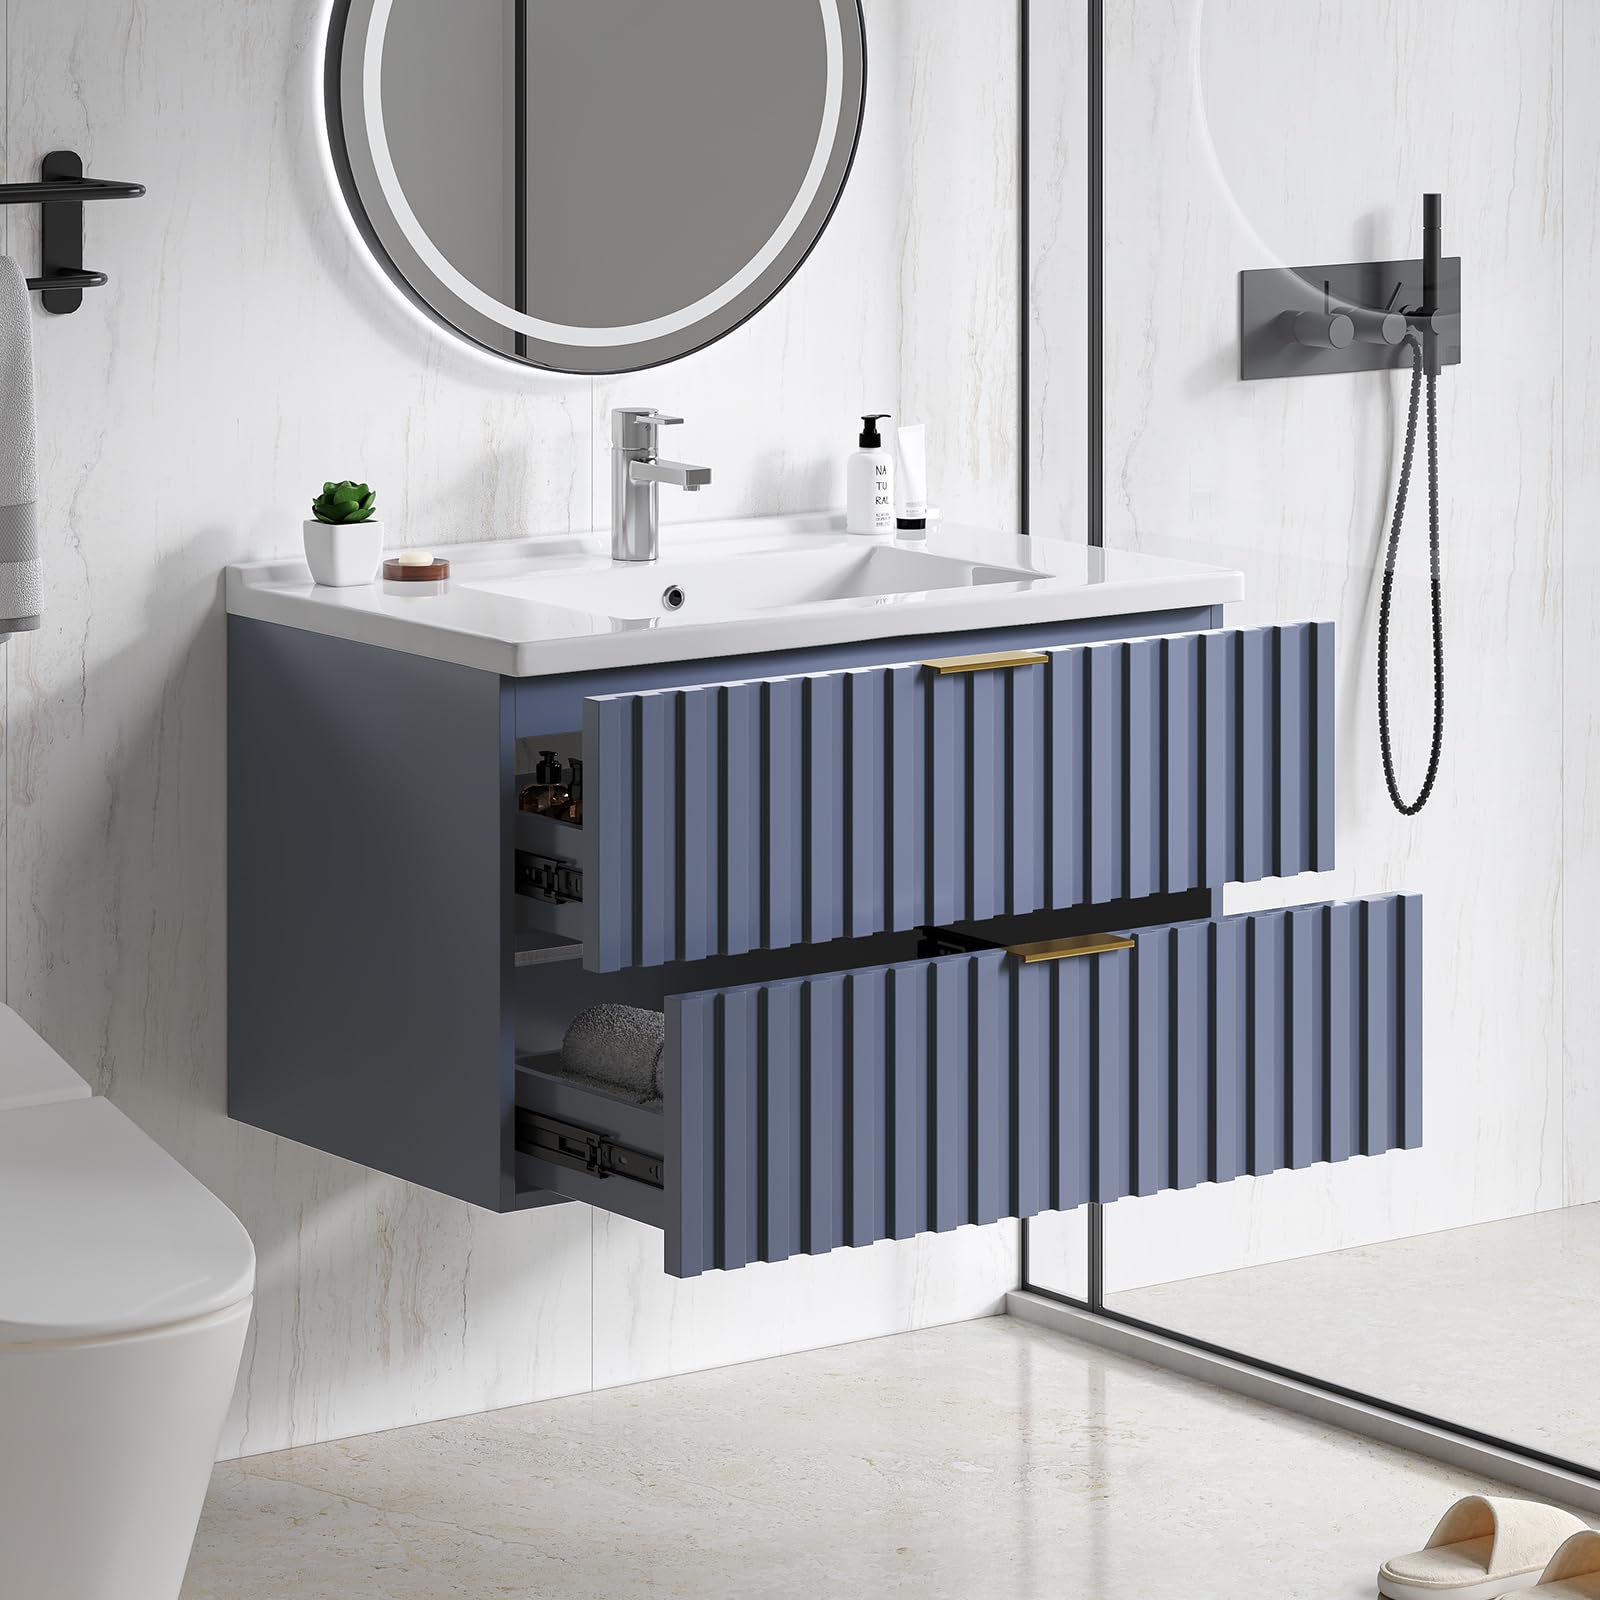
Image: ONBRILL 30 Inch Floating Bathroom Vanity with Sink Combo, showcasing its modern design and integrated sink.
Key Features:
- 30" Bathroom Vanity with Storage Drawer: Offers ample storage space with two fluted drawers for bathroom essentials.
- Quiet Soft-Closing Slide Rail: Automatically slows closing speed, reducing noise and preventing finger pinching.
- Ceramic Integrated Sink: Wall-mounted design with impact-resistant ceramic, ensuring durability and easy cleaning.
- Stable Construction: Comprising MDF and engineered wood with a paint surface for long-term use in humid environments.
- Modern Floating Design: Wall-mounted to save space and reduce water splashing, with a moisture-proof finish for easy maintenance.
Safety Information
Please observe the following safety precautions during assembly and use:
- Always ensure the vanity is securely mounted to a sturdy wall structure to prevent tipping.
- Use appropriate tools and follow all assembly steps carefully.
- Keep small parts and hardware away from children to prevent choking hazards.
- Do not overload drawers or shelves beyond their recommended weight capacity.
- Avoid using harsh chemicals or abrasive cleaners that may damage the vanity's finish or sink material.
Specifications
| Brand | ONBRILL |
| Model Name | ON-YS01 |
| Product Dimensions | 18.1"D x 30"W x 18.5"H |
| Item Weight | 70 Pounds |
| Material | Engineered Wood (MDF) |
| Top Material Type | Ceramic |
| Mounting Type | Wall Mount |
| Number of Drawers | 2 |
| Handle Material | Metal (Gold Hardware) |
| Finish Type | Glossy |

Image: Detailed dimensions of the ONBRILL 30 Inch Floating Bathroom Vanity.
Setup & Installation
For your convenience, all components and hardware for the bathroom cabinet are shipped in one box. Each part is marked, and pre-drilled holes allow for a seamless, step-by-step installation process. Two adults can easily complete the installation within one hour by following the clear instructions.
Installation Video Guide:
Video: Step-by-step guide on how to install the ONBRILL Bathroom Vanity. This video demonstrates the assembly process from start to finish.
Step-by-Step Assembly:
- Assemble the Side Panels: Attach the side panels to the base using the provided screws (A x18). Ensure all connections are secure.
- Connect Back Panel: Secure the back panel (part 4) to the assembled base using cam locks (B x2) and dowels (C x2).
- Attach Vertical Supports: Install the vertical support panels (parts 3, 5, 16) to the base using cam locks (B x5) and dowels (C x4).
- Complete Cabinet Frame: Attach the remaining side panels and top panel (part 2) to form the complete cabinet frame using cam locks (B x9) and dowels (C x8).
- Assemble Drawer Boxes: Construct the two drawer boxes by screwing the sides together (D x16 for each drawer).
- Attach Drawer Fronts & Handles: Secure the fluted drawer fronts (part 6) to the drawer boxes using cam locks (B x8 for each drawer) and attach the metal handles (F x2) with screws (E x4).
- Mount Wall Brackets: Drill holes in the wall according to the vanity's dimensions and secure the wall mounting brackets (H x2) using wall plugs (G x6) and screws (J x4).
- Hang the Vanity Cabinet: Carefully lift and hang the assembled vanity cabinet onto the wall mounting brackets. Secure it in place with additional screws (J x2) and washers (I x2).
- Install Drawers: Slide the assembled drawers into the cabinet's soft-closing slide rails.
- Place the Sink Top: Carefully lower the ceramic integrated sink (part 15) onto the vanity cabinet. Apply caulk around the edges for a watertight seal. Wipe away any excess caulk with a soft cloth and allow approximately 24 hours for it to dry.

Image: Screwing in fasteners to secure the side panels.

Image: Assembling the back panel with cam locks and dowels.

Image: Securing the vertical support panels to the vanity base.

Image: The cabinet frame fully assembled.

Image: Assembling the individual drawer components.

Image: Attaching the fluted drawer front and gold metal handle to a drawer box.

Image: Drilling pilot holes and securing wall mounting brackets.

Image: Hanging the vanity cabinet onto the pre-installed wall brackets.

Image: Sliding the drawers into the vanity cabinet.

Image: Carefully placing the ceramic sink top onto the vanity cabinet.
WARNING: Vanity MUST be secured to the wall. At this stage, it may be easier to install the faucet and drain kit (not included) to the top (15) per the manufacturer's instructions before placing it on the vanity.
Operating Instructions
Drawers:
The vanity features two fluted drawers equipped with soft-closing slide rails. To open, gently pull the gold metal handles. To close, push the drawers inward; the soft-closing mechanism will engage to ensure a quiet and smooth closure, preventing slamming.
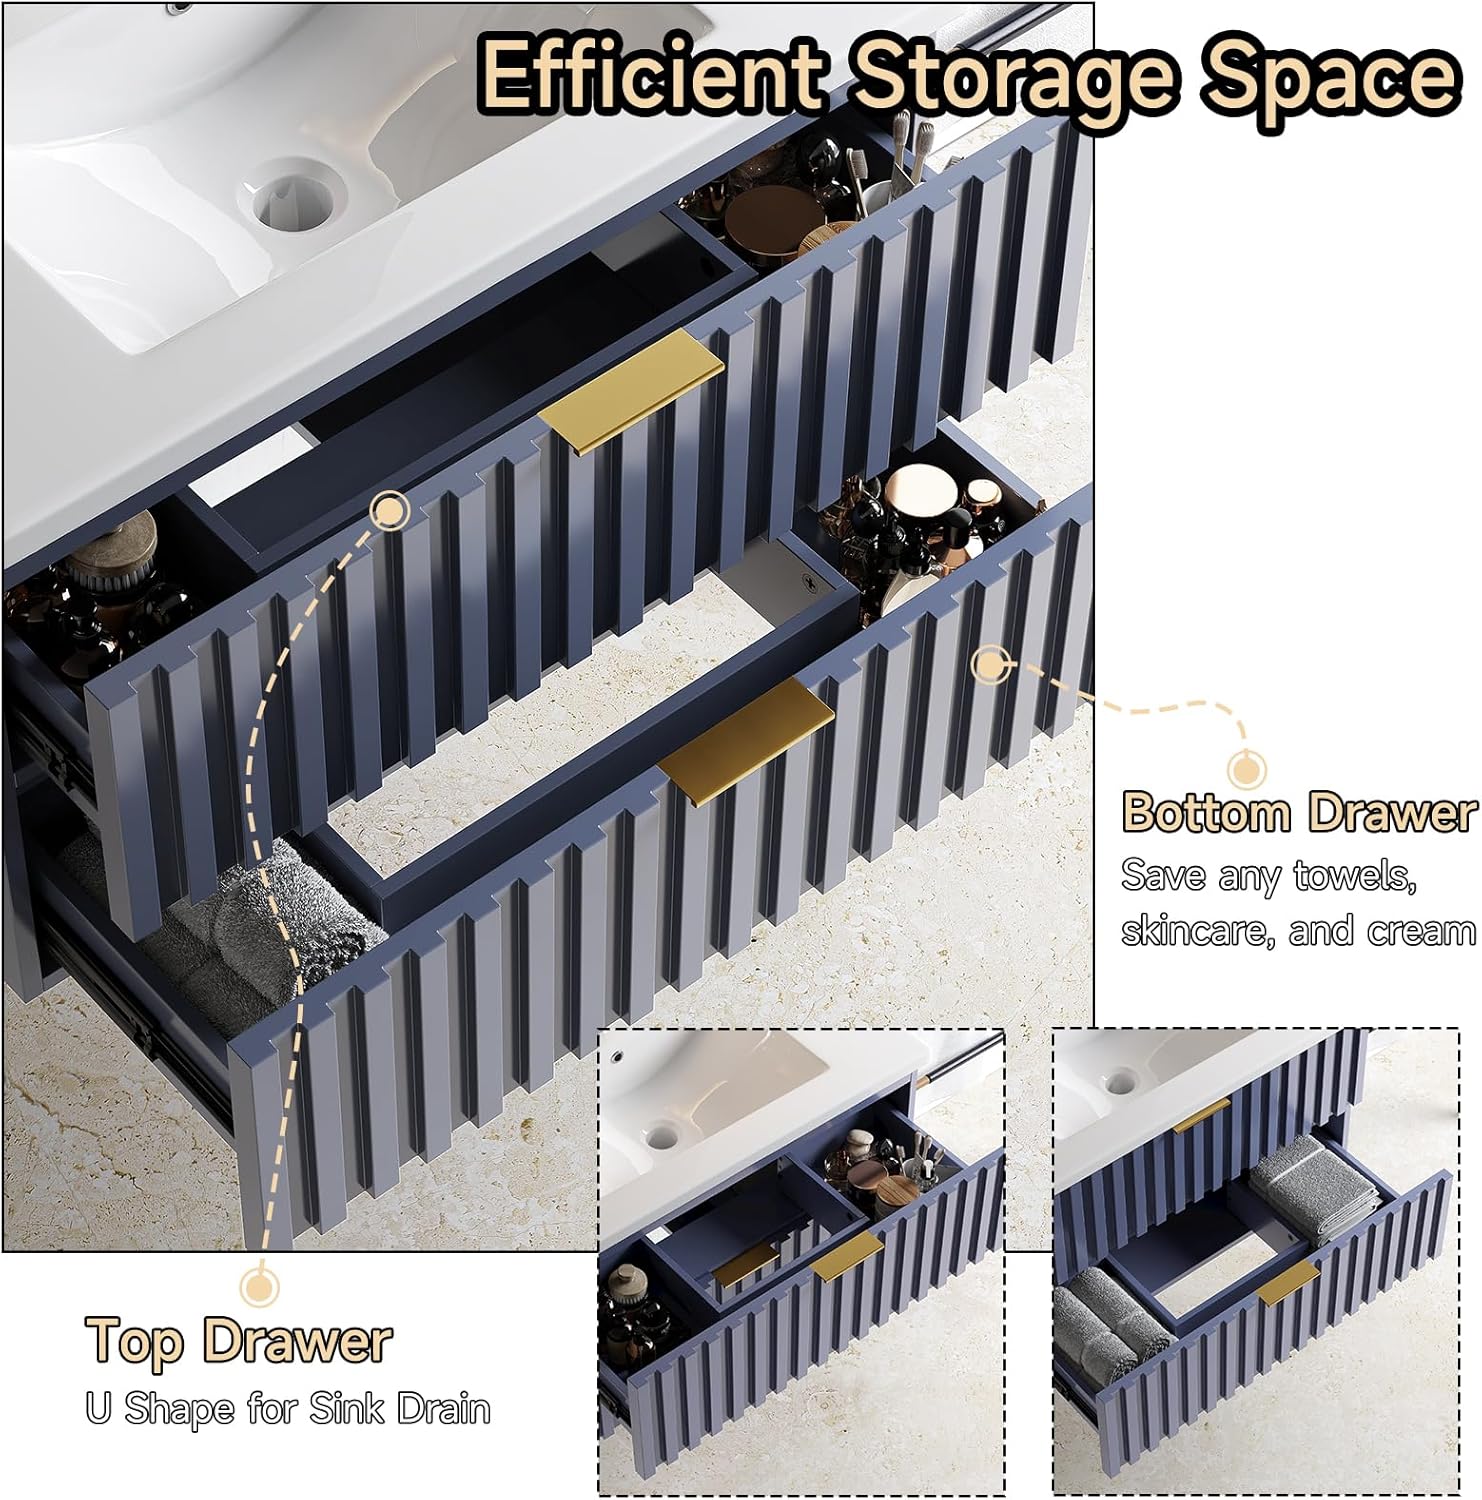
Image: The efficient storage space within the vanity drawers, including a U-shape cutout for the sink drain in the top drawer.
Integrated Ceramic Sink:
The ceramic integrated sink is designed for daily use. It includes a pre-drilled faucet hole (faucet not included) and an anti-spill overflow drain to prevent water from overflowing. The smooth, rounded edges enhance safety and ease of cleaning.
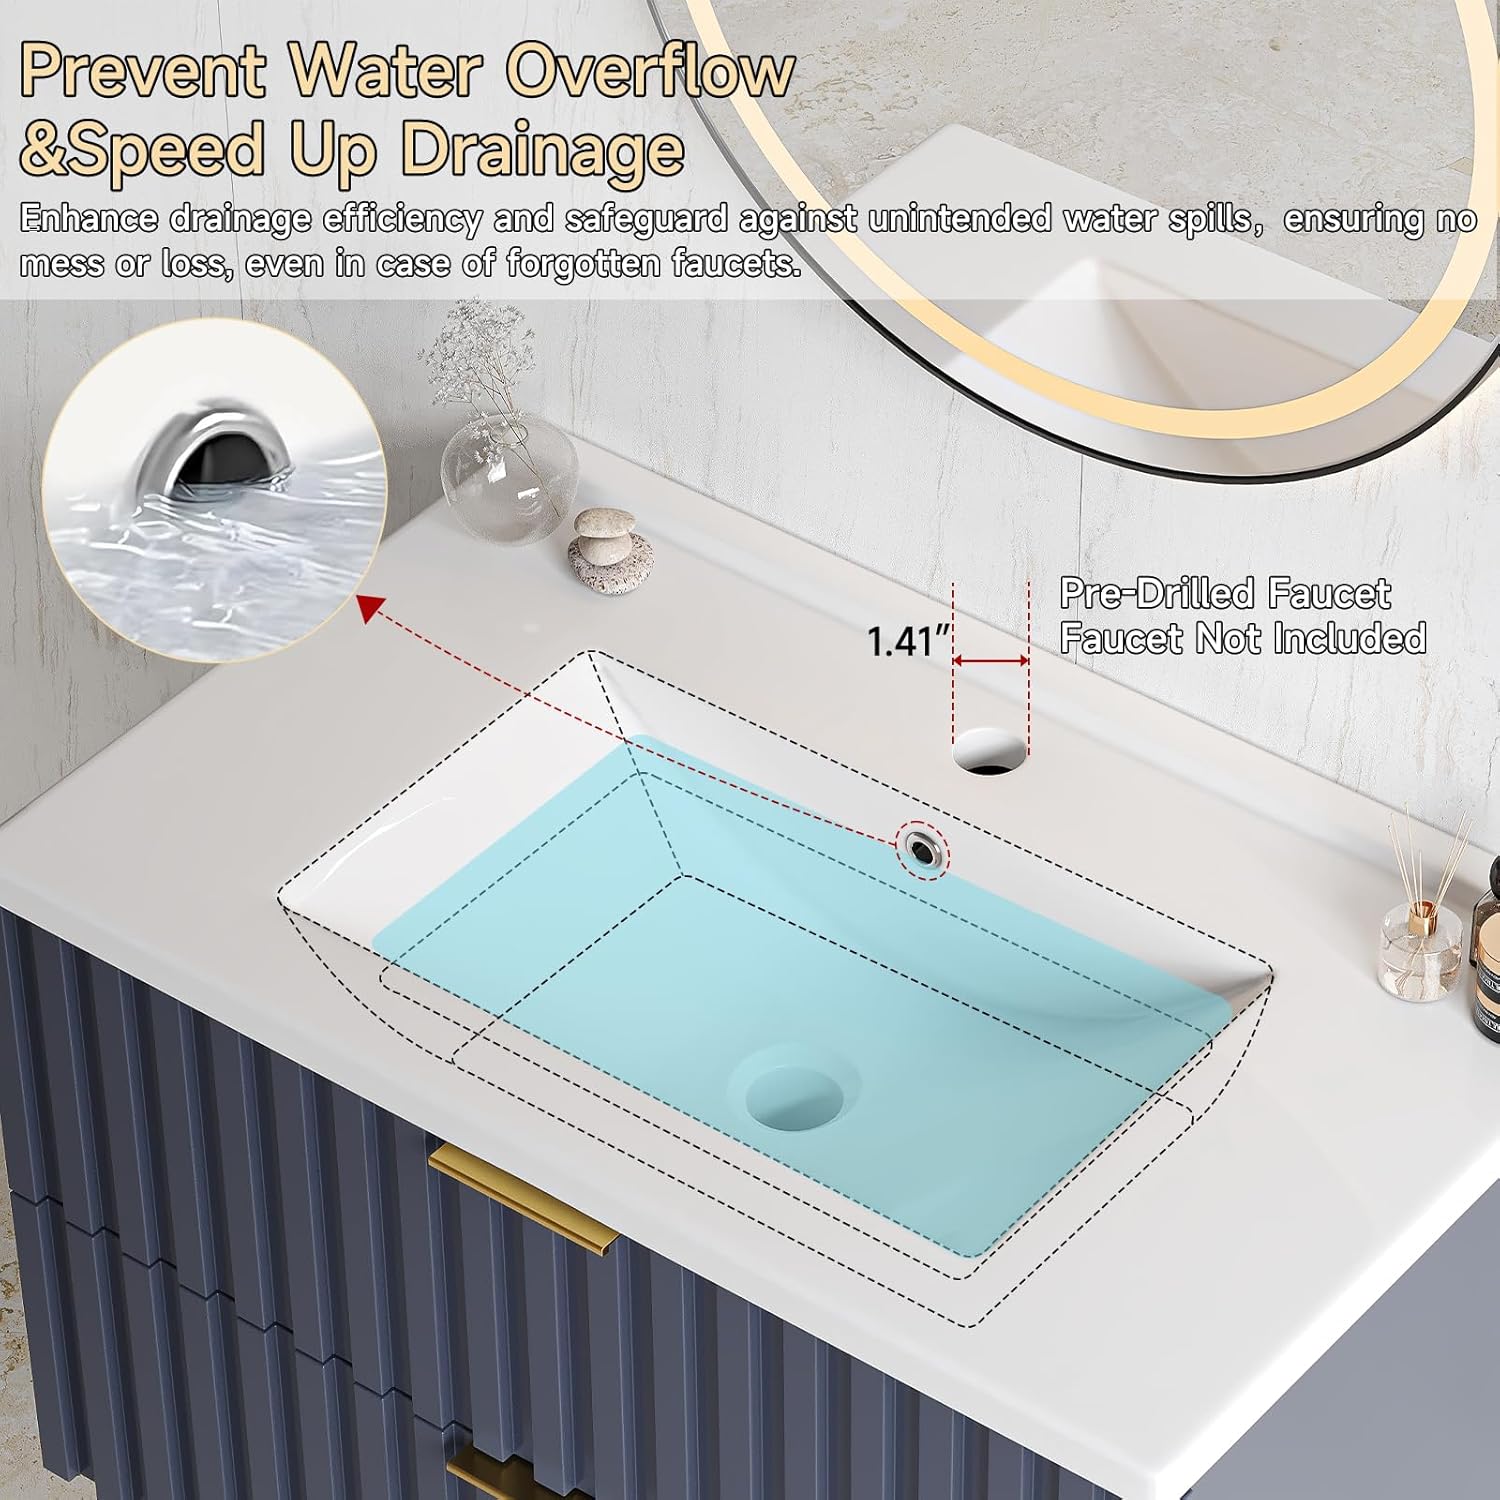
Image: Close-up of the sink's anti-spill hole and pre-drilled faucet hole, highlighting the drainage system.
Maintenance & Care
Proper care will ensure the longevity and appearance of your ONBRILL bathroom vanity:
- Cleaning the Cabinet: The cabinet's painted surface is moisture-proof and easy to clean. Simply wipe down with a damp cloth and mild soap. Avoid abrasive cleaners or harsh chemicals that could damage the finish.
- Cleaning the Sink: The ceramic integrated sink is designed for easy maintenance. Use a soft cloth and non-abrasive cleaner to keep it sparkling. Rinse thoroughly after cleaning.
- Hardware Care: The gold metal handles can be cleaned with a soft, dry cloth. Avoid using chemical cleaners on metal hardware.
- Preventing Water Damage: Although moisture-proof, promptly wipe up any standing water on the vanity surface to prevent potential damage over time.

Image: Close-up of the integrated ceramic sink, emphasizing its easy-to-clean surface and plumbing access hole.
Troubleshooting
If you encounter any issues with your vanity, please refer to the following common solutions:
- Drawers not closing smoothly: Check if the soft-closing slide rails are properly aligned and free of obstructions. Ensure all screws securing the rails are tightened.
- Drawers not closing flush: This can sometimes occur if the drawer slides are not perfectly aligned or if the cam lock fasteners are not fully tightened. Re-check the assembly of the drawer box and its connection to the cabinet.
- Wobbly cabinet: Ensure the wall mounting brackets are securely fastened to a solid wall structure. Verify that all cam locks and dowels within the cabinet frame are fully tightened.
- Water leakage from sink: Check all plumbing connections for tightness. Ensure caulk around the sink is properly applied and fully cured.
For persistent issues or concerns not addressed here, please contact ONBRILL customer support.
Warranty & Support
ONBRILL is committed to providing high-quality products. For information regarding product warranty, returns, or technical support, please refer to your purchase documentation or contact ONBRILL customer service directly. Keep your proof of purchase for any warranty claims.

