1. Introduction
This manual provides detailed instructions for the installation, operation, and maintenance of your Anweller MD168BC Keyless Entry Door Lock. Please read this manual thoroughly before installation and use to ensure proper function and safety.

Image: Anweller MD168BC Integrated Door Handle Set, highlighting features like passcode, app, RFID, key, emergency power, auto-lock, passage mode, and IP54 waterproof rating.
2. Safety Information
- Ensure all components are present and undamaged before installation.
- Do not attempt to disassemble or modify the lock, as this may void the warranty and compromise security.
- Keep mechanical keys in a safe place outside your home.
- Replace batteries promptly when the low battery indicator appears.
- Use only specified battery types (4 AA Alkaline batteries).
3. Package Contents
Verify that all the following items are included in your package:
- 1 x Deadbolt Lock and Knob Handle Set (All Parts)
- 1 x User Manual
- 2 x Mechanical Keys
- 2 x RFID Cards
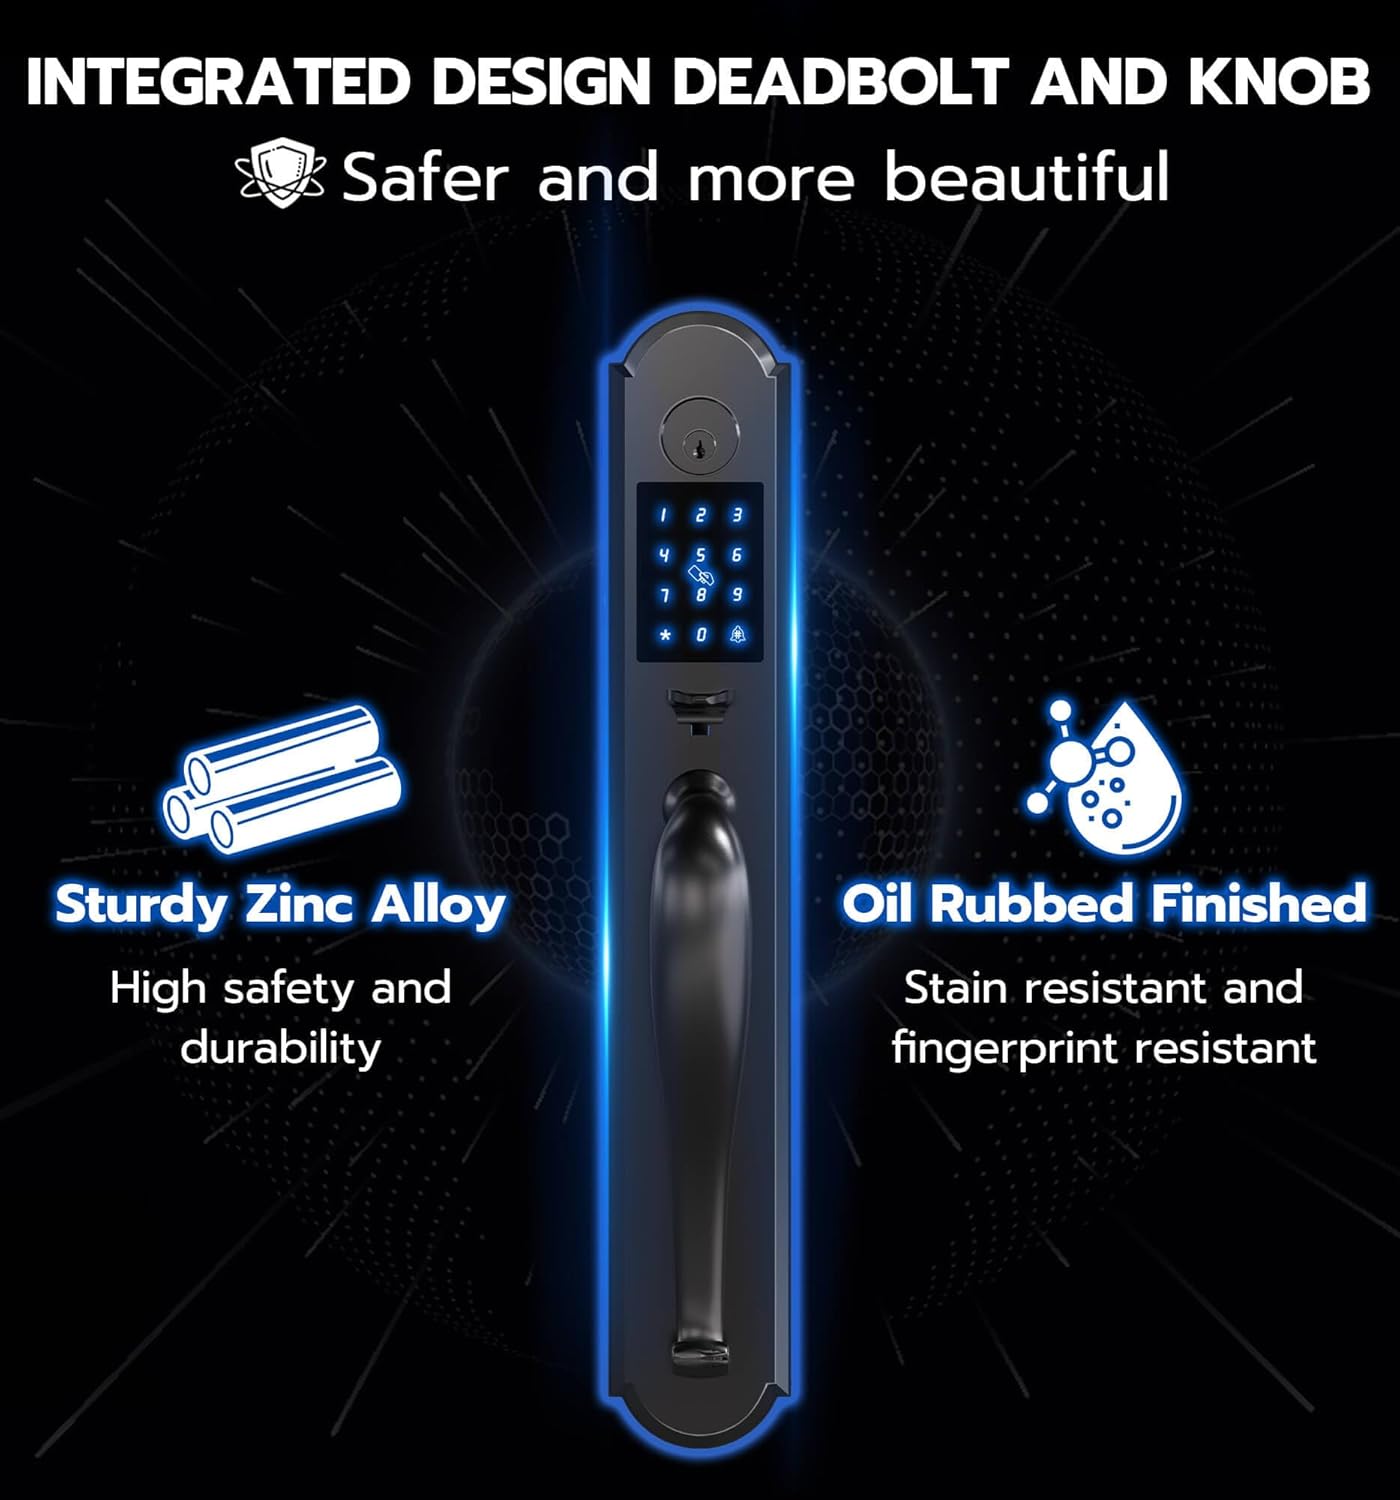
Image: Overview of all components included in the Anweller MD168BC Keyless Entry Door Lock package.
4. Installation Guide
Before beginning installation, ensure your door meets the following specifications:
- Door thickness: 1-3/8" to 2-1/8" (35mm to 55mm)
- Backset: 2-3/8" or 2-3/4" (60mm or 70mm)
- Distance between 2 door holes: 5-1/2" (140mm)
- Hole Diameter: > 1-17/20" (47mm)
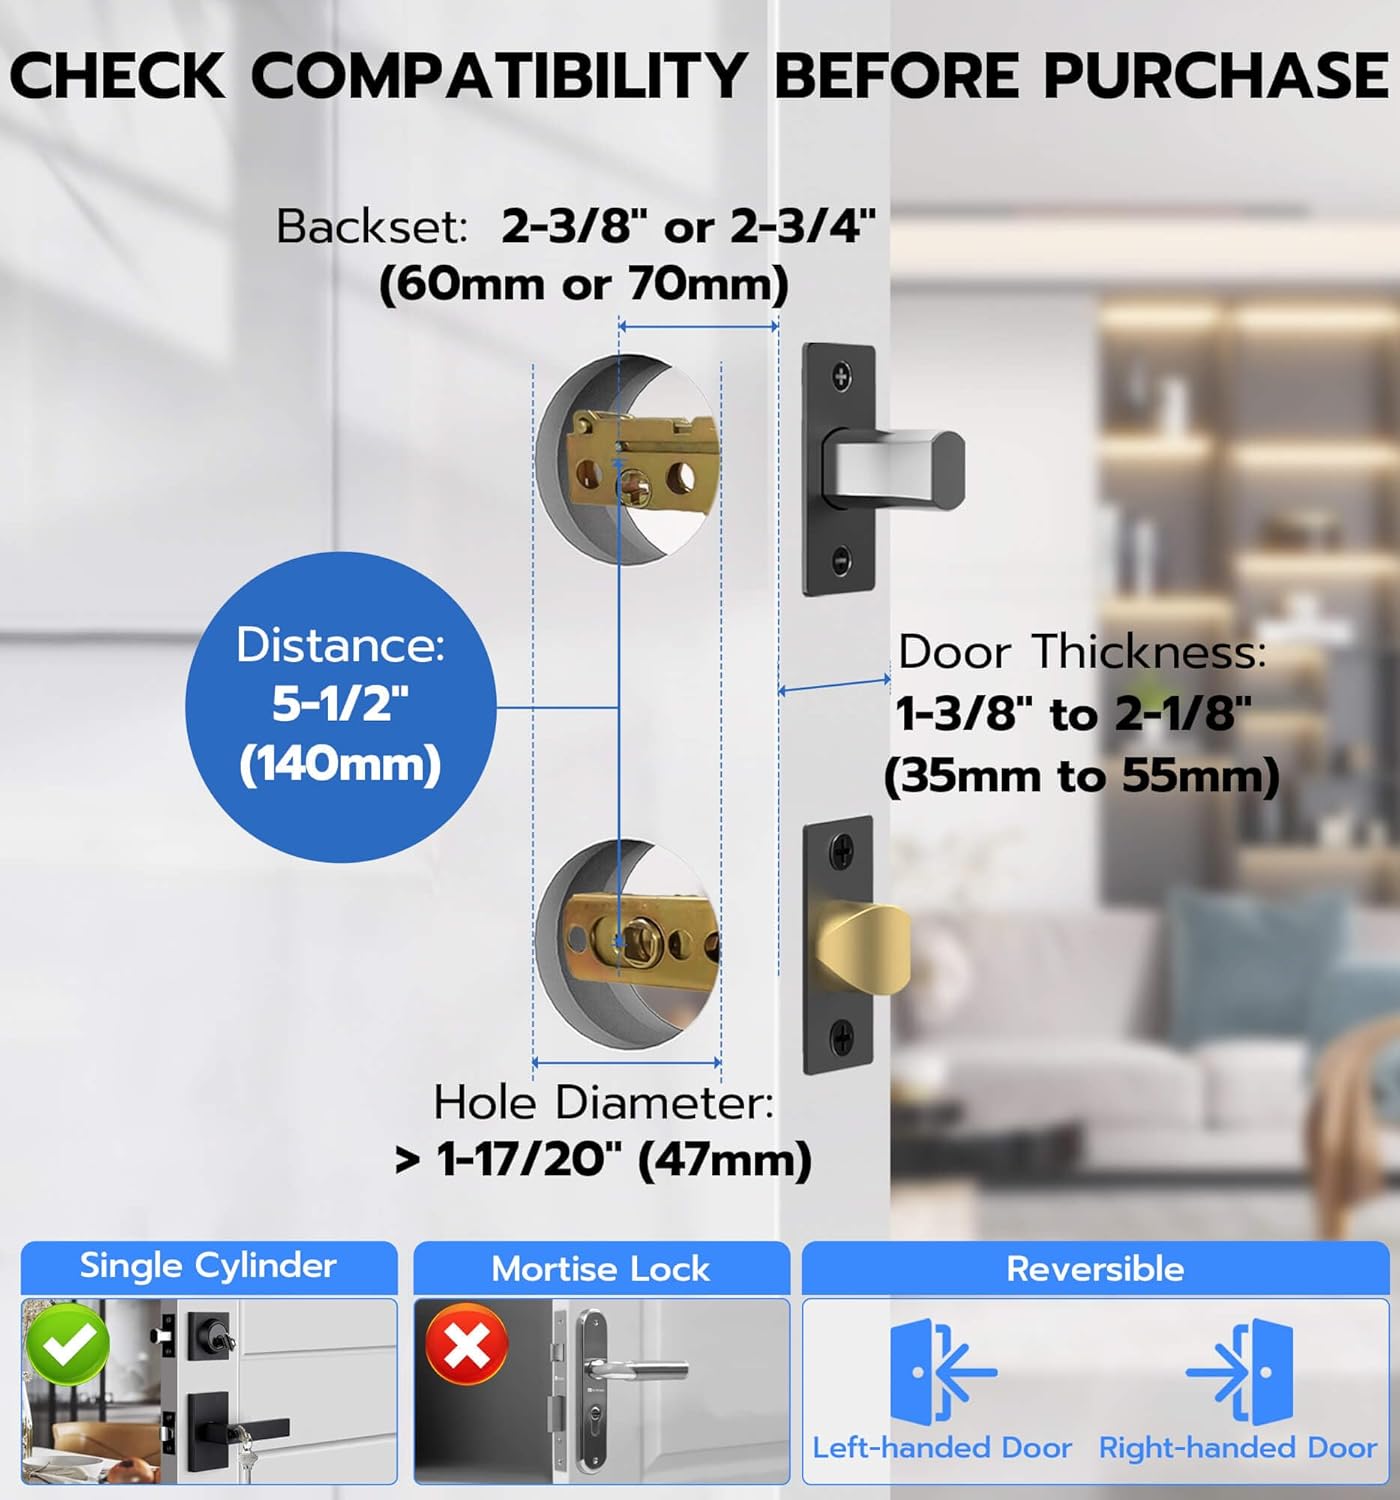
Image: Door compatibility measurements for Anweller MD168BC lock.
Installation Video
Video: Official installation guide for the Anweller MD168BC Keyless Entry Door Lock. This video demonstrates each step of the installation process, from preparing the door to securing the lock components.
Step-by-Step Installation
- Install Closed Bolt and Latch Bolt:
Measure your door's thickness and lock body distance. If the lock body distance is 70mm, adjust the closed bolt by turning it 3/4. Align the door hole and insert the closed bolt, ensuring the 'UP' marking is at the top. Secure with screw 2. Repeat for the latch bolt.
Image: Installing the closed bolt.
- Install Front Panel Studs:
Insert the studs into the front panel and tighten them with pliers to secure.
Image: Installing front panel studs.
- Install Front Panel:
Pass the front panel power cord under the closed bolt and through the door hole. Rotate the lock ruler to a horizontal position. Align the lock ruler and square rod with the center of the closing bolt and latch bolt, then buckle them up.
Image: Installing the front panel.
- Install Rear Base Plate:
After installing the base plate rubber gasket (arrow points up), press the edge buckle. Pass the power cord through the rear chassis and secure it with screw 1.
Image: Installing the rear base plate.
- Adjust Front and Rear Panels:
Ensure the front and rear panels are vertically aligned. Tighten the screws again to secure the alignment.
Image: Adjusting front and rear panels.
- Install Square Pole:
Insert the spring into the square rod, then put the square rod into the latch bolt core hole.
Image: Installing the square pole.
- Remove Rear Lock Battery Box Cover:
Press the groove on the top of the rear panel to remove the battery cover.
Image: Removing battery box cover.
- Test Lock Sensitivity:
Use pliers to hold the lock ruler. Twist to the right to lock, and to the left to unlock. Check for smooth rotation.
Image: Testing lock sensitivity.
- Install Rear Panel:
Connect the front lock power cord (note the front and back of the connector). Turn the locking knob from horizontal to vertical. Align the lock ruler and square rod, then install the rear panel. Tighten the rear lock No. 3 fixing screw.
Image: Connecting power cord for rear panel installation.
- Install Battery:
Insert 4 AA alkaline batteries into the battery compartment. Close the battery cover.
Image: Installing batteries.
- Install Meson:
Install the meson and tighten the meson screws.
Image: Installing meson.
5. Operating Instructions
The Anweller MD168BC offers four convenient ways to unlock your door:
- Passcode: Enter your programmed digital code on the keypad.
- Mobile App: Use the dedicated mobile application for remote unlocking and management.
- RFID Card: Tap the provided RFID card to the lock for quick access.
- Spare Key: Use the mechanical key as a traditional backup.
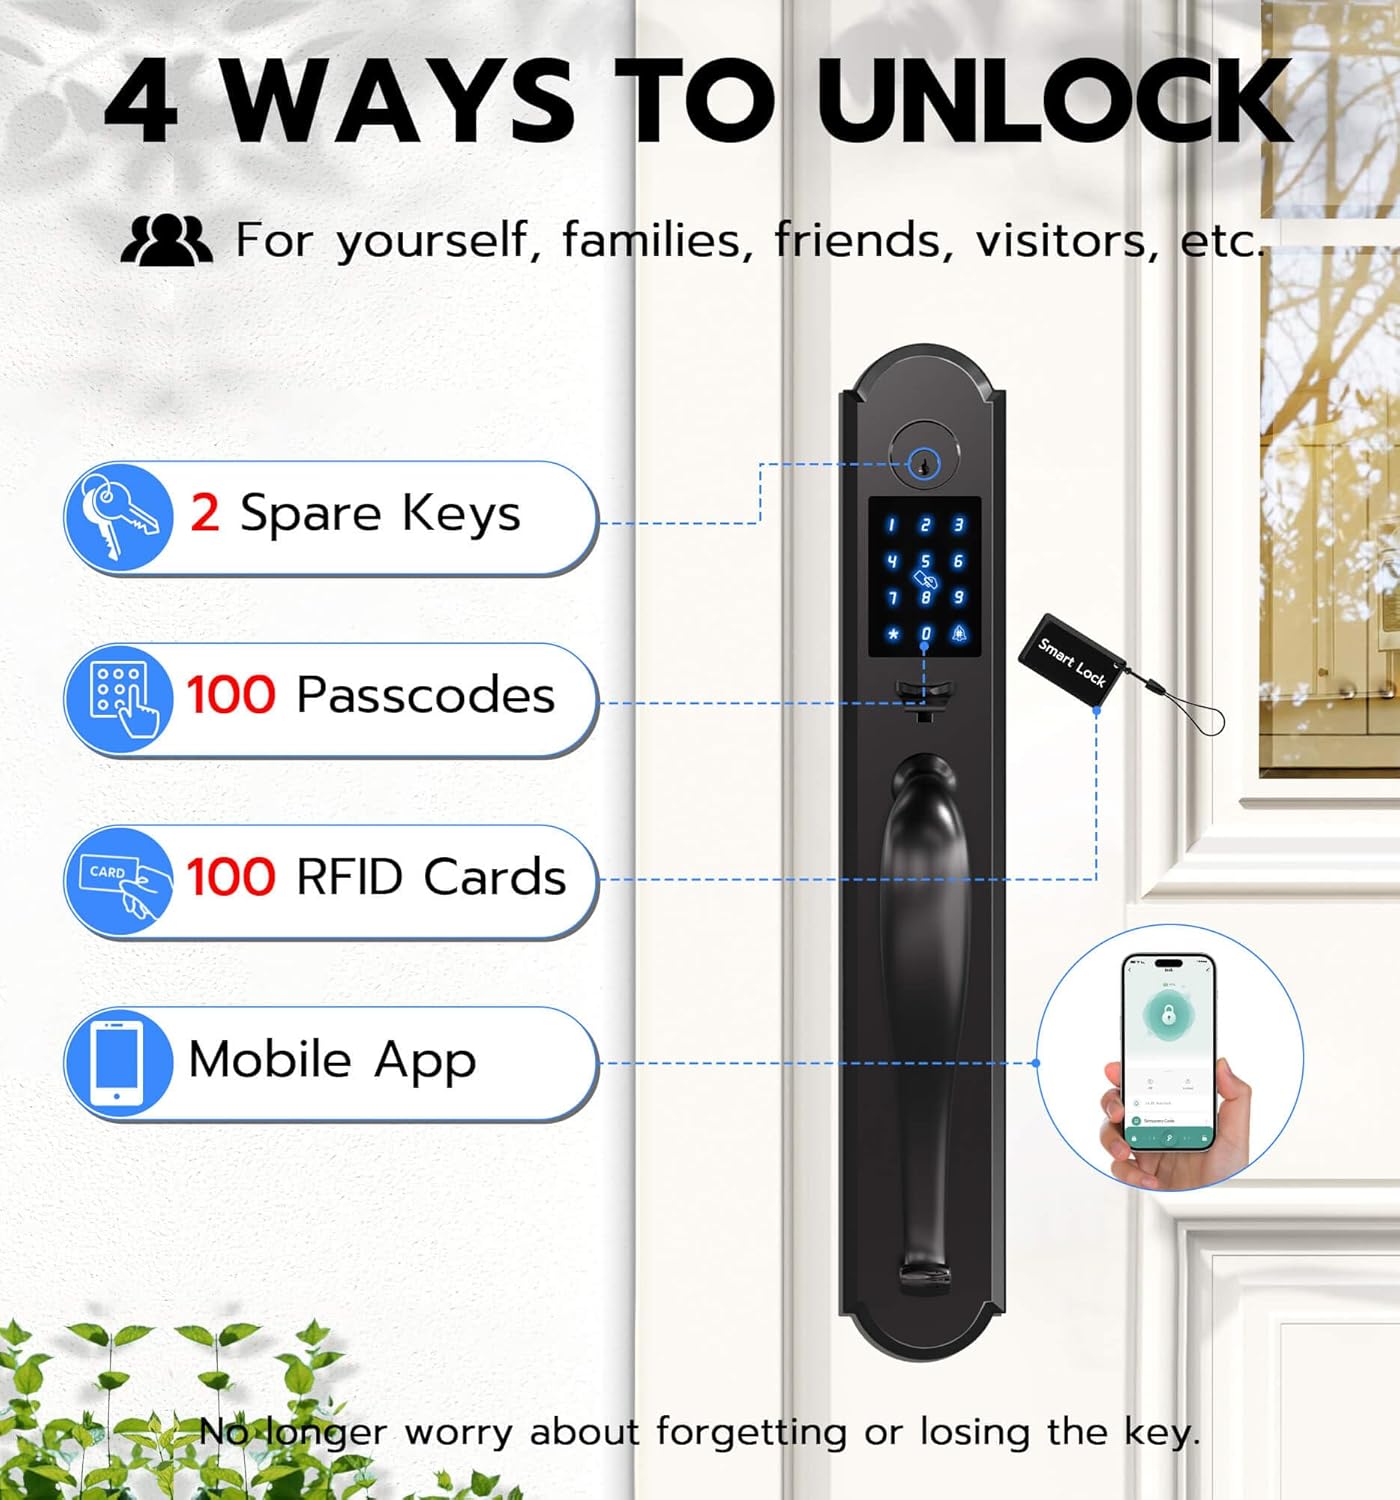
Image: Four unlocking methods for the Anweller MD168BC lock.
Key Features:
- Anti-Peeping Passcode: Enter random digits before or after your actual passcode to prevent others from guessing your code.
- Auto Lock: The lock can be set to automatically lock after a specified period.
- Passage Mode: Temporarily disable auto-lock for continuous access, ideal for gatherings.
- Multiple PIN Code Types: Create admin codes, permanent codes, custom codes, one-time codes, recurring codes, and timed codes for various users.
- Mobile App Control: Setup/delete passcodes, program/delete RFID cards, receive real-time unlocking reminders, check lock status and battery level.
6. Maintenance
Battery Replacement:
The lock requires 4 AA alkaline batteries. The low power consumption design ensures approximately 180 days of battery life. The lock will provide a low battery reminder. In case of complete battery depletion, a power bank can be used for emergency power via the USB-C port.

Image: Battery compartment and battery life information.
Cleaning:
Wipe the lock surface with a soft, damp cloth. Avoid using abrasive cleaners or solvents that could damage the finish.
7. Troubleshooting
- Lock not responding: Check battery levels and replace if necessary. Ensure the power cord connections are secure.
- Invalid entry alarm: The lock will shut down for 3 minutes after 5 invalid entry codes or RFIDs. Wait for the lockout period to end.
- Difficulty with installation: Refer to the installation video and step-by-step guide. Ensure all measurements and alignments are correct.
- Lock not engaging/disengaging smoothly: Check for any obstructions in the door frame or latch mechanism. Ensure the square pole is correctly installed.
8. Specifications
| Feature | Detail |
|---|---|
| Model Number | MD168BC |
| Material | Zinc |
| Color | Black |
| Exterior Finish | Black |
| Lock Type | Deadbolt Lock, Keypad Lock, Pin Code, RFID |
| Unlocking Ways | Passcode, Mobile App, RFID Card, Spare Key |
| Power Source | 4 AA batteries (not included) |
| Emergency Power | USB-C |
| Battery Life | Approx. 180 days standby time |
| Waterproof Rating | IP54 |
| Product Dimensions | 19.3 x 3.1 x 3.3 inches |
| Item Weight | 8.8 Pounds |
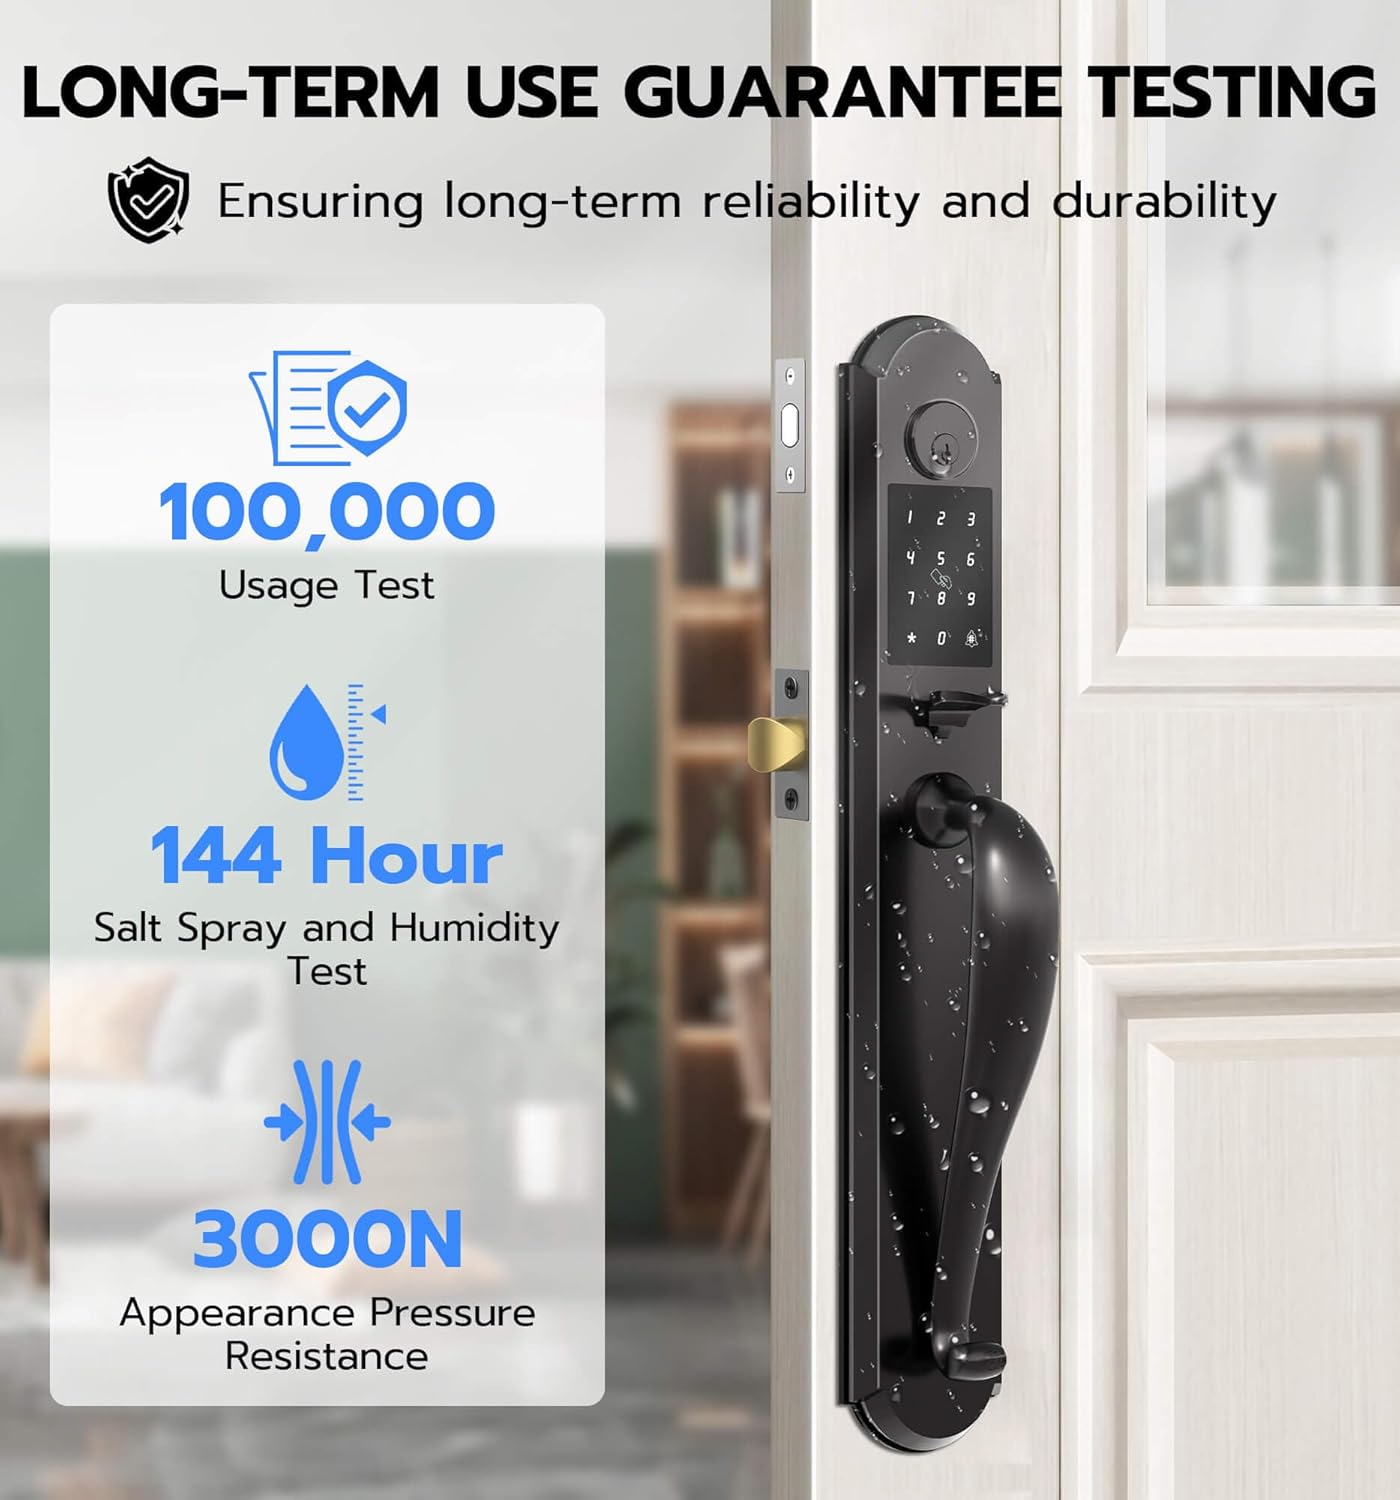
Image: Durability testing details for the Anweller MD168BC lock.
9. Warranty and Support
Anweller provides a 12-month warranty for this product. Additionally, free lifetime technical support is available. For any queries, replacements, or refunds within the warranty period, please contact us via email.
Email: hongjdzwj@outlook.com
