
1. Introduction
Thank you for choosing the Aquonderful Model 225 Smart Bidet Toilet Seat. This manual provides essential information for the safe and efficient installation, operation, and maintenance of your new bidet toilet seat. Please read this manual thoroughly before installation and retain it for future reference.
Safety Information
- Ensure all electrical connections comply with local codes. A grounded electrical outlet is required.
- Turn off the water supply before beginning installation.
- Do not attempt to disassemble or repair the unit yourself. Contact qualified service personnel.
- This product is designed for household use only.
2. Package Contents
Verify that all components are present before installation:
- Aquonderful Model 225 Smart Bidet Toilet Seat
- Wireless Remote Control
- Mounting Plate and Hardware (bolts, nuts, washers)
- T-Valve for Water Connection
- Water Supply Hose
- Pipe Thread Tape
- User Manual (this document)
3. Product Overview
The Aquonderful Model 225 Smart Bidet Toilet Seat offers advanced features for enhanced hygiene and comfort. Key features include:
- Unlimited Warm Water: Provides continuous warm water for washing.
- Adjustable Washes: Rear wash, front wash, and vortex wash with adjustable water pressure and nozzle position.
- Warm Air Drying: Adjustable warm air dryer to reduce toilet paper usage.
- Heated Toilet Seat: Provides comfort, especially in colder environments.
- LED Night Light: Illuminates the toilet bowl for nighttime use.
- Slow-Closing Lid: Prevents slamming and reduces noise.
- Stainless Steel Nozzle: Durable and hygienic.
- Wireless Remote Control: Easy access to all functions.
- Energy-Saving Mode: Optimizes power consumption.

Image: Aquonderful Model 225 Smart Bidet Toilet Seat with its wireless remote control, showcasing its sleek design and integrated features.
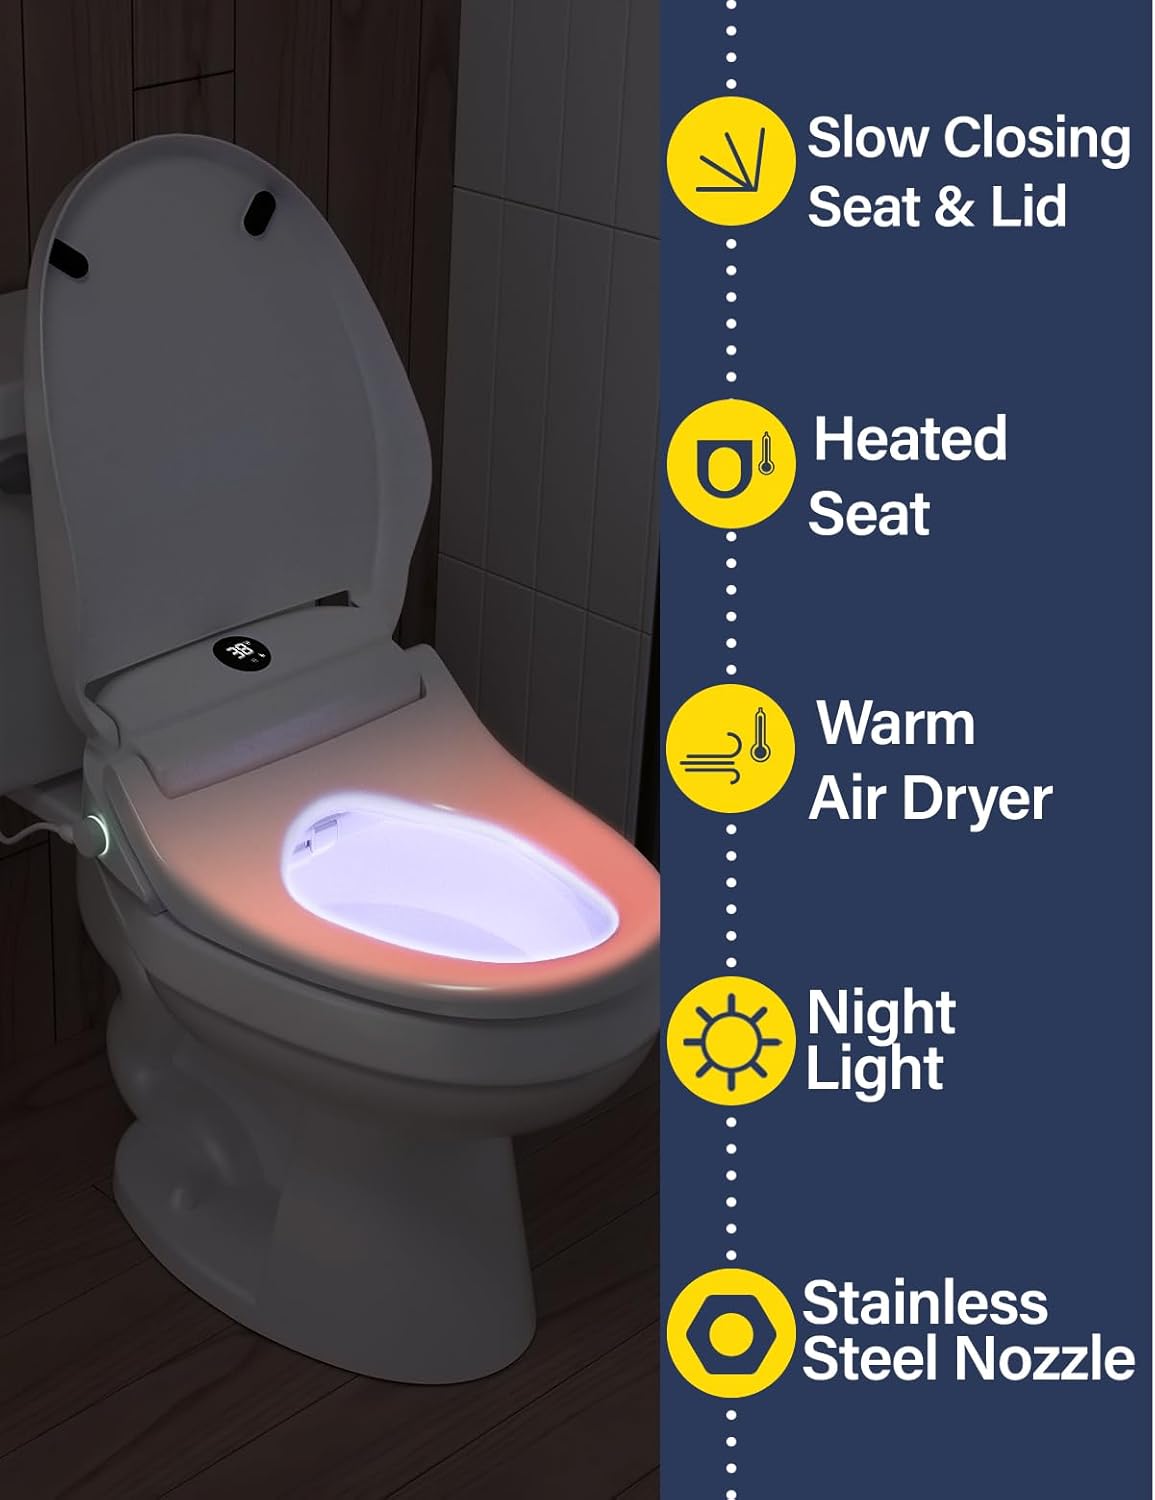
Image: Visual representation of the bidet seat's key features including slow closing, heated seat, warm air dryer, night light, and stainless steel nozzle.
4. Installation
Installation is designed to be straightforward. Follow these steps carefully. An electrical outlet near the toilet is required.
4.1 Toilet Fit Check
Ensure your toilet is compatible with the bidet seat. This model is designed for elongated toilets. Measure your toilet bowl from the center of the mounting holes to the front edge (B) and the distance between the mounting holes (C). Also, ensure there is at least 1 inch (25mm) clearance from the tank to the mounting holes (A).

Image: Diagram illustrating how to measure your toilet for proper bidet seat fit, showing dimensions for elongated and round shapes, and the requirement for an electrical outlet.
4.2 Step-by-Step Installation
- Remove Existing Toilet Seat: Lift the hinge covers and unscrew the bolts holding your current toilet seat. Remove the seat and lid.
- Install Mounting Plate: Place the bidet seat's mounting plate over the toilet's bolt holes. Insert the mounting bolts and tighten them to secure the plate.
- Attach Bidet Seat: Slide the Aquonderful bidet toilet seat onto the installed mounting plate until it clicks into place.
- Connect Water Supply:
- Turn off the main water supply to your toilet.
- Flush the toilet to drain the tank.
- Disconnect the existing water supply hose from the toilet tank.
- Install the provided T-valve to the toilet tank's fill valve. Apply pipe thread tape to ensure a watertight seal.
- Connect the original water supply hose to the bottom of the T-valve.
- Connect the bidet's water supply hose to the side of the T-valve and to the bidet seat's water inlet.
- Slowly turn the main water supply back on and check for leaks.
- Connect Power: Plug the bidet toilet seat's power cord into a grounded electrical outlet.
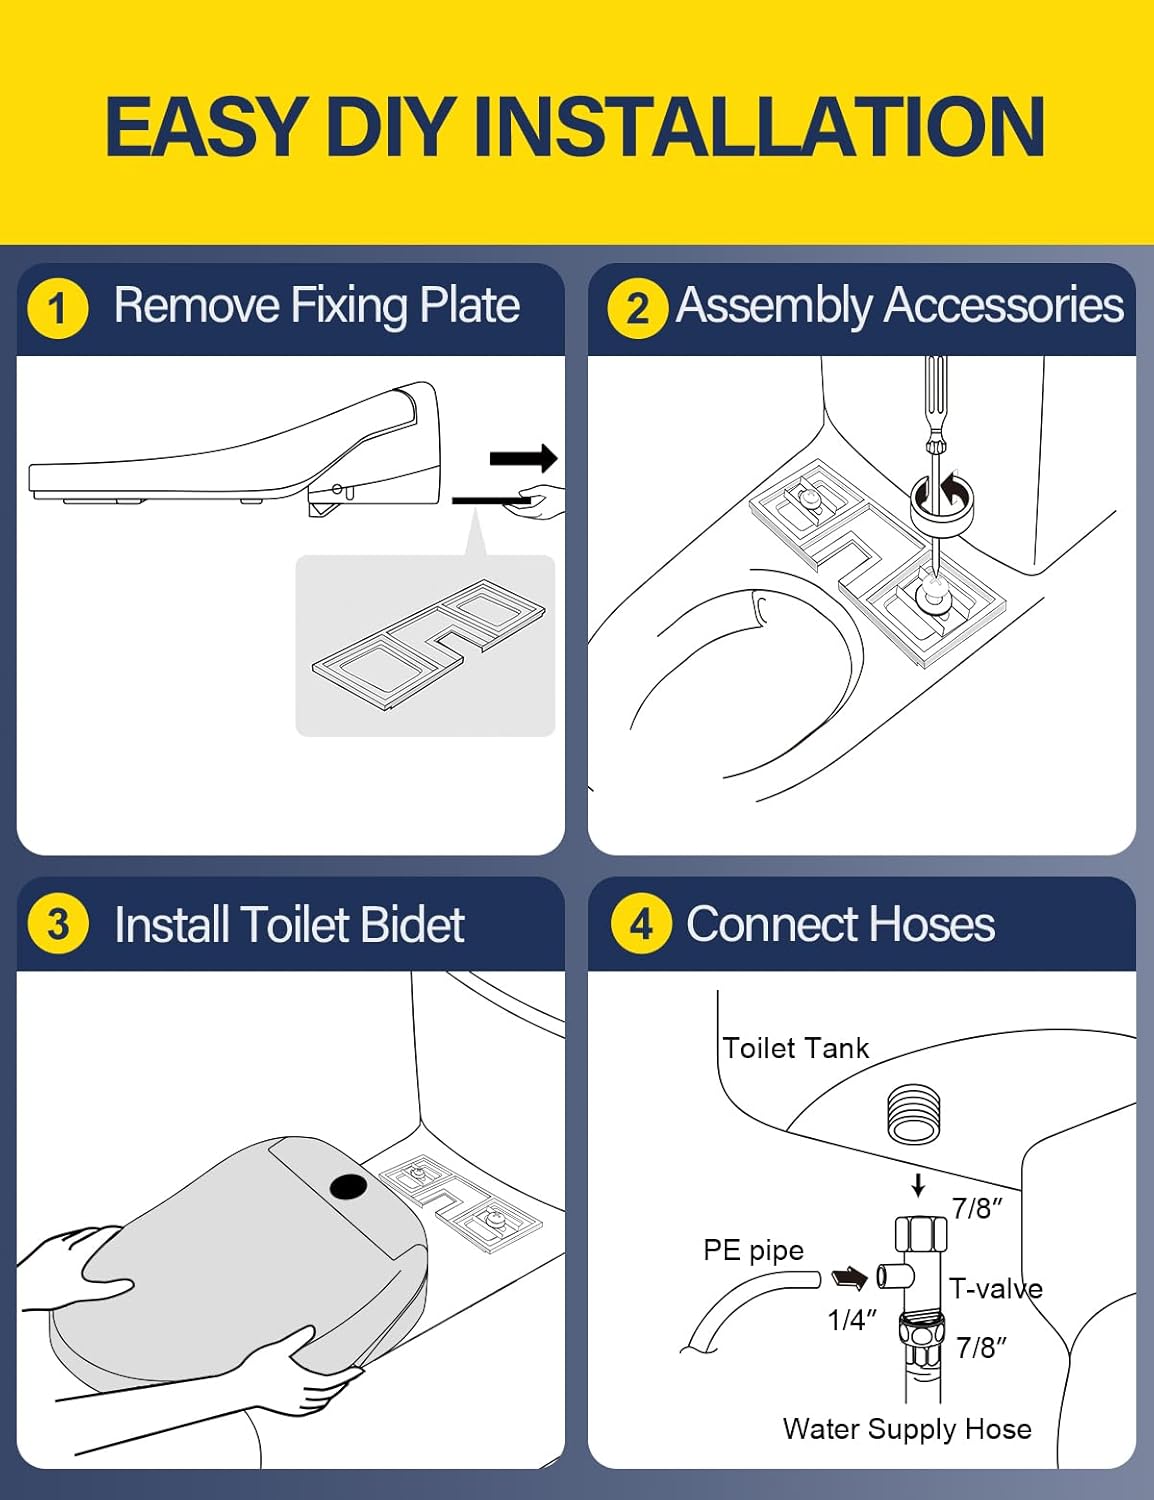
Image: Four-step visual guide for easy DIY installation, showing removal of fixing plate, assembly of accessories, installation of the bidet, and connection of hoses to the toilet tank.
Video: An installation and review video for the Aquonderful 225 Smart Bidet Toilet Seat, demonstrating the setup process and key features. This video is provided by the seller.
5. Operation
The Aquonderful Model 225 Smart Bidet Toilet Seat is operated primarily via its wireless remote control. A side control knob is also available for basic functions.
5.1 Remote Control Functions
The remote control allows for personalized settings:

Image: The wireless remote control for the Aquonderful bidet seat, displaying buttons for various functions such as rear wash, bidet wash, drying, water temperature, seat temperature, drying temperature, nozzle position, water pressure, and night light.
- Stop/Power: Turns the unit on/off or stops current operation.
- Rear Wash: Activates the rear cleansing function.
- Front Wash (Bidet Wash): Activates the feminine cleansing function.
- Turbo Wash: Provides a stronger, more focused wash.
- Drying: Activates the warm air dryer.
- Auto Mode: Initiates a pre-programmed wash and dry cycle.
- Kids Mode: Adjusts settings for children's use.
- Water Temp: Adjusts water temperature.
- Seat Temp: Adjusts heated seat temperature.
- Drying Temp: Adjusts warm air dryer temperature.
- Nozzle Position: Adjusts the nozzle's forward/backward position.
- Water Pressure: Adjusts the intensity of the water spray.
- Lighting: Toggles the night light on/off.
- ECO Mode: Activates energy-saving mode.
5.2 Sensor Operation
The bidet seat features a skin sensor. Washing functions will only activate when a user is seated on the bidet seat.

Image: Close-up view of the bidet nozzle extending and spraying water for effective cleansing.

Image: The bidet nozzle demonstrating oscillating movement for wider coverage and a self-cleaning function with water spray.
6. Maintenance
Regular cleaning and maintenance will ensure the longevity and hygienic performance of your bidet toilet seat.
6.1 Cleaning the Nozzle
- The nozzle performs a self-cleaning function before and after each use.
- For manual cleaning, refer to the remote control for a 'Nozzle Clean' or 'Nozzle Extend' function to expose the nozzle.
- Gently wipe the nozzle with a soft cloth or brush and a mild, non-abrasive cleaner. Do not use harsh chemicals.
6.2 Cleaning the Bidet Seat
- Unplug the unit from the electrical outlet before cleaning.
- Wipe the exterior surfaces with a soft, damp cloth and a mild household cleaner.
- Avoid using abrasive cleaners, brushes, or chemical solvents that could damage the surface.
- Do not spray water directly onto the unit.
7. Troubleshooting
If you encounter issues with your Aquonderful bidet toilet seat, refer to the following common problems and solutions:
| Problem | Possible Cause | Solution |
|---|---|---|
| No water spray | Water supply valve closed; Unit not powered; Skin sensor not activated | Open water supply valve; Ensure unit is plugged in and power is on; Ensure you are properly seated on the bidet. |
| Water temperature is cold | Water heater setting too low; ECO mode active | Adjust water temperature setting via remote; Deactivate ECO mode if desired. |
| Nozzle does not extend/retract | Unit not powered; Obstruction | Ensure unit is plugged in and power is on; Check for any obstructions around the nozzle. |
| Remote control not responding | Batteries low/dead; Remote out of range | Replace remote batteries; Ensure remote is within operating range of the bidet seat. |
| Leaks from connections | Loose connections; Insufficient thread tape | Tighten all water connections; Reapply pipe thread tape if necessary. |
If the problem persists after attempting these solutions, please contact Aquonderful customer support.
8. Specifications
| Feature | Detail |
|---|---|
| Model Number | 225 |
| Brand | Aquonderful |
| Shape | Oval (Elongated) |
| Color | White |
| Material | Acrylonitrile Butadiene Styrene (ABS) |
| Product Dimensions | 20"L x 15.91"W |
| Item Weight | 10.78 pounds |
| Power Source | Corded Electric (Batteries required for remote) |
| Included Components | Bidet seat |
9. Warranty and Support
For warranty information or technical support, please refer to the warranty card included with your product or visit the official Aquonderful website. Please have your model number (225) and purchase date available when contacting support.