1. Introduction
Thank you for choosing the Ant Esports Glacius 360D AIO Liquid Cooler. This high-performance liquid cooling system is designed to provide efficient thermal management for your CPU, featuring a 2.8-inch customizable LCD display, powerful pump, and high-airflow fans. This manual provides essential information for proper installation, operation, and maintenance to ensure optimal performance and longevity of your cooler.

Image: The Ant Esports Glacius Series AIO Liquid Cooler, showcasing the pump block with its 2.8-inch LCD display and the radiator with three cooling fans.
2. Safety Information
Please read and understand all safety instructions before installing or operating this product. Failure to follow these instructions may result in product damage, personal injury, or voiding your warranty.
- Ensure your computer system is powered off and unplugged from the wall outlet before installation.
- Handle components with care to avoid damage.
- Do not open the pump or radiator as this may cause leaks and void the warranty.
- Keep the product away from extreme temperatures, humidity, and direct sunlight.
- Use only the provided mounting hardware.
- If you encounter any issues during installation, consult a qualified technician or contact Ant Esports support.
3. Package Contents
Verify that all components are present in your package before beginning installation:

Image: An illustration of the Ant Esports Glacius 360D mounting kit, showing various brackets, screws, and thermal grease.
- Ant Esports Glacius 360D AIO Liquid Cooler (Radiator with 3x 120mm Fans, Pump Block with LCD Display, and Tubing)
- Intel Backplate
- Intel Mounting Bracket
- AMD Mounting Bracket
- Screw Nuts (4x)
- 1851/1700 Thread Bolts (4x)
- 115X/1200 Thread Bolts (4x)
- 20XX Thread Bolts (4x)
- AMD Thread Bolts (4x)
- Thermal Grease
- User Manual (This document)
4. Setup and Installation
Follow these steps carefully to install your Ant Esports Glacius 360D AIO Liquid Cooler. Ensure your system is powered off and unplugged before proceeding.
4.1. Prepare the Radiator and Fans
Mount the three 120mm fans to the radiator using the provided screws. Ensure the fan airflow direction is appropriate for your case's cooling configuration (typically pushing air through the radiator or pulling air through it, depending on mounting location).

Image: A diagram illustrating the main components of the AIO cooler: the cooling fans, the cooling radiator, and the pump block with its integrated display.
4.2. CPU Socket Preparation
Clean the CPU surface thoroughly to remove any old thermal paste. Apply a small amount of the provided thermal grease to the center of your CPU. The cooler supports Intel LGA1851, LGA1700, LGA1200, LGA115X, LGA1366 and AMD AM5, AM4, AM3+, AM3, AM2+, AM2, AM1, FM2+, FM2, FM1 sockets.
4.3. Mounting the Pump Block
For Intel Sockets:
- Install the Intel backplate onto the motherboard from the rear, aligning the holes with the CPU socket.
- Place the appropriate Intel thread bolts (1851/1700, 115X/1200, or 20XX) through the backplate and motherboard holes.
- Secure the Intel mounting bracket onto the pump block.
- Carefully place the pump block onto the CPU, aligning the holes on the bracket with the thread bolts.
- Secure the pump block using the four screw nuts, tightening them in a diagonal pattern until snug. Do not overtighten.
For AMD Sockets:
- Remove the stock AMD retention brackets from your motherboard, but keep the original backplate.
- Secure the AMD mounting bracket onto the pump block.
- Place the AMD thread bolts into the original AMD backplate holes.
- Carefully place the pump block onto the CPU, aligning the holes on the bracket with the thread bolts.
- Secure the pump block using the four screw nuts, tightening them in a diagonal pattern until snug. Do not overtighten.
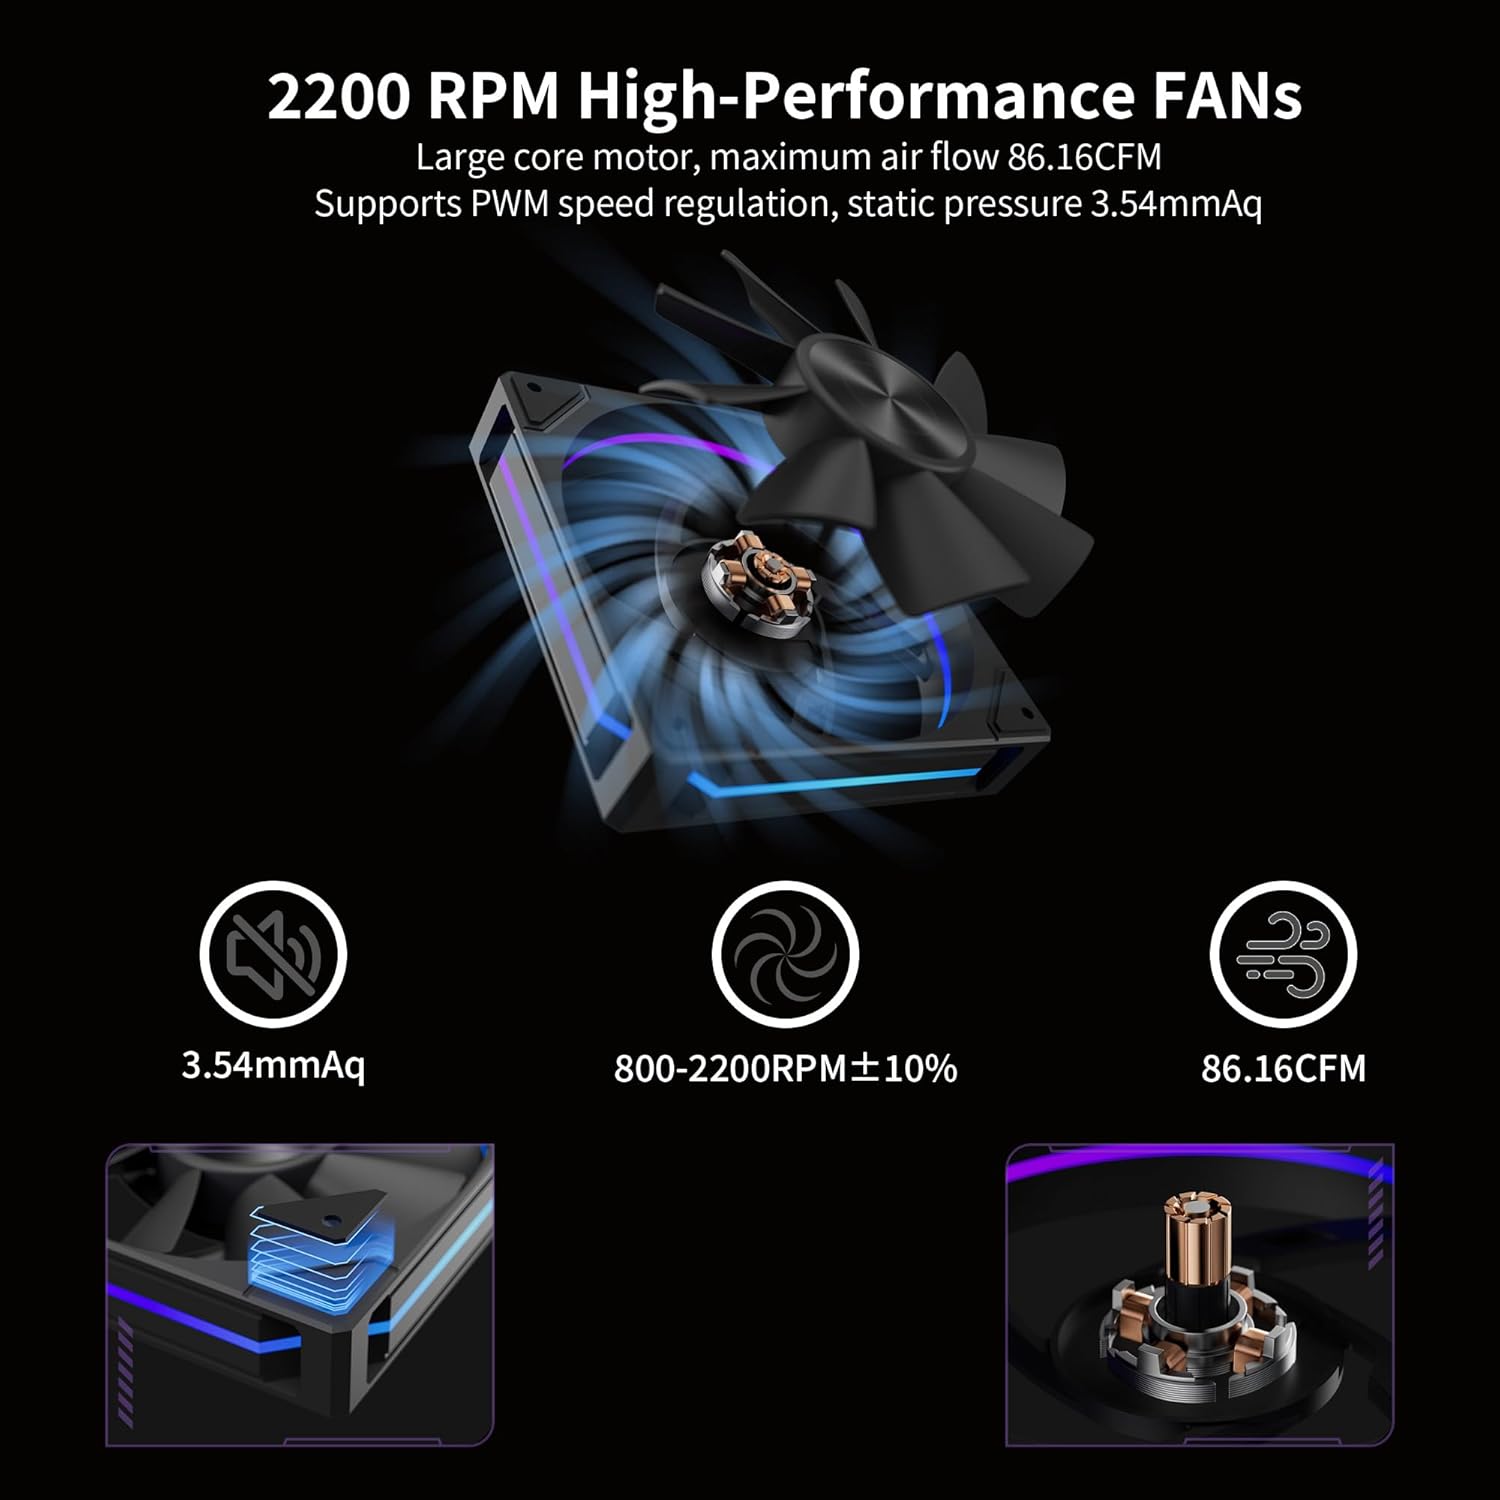
Image: An exploded diagram showing the internal components of the pump block, including the copper base, 10-pole impeller, ceramic bearing shaft, and 3-phase 12-slot motor.
4.4. Mount the Radiator
Install the radiator with the attached fans into an available mounting location in your PC case (e.g., top, front, or rear). Use the appropriate screws to secure the radiator firmly.

Image: A visual representation of the quick-flow radiator design, highlighting its 12 precision water channels and serrated cooling fins for enhanced heat exchange.
4.5. Connect Cables
- Connect the pump's 3-pin power connector to an available CPU_FAN or AIO_PUMP header on your motherboard.
- Connect the fan cables to the appropriate fan headers on your motherboard or a fan controller.
- Connect the USB cable from the pump block to an available internal USB 2.0 header on your motherboard for LCD display control and software functionality.
- Connect the ARGB cable from the pump block and fans to a compatible 5V ARGB header on your motherboard or an ARGB controller for lighting synchronization.
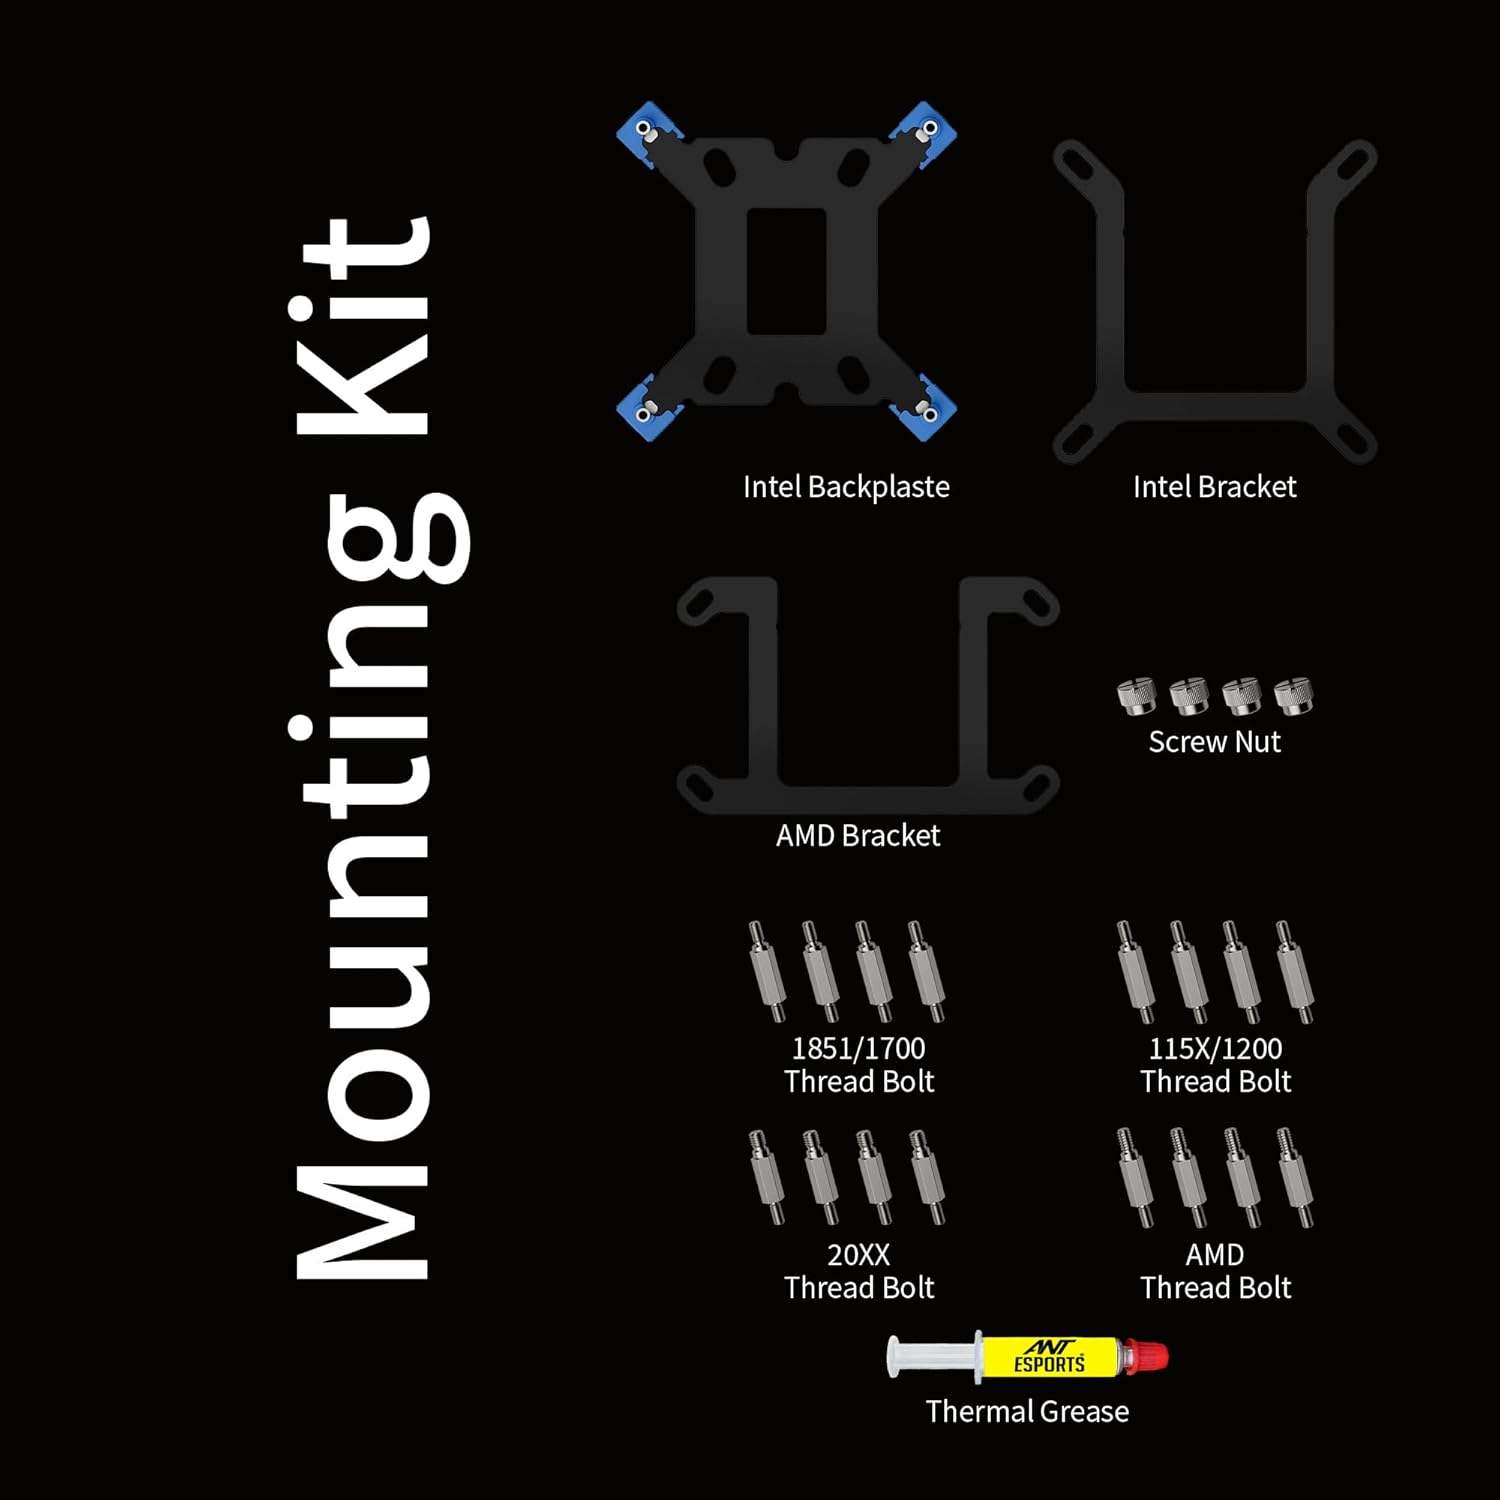
Image: A close-up view of the heat-resistant braided nylon tubing, designed for flexibility and durability.
5. Operating Instructions
5.1. Initial Power On
After completing the installation and ensuring all connections are secure, power on your computer. The LCD display on the pump block should illuminate and show default information.
5.2. Software Installation and Customization
To fully utilize the 2.8-inch customizable LCD display and control fan/pump speeds, you need to install the dedicated software from Ant Esports.
- Download the software: Visit the official Ant Esports website at https://antesports.com/downloads and download the software corresponding to your Glacius 360D model.
- Install the software: Follow the on-screen instructions to install the application.
- Customize the display: The software allows you to monitor system parameters (CPU/GPU temperature, frequency, usage), switch between pre-installed themes, or upload your own pictures, GIFs, and videos (JPG, PNG, GIF, MP4) to the 320x320 resolution display.
- Fan and Pump Control: Adjust fan and pump speeds, or set up custom fan curves based on temperature readings for optimal cooling and noise levels.

Image: The customizable 2.8-inch LCD display on the pump block, showing system monitoring data, alongside a screenshot of the software interface used to configure the display and monitor system parameters.
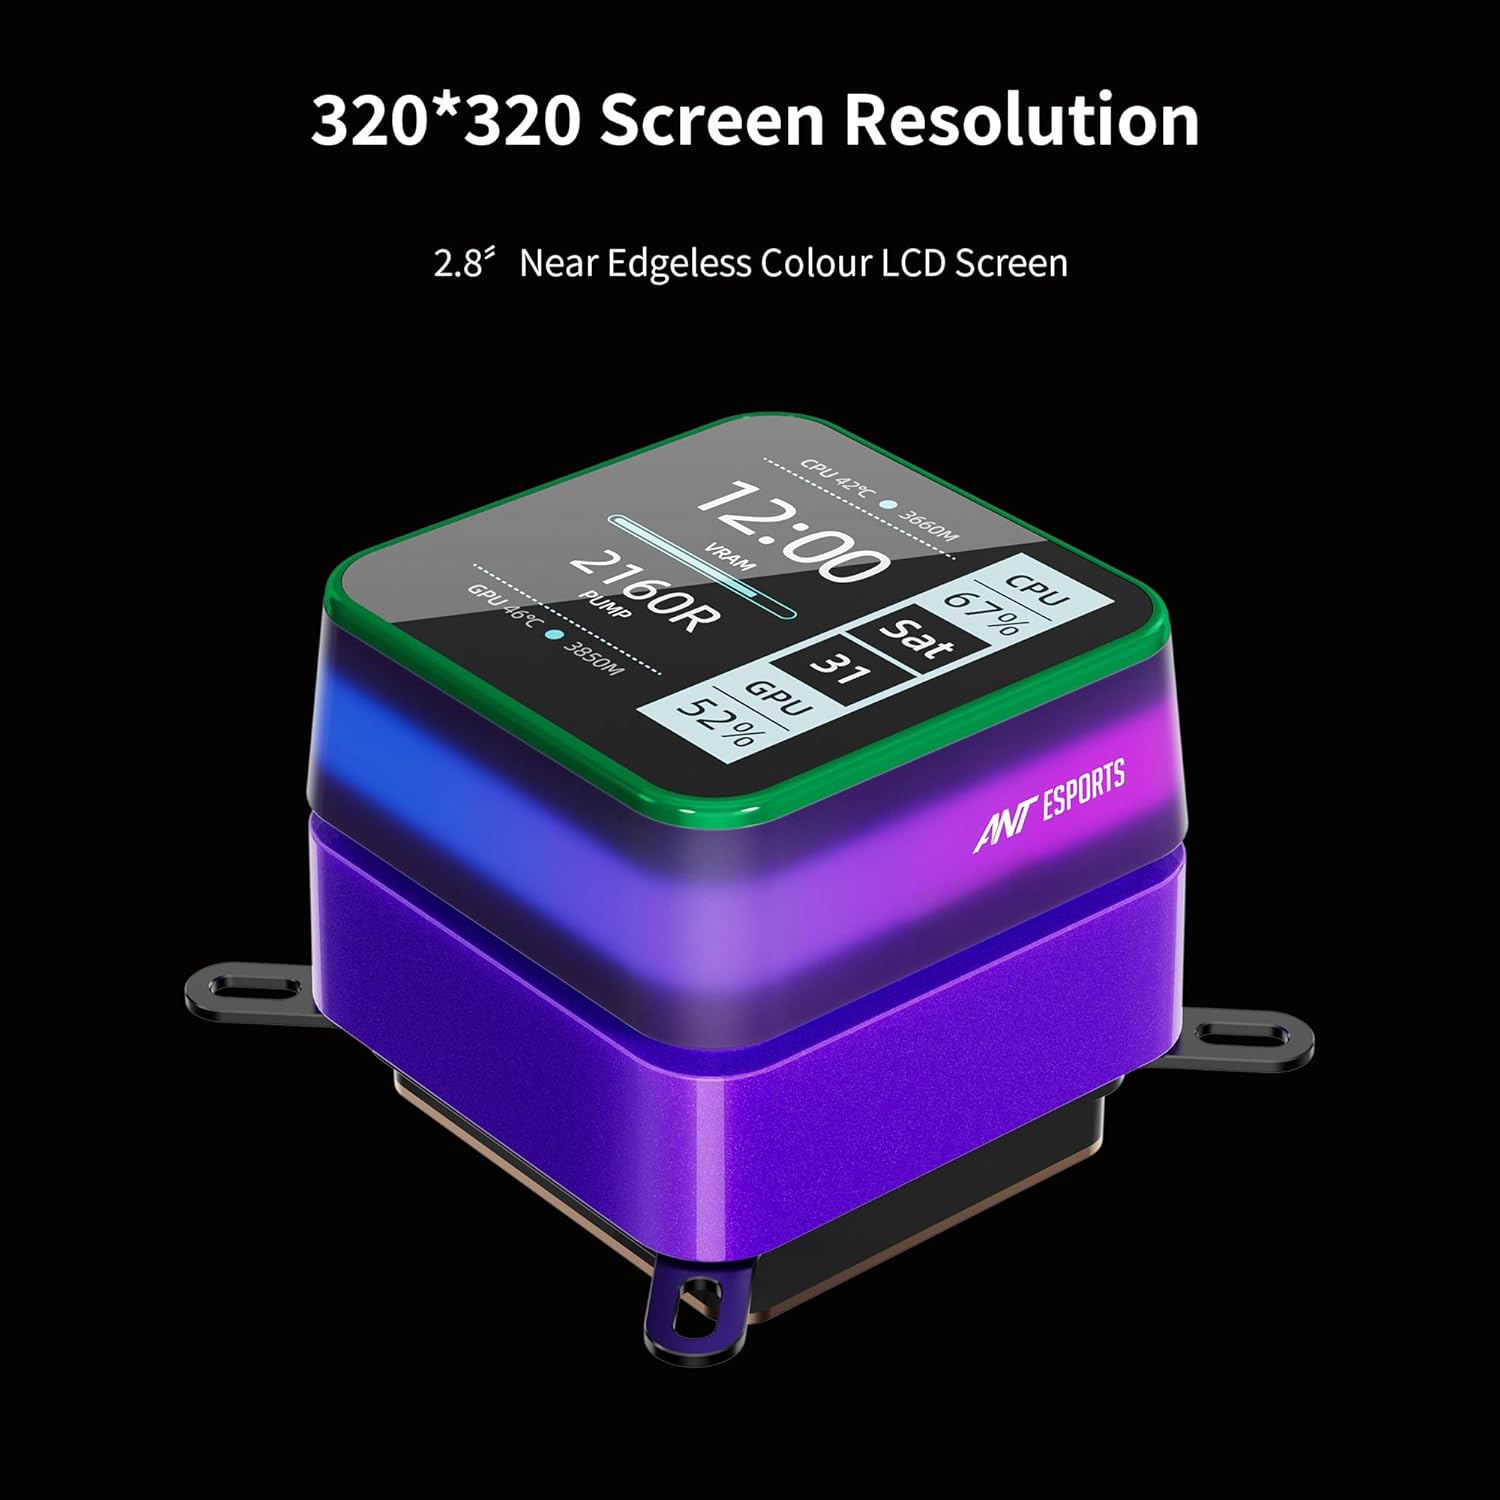
Image: An illustration demonstrating various pre-installed themes available for the 2.8-inch LCD display, highlighting customization options.
6. Maintenance
Regular maintenance helps ensure the longevity and optimal performance of your liquid cooler.
- Dust Cleaning: Periodically clean the radiator fins and fan blades with compressed air to remove dust buildup. Dust can impede airflow and reduce cooling efficiency.
- Tubing Inspection: Occasionally inspect the braided nylon tubing for any signs of wear, kinks, or leaks. The leak-proof technology minimizes risks, but visual inspection is recommended.
- Pump Block: Wipe the pump block and LCD display with a soft, dry cloth. Avoid using harsh chemicals.
- Software Updates: Check the Ant Esports website for software and firmware updates to ensure compatibility and access to new features.
7. Troubleshooting
If you encounter issues with your Glacius 360D AIO Liquid Cooler, refer to the following common problems and solutions:
| Problem | Possible Cause | Solution |
|---|---|---|
| High CPU Temperatures |
|
|
| LCD Display Not Working |
|
|
| Excessive Fan Noise |
|
|
| ARGB Lighting Not Working |
|
|
8. Specifications
| Feature | Detail |
|---|---|
| Model Number | Glacius 360D |
| Cooler Type | All-in-One (AIO) Liquid Cooler |
| Radiator Size | 360mm |
| Compatible CPU Sockets |
|
| Pump Speed | 2600 RPM |
| Fan Size | 120mm (x3) |
| Fan Speed | Up to 2200 RPM |
| Airflow Capacity | 86.16 CFM (per fan) |
| Static Pressure | 3.54 mmH2O (per fan) |
| LCD Display | 2.8-inch, 320x320 Resolution, 24-bit true color, 550 NITS peak brightness |
| Tubing Material | Braided Nylon |
| Product Dimensions (Radiator) | 39.6 x 12 x 2.7 cm |
| Item Weight | 1.54 kg |
| Power Connector Type | 3-Pin (Pump) |
| Cooling Method | Fan, Liquid |
9. Warranty and Support
Warranty: The Ant Esports Glacius 360D AIO Liquid Cooler comes with a 3-year replacement warranty from the date of purchase. This warranty covers manufacturing defects and ensures peace of mind regarding your product's reliability. Please retain your proof of purchase for warranty claims.
Technical Support: For technical assistance, troubleshooting beyond this manual, or warranty inquiries, please visit the official Ant Esports website or contact their customer support. You can find contact information and additional resources on their website:
For software downloads and updates, please visit: https://antesports.com/downloads


