
1. Introduction
The FABULETTA TM919TK Astronomical Timer Switch is an advanced digital electronic time switch designed for automatic control of electrical loads based on astronomical events such as sunrise and sunset. It features automatic adjustment for geographical location, flexible time zone configuration, and a built-in perpetual calendar, providing precise and reliable operation without frequent manual adjustments.
2. Product Features
- Intelligent Sunrise Sunset Control: Automatically adjusts to local sunrise and sunset times based on geographical location, eliminating the need for seasonal manual tweaks.
- Adaptable Latitude and Longitude Settings: Supports latitude settings from 0 to 70 degrees North or South and longitude from -180 to 180 degrees for global use.
- User-Friendly Time Zone Setting: Flexible configuration allows accurate local time setting within a range of +12 to -12 hours.
- Built-in Perpetual Calendar: Includes a calendar valid until 2042, ensuring long-lasting performance without frequent updates.
- Customizable Programming Options: Supports up to 8 different program schedules based on astronomical timings, with easy switching between 12-hour and 24-hour formats.
3. Safety Information
Please read and understand all safety instructions before installation and operation. Failure to follow these instructions may result in electric shock, fire, or serious injury.
- Installation should only be performed by a qualified electrician.
- Ensure power is disconnected at the main circuit breaker before installation or maintenance.
- Do not exceed the maximum load rating of 16A / 3200W.
- Do not expose the device to moisture or extreme temperatures.
- Verify all connections are secure and correct before restoring power.
4. Package Contents
- 1 x FABULETTA TM919TK Astronomical Timer Switch
- 1 x User Manual (this document)
5. Product Overview
Familiarize yourself with the components of the TM919TK timer switch.
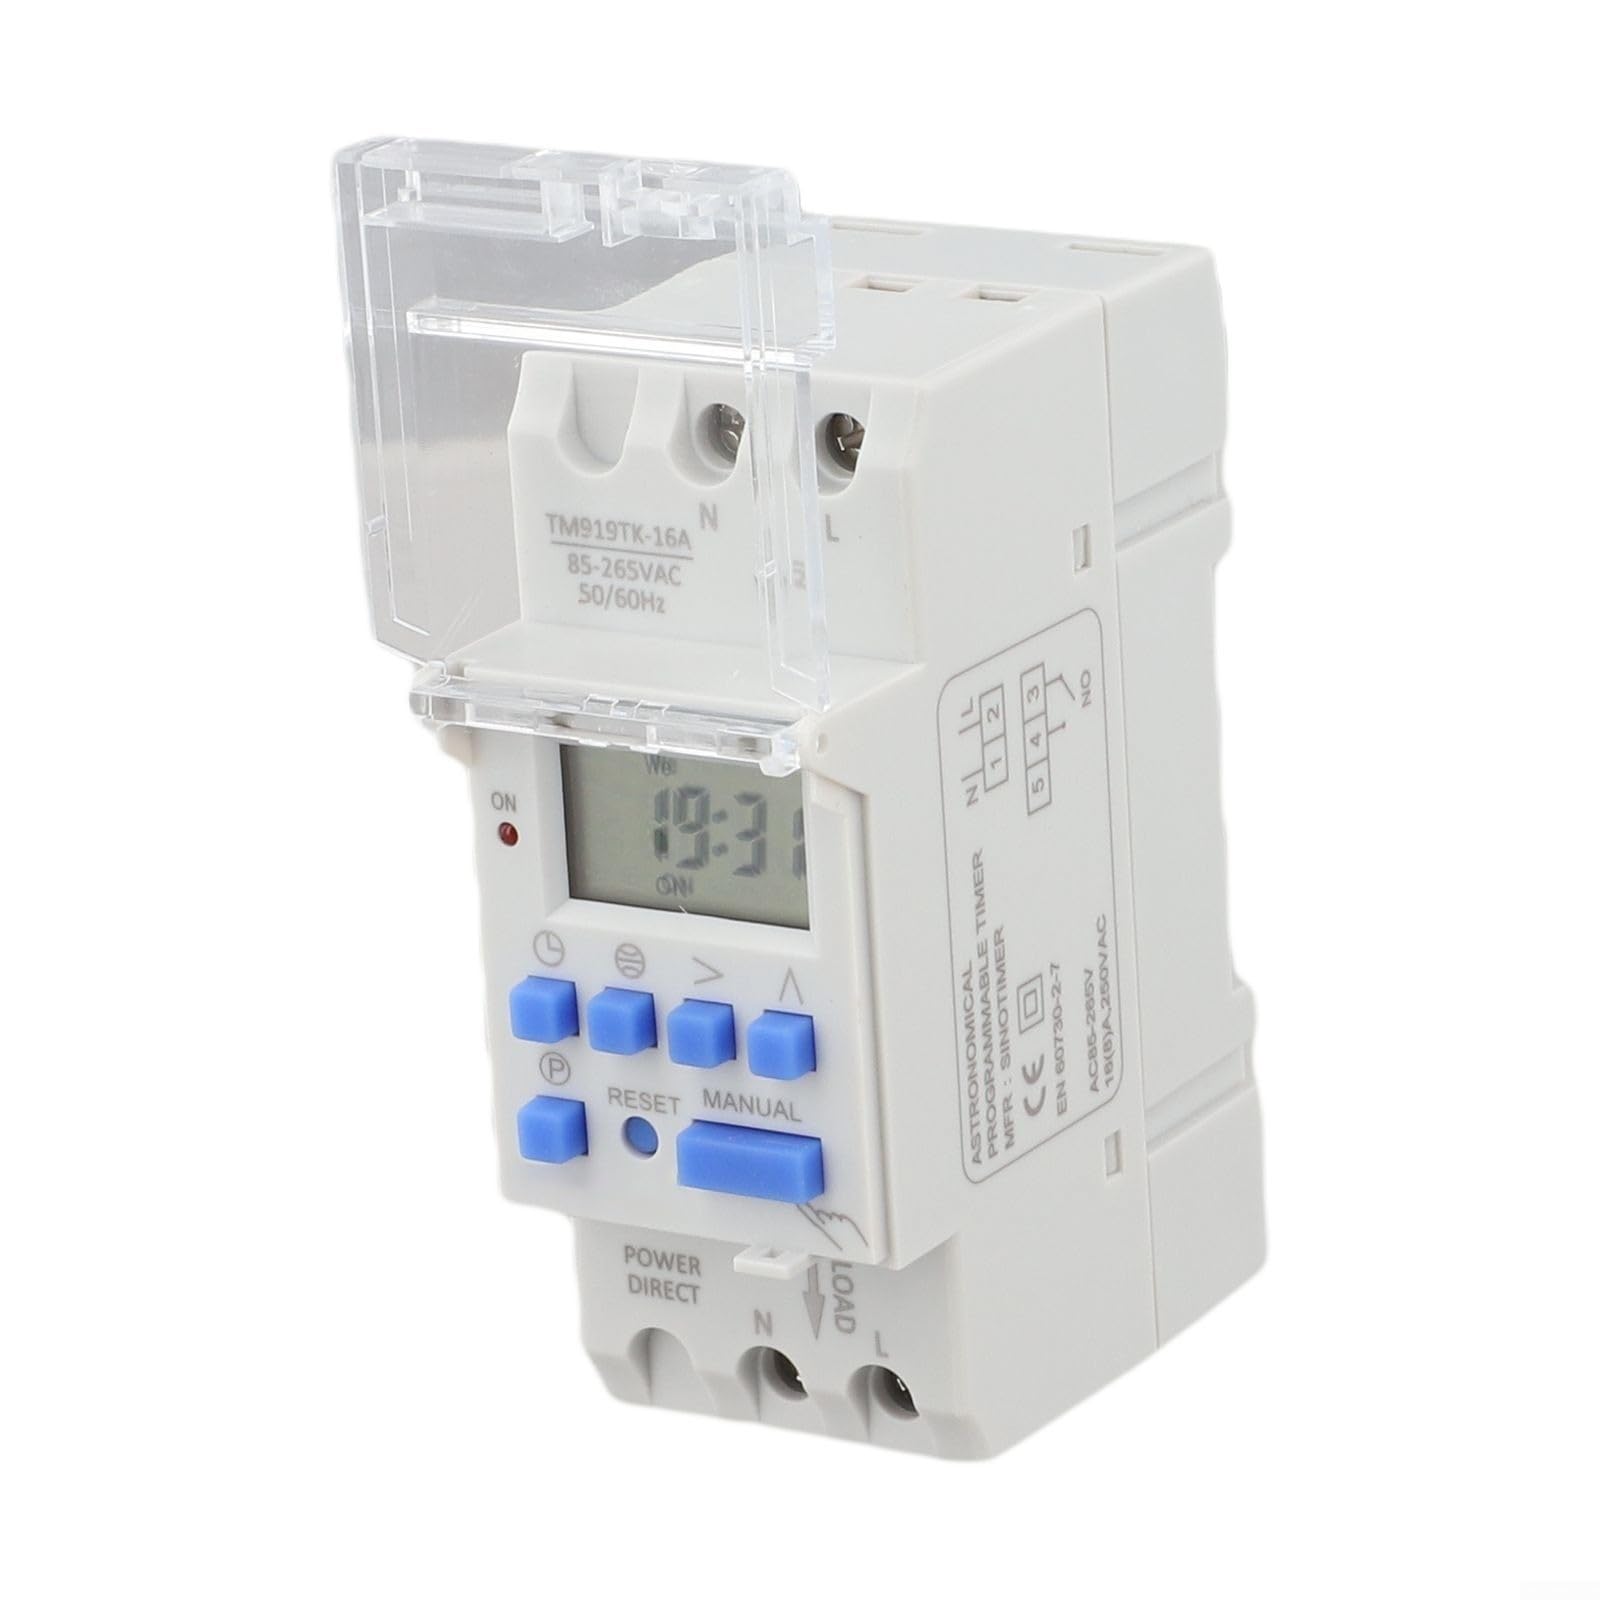
Image: Front and side views of the TM919TK Astronomical Timer Switch, showing the display, buttons, and wiring terminals.

Image: Side view of the TM919TK timer switch with the clear cover open, revealing the display and control buttons.

Image: Bottom view of the TM919TK timer switch showing the wiring terminals labeled N, L, and LOAD.
6. Installation and Setup
The TM919TK timer switch is designed for DIN rail mounting within an electrical panel. Ensure power is off before proceeding.
6.1 Mounting
- Locate an available space on a standard 35mm DIN rail within your electrical enclosure.
- Clip the timer switch onto the DIN rail, ensuring it is securely fastened.
6.2 Wiring
Refer to the wiring diagram below and the labels on the device. Always ensure power is disconnected before making any electrical connections.

Image: Hands installing the TM919TK timer switch into an electrical panel, demonstrating typical installation environment.
- Connect the Neutral (N) wire from your power supply to the 'N' terminal on the timer switch.
- Connect the Live (L) wire from your power supply to the 'L' terminal on the timer switch.
- Connect the Live wire to your load (e.g., light fixture) to the 'LOAD' terminal on the timer switch. The other side of your load should be connected to the Neutral wire.
- Ensure all terminal screws are tightened securely.
6.3 Initial Power-Up
After wiring, restore power to the circuit. The display should illuminate. If the display does not light up, check your wiring and power supply.
7. Initial Configuration
Upon first power-up or after a reset, you will need to configure the basic settings.
7.1 Setting Current Time and Date
- Press the CLOCK button (often labeled with a clock icon) and hold for 3 seconds to enter time setting mode.
- Use the HOUR, MINUTE, and DAY buttons to adjust the current time and day of the week.
- Press CLOCK again to save and exit.
7.2 Setting Time Zone
- Press the TIME ZONE button (or similar, refer to device specific labels) to cycle through available time zone offsets (+12 to -12).
- Select your local time zone.
7.3 Setting Latitude and Longitude
These settings are crucial for accurate astronomical calculations.
- Press and hold the LAT/LONG button (or similar) for 3 seconds to enter setting mode.
- Use the UP/DOWN arrows to adjust the Latitude (0-70 degrees North/South).
- Press LAT/LONG again to switch to Longitude setting.
- Use the UP/DOWN arrows to adjust the Longitude (-180 to 180 degrees).
- Press LAT/LONG once more to save and exit.
8. Operating Instructions
8.1 Programming ON/OFF Times (Astronomical Mode)
The TM919TK allows for up to 8 ON/OFF programs. These can be set relative to sunrise/sunset or at fixed times.
- Press the PROG button to enter programming mode. The display will show '1 ON'.
- Use the HOUR, MINUTE, and DAY buttons to set the desired ON time. To set an astronomical time, press the ASTRO button (or similar) to cycle through options like 'SUNRISE', 'SUNSET', 'SUNRISE + X min', 'SUNSET - X min', etc.
- Press PROG again to set the '1 OFF' time, repeating the steps above.
- Continue pressing PROG to set subsequent programs (2 ON, 2 OFF, etc.) up to 8 programs.
- After setting all desired programs, press the CLOCK button to exit programming mode and return to normal operation.
8.2 Manual Override
To temporarily override the current program state:
- Press the MANUAL button (or similar). The output will switch from ON to OFF or OFF to ON.
- The timer will maintain this manual state until the next programmed event, at which point it will revert to automatic operation.
8.3 12/24 Hour Format Conversion
To switch between 12-hour (AM/PM) and 24-hour formats:
- While in normal time display mode, press the CLOCK button and the HOUR button simultaneously.
8.4 Reset Function
To clear all settings and return the timer to factory defaults:
- Locate the RESET button (often a small recessed button).
- Use a pointed object (e.g., a pen tip) to press the RESET button. The display will clear, and you will need to reconfigure all settings.
9. Maintenance
The TM919TK timer switch requires minimal maintenance.
- Keep the device clean and free from dust. Use a soft, dry cloth for cleaning.
- Do not use abrasive cleaners or solvents.
- Ensure the clear protective cover over the display and buttons is kept closed to prevent dust ingress.
- The internal battery for the perpetual calendar is designed for long-term use and typically does not require replacement during the product's lifespan.
10. Troubleshooting
| Problem | Possible Cause | Solution |
|---|---|---|
| Display is blank | No power supply; Incorrect wiring | Check power connections and circuit breaker. Verify wiring according to Section 6.2. |
| Timer does not switch ON/OFF at programmed times | Incorrect program settings; Manual override active; Incorrect time/date/latitude/longitude settings | Review program settings (Section 8.1). Check if manual override is active (Section 8.2). Verify current time, date, time zone, latitude, and longitude (Section 7). |
| Astronomical times are inaccurate | Incorrect latitude/longitude settings; Incorrect time zone | Double-check latitude, longitude, and time zone settings for your exact location (Section 7.2, 7.3). |
| Device is unresponsive | Temporary software glitch | Perform a full reset (Section 8.4) and reconfigure settings. |
11. Specifications
- Product Name: Timer Switch
- Model: TM919TK
- Material: Plastic
- Color: White (As Picture Show)
- Dimensions: 90x36x68mm (approx. 3.54 x 1.42 x 2.68 inches)
- Item Weight: 125 Grams (approx. 4.4 ounces)
- Voltage: AC85-265V (as per product image)
- Max Load: 16A / 3200W
- Latitude Range: 0 to 70 degrees North or South
- Longitude Range: -180 to 180 degrees
- Time Zone: +12 to -12 hours
- Calendar Validity: 2017 to 2042
- Programming: 8 ON/OFF programs
12. Warranty Information
FABULETTA products are manufactured to high-quality standards. This product is covered by a limited warranty against defects in materials and workmanship for a period specified by your retailer or local regulations from the date of purchase. Please retain your proof of purchase for warranty claims. The warranty does not cover damage caused by improper installation, misuse, unauthorized modification, or natural disasters.
13. Customer Support
If you have any questions, require technical assistance, or encounter issues not covered in this manual, please contact FABULETTA customer support through the retailer where the product was purchased or visit the official FABULETTA website for contact information.
For online resources and frequently asked questions, please refer to the product support page on the FABULETTA website.