1. Introduction
This manual provides essential information for the safe and efficient operation of your BSMTEK 9L Large Diesel Heater. Designed for versatile use, this 8KW all-in-one diesel air heater is suitable for various environments including trucks, RVs, homes, cars, campers, and boats. It supports multiple voltages (12V, 24V, 110V, 240V) and features an LCD switch and remote control for convenient operation. Please read this manual thoroughly before use to ensure proper setup and to maximize the product's lifespan.
2. Safety Information
- Exhaust Venting: The exhaust from the heater must be vented externally to prevent the accumulation of harmful fumes. Ensure proper installation of the exhaust pipe and muffler in a well-ventilated area.
- Fuel Handling: Use only diesel fuel. Do not overfill the fuel tank. Handle fuel in a well-ventilated area away from open flames or ignition sources.
- Placement: Ensure the heater is placed on a stable, non-combustible surface. Maintain adequate clearance around the heater to prevent obstruction of air intake and exhaust.
- Electrical Connections: Connect the heater to the appropriate power source (12V/24V DC or 110V/240V AC via adapter) as specified. Ensure all connections are secure to prevent electrical hazards.
- Children and Pets: Keep children and pets away from the operating heater.
- Maintenance: Perform regular maintenance as described in this manual to ensure safe and efficient operation.
3. Package Contents
Verify that all items are present in the package:
- Diesel Heater Unit
- Remote Control
- Exhaust Pipe
- Installation Nut
- Clamps (various sizes)
- Air Filter
- Upper and Lower Covers of the Steering Air Outlet
- Muffler
- Air Outlet Pipe
- Small Wrench
- Converter (for AC power)
- User Manual
4. Setup & Installation
Follow these steps to set up your diesel heater:
- Unboxing: Carefully remove all components from the packaging.
- Exhaust System Assembly: Attach the exhaust pipe to the heater's exhaust port using the provided clamps and installation nut. Secure the muffler to the end of the exhaust pipe. Ensure all connections are tight to prevent leaks.
- Air Filter Installation: Install the air filter onto the air intake port of the heater.
- Air Outlet Pipe: Attach the air outlet pipe to the heater's hot air outlet.
- Fuel Filling: Open the fuel cap and carefully fill the 9L tank with diesel fuel. Do not overfill.
- Power Connection: Connect the heater to your desired power source. For 12V/24V DC, use the provided wires to connect directly to a battery. For 110V/240V AC, use the converter and plug it into a standard socket.
Visual Guide: Unboxing and Assembly
This video demonstrates the unboxing process and assembly of the exhaust system and power connections for the diesel heater.
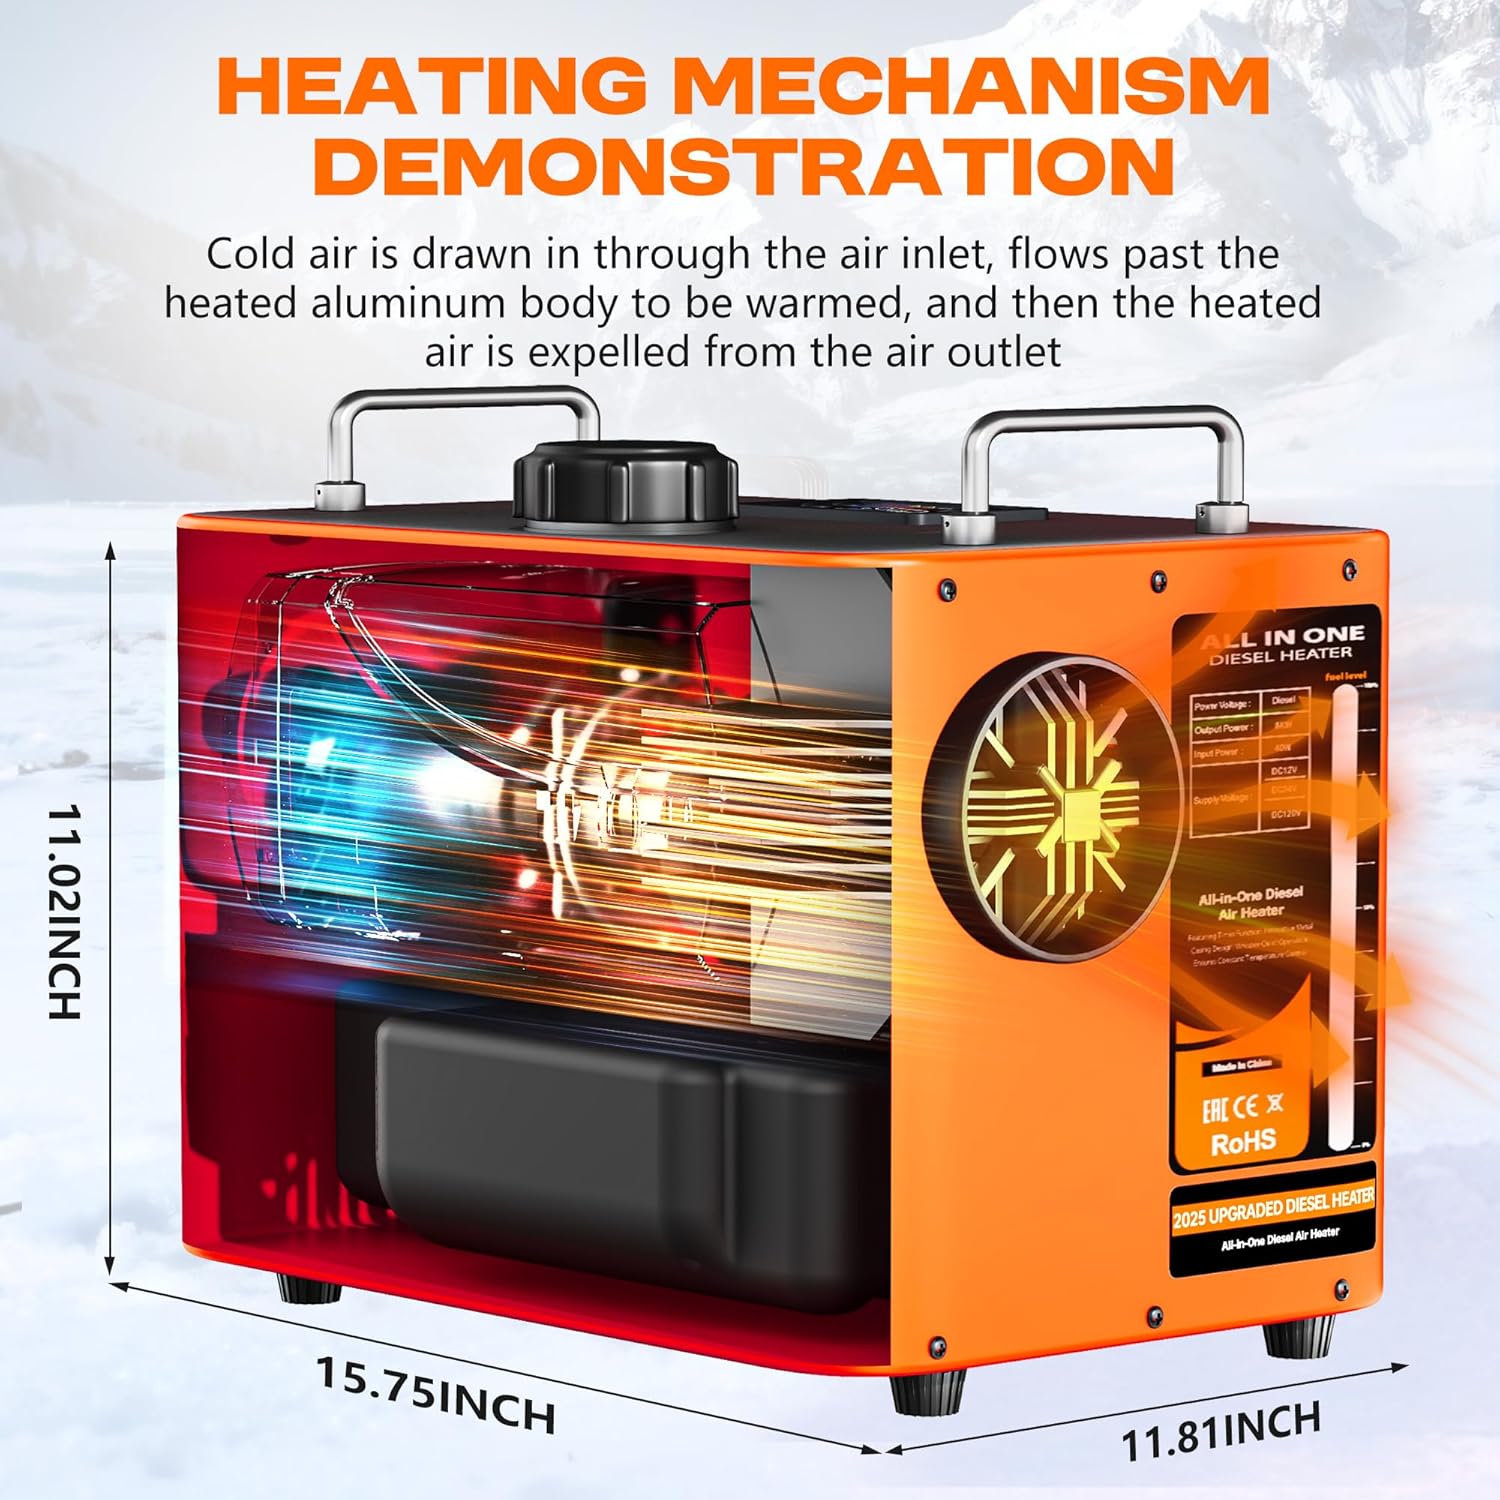
Image showing the BSMTEK Diesel Heater with its dimensions (17.09 x 12.9 x 15.9 inches).

The 9L large fuel tank provides extended operating time, shown here in a winter setting.

This image illustrates the heater's adaptability to various voltages, including 110V for standard outlets and 12V/24V for vehicle batteries.
5. Operation
Operating your BSMTEK diesel heater is straightforward:
- Power On: Press the power button on the LCD control panel or the ON button on the remote control. The display will light up, indicating the heater is starting.
- Adjust Heat Setting: Use the up and down arrows on the LCD panel or remote control to adjust the desired heat output (P-01 to P-10). The heater will rapidly warm up, reaching optimal temperature within 5-10 minutes.
- Monitoring: The LCD screen displays the current temperature and power settings.
- Power Off: Press the power button on the LCD control panel or the OFF button on the remote control. The heater will enter a cool-down cycle before completely shutting off. Do not unplug the heater during the cool-down cycle.
Visual Guide: Heater Operation
This video demonstrates the basic operation of the heater, including powering on, adjusting settings, and observing heat output.

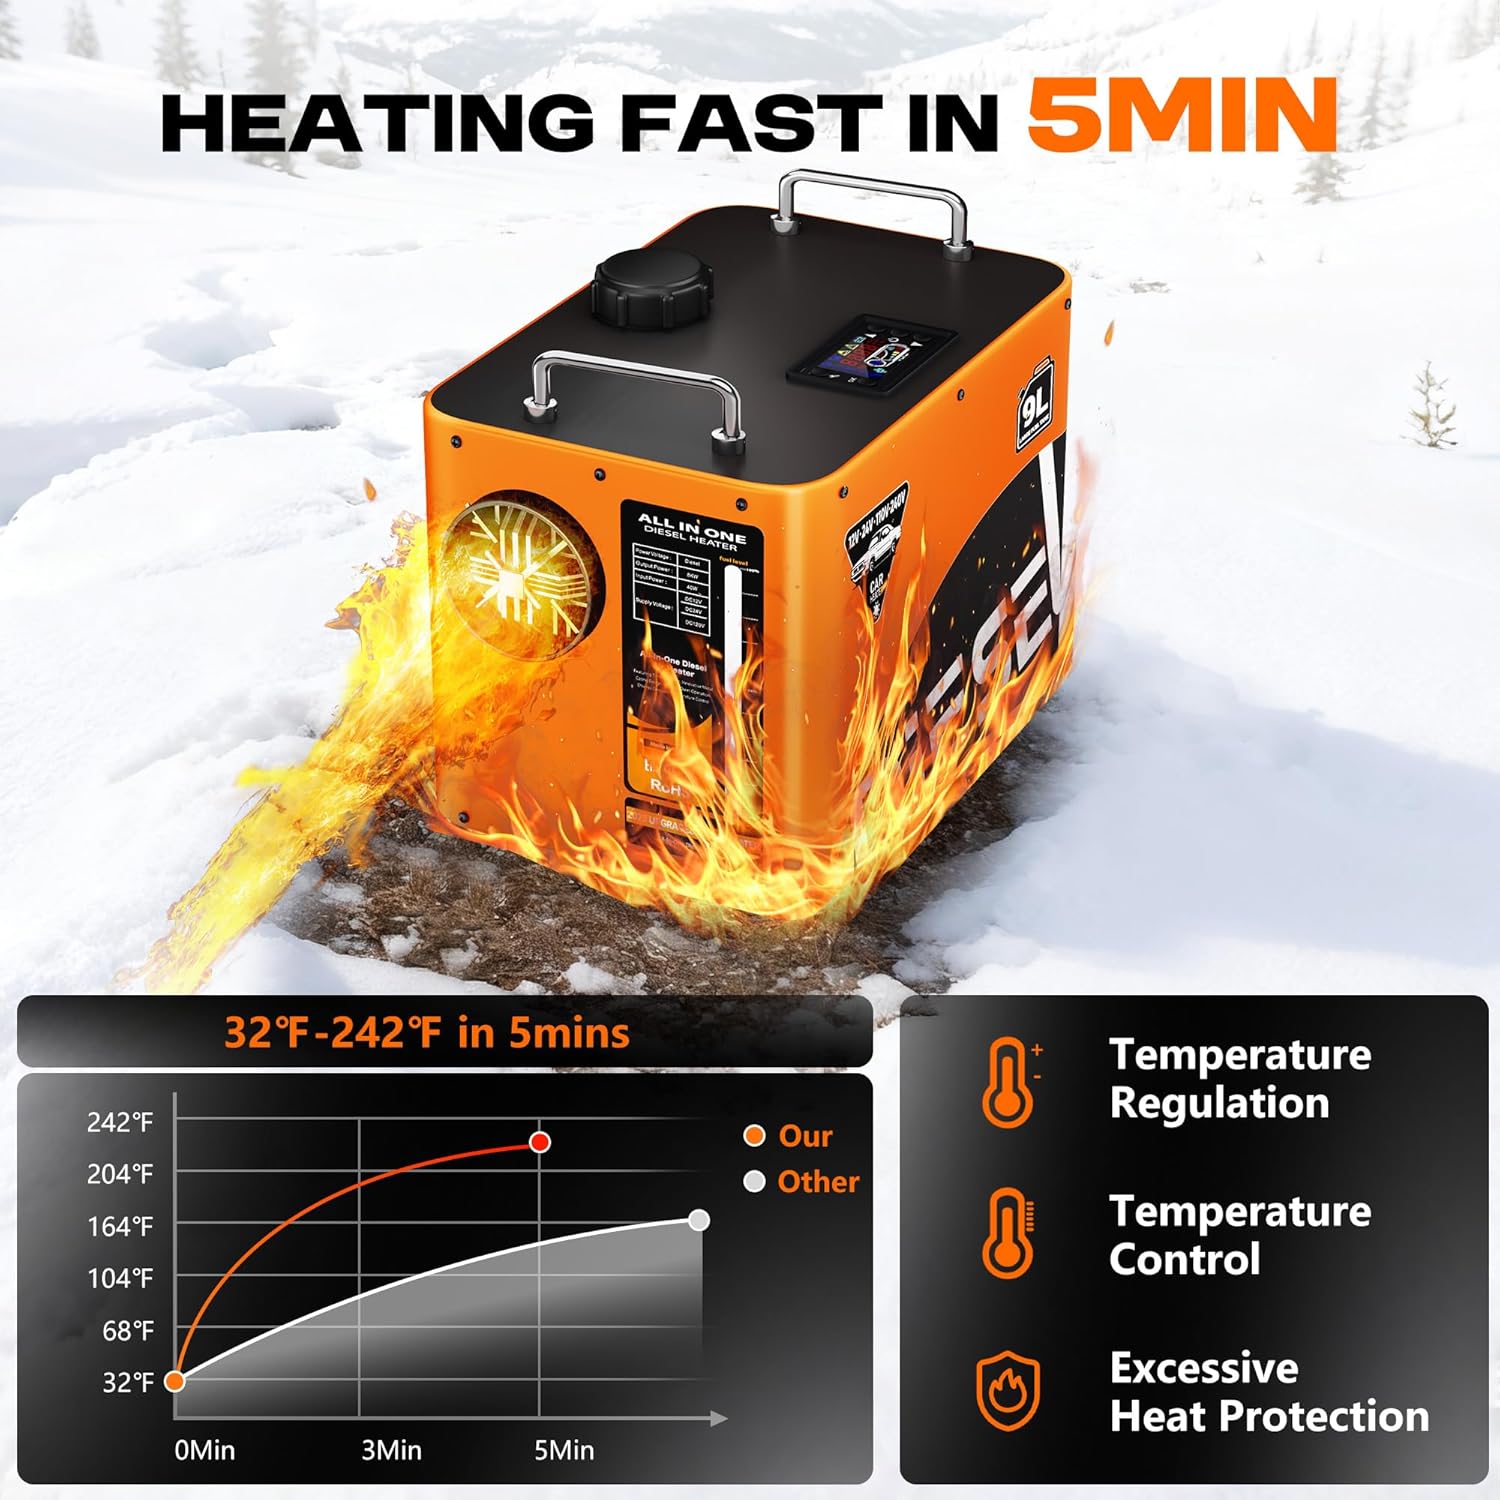
The heater is designed for rapid heating, reaching desired temperatures within 5 minutes.

The heater boasts low fuel consumption, using approximately 1 gallon per night for extended operation.
The remote control allows for convenient operation from up to 100 feet away.
6. Maintenance
Regular maintenance ensures optimal performance and longevity of your heater:
- Fuel Tank: The 9L fuel tank is equipped with an upgraded anti-oil leakage design, featuring an internal thread and additional rubber ring. Periodically check for any signs of leakage.
- Cleaning: Keep the exterior of the heater clean. Ensure the air intake and exhaust ports are free from obstructions.
- Storage: When not in use, especially during off-season, store the diesel heater in its original packaging or a protective box in a dry, safe place.
7. Troubleshooting
If you encounter issues with your heater, refer to the following common troubleshooting tips:
- No Power: Check all power connections. Ensure the battery is charged or the AC adapter is properly plugged into a working outlet.
- No Heat Output: Verify that the fuel tank has sufficient diesel. Check for any blockages in the fuel lines or exhaust system. Ensure the power setting is not at minimum.
- Error Codes: If an error code appears on the LCD screen, consult the specific error code section in the detailed instruction booklet provided with your product for resolution steps.
- Excessive Noise: While designed for low noise operation (around 45dB), ensure the unit is on a stable surface and that no components are loose or vibrating excessively.
8. Specifications
| Feature | Specification |
|---|---|
| Heater Power | 8 KW (8000W) |
| Rated Voltage | 12V / 24V / 110V / 240V |
| Fuel Type | Diesel |
| Tank Volume | 9 Liters (2.38 GAL) |
| Fuel Consumption | 0.16 ~ 0.62 L/H |
| Applicable Range | 20-25 m² (215-269 ft²) |
| Working Temperature | -45°F to 109°F (-43°C to 43°C) |
| Noise Level | ≤ 45 dB |
| Item Weight | 26.8 pounds |
| Product Dimensions | 17.09 x 12.9 x 15.9 inches |
9. Warranty & Support
For warranty information, technical support, or any inquiries not covered in this manual, please refer to the official BSMTEK website or contact their customer service directly. Keep your purchase receipt for warranty claims.


