1. Introduction
Thank you for choosing the OUZVI 42-inch Invisible LED Ceiling Fan. This product combines the functionality of a ceiling fan with modern LED lighting, designed to provide both comfort and aesthetic appeal to your living space. Featuring retractable ABS blades and remote control operation, this fan is suitable for various indoor environments such as living rooms, bedrooms, and offices.
This manual provides detailed instructions for installation, operation, maintenance, and troubleshooting to ensure safe and efficient use of your new ceiling fan.
2. Important Safety Instructions
WARNING: To reduce the risk of fire, electric shock, or personal injury, always follow these basic precautions:
- Read all instructions carefully before installing and operating the fan.
- All electrical connections must be in accordance with local codes and ordinances, and the National Electrical Code (NEC). If you are unfamiliar with proper electrical wiring, seek the services of a qualified electrician.
- Before installation, disconnect power by turning off the circuit breakers to the fan's location.
- Ensure the installation site can support the weight of the fan (approximately 10-15 kg).
- Do not operate the fan with damaged blades or housing.
- Avoid placing objects in the path of the fan blades.
- This product is designed for indoor use only.
- Do not attempt to repair or modify the fan yourself. Contact qualified service personnel for repairs.
3. Package Contents
Carefully unpack your ceiling fan and ensure all items are present and undamaged. If any items are missing or damaged, contact customer support immediately.
- Ceiling Fan Unit (Motor Housing with Integrated LED Light)
- Retractable ABS Blades (4x)
- Remote Control
- Mounting Bracket
- Downrod (Standard length)
- Canopy
- Hardware Pack (Screws, wire nuts, washers, etc.)
- User Manual (This document)
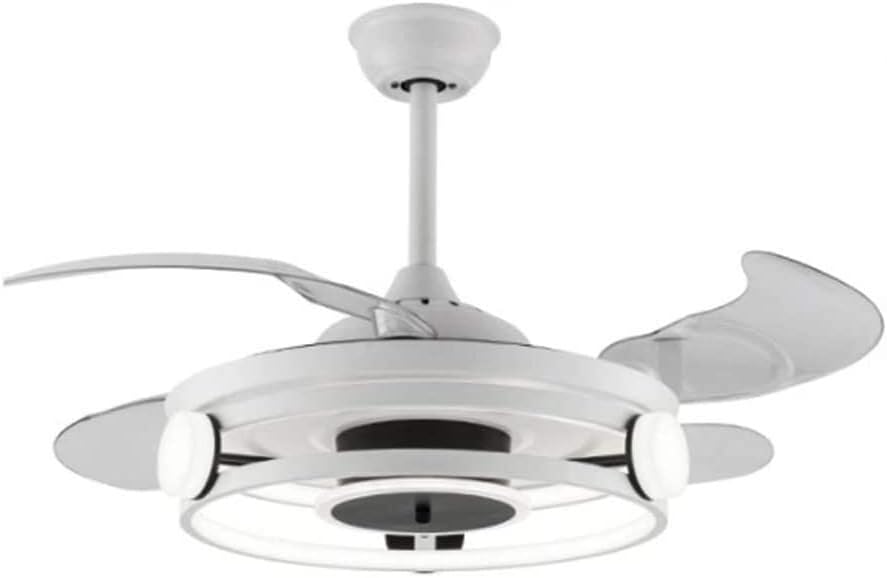
Figure 3.1: Main view of the OUZVI 42-inch Invisible LED Ceiling Fan, showcasing its white finish and integrated light fixture.
4. Product Specifications
| Feature | Specification |
|---|---|
| Model Number | B0FMKMFD42 |
| Brand | OUZVI |
| Fan Size | 42 inches (when blades extended) |
| Blade Material | ABS (Retractable, Transparent Acrylic) |
| Light Type | Integrated LED |
| Light Color Temperatures | 3 colors (Cool, Neutral, Warm) |
| Fan Speeds | 6 speeds |
| Control Method | Remote Control |
| Timer Function | 1/2/4/8 hours auto-off |
| Motor Type | Pure Copper Motor |
| Voltage | 110V ~ 220V |
| Recommended Application Area | 10-25 square meters |
| Mounting Type | Ceiling Mount |

Figure 4.1: Product dimensions. The fan has a diameter of 42 inches (107 cm) when blades are extended, and a main body diameter of 18.9 inches (48 cm). The total height with a 12 cm downrod is approximately 13.8 inches (35 cm).
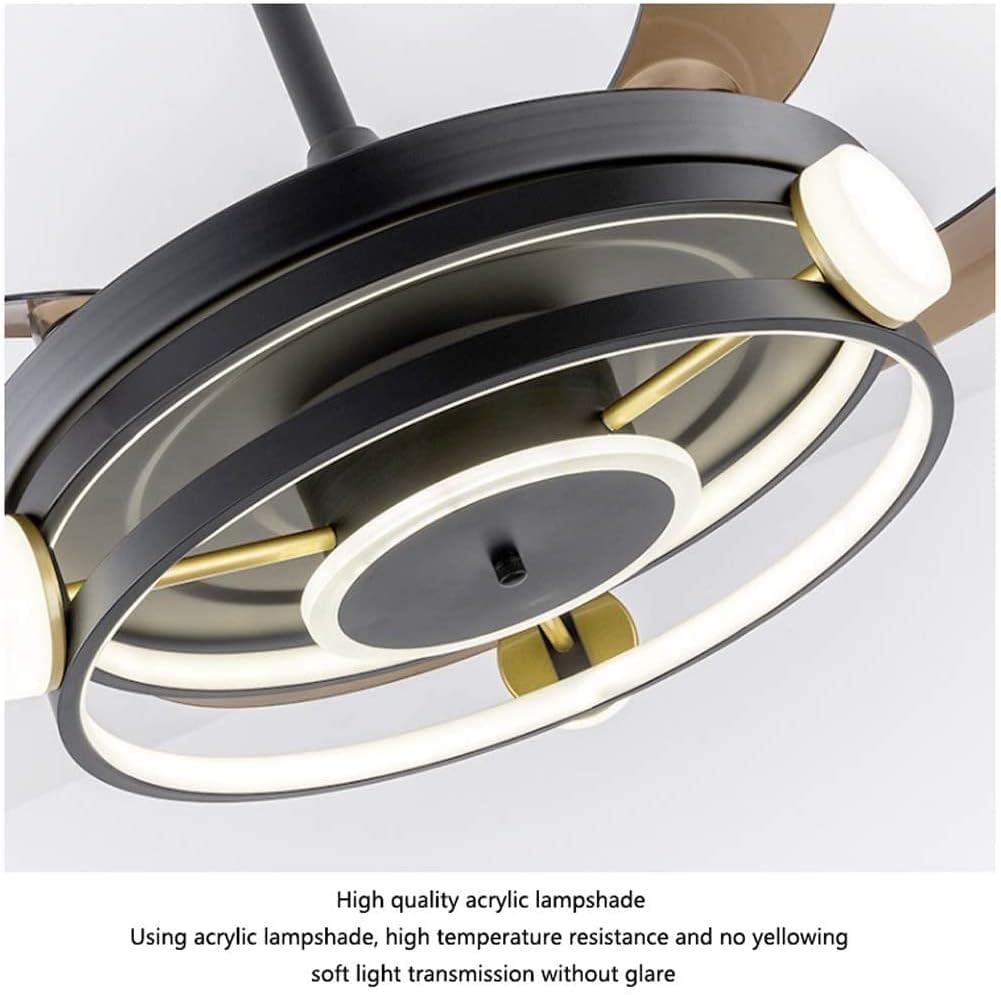
Figure 4.2: Close-up view demonstrating the high-quality acrylic lampshade material, which is resistant to high temperatures and yellowing, providing soft light transmission without glare.
5. Installation Guide
IMPORTANT: Professional installation is highly recommended for safety and proper functionality. Ensure power is disconnected at the circuit breaker before beginning installation.
- Prepare the Installation Site: Ensure the ceiling junction box is securely mounted and capable of supporting the fan's weight.
- Install the Mounting Bracket: Secure the mounting bracket to the ceiling junction box using the provided screws and washers.
- Assemble the Downrod: Feed the electrical wires from the fan motor through the downrod. Attach the downrod to the fan motor assembly.
- Hang the Fan: Carefully lift the fan assembly and hang it onto the mounting bracket.
- Make Electrical Connections: Connect the fan's electrical wires to the household wiring according to the wiring diagram (refer to the diagram provided in the physical manual, if applicable). Ensure all connections are secure with wire nuts.
- Secure the Canopy: Slide the canopy up to the ceiling and secure it to the mounting bracket, covering the electrical connections.
- Install Blades: The blades are retractable and integrated. Ensure they are free to move.
- Test Operation: Restore power at the circuit breaker and test the fan and light functions using the remote control.

Figure 5.1: The OUZVI ceiling fan seamlessly integrated into a modern living room setting, demonstrating its aesthetic appeal.
6. Operating Instructions
Your OUZVI ceiling fan is operated via the included remote control. Ensure batteries are installed correctly in the remote control.
Remote Control Functions:
- Fan ON/OFF: Press to turn the fan on or off.
- Fan Speed Control: Buttons for 6 fan speeds. Press to cycle through or select desired speed. The retractable blades will extend automatically when the fan is turned on and retract when turned off.
- Light ON/OFF: Press to turn the LED light on or off.
- Light Color Temperature: Press to cycle through 3 light color temperatures: Cool White, Neutral White, and Warm White.
- Timer Function: Buttons for 1H, 2H, 4H, 8H. Press to set the fan to automatically turn off after the selected duration.

Figure 6.1: The OUZVI ceiling fan providing illumination and air circulation in a dining room setting.
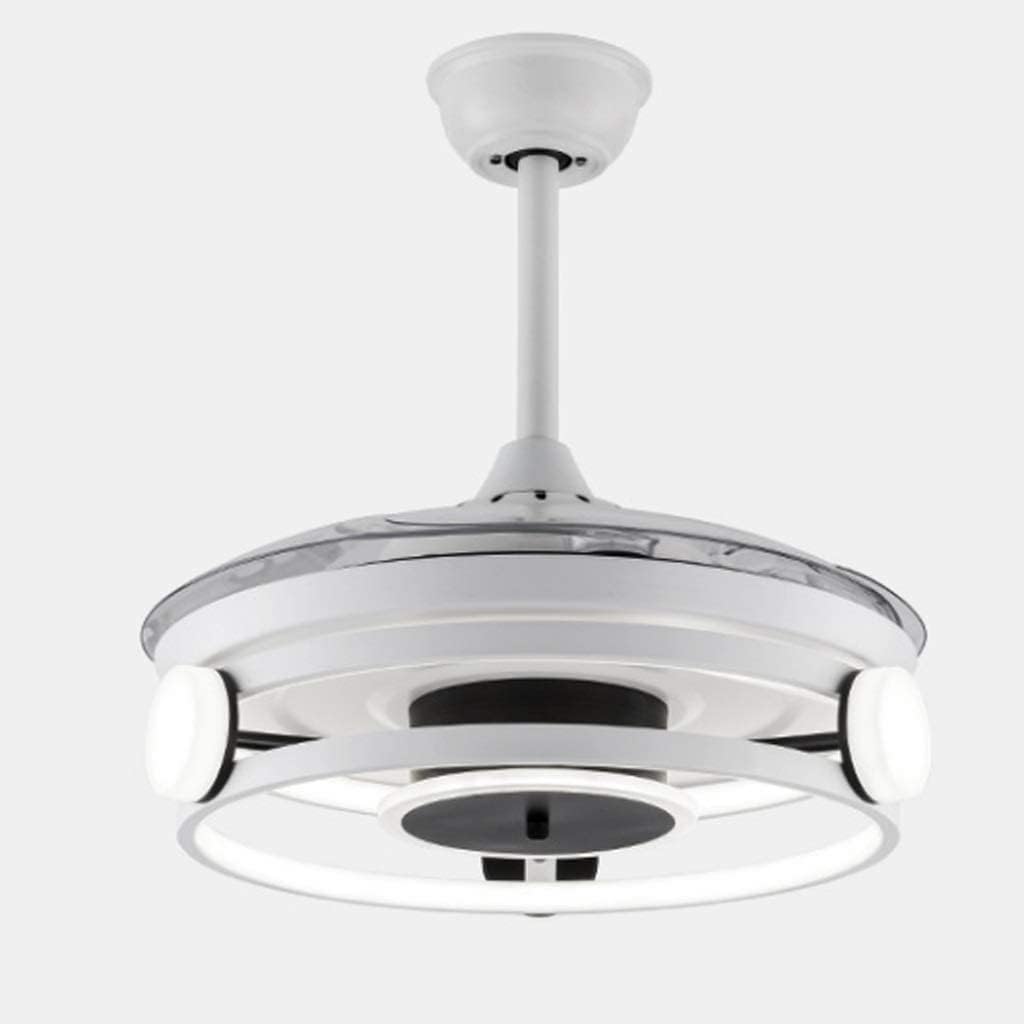
Figure 6.2: Side view of the OUZVI ceiling fan with its transparent acrylic blades fully retracted, showcasing its compact and discreet design when not in use as a fan.

Figure 6.3: The OUZVI ceiling fan in operation, illustrating the airflow generated by its extended blades, providing a comfortable breeze in the room.
7. Care and Maintenance
Regular maintenance will help prolong the life and performance of your ceiling fan.
- Cleaning: To clean the fan, wipe with a soft, damp cloth. Do not use abrasive cleaners or solvents as they may damage the finish or acrylic blades. Ensure the fan is turned off and power is disconnected before cleaning.
- Blade Care: The ABS blades are moisture-proof and non-deformable. Clean them gently to avoid scratches.
- Motor: The pure copper motor is designed for durability and quiet operation and requires no lubrication.
- Light Source: The integrated LED light source is designed for long life. If it requires replacement, contact customer support.
- Tightness Check: Periodically check all screws and connections for tightness. Retighten as necessary.
8. Troubleshooting
Before contacting customer support, please refer to the following troubleshooting guide for common issues:
| Problem | Possible Cause | Solution |
|---|---|---|
| Fan does not start. | No power to the fan; Loose wire connections; Remote control battery low or incorrectly installed. | Check circuit breaker. Ensure all wire connections are secure. Replace remote control batteries and ensure correct polarity. |
| Light does not turn on. | Loose wire connections; LED module failure; Remote control issue. | Check wire connections. Test with remote. If issue persists, contact customer support for LED module replacement. |
| Fan makes unusual noise. | Loose screws on fan housing or blades; Mounting bracket not secure. | Check and tighten all screws on the fan and mounting bracket. Ensure the fan is properly balanced. |
| Remote control not working. | Low or dead batteries; Remote not paired (if applicable); Obstruction between remote and receiver. | Replace batteries. Ensure no obstructions. If pairing is required, refer to specific remote pairing instructions (usually in physical manual). |
9. Warranty Information
OUZVI products are manufactured to high-quality standards. While specific warranty details may vary by region and retailer, generally, this product is covered by a limited manufacturer's warranty against defects in materials and workmanship from the date of purchase.
Please retain your purchase receipt as proof of purchase. For detailed warranty terms and conditions, or to make a warranty claim, please contact OUZVI customer support.
Note: Damage caused by improper installation, misuse, neglect, or unauthorized repairs is not covered under warranty.
10. Customer Support
If you have any questions, require assistance with installation, or encounter issues not covered in the troubleshooting section, please do not hesitate to contact OUZVI customer support.
Contact Information:
- Website: Visit OUZVI on Amazon (for general product information)
- Email: Refer to your product packaging or purchase documentation for direct support email.
- Phone: Refer to your product packaging or purchase documentation for direct support phone number.
Please have your model number (B0FMKMFD42) and purchase date ready when contacting support.


