
1. Introduction
Thank you for choosing the FINOTI L200 PRO MAX GPS Drone. This advanced quadcopter features a 4K HD camera with a 2-axis gimbal, GPS intelligent flight modes, and optional 360° obstacle avoidance. This manual provides essential information for safe operation, setup, and maintenance to ensure you get the most out of your drone.

Image 1.1: The FINOTI L200 PRO MAX GPS Drone, showcasing its sleek design and integrated camera system.
2. Safety Information
Please read all safety warnings and precautions carefully before operating the drone. Failure to follow these instructions may result in injury, damage to the drone, or property damage.
- Local Regulations: Always comply with local aviation regulations and restrictions.
- Pre-Flight Check: Ensure the drone, remote controller, and batteries are fully charged and in good working condition before each flight.
- Environmental Conditions: Do not fly in strong winds, rain, snow, or fog. Avoid flying near crowds, buildings, or high-voltage lines.
- Line of Sight: Maintain visual line of sight with the drone at all times.
- Propeller Safety: Keep hands, face, and loose clothing away from rotating propellers.
- Battery Handling: Use only approved chargers and batteries. Do not overcharge or puncture batteries.
- Age Restriction: This product is not suitable for children under 14 years old.
3. Package Contents
Verify that all items listed below are included in your package. If any items are missing or damaged, please contact customer support.
- 1 x L200 PRO MAX Drone (with or without obstacle avoidance device, optional)
- 1 x Obstacle Avoidor (optional)
- 1 x Remote Controller
- 1 x Battery (one battery included in the drone, this package is for Dual Battery variant, so 2 batteries total)
- 1 x USB Charging Cable
- 8 x Spare Propeller Blades
- 1 x User Manual
- 4 x Screws
- 1 x Screwdriver
- 1 x Storage Bag
4. Component Overview
4.1 Drone Components
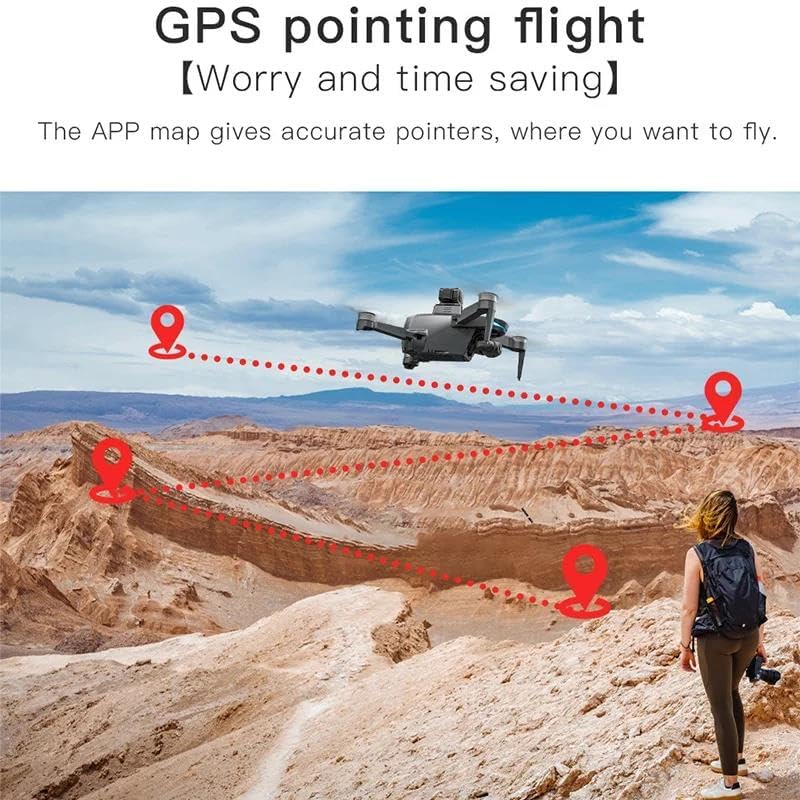
Image 4.1: Detailed diagram highlighting key components of the L200 PRO MAX drone, including the 360° laser obstacle avoidor, GPS module, 4K HD camera, and 2-axis mechanical gimbal.
- Propellers: For lift and propulsion.
- Motors: Brushless motors for stable flight.
- 4K HD Camera: Front-facing camera with 80° adjustable angle and 100° wide-angle lens.
- 2-axis Gimbal: Stabilizes the camera for smooth footage.
- GPS Module: Enables intelligent flight features.
- 360° Laser Obstacle Avoidor (Optional): Detects obstacles up to 25 meters away.
- Battery Compartment: Houses the flight battery.
- Bottom Camera (1280*720P): For optical flow positioning and additional views.
4.2 Remote Controller Overview
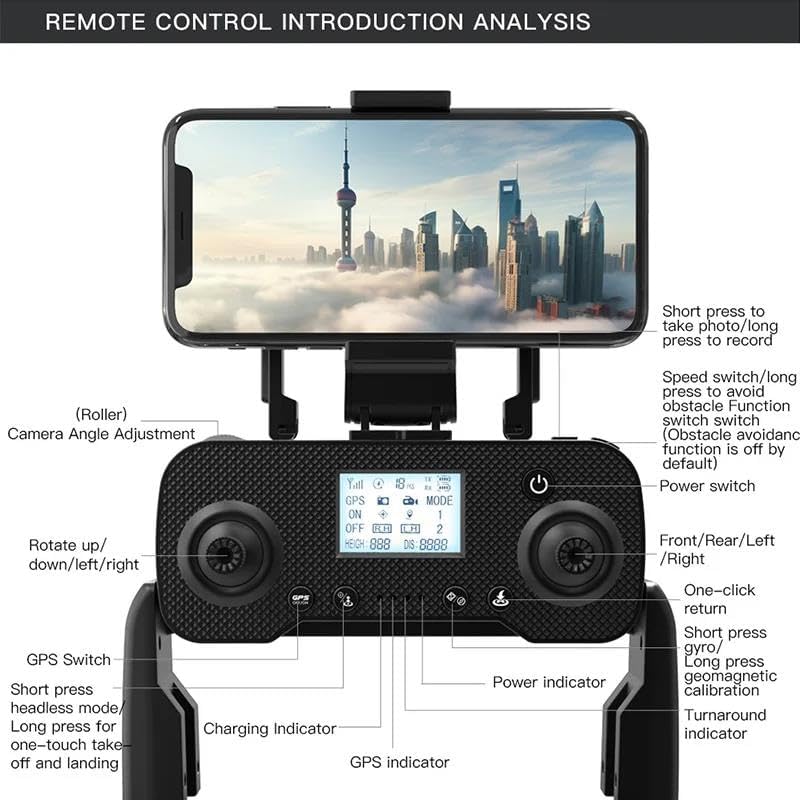
Image 4.2: Detailed diagram of the remote controller, labeling buttons and functions such as speed switch, camera angle adjustment, GPS switch, and power indicators.
- Power Switch: Turns the remote controller on/off.
- Joysticks: Control drone movement (left for throttle/yaw, right for pitch/roll).
- GPS Switch: Toggles GPS mode.
- Speed Switch: Adjusts flight speed (long press for obstacle avoidance function toggle).
- Camera Angle Adjustment (Roller): Adjusts the vertical angle of the 4K camera.
- Photo/Video Button: Short press for photo, long press for video recording.
- One-Click Return: Initiates automatic return to home.
- One-Touch Takeoff/Landing: For simplified flight initiation and termination.
- Mobile Phone Clip: Secures your smartphone for FPV viewing.
5. Setup
5.1 Battery Charging and Installation
- Charge Batteries: Use the provided USB charging cable to fully charge both drone batteries. The charging indicator will change when charging is complete.
- Install Drone Battery: Insert a fully charged battery into the drone's battery compartment until it clicks securely into place.
- Install Remote Controller Batteries: Open the battery cover on the back of the remote controller and insert 3 AA batteries (not included), ensuring correct polarity.
5.2 Propeller Installation
The drone comes with propellers pre-installed. If replacement is needed:
- Identify propellers marked 'A' and 'B'.
- Match 'A' propellers to 'A' motor shafts and 'B' propellers to 'B' motor shafts.
- Secure each propeller with the provided screws using the screwdriver. Ensure they are firmly attached but not overtightened.
5.3 Obstacle Avoidor Installation (Optional)
If your package includes the optional obstacle avoidor:
- Locate the designated slot on top of the drone.
- Gently slide the obstacle avoidor into the slot until it is securely seated.
5.4 App Download and Connection
- Scan the QR code in the manual or search for the official FINOTI drone app in your smartphone's app store.
- Install the app.
- Power on the drone and the remote controller.
- On your smartphone, connect to the drone's Wi-Fi network (usually named "FINOTI-L200PROMAX-XXXX").
- Open the app to establish connection and view the FPV feed.
6. Operating Instructions
6.1 Power On/Off
- Drone: Press and hold the power button on the drone for 2 seconds until the indicator lights turn on.
- Remote Controller: Press the power button on the remote controller. It will beep, and the indicator lights will turn on.
- Power Off: Reverse the power-on steps.
6.2 Pairing and Calibration
- Place the drone on a flat, level surface.
- Power on the drone and remote controller.
- Push the left joystick up then down to pair the remote with the drone.
- Gyroscope Calibration: Push both joysticks down and to the left simultaneously until the drone lights flash rapidly, then become solid.
- Compass Calibration: Push both joysticks down and to the right simultaneously. The drone lights will flash slowly. Pick up the drone and rotate it horizontally 360° until the lights flash quickly. Then rotate it vertically 360° with the nose pointing down until the lights become solid.
6.3 Takeoff and Landing
- Manual Takeoff: Push both joysticks outwards and downwards to start the motors. Slowly push the left joystick up to ascend.
- One-Touch Takeoff: Press the one-touch takeoff/landing button on the remote controller. The drone will automatically ascend to a safe height.
- Manual Landing: Slowly pull the left joystick down to descend. Once on the ground, hold the left joystick down for 3 seconds to stop the motors.
- One-Touch Landing: Press the one-touch takeoff/landing button. The drone will automatically descend and land.
6.4 Basic Flight Controls
- Left Joystick (Throttle/Yaw): Up/Down for altitude, Left/Right for rotation (yaw).
- Right Joystick (Pitch/Roll): Up/Down for forward/backward movement (pitch), Left/Right for left/right movement (roll).
- Speed Switch: Short press to cycle through speed modes (low, medium, high).
7. Advanced Features
7.1 GPS Intelligent Flight Modes
Ensure GPS signal is strong before activating these modes (indicated by solid GPS light on drone/remote).
- One-Click Return Home (RTH): Press the RTH button. The drone will automatically return to its takeoff point. It also activates automatically on low battery or signal loss.
- Follow Me Mode: In the app, select Follow Me. The drone will follow the remote controller or smartphone.
- Waypoint Flight (Multi-point Route Planning): In the app, draw a path on the map. The drone will fly along the specified route.
- Fixed-Point Surround Flight: Select a point of interest in the app, and the drone will orbit around it.

Image 7.1: Visual representation of the GPS pointing flight feature, showing the drone following a pre-defined route on a map.
7.2 360° Obstacle Avoidance
The optional 360° laser obstacle avoidor enhances flight safety by detecting obstacles up to 25 meters away.
- Activation: Long press the speed switch button on the remote controller to toggle the obstacle avoidance function on/off.
- Operation: When active, the drone will automatically adjust its flight path to avoid detected obstacles.

Image 7.2: Illustrations of the drone's 360° obstacle avoidance system in various environments, including following, glass mirror, night, and corridor navigation.
7.3 Camera and FPV System
The L200 PRO MAX features a 4K ESC front camera and a 1280*720P bottom camera for versatile aerial photography and FPV.
- 4K ESC Camera: Captures 3840*2160P photos and 30fps video. Adjustable 80° angle and 100° wide-angle lens.
- 2-axis Gimbal: Provides anti-shake stabilization for smooth, professional-looking footage.
- FPV Transmission: Real-time 5G image transmission to your smartphone via the app, with a range of up to 1200M (ideal conditions).
- Photo/Video Capture: Use the dedicated button on the remote or the app interface.
- Gesture Control: Perform gestures within 1-3 meters of the drone for hands-free photo capture.

Image 7.3: Close-up of the drone's 4K ESC camera with anti-shake lens and field of view indicators.
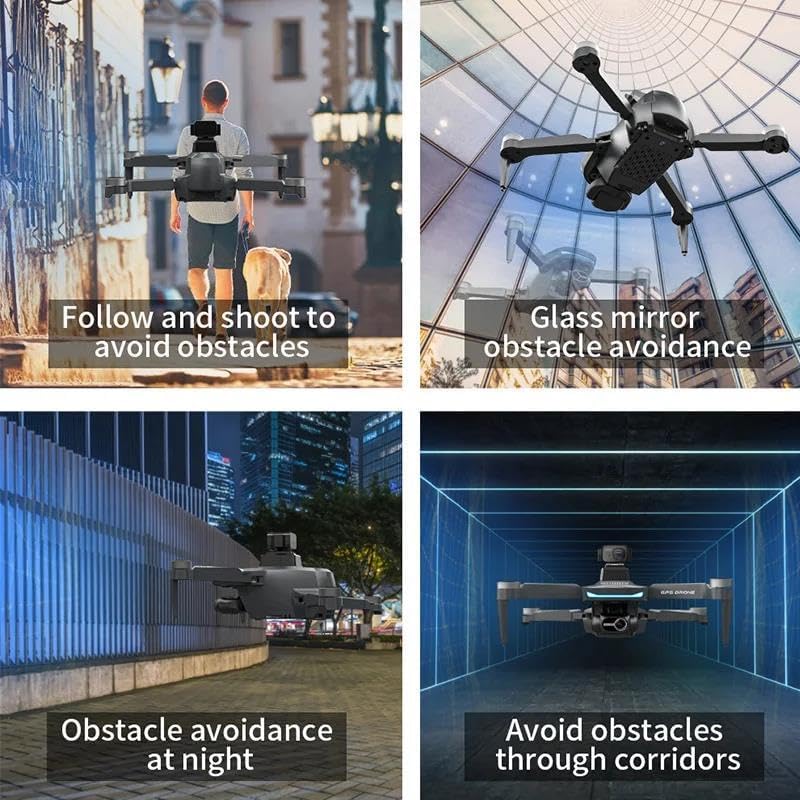
Image 7.4: Remote controller with a smartphone displaying real-time 5G high-definition image transmission from the drone.
8. Maintenance
8.1 Cleaning
- Wipe the drone and remote controller with a soft, dry cloth after each use.
- Do not use harsh chemicals or solvents.
- Ensure no dust or debris accumulates in the motors or camera lens.
8.2 Propeller Replacement
If propellers are damaged, replace them immediately using the spare blades and screwdriver provided. Ensure correct 'A' and 'B' propeller placement.
8.3 Battery Care
- Store batteries in a cool, dry place away from direct sunlight.
- Do not store fully charged or completely depleted batteries for extended periods. Charge them to about 50-60% for long-term storage.
- If a battery is swollen, leaking, or damaged, discontinue use immediately and dispose of it properly.
8.4 Storage
When not in use, fold the drone and store it along with the remote controller and accessories in the provided storage bag to protect it from dust and damage.
9. Troubleshooting
| Problem | Possible Cause | Solution |
|---|---|---|
| Drone does not power on | Low battery; Battery not installed correctly | Charge battery fully; Reinstall battery securely |
| Remote controller does not power on | Low/dead AA batteries; Batteries installed incorrectly | Replace AA batteries; Check polarity |
| Drone cannot take off/unstable flight | Improper calibration; Damaged propellers; Weak GPS signal | Perform gyroscope and compass calibration; Replace damaged propellers; Fly in an open area with clear sky |
| No FPV feed on smartphone | Not connected to drone's Wi-Fi; App not open/crashed | Connect to drone's Wi-Fi in phone settings; Restart app and drone |
| Obstacle avoidance not working | Feature disabled; Sensor blocked/damaged | Long press speed switch to enable; Clean sensor; Contact support if damaged |
| Drone flies away/loses control | Weak GPS signal; Interference; Out of range | Fly in open area; Avoid strong electromagnetic interference; Stay within control range; Use One-Click Return Home |
10. Specifications
- Model: L200 PRO MAX
- Brand: FINOTI
- Dimensions (Folded): 130*75*85mm
- Flight Time: Up to 25 minutes (per battery)
- Drone Battery: 7.4V/1600mAh
- Remote Control Range: Up to 3000M (ideal conditions)
- FPV Transmission Range: Up to 1200M (ideal conditions)
- Max Flight Height: 120M
- Front Camera: 4K ESC (3840*2160P photos, 30fps video), 80° adjustable angle, 100° wide-angle lens
- Gimbal: 2-axis mechanical anti-shake
- Bottom Camera: 1280*720P
- Obstacle Avoidance: Optional 360° laser, detects up to 25M
- Motor: 1503 Brushless Motor
- Stabilization: 6-axis gyroscope, height hold via pressure sensor
11. Warranty and Support
For warranty information and technical support, please refer to the warranty card included in your package or contact FINOTI customer service through the retailer where the product was purchased. Keep your proof of purchase for warranty claims.
For further assistance, visit the official FINOTI website or contact their support team directly.