1. Introduction
This manual provides essential instructions for the safe and efficient operation of your BUUBO 1200W Switching Power Supply. This device is designed to convert AC input voltage (100-240V) to a stable DC output, available in various voltages including 12V, 18V, 24V, 36V, 48V, 60V, 70V, and 72V, with a maximum output power of 1200W. It is suitable for a wide range of applications requiring a reliable DC power source.

Figure 1: BUUBO 1200W Switching Power Supply, showing its compact, rectangular metal casing with terminal block connections.
2. Safety Instructions
Please read and understand all safety instructions before installation and operation. Failure to follow these instructions may result in electric shock, fire, or other hazards.
- Electrical Safety: Always ensure the power supply is disconnected from the AC mains before making any connections or adjustments. Only qualified personnel should perform installation and wiring.
- Ventilation: Ensure adequate ventilation around the power supply to prevent overheating. Do not block ventilation openings.
- Load Capacity: To ensure the longevity and stable operation of the power supply, it is recommended to operate it at no more than 80% of its rated power. For a 1200W unit, the recommended maximum continuous load is approximately 960W.
- Protection Features: This power supply includes built-in protection mechanisms.

Figure 2: Diagram illustrating the six safety protection features: Leakage Protection, Short-circuit Protection, Boot Protection, Overload Protection, Over-current Protection, and Over Temperature Protection.
3. Product Features
- High efficiency and reliability.
- Selectable AC input voltage range (110V/220V).
- 100% full load burn-in test for quality assurance.
- Protection against short circuit and overload.
- Integrated cooling fan for efficient heat dissipation.
4. Setup and Installation
4.1 Input Voltage Selection
Before connecting the power supply to the AC mains, ensure the input voltage switch is set correctly for your region (110V or 220V). Incorrect selection can damage the unit.
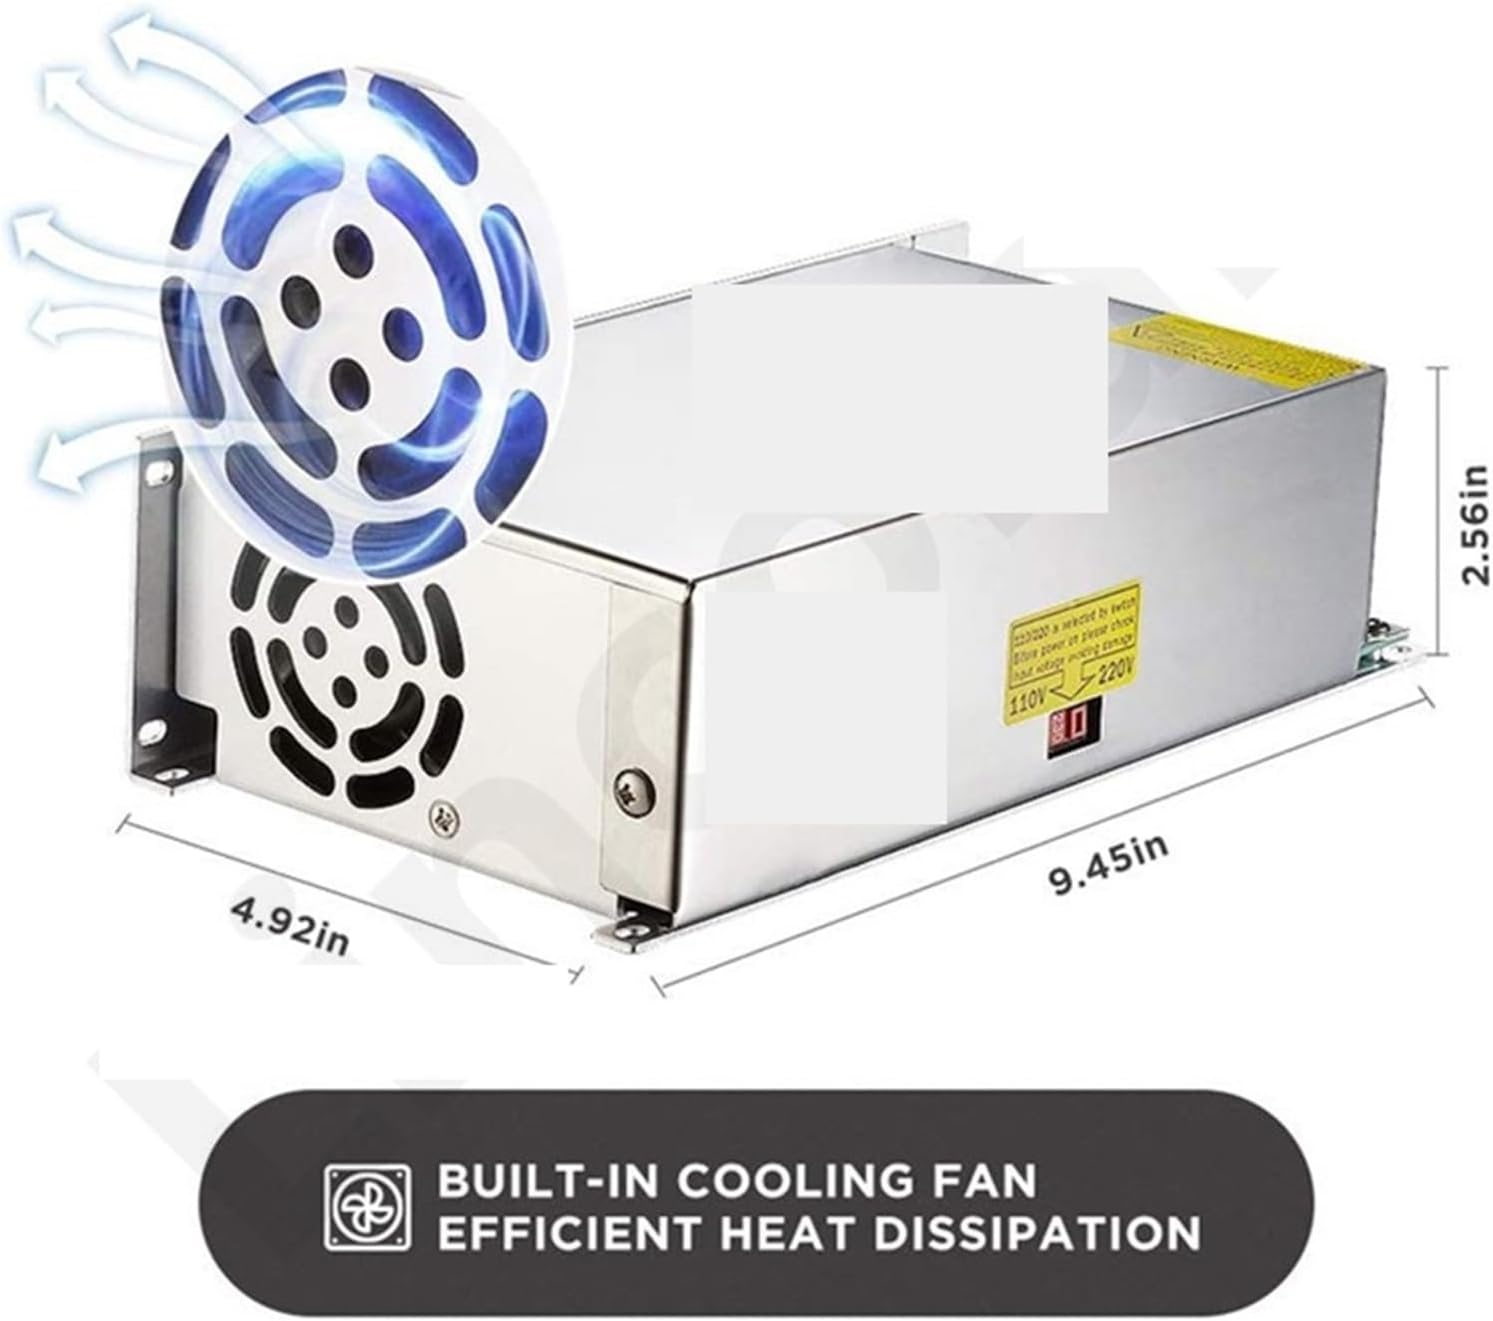
Figure 3: Location of the 110V/220V input voltage selector switch on the side of the power supply unit.
4.2 Wiring Connections
Connect the AC input and DC output wires to the terminal block as indicated. Ensure all connections are secure and correctly polarized.
- AC Input: Connect the Live (L), Neutral (N), and Earth (⌂) wires from your AC mains to the corresponding terminals.
- DC Output: Connect your load to the DC output terminals, ensuring correct polarity (+V for positive, -V for negative). The unit provides multiple positive and negative output terminals for convenience.

Figure 4: Detailed view of the terminal block, showing connections for Live (L), Neutral (N), Earth (⌂), DC output negative (-V), and DC output positive (+V). An 'ADJ' potentiometer for output voltage regulation is also visible.
4.3 Mounting
The power supply features screw fixing holes for secure mounting on a wall or shelf. Ensure the mounting location allows for proper ventilation.
5. Operating Instructions
5.1 Power On/Off
Once all connections are secure and the input voltage is correctly selected, connect the power supply to the AC mains. The unit will power on automatically. Disconnect from AC mains to power off.
5.2 Output Voltage Adjustment
The output DC voltage can be finely adjusted using the 'ADJ' potentiometer located on the terminal block. Use a small screwdriver to carefully turn the potentiometer clockwise to increase voltage or counter-clockwise to decrease it. Monitor the output voltage with a multimeter during adjustment.
6. Typical Applications
This versatile switching power supply is suitable for various applications, including but not limited to:
- Industrial automation systems
- LED lighting (downlights, ceiling lights, strip lights)
- LED displays
- Communication equipment
- Motor-driven devices
- Water pumps
- Laser printers
- General electrical equipment
- CCTV security systems
- DIY electronics projects

Figure 5: Illustrative diagram showing various applications for the power supply, including LED strip lights, motors, water pumps, laser printers, CCTV systems, and other electrical equipment.
7. Maintenance
- Cleaning: Periodically clean the exterior of the power supply with a dry, soft cloth. Do not use liquid cleaners or solvents.
- Ventilation: Ensure that the cooling fan and ventilation openings remain free from dust and obstructions. Blocked vents can lead to overheating and reduced lifespan.
- Connection Checks: Regularly inspect all wiring connections for tightness and signs of wear or corrosion.
8. Troubleshooting
8.1 No Output Power
- Check if the AC input voltage switch (110V/220V) is set correctly.
- Verify that the AC mains power is active and the power cord is securely connected.
- Inspect all wiring connections for proper contact and polarity.
- Check for any tripped circuit breakers or blown fuses in your electrical system.
8.2 Incorrect Output Voltage
- Use a multimeter to measure the output voltage.
- Adjust the 'ADJ' potentiometer carefully to set the desired output voltage.
- Ensure the load connected is within the recommended 80% of the rated power. Overloading can cause voltage drop.
8.3 Overheating
- Ensure the power supply is in a well-ventilated area.
- Clear any dust or obstructions from the cooling fan and ventilation openings.
- Reduce the load on the power supply if it exceeds the recommended 80% capacity.
9. Specifications
| Feature | Specification |
|---|---|
| Model Number | 1005005191633442 |
| Input Voltage | AC 100-240V (selectable) |
| Output Power | 1200W |
| Output Voltage (Current Model) | DC 60V, 20A |
| Adjustable Output Voltage | Yes (via ADJ potentiometer) |
| Dimensions (L x W x H) | Approx. 9.45 x 4.92 x 2.56 inches (240 x 125 x 65 mm) |
| Item Weight | 3.31 pounds (1.5 kg) |
| Cooling | Built-in fan |
| Protection Features | Leakage, Short-circuit, Boot, Overload, Over-current, Over Temperature |

Figure 6: Image showing the dimensions of the power supply (9.45in length, 4.92in width, 2.56in height) and highlighting the built-in cooling fan for efficient heat dissipation.
10. Warranty and Support
Specific warranty details are not provided in the product information. For warranty claims, technical support, or service inquiries, please contact the manufacturer, BUUBO, or your point of purchase. Keep your purchase receipt as proof of purchase.