
1. Introduction
Thank you for choosing the AIRIVO SR03 Smart Alarm Clock. This device combines a versatile alarm clock with a sound machine, offering a colorful LCD display, multiple alarm settings, and a wide range of soothing sounds. Designed for ease of use and functionality, it aims to enhance your daily routine and sleep environment. Please read this manual thoroughly before use to ensure proper operation and to fully utilize all features.
2. Safety Information
- Do not expose the device to water or excessive moisture.
- Avoid extreme temperatures, direct sunlight, or dusty environments.
- Use only the provided power adapter and USB-C cable.
- Do not attempt to disassemble or repair the device yourself. Refer all servicing to qualified personnel.
- Keep out of reach of children and pets.
- Ensure the device is placed on a stable, flat surface.
3. Package Contents
Verify that all items are present in the package:
- AIRIVO SR03 Smart Alarm Clock
- USB-C Power Cable
- User Manual
4. Product Overview
The AIRIVO SR03 Smart Alarm Clock features a compact design with an intuitive interface. It includes a vibrant LCD display, a multi-function rotary knob, and a snooze button.
4.1 Components
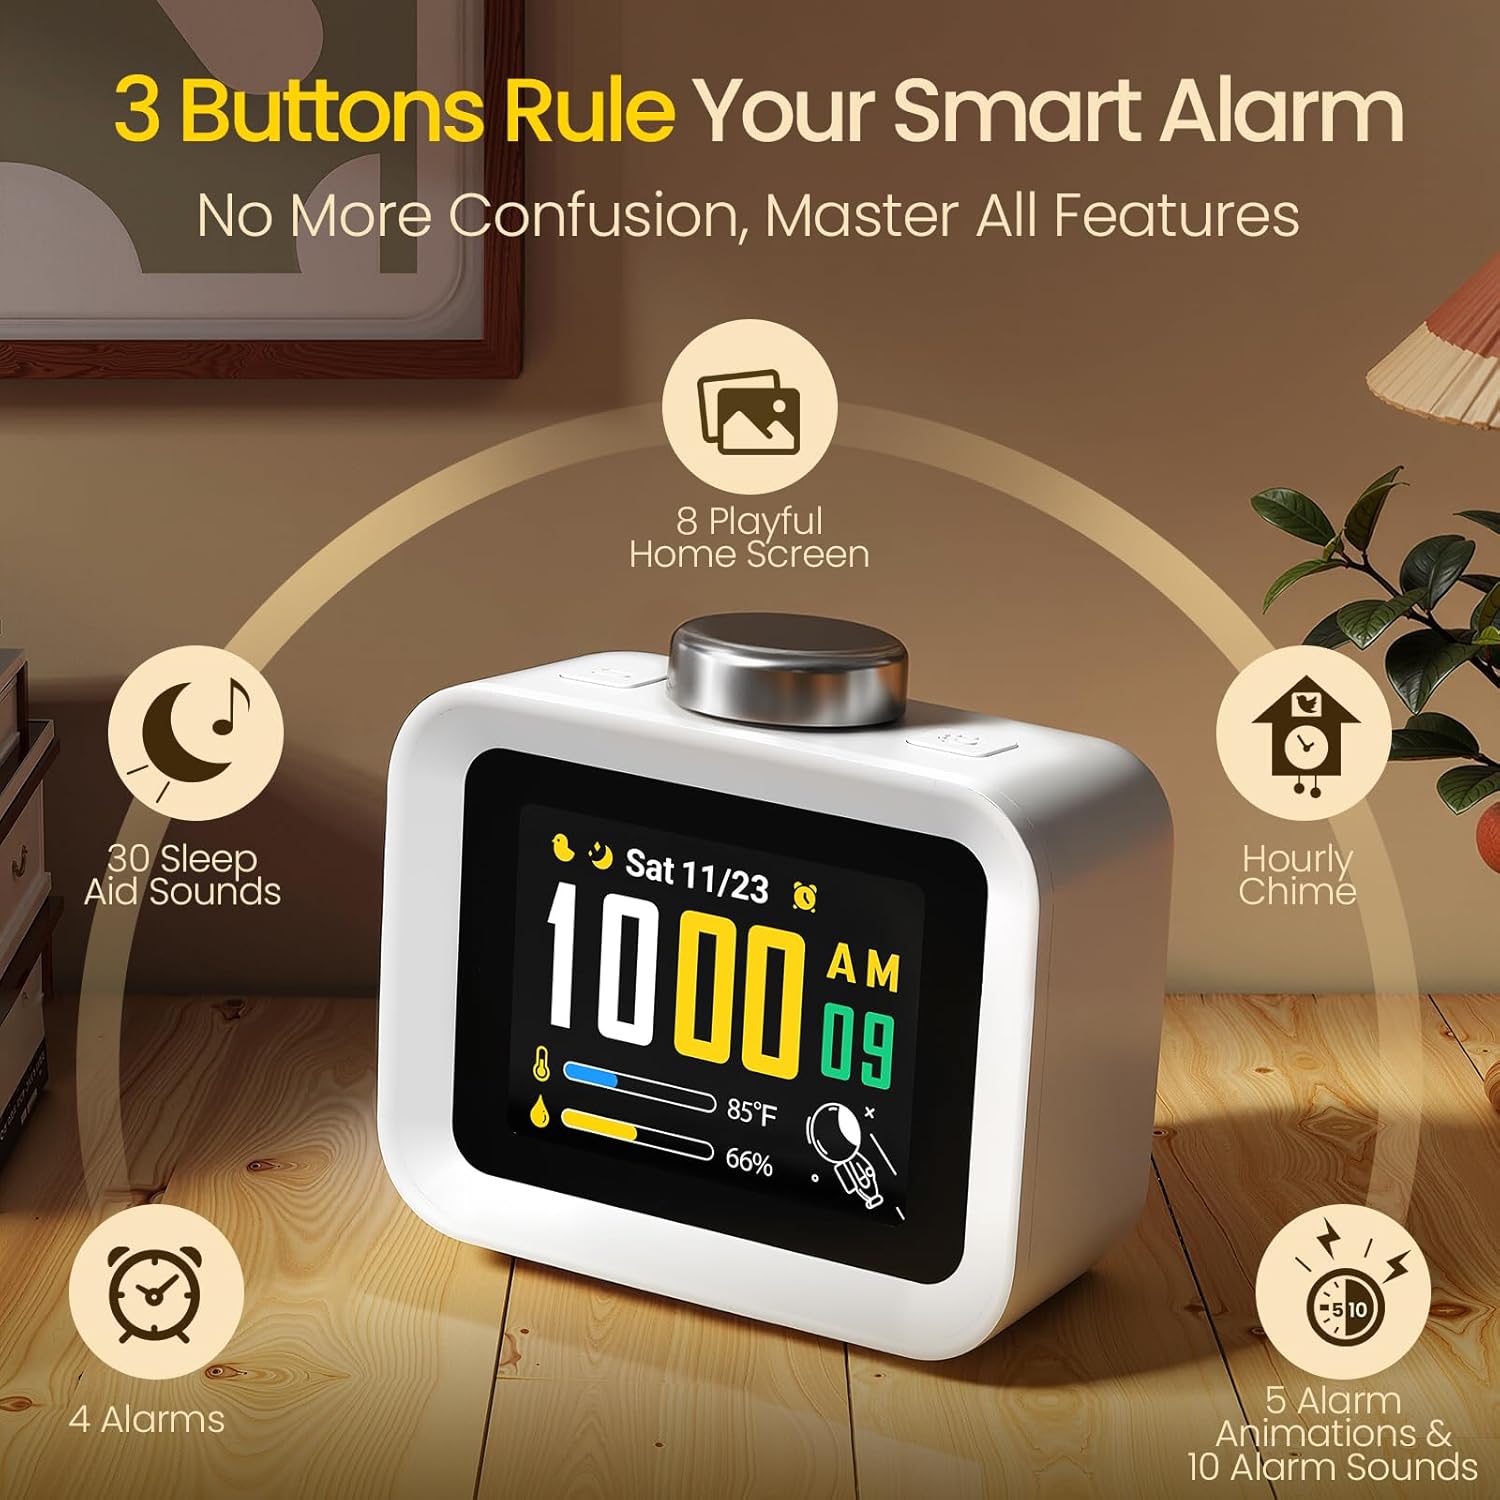
Image: The AIRIVO SR03 Alarm Clock, illustrating its three primary control buttons for easy navigation and function management.
- LCD Display: Shows time, date, temperature, humidity, and various visual themes.
- Rotary Knob (Top): Used for navigation, selection, and adjustment of settings. Press to confirm, rotate to change values.
- Snooze Button (Top): Activates snooze during an alarm.
- USB-C Port (Rear): For power input.
5. Setup
5.1 Power Connection
- Connect the provided USB-C cable to the port on the back of the alarm clock.
- Plug the other end of the USB-C cable into a compatible USB power adapter (not included) and then into a wall outlet.
- The clock will power on and display the initial setup screen.
5.2 Initial Time and Date Setting

Image: A visual guide demonstrating the quick start setup process, including how to set the date and time using the rotary knob.
- Upon first power-on, the clock will prompt you to set the date and time.
- Rotate the knob to adjust the year, month, day, hour, and minute.
- Press the knob to confirm each selection and move to the next setting.
- Once all settings are confirmed, the clock will display the main screen.
6. Operating Instructions
The AIRIVO SR03 is controlled primarily by the multi-function rotary knob. Press the knob to enter menus or confirm selections, and rotate it to navigate options or adjust values.
6.1 Setting Time and Date
- From the main screen, press the rotary knob to enter the main menu.
- Rotate the knob to select "Time Settings" or "Date Settings" and press to confirm.
- Adjust values by rotating the knob and confirm each segment (hour, minute, year, month, day) by pressing the knob.
- Select 12/24-hour format as desired.
6.2 Alarm Settings
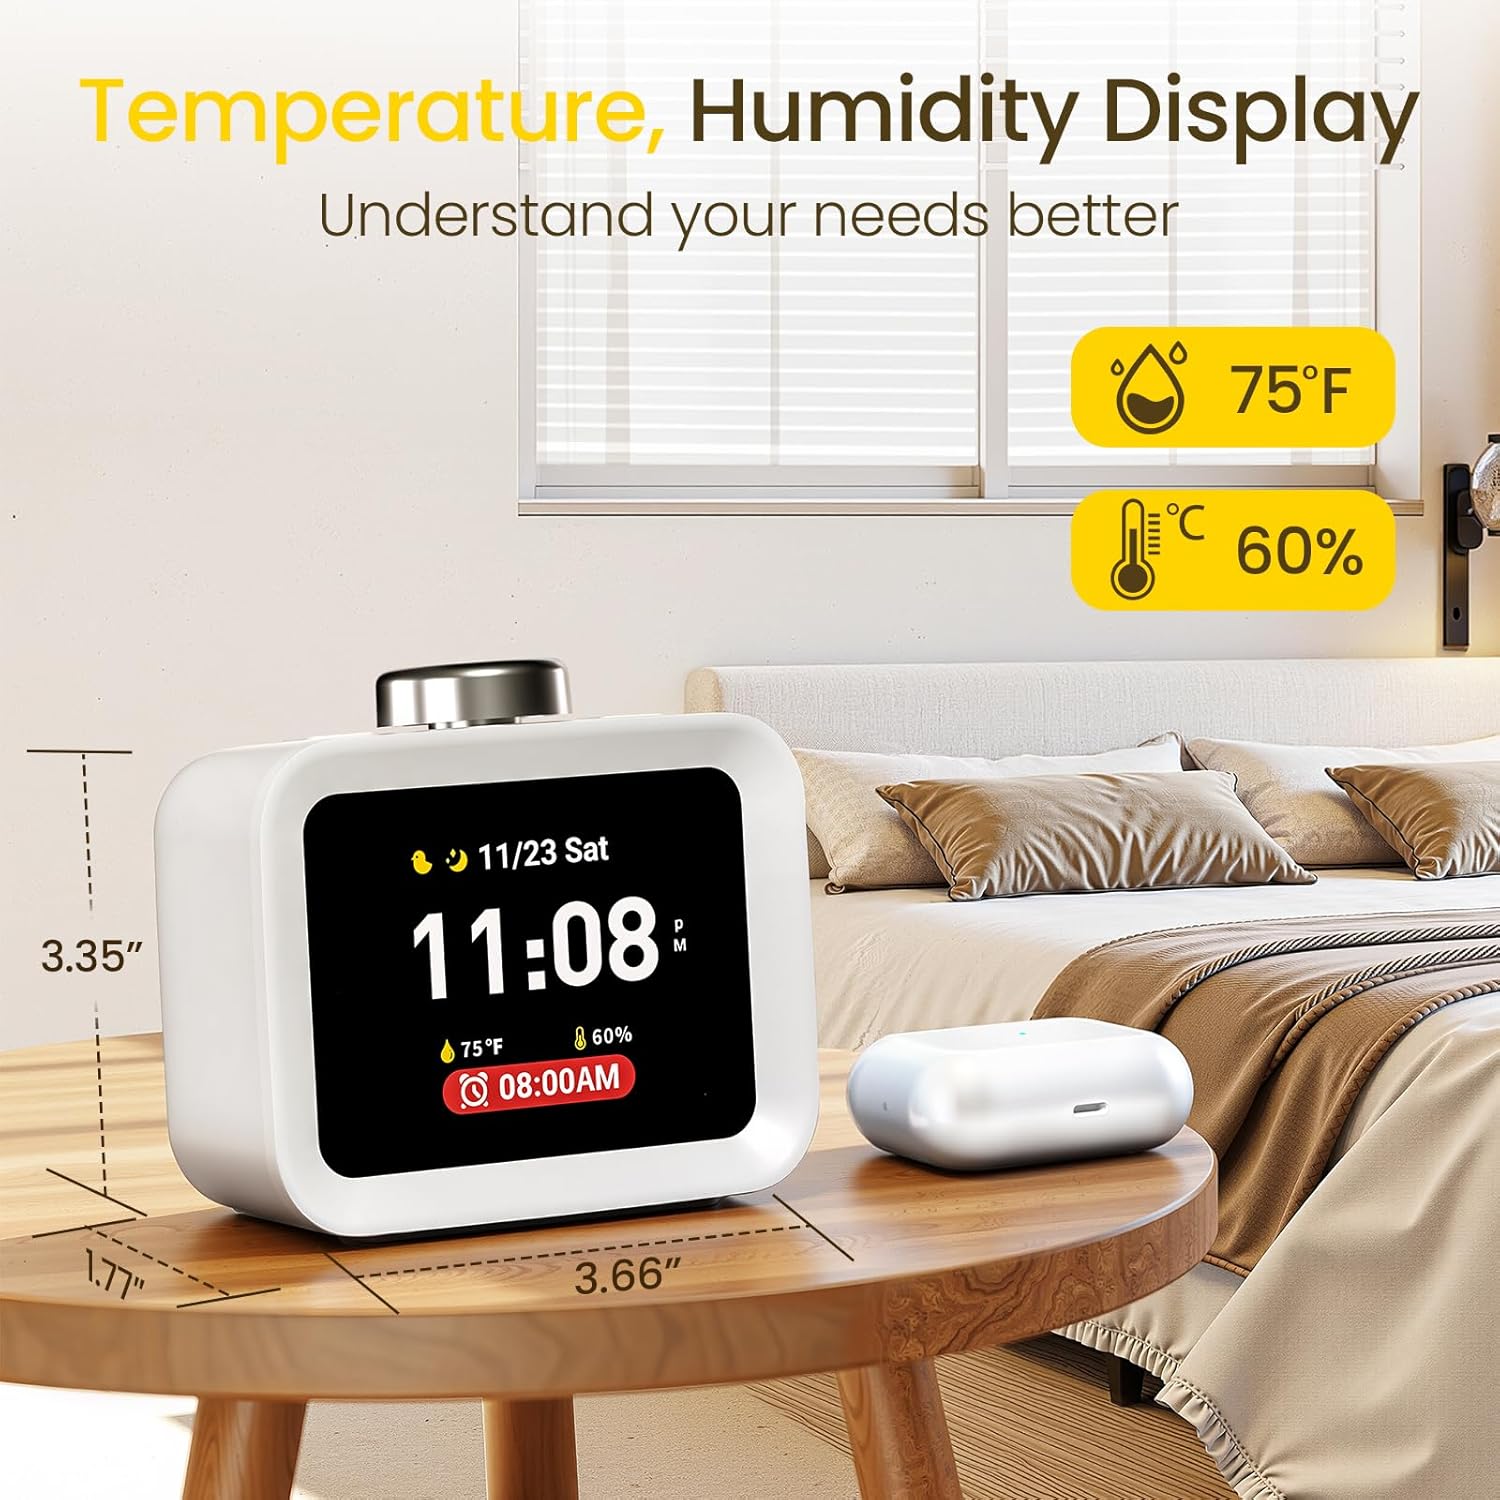
Image: A user interacting with the AIRIVO SR03 alarm clock to set one of its four customizable alarms.
The clock supports up to 4 customizable digital alarms.
- From the main menu, select "Alarm Settings".
- Choose one of the four available alarms (Alarm 1-4) to configure.
- Set Alarm Time: Rotate the knob to set the hour and minute, pressing to confirm each.
- Select Alarm Days: Choose specific days of the week (e.g., Mon-Fri, Sat-Sun, or custom selection).
- Choose Wake-Up Sound: Select from 10 gentle wake-up tunes.
- Select Wake-Up Animation: Choose from 5 playful animations to accompany your alarm.
- Set Volume: Adjust the alarm volume (10 levels).
- Snooze Function: When an alarm sounds, press the snooze button on top to activate a 9-minute snooze. This can be repeated up to 5 times.
6.3 Sound Settings

Image: A child sleeping peacefully with the AIRIVO SR03 clock nearby, showcasing its soothing sound and visual theme capabilities.
The clock offers 30 soothing sounds to aid sleep and relaxation.
- From the main menu, select "Sound Settings".
- Rotate the knob to browse through 30 available sounds (e.g., nature sounds, meditation tones, white noise).
- Press the knob to select a sound.
- Adjust the playback volume using the knob.
- You can set a timer for sound playback (5-120 minutes) or choose to play it all night.
6.4 Display Settings

Image: The AIRIVO SR03 clock showcasing its diverse range of 8 dynamic and static home screen themes, allowing users to customize the display.
Customize your clock's appearance with various themes and brightness levels.
- From the main menu, select "Display Settings".
- Home Screens: Choose from 8 dynamic and static home screen themes. Rotate the knob to preview and press to select.
- Visual Themes (for Soothing Sounds): When playing soothing sounds, select from 5 customizable visual themes to enhance the ambiance.
- Brightness: Adjust the display brightness through 10 levels or enable the auto-dimming function for automatic adjustment based on ambient light.
6.5 Hourly Chime

Image: The AIRIVO SR03 clock on a desk, illustrating its gentle hourly reminder feature for maintaining focus during work or study.
The hourly chime feature provides a subtle reminder throughout the day.
- From the main menu, navigate to "Hourly Chime Settings".
- Enable or disable the hourly chime.
- Customize the chime sound (2 ringtones) and set quiet times if desired.
6.6 Temperature and Humidity Display

Image: A close-up of the AIRIVO SR03 clock's display, clearly showing the real-time temperature and humidity readings.
The built-in sensor monitors room temperature (±0.2°C precision) and humidity in real-time, displayed on the main screen.
6.7 Official Product Video
Video: An official product video from AIRIVO SHOP demonstrating the features and operation of the AIRIVO Colorful LCD Smart Alarm Clock.
7. Maintenance
- Clean the device with a soft, dry cloth. Do not use abrasive cleaners or solvents.
- Keep the device free from dust and debris.
- Ensure proper ventilation around the device.
8. Troubleshooting
| Problem | Possible Cause | Solution |
|---|---|---|
| Clock does not power on. | No power, loose cable. | Ensure USB-C cable is securely connected and power adapter is plugged into a working outlet. |
| Alarm does not sound. | Alarm disabled, volume too low, incorrect time set. | Check alarm settings to ensure it is enabled, adjust volume, and verify alarm time. |
| Display is too dim/bright. | Brightness setting, auto-dimming enabled. | Adjust brightness manually in Display Settings or toggle auto-dimming. |
| Cannot change settings. | Incorrect menu, knob not pressed. | Ensure you are in the correct menu. Press the rotary knob to confirm selections after rotating. |
9. Specifications
| Feature | Detail |
|---|---|
| Brand | AIRIVO |
| Model Number | SR03 |
| Display Type | Digital LCD |
| Alarms | 4 Customizable Digital Alarms with Weekday Selection |
| Snooze Function | 9 minutes (up to 5 times) |
| Soothing Sounds | 30 options (nature, meditation, white noise) |
| Wake-Up Sounds | 10 options |
| Volume Levels | 10 levels (up to 112dB) |
| Display Brightness | 10 levels, Auto-Dimming function |
| Home Screens | 8 Dynamic & Static Themes |
| Visual Themes | 5 options for soothing sounds |
| Hourly Chime | Customizable with 2 ringtones |
| Sensors | Built-in temperature (±0.2°C) and humidity |
| Power Source | Corded Electric (USB-C) |
| Product Dimensions | 3.4"W x 3.7"H |
| Item Weight | 9.6 ounces |
| Material Type | Acrylonitrile Butadiene Styrene (ABS) |
10. Warranty and Support
AIRIVO products are designed and manufactured to the highest quality standards. For information regarding warranty coverage, technical support, or service inquiries, please refer to the warranty card included with your product or visit the official AIRIVO website. Please retain your proof of purchase for any warranty claims.