
Introduction
The Giro Avera MIPS Helmet is designed for comfort, fit, and protection in various winter conditions. This manual provides essential information for the proper use and care of your helmet and accompanying snow goggles.
The Avera MIPS helmet features lightweight In-Mold Construction, the In Form Fit System with Vertical Tuning for a personalized fit, and Thermostat Control Adjustable Venting for on-the-go temperature regulation. It also incorporates the MIPS Brain Protection System for enhanced safety.
Key Features
- Integrated MIPS Brain Protection System: Designed to reduce rotational forces that can result from certain impacts.
- Hardshell with I.M. Hardbody Lower Wrap: Combines a tough outer shell with a polycarbonate lower shell for durability and reduced weight.
- Thermostat Control Adjustable Venting: Allows for instant, custom-tuned airflow with an external control button.
- In Form Fit System with Vertical Tuning: Provides easy, on-the-fly adjustment for a secure and comfortable fit, even with gloves.
- Seamless Compatibility: Designed to integrate perfectly with Giro Ski and Snowboard Goggles.
Setup
1. Helmet Fitting
Ensure the helmet fits snugly and comfortably. The In Form Fit System allows for precise adjustment.

Image: The In Form Dial Fit System on the Giro Avera MIPS helmet, illustrating how to adjust the fit with a dial at the back. A size chart is also visible, showing measurements for Small, Medium, Large, and XL sizes.
- Place the helmet on your head. It should sit level and cover your forehead.
- Turn the dial at the base of the helmet (In Form Fit System) to tighten or loosen the fit until it feels secure without excessive pressure points.
- Adjust the vertical tuning to ensure the helmet sits correctly on your head, providing optimal goggle integration and coverage.
- Fasten the chin strap securely, ensuring it is snug but not uncomfortably tight.
2. Goggle Integration
The Avera MIPS helmet is designed for seamless compatibility with Giro Ski and Snowboard Goggles.

Image: A pair of Giro Cruz Snow Goggles, featuring a lilac frame and strap with a prominent Giro logo. The lens has a reflective finish.
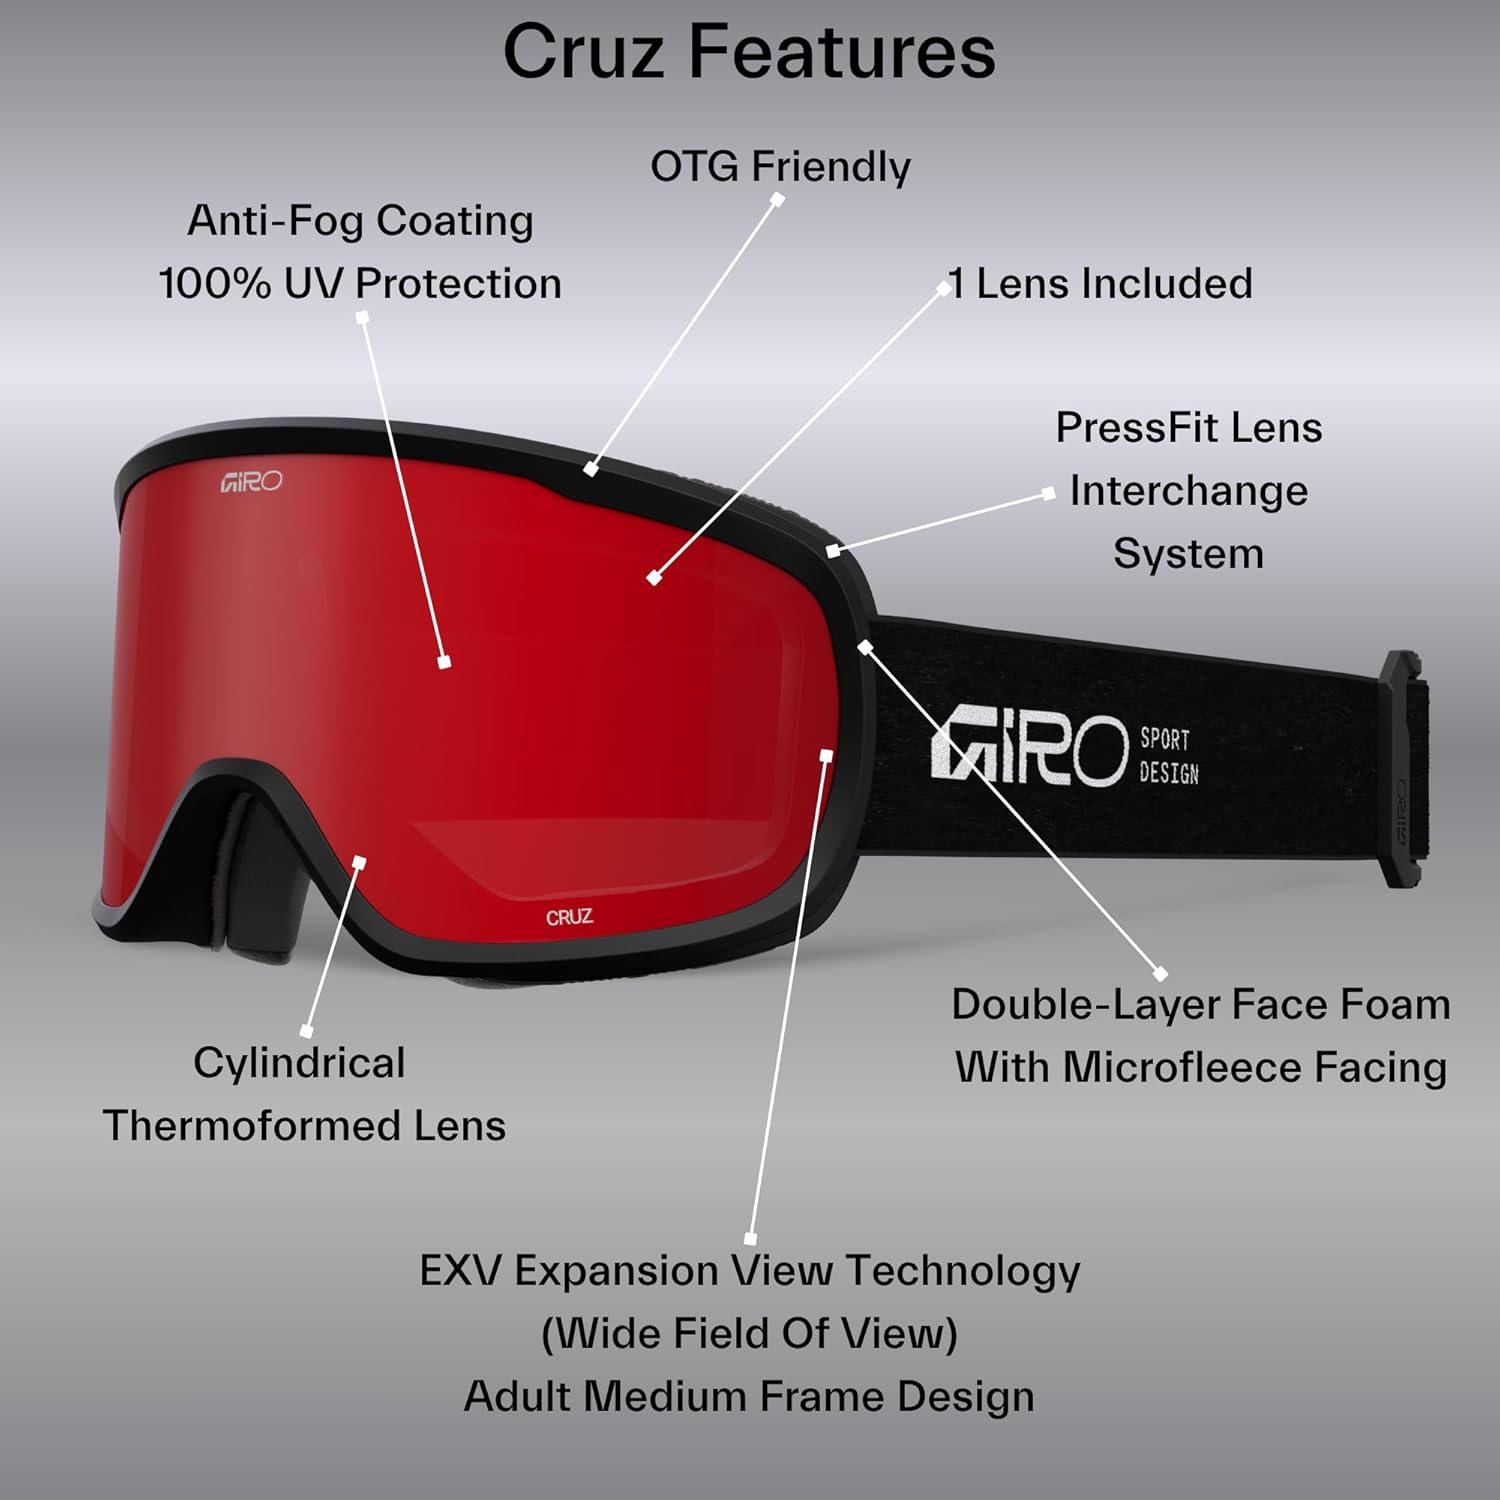
Image: A diagram highlighting the features of the Giro Cruz Goggles, including Anti-Fog Coating, 100% UV Protection, OTG Friendly design, 1 Lens Included, PressFit Lens Interchange System, Double-Layer Face Foam with Microfleece Facing, Cylindrical Thermoformed Lens, EXV Expansion View Technology (Wide Field Of View), and Adult Medium Frame Design.
- Place your goggles over your eyes and position the strap around the back of the helmet.
- Ensure the goggle strap is secured by the helmet's goggle retainer clip (if present).
- Adjust the goggle strap for a comfortable fit that holds the goggles firmly against your face without creating pressure points or gaps.
Operating the Helmet
Adjusting Ventilation
The Thermostat Control Adjustable Venting system allows you to regulate airflow and temperature inside your helmet.
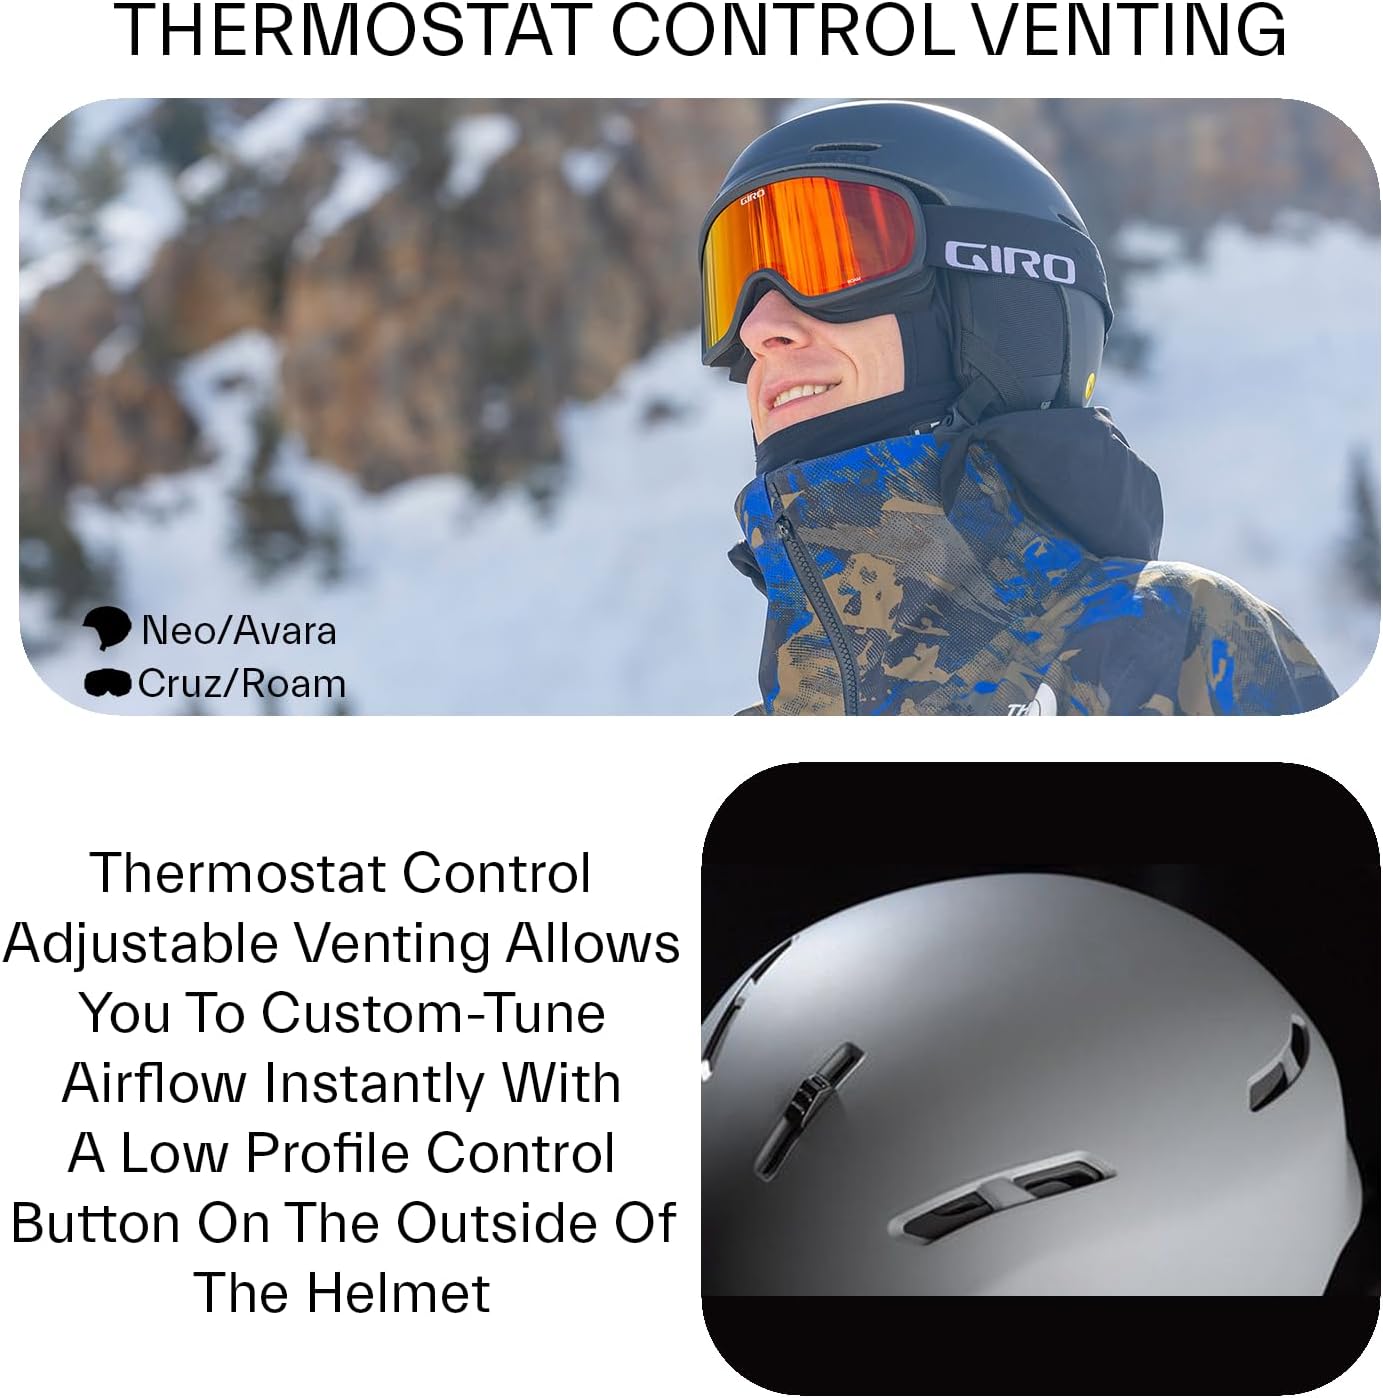
Image: A close-up of the Giro Avera MIPS helmet, highlighting the Thermostat Control Adjustable Venting system. A rider is shown wearing the helmet and goggles in a snowy environment, demonstrating the helmet's use.
- Locate the low-profile control button on the outside of the helmet.
- Slide the button forward to open the vents for maximum airflow and cooling.
- Slide the button backward to close the vents for maximum warmth.
- Adjust as needed to maintain optimal comfort throughout your activity.
Maintenance
Cleaning Your Helmet
- Clean the helmet exterior with a soft, damp cloth and mild soap. Avoid harsh chemicals or abrasive cleaners.
- The interior padding can often be removed and hand-washed with mild soap and water. Allow to air dry completely before reinserting.
- Clean goggle lenses with a microfiber cloth designed for optics. Do not wipe the inner surface if it has an anti-fog coating, as this can damage it.
Storage
- Store your helmet in a cool, dry place away from direct sunlight and extreme temperatures.
- Use the included helmet bag (if applicable) to protect it from scratches and dust.
Safety Information
The Giro Avera MIPS helmet is equipped with the Multi-directional Impact Protection System (MIPS) to help reduce rotational forces to the brain in certain angled impacts.

Image: A close-up of the Giro Avera MIPS helmet, showing the yellow MIPS logo sticker, indicating the helmet is equipped with the Multi-directional Impact Protection System.
Video: An informational video explaining the benefits of MIPS technology in Giro ski and snowboard helmets, detailing how it helps reduce rotational forces during impacts.
No helmet can protect against all foreseeable impacts. Always inspect your helmet for damage before each use. If the helmet has sustained an impact, even if no visible damage is present, it should be replaced immediately.
Specifications
| Feature | Detail |
|---|---|
| Brand | Giro |
| Model Name | Avera Mips |
| Age Range | Adult |
| Outer Material | Acrylonitrile Butadiene Styrene (ABS) |
| Inner Material | Foam |
| Special Feature | Ventilation |
| Recommended Uses | Skiing, Snowboarding |
| Item Dimensions (LxWxH) | 12 x 10 x 10 inches |
| Package Weight | 0.95 Kilograms |
| Included Components | Snow Goggle, Snow Helmet |
Warranty & Support
Warranty Information
Giro Sport Design warrants its products to be free from defects in workmanship and materials for a period of one (1) year from the date of purchase. This warranty is extended only to the original consumer purchaser. During the warranty period, Giro will (at its sole option) repair, replace, or refund the purchase price of any defective part or product covered by this warranty when it is returned by the original owner with proof of purchase. The repair, replacement, or refund will be without charge except for reasonable shipping, handling, and insurance charges.
Customer Support
For further assistance, product registration, or to view other Giro products, please visit the official Giro Store.