1. Safety Information
Please read all safety instructions carefully before installation and use to ensure proper operation and prevent injury or damage.
- Ensure the power supply is disconnected before any installation or maintenance.
- This product must be installed by a qualified professional in accordance with local plumbing and electrical codes.
- Do not expose the product to direct water spray or excessive humidity.
- Keep children and pets away from the toilet during operation, especially when the lid is opening/closing automatically.
- Do not use abrasive cleaners or harsh chemicals on any part of the toilet.
- Regularly inspect the power cord and water hoses for any signs of damage.

2. Package Contents
Verify that all components are present and undamaged before beginning installation.
- One-piece Smart Toilet Unit
- Wireless Remote Control
- Mounting Brackets (x2)
- Screws and Anchors
- Wax Ring
- Screw Plate
- Installation Template
- User Manual (this document)
- Water Supply Hose

3. Setup and Installation
3.1 Pre-Installation Checklist
- Confirm availability of a standard 120V AC power outlet within reach of the toilet.
- Ensure a cold water supply line with a shut-off valve is available.
- Verify floor stability and adequate space for the toilet dimensions (26.77"D x 15.95"W x 17.72"H).
- Gather necessary tools: wrench, screwdriver, drill, level, measuring tape.
3.2 Installation Steps
- Prepare the Area: Turn off the water supply and remove the old toilet if applicable. Clean the flange area thoroughly.
- Position the Template: Use the provided installation template to mark the drilling points for the mounting brackets.
- Install Mounting Brackets: Drill holes as marked and secure the mounting brackets to the floor using the screws and anchors.
- Install Wax Ring: Place the new wax ring onto the toilet flange, ensuring a proper seal.
- Set the Toilet: Carefully lower the smart toilet unit onto the mounting brackets, aligning it with the flange. Press down firmly to create a seal with the wax ring.
- Secure the Toilet: Attach the toilet to the mounting brackets using the provided fasteners. Do not overtighten.
- Connect Water Supply: Connect the water supply hose from the shut-off valve to the toilet's water inlet. Hand-tighten, then use a wrench for a quarter turn. Check for leaks.
- Connect Power: Plug the power cord into a grounded 120V AC outlet.
- Test Functions: Turn on the water supply and power. Allow the toilet to fill and perform initial self-checks. Test flushing and bidet functions.
4. Operating Instructions
4.1 Basic Functions
- Automatic Lid Open/Close: The lid will automatically open when a user approaches and close when the user leaves.
- Foot Sensor Activation: A foot sensor located at the base of the toilet allows for hands-free lid opening and flushing.
- Dual Auto Flush: The toilet features a powerful 1.28 GPF full flush and a water-saving 0.92 GPF half flush. Flushing can be activated automatically upon exit, via foot sensor, or using the remote control.
- Night Light: A soft LED night light illuminates the bowl for safe navigation in low light conditions.


4.2 Bidet Functions
- Posterior Wash: Provides a thorough cleansing for the posterior area.
- Feminine Wash: Offers a gentle and dedicated wash for feminine hygiene.
- Massage Wash: Alternating water pressure for a soothing and stimulating wash.
- Warm Water & Dry Function: Adjustable warm water temperature for washing and a warm air dryer for a comfortable, paperless experience.
- Nozzle Self-Cleaning: The bidet nozzle performs a self-cleaning cycle before and after each use.

4.3 Temperature Control
The smart toilet allows for personalized comfort with adjustable settings for seat, water, and dryer temperatures. Each setting offers four options: Normal, 93°F, 96°F, and 99°F.
- Heated Seat: Provides warmth for comfort, especially in colder environments.
- Warm Water: Ensures a comfortable bidet wash.
- Warm Air Dryer: Dries the area gently after washing.

4.4 Remote Control
The wireless remote control provides convenient access to all functions. The real-time LCD display on the toilet shows current seat, water, and dryer temperatures.
- Flush: Activates flushing.
- Hip/Move: Posterior wash and nozzle oscillation.
- Female/Move: Feminine wash and nozzle oscillation.
- Dryer: Activates warm air drying.
- Water Temp: Adjusts water temperature.
- Seat Temp: Adjusts seat temperature.
- Air Temp: Adjusts dryer air temperature.
- Pressure +/-: Adjusts water pressure.
- Light: Controls the night light.
- ECO: Activates energy-saving mode.
- Self-cleaning: Initiates nozzle self-cleaning.
- Stop: Stops all active functions.
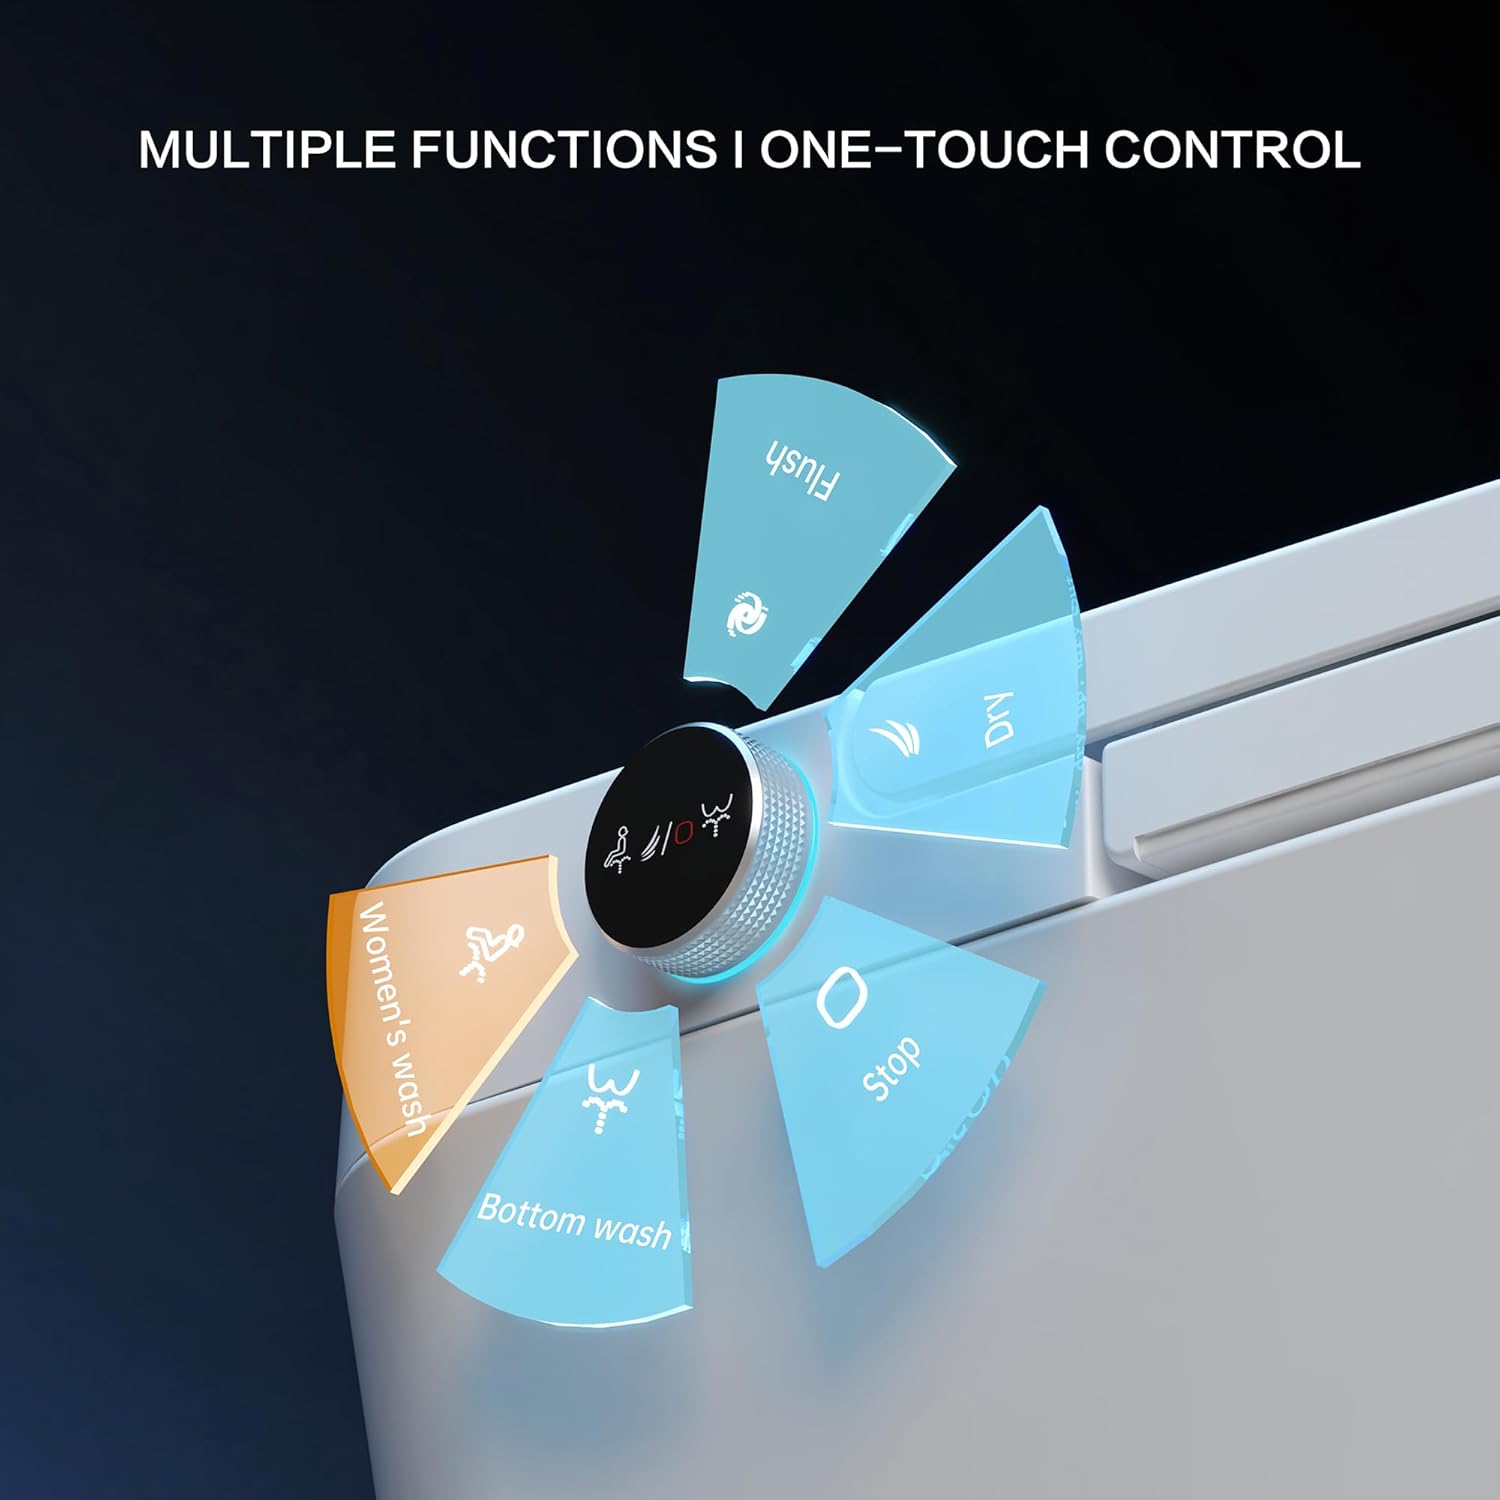
4.5 Side Panel Control
A rotary knob and buttons on the side panel of the toilet provide quick access to essential functions.
- Rotary Knob: Typically controls flush, dry, women's wash, and bottom wash with a simple turn.
- Buttons: May include additional controls for pressure, temperature, or stop functions.
5. Maintenance
5.1 Cleaning
- Exterior: Wipe the exterior surfaces with a soft, damp cloth and a mild, non-abrasive cleaner. Avoid harsh chemicals.
- Seat and Lid: Clean with a soft cloth and mild soap. Do not use strong disinfectants that may damage the material.
- Nozzle: The bidet nozzle has a self-cleaning function. For manual cleaning, gently pull out the nozzle and wipe with a soft cloth. Do not use excessive force.
- Bowl: Use a toilet brush and standard toilet bowl cleaner. Ensure cleaners are safe for ceramic surfaces.
5.2 Filter Replacement
The smart toilet may include a water filter for the bidet function. Refer to the specific filter instructions for replacement frequency and procedure. Typically, filters should be replaced every 6-12 months depending on water quality and usage.
6. Troubleshooting
If you encounter issues, consult the table below before contacting customer support.
| Problem | Possible Cause | Solution |
|---|---|---|
| No power/display off | Power cord unplugged, circuit breaker tripped, power outage. | Check power connection, reset circuit breaker, verify power supply. |
| No water for bidet | Water supply valve closed, water filter clogged. | Open water supply valve, replace water filter. |
| Lid not opening/closing automatically | Sensor obstructed, sensor malfunction. | Clean sensor area, ensure no obstructions. If issue persists, contact support. |
| Weak flush | Low water pressure, partial clog. | Check water supply pressure, clear any visible obstructions in the bowl or trapway. |
| Remote control not working | Dead batteries, remote out of range, interference. | Replace batteries, ensure remote is within range, remove potential interference sources. |
7. Specifications
| Feature | Detail |
|---|---|
| Model Number | ST945B/TANKLESS (U5-1-WK) |
| Product Dimensions | 26.77"D x 15.95"W x 17.72"H |
| Material | ABS, Ceramic |
| Item Weight | 86 Pounds |
| Installation Type | Floor Mounted |
| Shape | U-Shape (Elongated) |
| Flushing System | Tankless Siphonic |
| Water Usage | 1.28 GPF (Full Flush), 0.92 GPF (Half Flush) |
| MAP Flush Rating | 1000g |
| Heated Seat | Adjustable (Normal, 93°F, 96°F, 99°F) |
| Water Temperature | Adjustable (Normal, 93°F, 96°F, 99°F) |
| Dryer Temperature | Adjustable (Normal, 93°F, 96°F, 99°F) |
| Display | LED |
| UPC | 701915577419 |
8. Warranty and Support
The Loniko ST945B Smart Toilet is covered by a 24-month replacement warranty from the date of purchase. This warranty covers manufacturing defects and malfunctions under normal use.
For technical assistance, troubleshooting, or warranty claims, please contact Loniko Customer Support. Our team is available 24/7 to provide assistance.
Contact Information:
Website: [Manufacturer Website Link]
Email: [Support Email Address]
Phone: [Support Phone Number]
Please have your model number (ST945B/TANKLESS) and proof of purchase ready when contacting support.
