
1. Introduction
Thank you for choosing the FlashFish P66 Portable Power Station. This device is designed to provide reliable power for your electronic devices during outdoor activities, emergencies, or when off-grid. With its versatile output options and compact design, the P66 is an essential companion for your power needs. This manual provides important information on how to safely operate, maintain, and troubleshoot your power station.
Please read this manual thoroughly before using the product and keep it for future reference.
2. Safety Instructions
To ensure safe operation and prolong the lifespan of your FlashFish P66, please observe the following safety precautions:
- Do not disassemble, repair, or modify the unit. Incorrect reassembly may cause fire or injury.
- Do not expose the unit to fire or extreme temperatures (above 45°C or below -10°C).
- Do not use or store the unit in bathrooms or areas exposed to water or rain.
- Do not use the unit if it is damaged or has been dropped.
- Keep the unit away from children and pets.
- Ensure proper ventilation during use. Do not block the ventilation openings.
- Use only the provided or approved accessories and chargers.
- Important Note: The DC output port cannot supply power simultaneously while the unit is being charged. However, the AC and USB ports can provide power during charging.
3. Product Overview
The FlashFish P66 Portable Power Station features a robust design with multiple output ports to meet various power demands. Below is an overview of its components and capabilities.
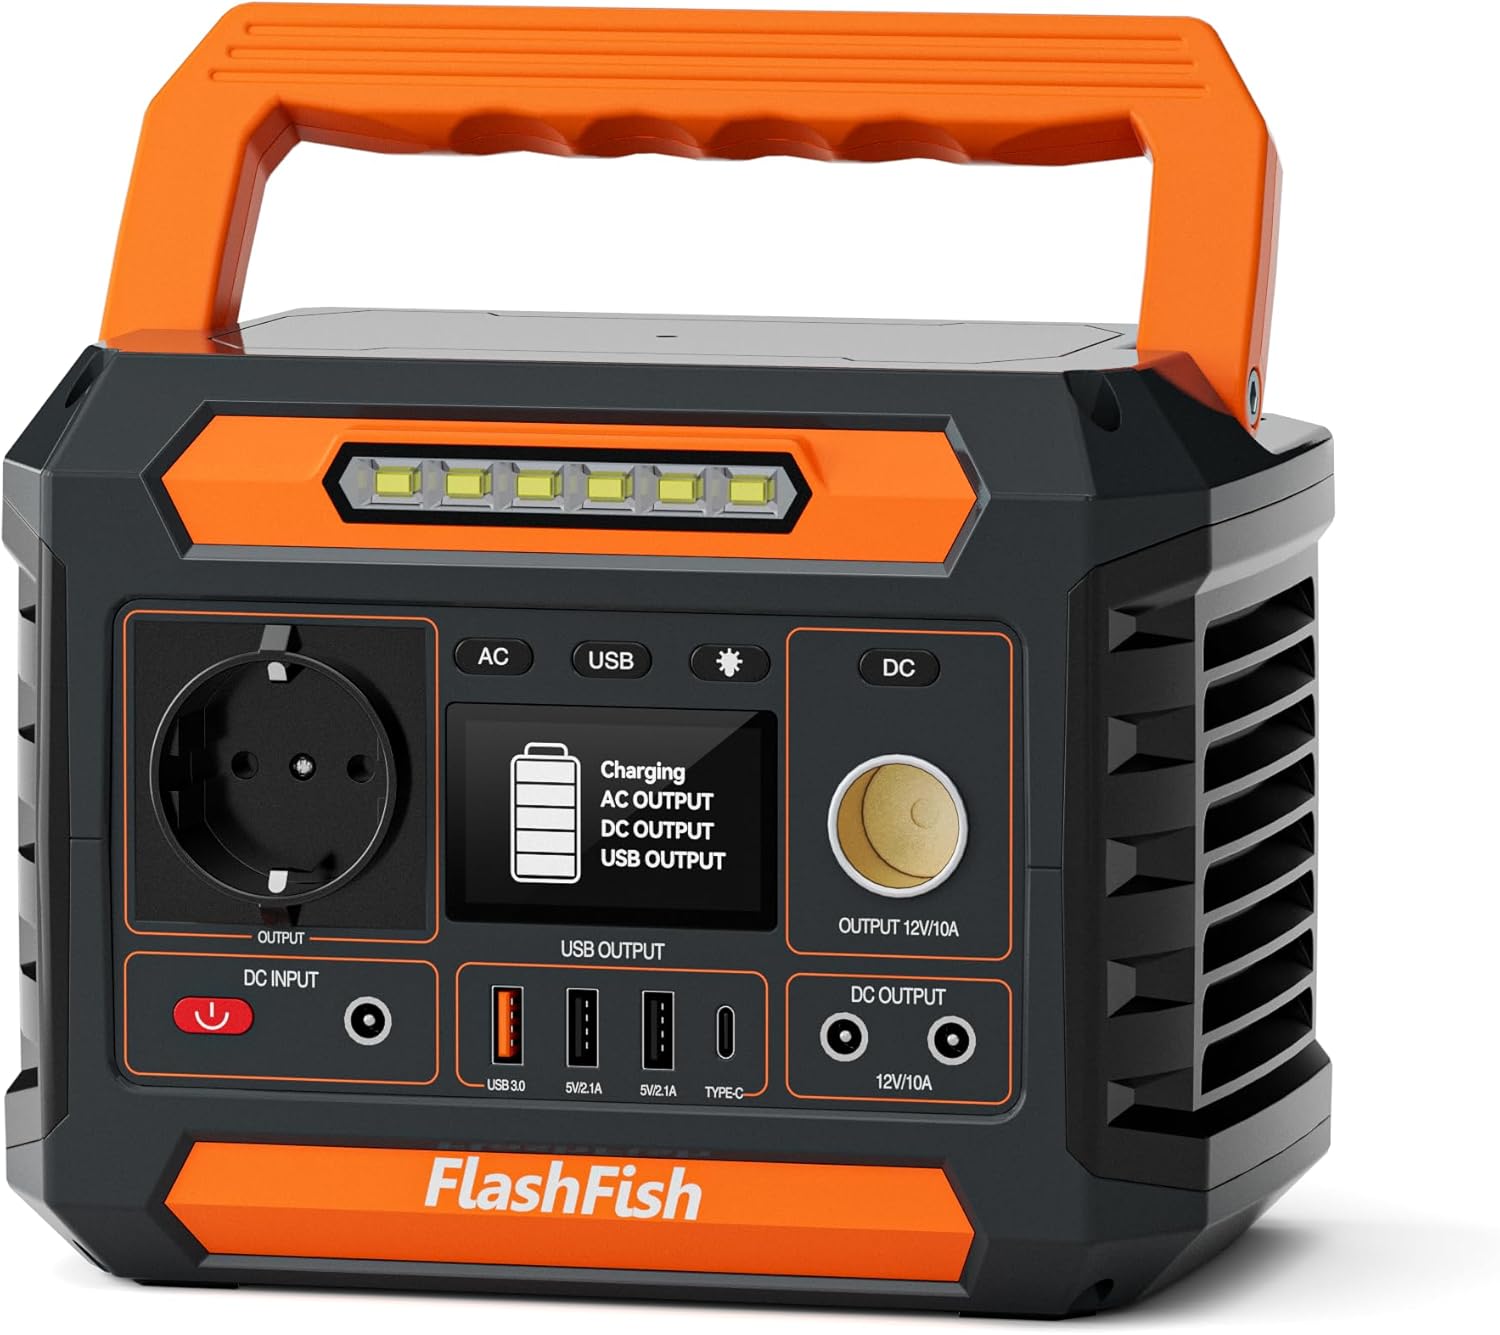
Figure 3.1: Front view of the FlashFish P66 Portable Power Station, showing the main display and output ports.
3.1 Key Features
- High Capacity: 230.88Wh (62400mAh) lithium-ion battery.
- Multiple Outputs: Includes AC, DC, USB-A, and USB-C ports.
- AC Output: 300W continuous power, 600W peak power (230V).
- USB Fast Charging: USB-A QC 18W and USB-C 18W for rapid device charging.
- Integrated LED Light: For emergency illumination.
- Multiple Charging Methods: Recharge via AC adapter, car charger, or solar panel (sold separately).
- Safety Protections: Over-temperature, over-current, over-voltage, and short-circuit protection.
3.2 Port Layout

Figure 3.2: Diagram showing the 8 versatile output ports of the FlashFish P66.
The FlashFish P66 is equipped with the following ports:
- 1 x AC Outlet (230V)
- 1 x USB 3.0 Output (18W QC)
- 2 x USB 5V/2.1A Outputs
- 1 x USB-C Output (18W)
- 2 x DC Outputs (12V/10A)
- 1 x Car Port (12V/10A)
4. Setup
4.1 Unpacking and Inspection
Upon receiving your FlashFish P66, carefully unpack the unit and check for any damage. Ensure all accessories are present.

Figure 4.1: Package contents for the FlashFish P66, including the power station, AC adapter, car charger cable, and user manual.
The package should include:
- 1 x FlashFish P66 Portable Power Station
- 1 x AC Power Adapter
- 1 x Car Charger Cable
- 1 x User Manual
4.2 Initial Charge
Before first use, it is recommended to fully charge the FlashFish P66. This ensures optimal battery performance and calibration. Refer to Section 6, "Charging the Power Station," for detailed instructions.
5. Operating Instructions
5.1 Powering On/Off
To turn on the unit, press and hold the main power button for approximately 3 seconds. The LCD display will illuminate. To turn off, press and hold the main power button again for 3 seconds.
5.2 Using AC Output
The P66 provides a 230V AC output suitable for devices up to 300W continuous power (600W peak). This is ideal for laptops, small appliances, and other electronics.
- Ensure the power station is turned on.
- Press the AC power button to activate the AC outlet. The AC indicator on the display will light up.
- Plug your device into the AC outlet.
- When finished, press the AC power button again to turn off the AC output and conserve battery.
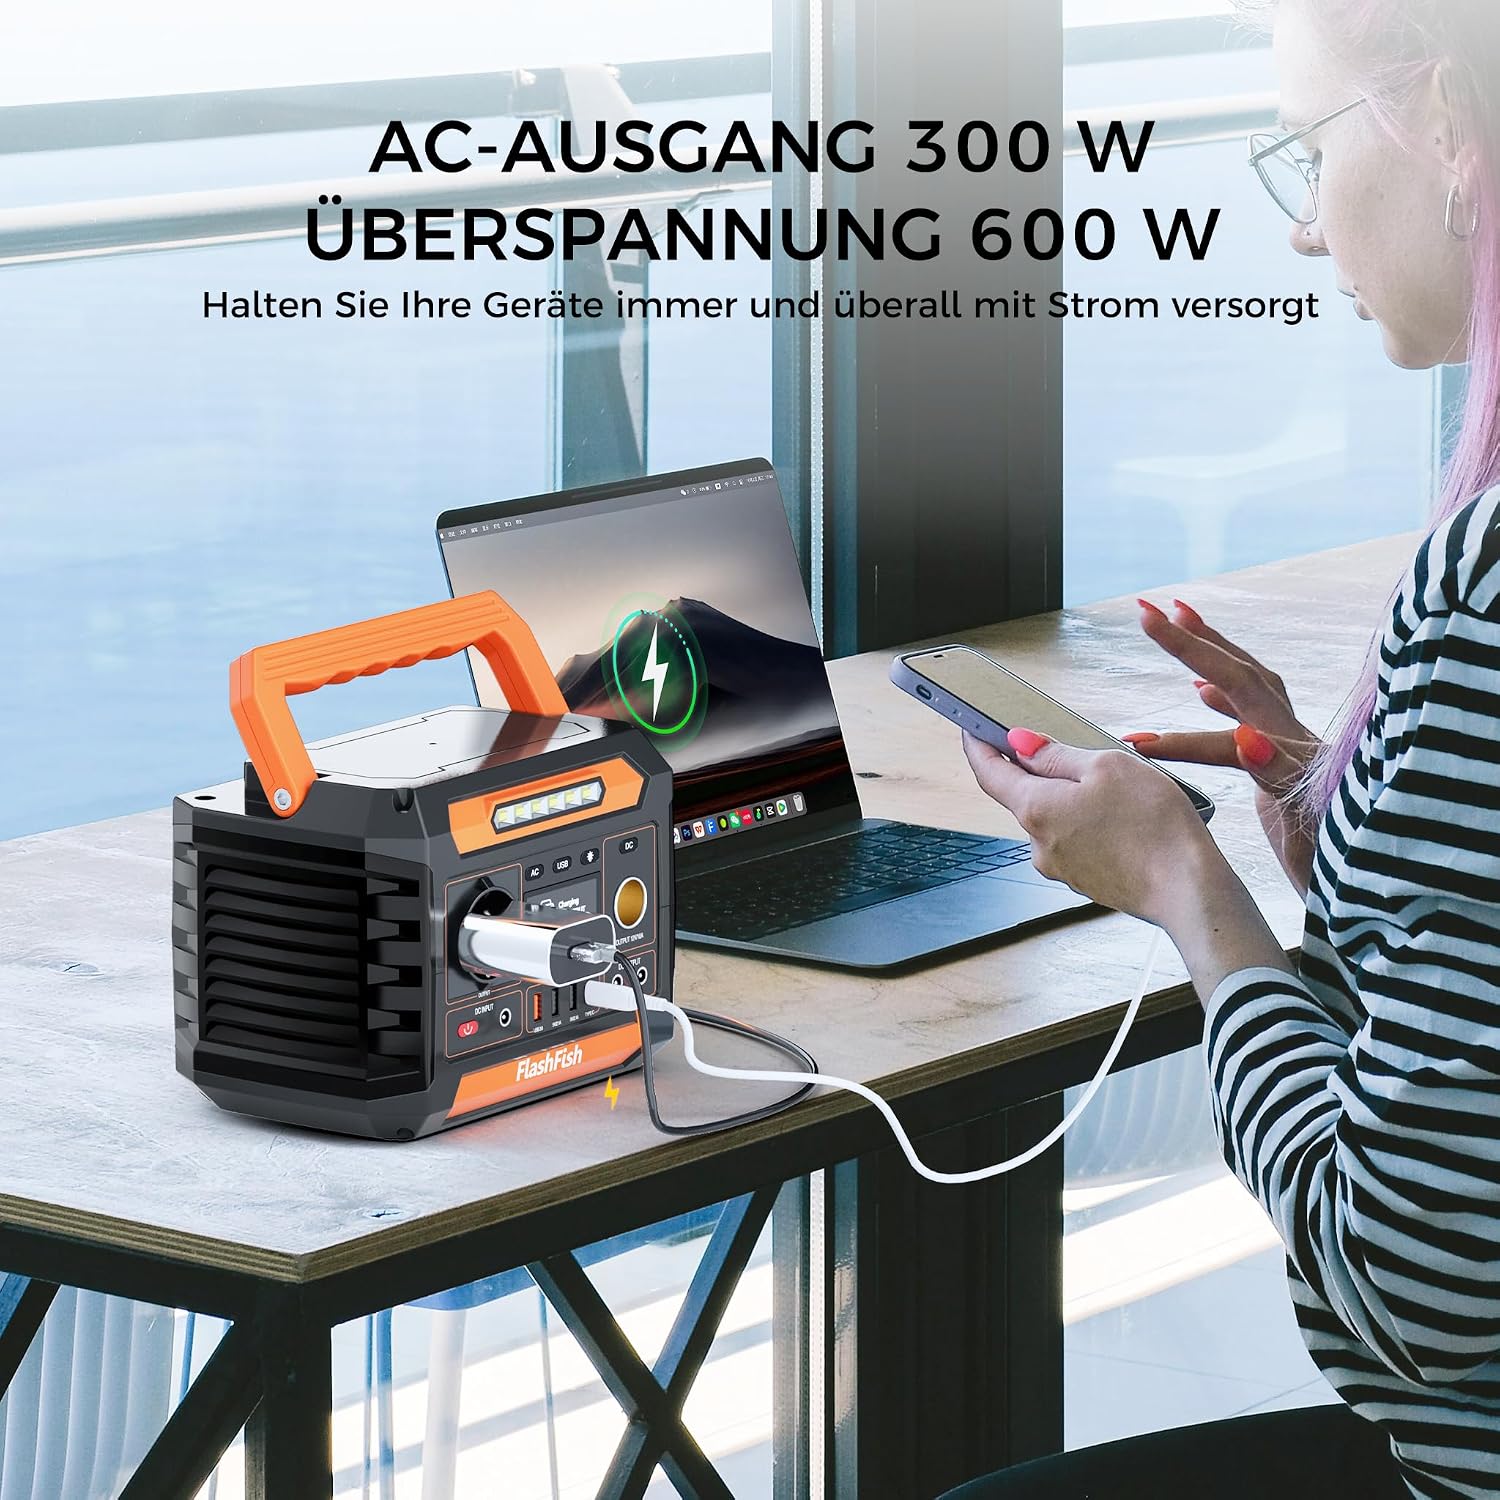
Figure 5.1: The FlashFish P66 providing 300W AC output to power a laptop.
5.3 Using DC Output
The 12V DC output ports and car port are suitable for devices like car refrigerators, LED lamps, and other 12V DC appliances.
- Ensure the power station is turned on.
- Press the DC power button to activate the DC outputs. The DC indicator on the display will light up.
- Plug your 12V DC device into the appropriate port.
- When finished, press the DC power button again to turn off the DC outputs.
5.4 Using USB Output
The USB ports (USB-A and USB-C) are designed for charging smartphones, tablets, e-readers, and other USB-powered devices.
- Ensure the power station is turned on.
- Press the USB power button to activate the USB outputs. The USB indicator on the display will light up.
- Connect your device to any of the USB-A or USB-C ports using a compatible cable.
- When finished, press the USB power button again to turn off the USB outputs.

Figure 5.2: The FlashFish P66 simultaneously charging a laptop, e-reader, and smartphone via its USB outputs.
5.5 Using the LED Light
The integrated LED light can be used as an emergency flashlight or for general illumination.
- Ensure the power station is turned on.
- Press the LED light button once to turn on the light.
- Press the button again to cycle through different brightness modes or SOS mode (if available).
- Press and hold the button to turn off the LED light.

Figure 5.3: The FlashFish P66 with its emergency LED flashlight activated, providing illumination.
5.6 LCD Display
The LCD display provides real-time information about the power station's status, including:
- Battery level indicator.
- Input power (charging status).
- Output power (AC, DC, USB active indicators).
- Warning indicators (e.g., over-temperature).
6. Charging the Power Station
The FlashFish P66 offers multiple ways to recharge its internal battery:

Figure 6.1: The FlashFish P66 illustrating its various charging methods: solar panel, AC wall adapter, and car charger.
6.1 AC Wall Adapter Charging
Use the included AC power adapter to charge the P66 from a standard wall outlet.
- Connect the AC adapter to the DC input port on the power station.
- Plug the AC adapter into a wall outlet.
- The LCD display will show the charging status. A full charge typically takes 8-9 hours.
6.2 Car Charger Charging
You can charge the P66 using the included car charger cable from your vehicle's 12V cigarette lighter socket.
- Connect the car charger cable to the DC input port on the power station.
- Plug the other end into your car's 12V cigarette lighter socket.
- The LCD display will indicate charging.
6.3 Solar Panel Charging (Optional)
The P66 is compatible with solar panels (sold separately) for eco-friendly charging.
- Connect a compatible solar panel (e.g., 15V/2.4A) to the DC input port on the power station.
- Position the solar panel in direct sunlight for optimal charging efficiency.
- The LCD display will show the charging status. Charging time will vary depending on solar intensity and panel specifications.
7. Maintenance and Storage
7.1 General Care
- Clean the unit with a dry, soft cloth. Do not use abrasive cleaners or solvents.
- Keep the ventilation openings clear of dust and debris.
- Avoid dropping or subjecting the unit to strong impacts.
7.2 Storage
- Store the unit in a cool, dry place, away from direct sunlight and extreme temperatures.
- For long-term storage, charge the unit to approximately 50-80% every 3-6 months to maintain battery health.
- Do not store the unit in a fully discharged state for extended periods.
8. Troubleshooting
If you encounter issues with your FlashFish P66, refer to the following common problems and solutions:
| Problem | Possible Cause | Solution |
|---|---|---|
| Unit does not turn on | Battery is completely discharged. | Charge the unit using the AC adapter. |
| AC output not working | AC output not activated. Device exceeds 300W. Overload protection triggered. | Press the AC button. Check device wattage. Disconnect device, restart AC output. |
| DC output not working during charging | This is a normal operational limitation. | Disconnect the charging input to use DC output, or use AC/USB outputs while charging. |
| Unit not charging | Charger not properly connected. Charger or cable is faulty. Extreme temperature. | Ensure connections are secure. Try a different charger/cable. Move to a suitable temperature range (-10°C to 45°C). |
| LED light not working | LED light not activated. | Press the LED light button. |
If the problem persists after trying these solutions, please contact customer support.
9. Specifications
Below are the technical specifications for the FlashFish P66 Portable Power Station:
| Feature | Specification |
|---|---|
| Model Name | P66 |
| Brand | FF FLASHFISH |
| Battery Type | Lithium-ion |
| Capacity | 230.88 Wh (62400 mAh) |
| AC Output | 230V, 300W (600W Peak) |
| DC Output | 12V/10A (x2) |
| Car Port Output | 12V/10A |
| USB-A Output | 18W QC (5V/2.4A, 9V/2A, 12V/1.5A) (x1), 5V/2.1A (x2) |
| USB-C Output | 18W QC (5V/2.4A, 9V/2A, 12V/1.5A) |
| Input (Charging) | DC 15V/2.4A |
| Charging Time (AC Adapter) | 8-9 hours |
| Operating Temperature | -10°C to 45°C |
| Dimensions (L x W x H) | 21 x 14.5 x 15.5 cm |
| Weight | 2.5 kg |
10. Warranty and Support
FlashFish products are designed for reliability and performance. For warranty information, technical support, or any questions regarding your P66 Portable Power Station, please refer to the warranty card included with your purchase or contact FlashFish customer service through the retailer where you purchased the product.
Please have your model number (P66) and purchase details ready when contacting support.

