1. Introduction
Thank you for choosing the Gisam Cordless Snow Shovel YL-4021. This powerful and efficient tool is designed to simplify snow removal from driveways, sidewalks, and patios. Featuring a 3500W brushless motor and dual 6.0Ah anti-freeze batteries, it offers robust performance and extended runtime. This manual provides essential information for safe assembly, operation, maintenance, and storage of your snow shovel.
2. Important Safety Information
Always read and understand all safety warnings and instructions before operating this product. Failure to follow these instructions may result in electric shock, fire, and/or serious injury.
- Wear appropriate safety gear: Always wear safety glasses, hearing protection, and sturdy footwear.
- Keep bystanders away: Ensure children, pets, and other people are at a safe distance from the operating area.
- Inspect the area: Before starting, clear the area of any objects (rocks, toys, wires) that could be thrown by the auger.
- Avoid contact with moving parts: Never place hands or feet near the auger while the unit is running.
- Use in daylight or good artificial light: Ensure adequate visibility during operation.
- Do not overreach: Maintain proper footing and balance at all times.
- Store properly: When not in use, store the snow shovel in a dry, secure place out of reach of children.
- Battery safety: Use only specified batteries and chargers. Do not expose batteries to extreme temperatures or moisture.
3. Package Contents
Verify that all items are present upon unpacking:
- 1x Gisam Cordless Snow Shovel (Main Unit)
- 2x 6.0Ah Anti-Freeze Lithium-Ion Batteries
- 1x Battery Charger
- 1x Ergonomic Auxiliary Handle
- 1x Pair of Gloves
- 1x User Manual

Image: Contents of the Gisam Cordless Snow Shovel package, including the main unit, two batteries, charger, auxiliary handle, gloves, and user manual.
4. Setup and Assembly
4.1 Assembly
The Gisam Cordless Snow Shovel requires minimal assembly. Follow these steps:
- Attach the Handle: Connect the main handle assembly to the snow shovel base. Ensure it clicks securely into place or is fastened with the provided screws/knobs.
- Install Wheels: If the wheels are separate, attach them to the base using the provided hardware.
- Adjust Telescopic Pole: Turn the locking knob counter-clockwise to extend or retract the telescopic pole to a comfortable operating height (107-122cm). Tighten clockwise to secure.
- Attach Auxiliary Handle: Position the auxiliary handle for optimal comfort and control, then tighten its fasteners.

Image: Visual guide showing the components of the snow shovel laid out for assembly, illustrating the ease of installation.

Image: Diagram illustrating how to adjust the telescopic pole length by turning a knob counter-clockwise to loosen and clockwise to tighten.
Video: A demonstration of how to install the Gisam Cordless Snow Shovel, showing the step-by-step assembly process.
4.2 Battery Installation and Charging
Ensure batteries are fully charged before first use.
- Charge Batteries: Connect the charger to a power outlet and insert the 6.0Ah batteries. The indicator lights on the charger will show charging status.
- Install Batteries: Once charged, slide the batteries into the designated slots on the snow shovel's handle until they click into place.
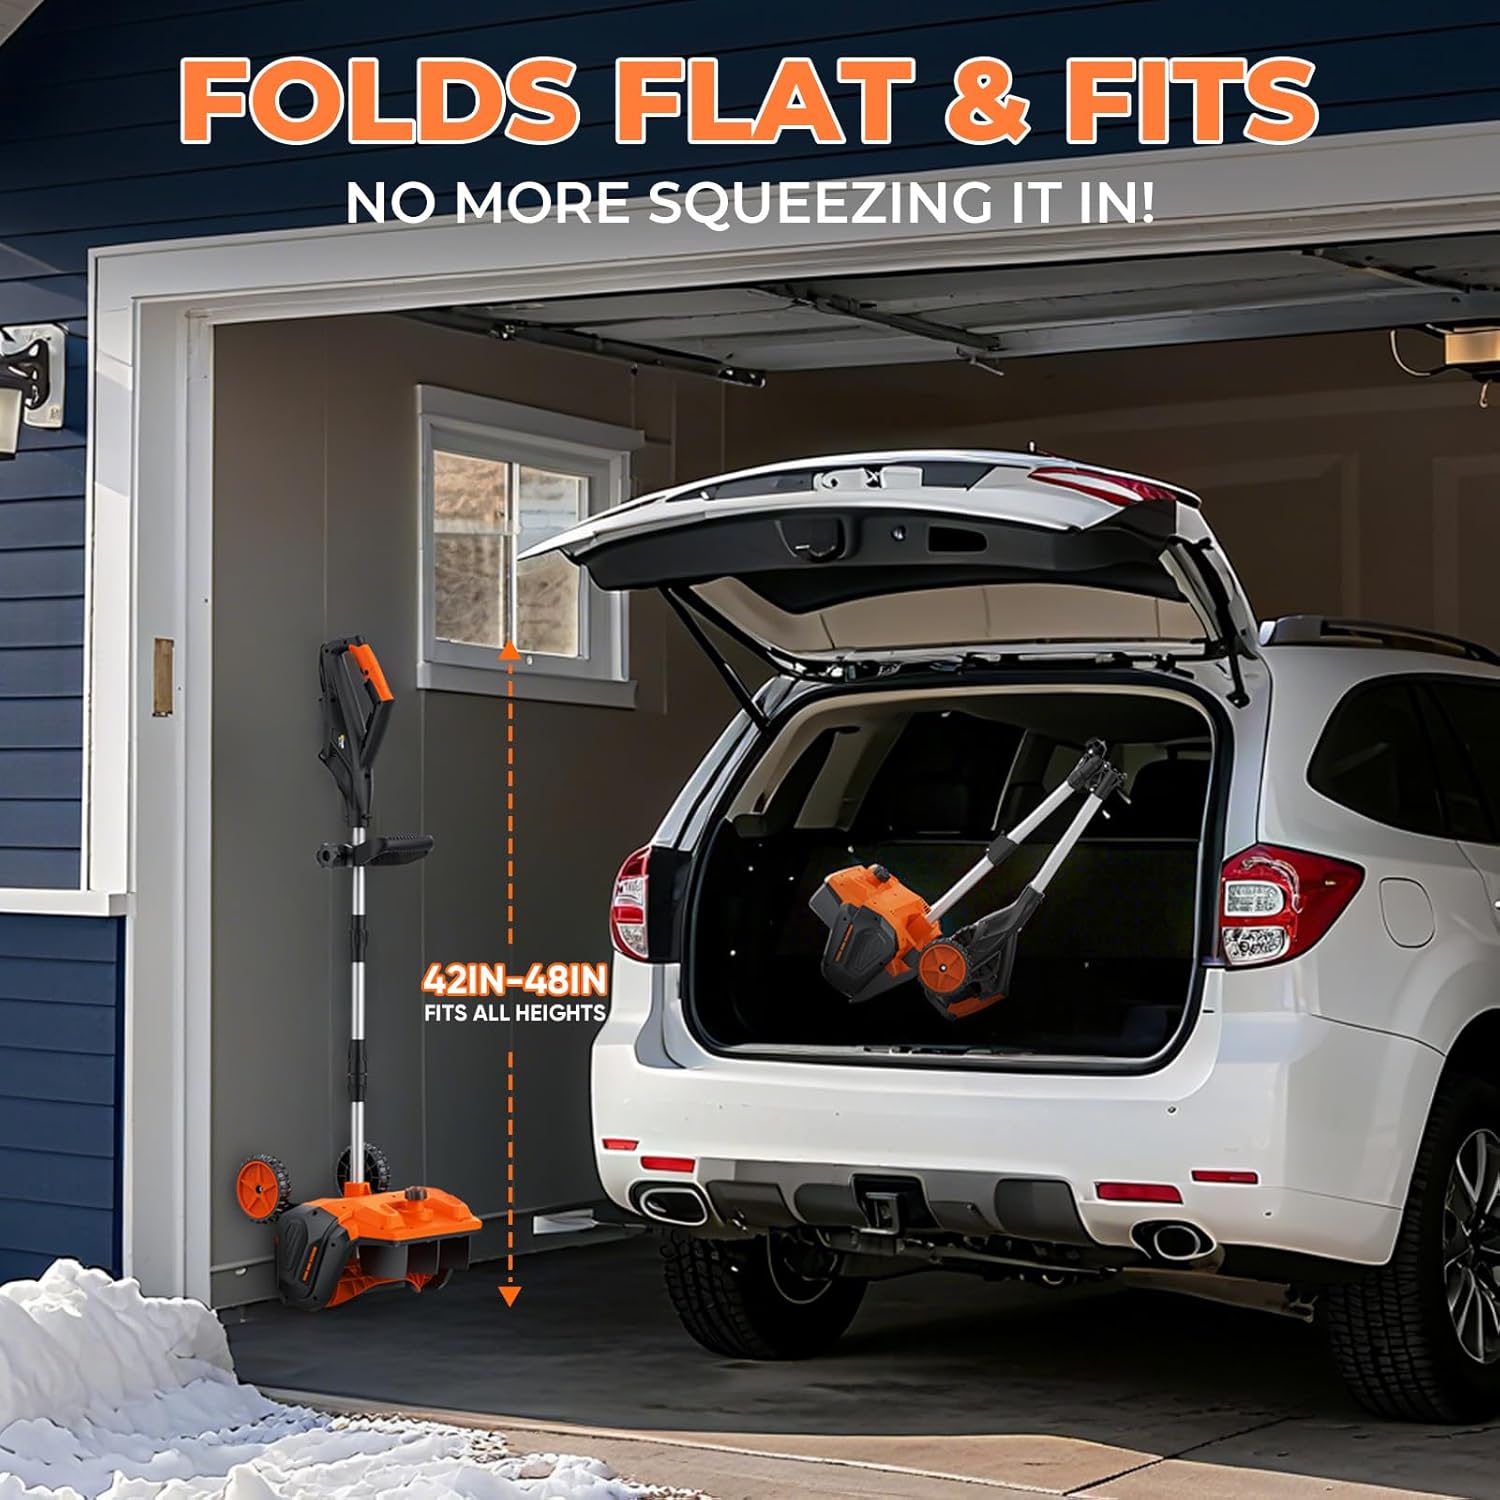
Image: Close-up of the 6000mAh Lithium-Ion batteries, highlighting their anti-freeze properties and protection features.
5. Operating Instructions
5.1 Starting and Stopping the Unit
- To Start: Press the safety button located on the handle, then hold the On/Off trigger. The auger will begin to spin.
- To Stop: Release the On/Off trigger. The auger will stop.

Image: Instructions showing how to start the snow shovel by pressing the safety button and holding the trigger.
5.2 Snow Clearing Techniques
For optimal performance and safety:
- Clearing Path: The shovel clears a 13-inch wide and 7-inch deep path. Push the unit forward at a steady pace.
- Adjusting Throw Direction: Use the ±30° adjustable directional plate to control where the snow is thrown, preventing it from landing on cleared areas or neighboring properties.
- Heavy Snow: For deeper or heavier snow, clear in narrower passes or lift the unit slightly to clear the top layer first, then the bottom.
- Battery Level Display: Monitor the battery level display on the handle to ensure you have sufficient power for the task.
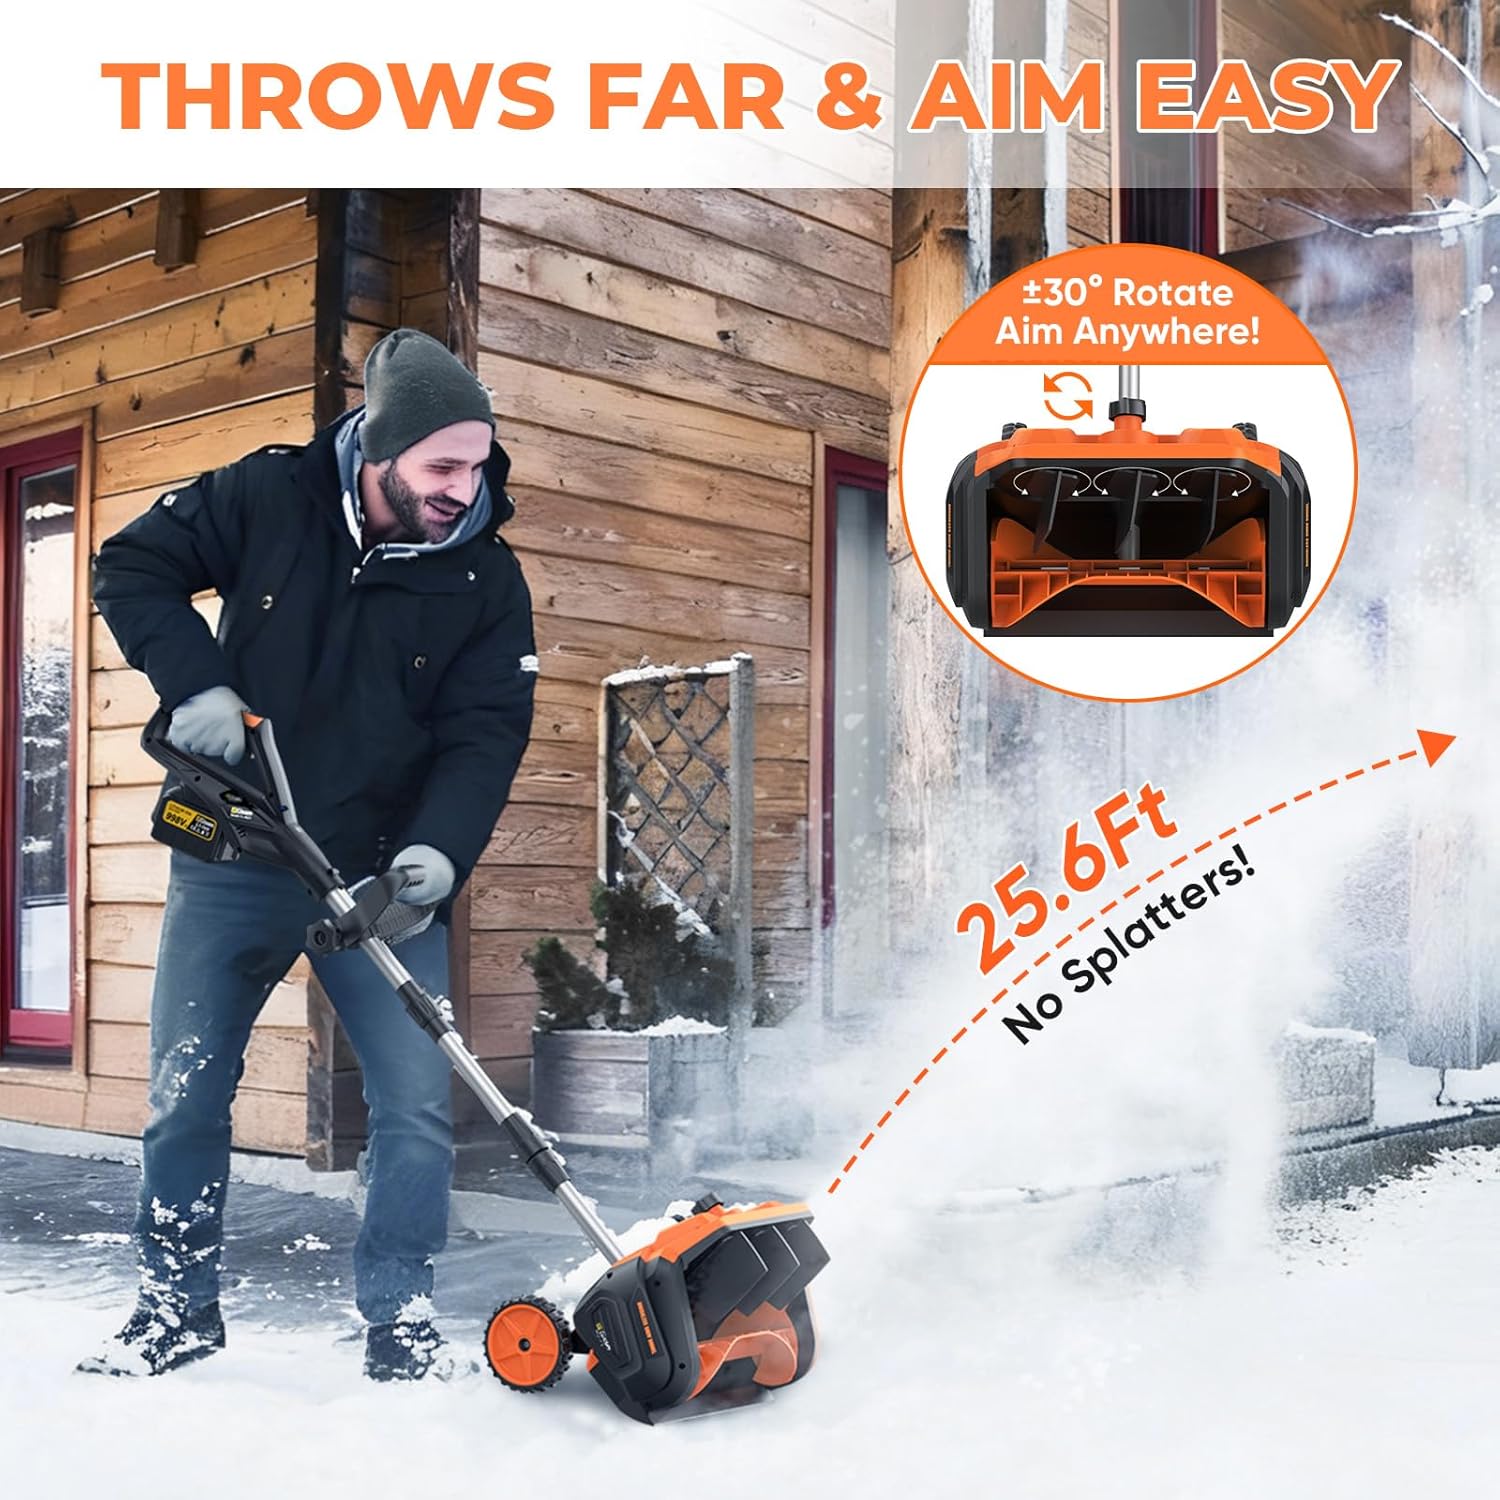
Image: A person operating the snow shovel, demonstrating its 25.6ft snow throwing capability and adjustable aim.

Image: Illustration showing the snow shovel's 13-inch clearing width and 7-inch clearing depth for efficient snow removal.
Video: A demonstration of the Gisam Cordless Snow Shovel in action, clearing snow from a driveway with its 3500W motor and wheels.
6. Maintenance
Regular maintenance ensures the longevity and optimal performance of your snow shovel.
- Cleaning: After each use, remove any snow, ice, or debris from the auger, housing, and directional plate. Use a damp cloth to wipe down the exterior. Do not use harsh chemicals.
- Battery Care: Store batteries in a cool, dry place. Charge them fully before long-term storage and periodically during off-season to maintain battery health.
- Inspection: Periodically check all fasteners, bolts, and moving parts for wear or damage. Replace any worn or damaged components immediately.
7. Storage
The Gisam Cordless Snow Shovel is designed for convenient, space-saving storage.
- Foldable Design: The telescopic pole can be folded flat, allowing the unit to be stored compactly in garages or closets.
- Dry Location: Store the snow shovel in a dry, protected area away from direct sunlight and extreme temperatures.
- Remove Batteries: Always remove batteries from the unit before storing for extended periods.

Image: The snow shovel with its telescopic pole folded, demonstrating its compact size for easy storage in a garage or car trunk.
8. Troubleshooting
If you encounter issues with your Gisam Cordless Snow Shovel, refer to the following common problems and solutions:
| Problem | Possible Cause | Solution |
|---|---|---|
| Unit does not start | Battery not installed correctly Battery not charged Safety button not pressed Trigger not fully engaged | Ensure batteries are fully inserted Charge batteries fully Press the safety button before pulling the trigger Ensure the trigger is fully pulled |
| Reduced snow throwing performance | Low battery charge Auger clogged with snow/ice Excessively deep/heavy snow | Recharge batteries Turn off unit, remove batteries, then clear clog safely Clear snow in narrower passes |
| Unit vibrates excessively | Loose components Damaged auger | Check all fasteners and tighten as needed Inspect auger for damage; contact support if damaged |
9. Specifications
| Feature | Detail |
|---|---|
| Brand | Gisam |
| Model | YL-4021 |
| Power Source | Battery Powered |
| Motor Type | 3500W Brushless |
| Battery | 2x 6.0Ah Lithium Ion (21V) |
| Clearing Width | 13 inches |
| Ideal Snow Depth | 7 inches |
| Throw Distance | Up to 25.6 feet |
| Directional Plate | ±30° Adjustable |
| Item Weight | 15.77 pounds (7.17 kg) |
| Product Dimensions | 10 x 20 x 49 inches |
10. Warranty & Support
The Gisam Cordless Snow Shovel YL-4021 comes with a 2-Year Warranty. If you encounter any issues with your product, please contact Gisam customer service for assistance. Ensure you have your purchase details and model number ready when contacting support.
For customer service inquiries, please refer to the contact information provided in your product packaging or visit the official Gisam website.


