1. Introduction
This manual provides detailed instructions for the installation, operation, and maintenance of your Jansite MT52 Motorcycle Display. The MT52 integrates wireless CarPlay and Android Auto functionalities, a 4K dual dashcam system, and robust IPX7 waterproofing, designed to enhance your riding experience with navigation, communication, and recording capabilities.
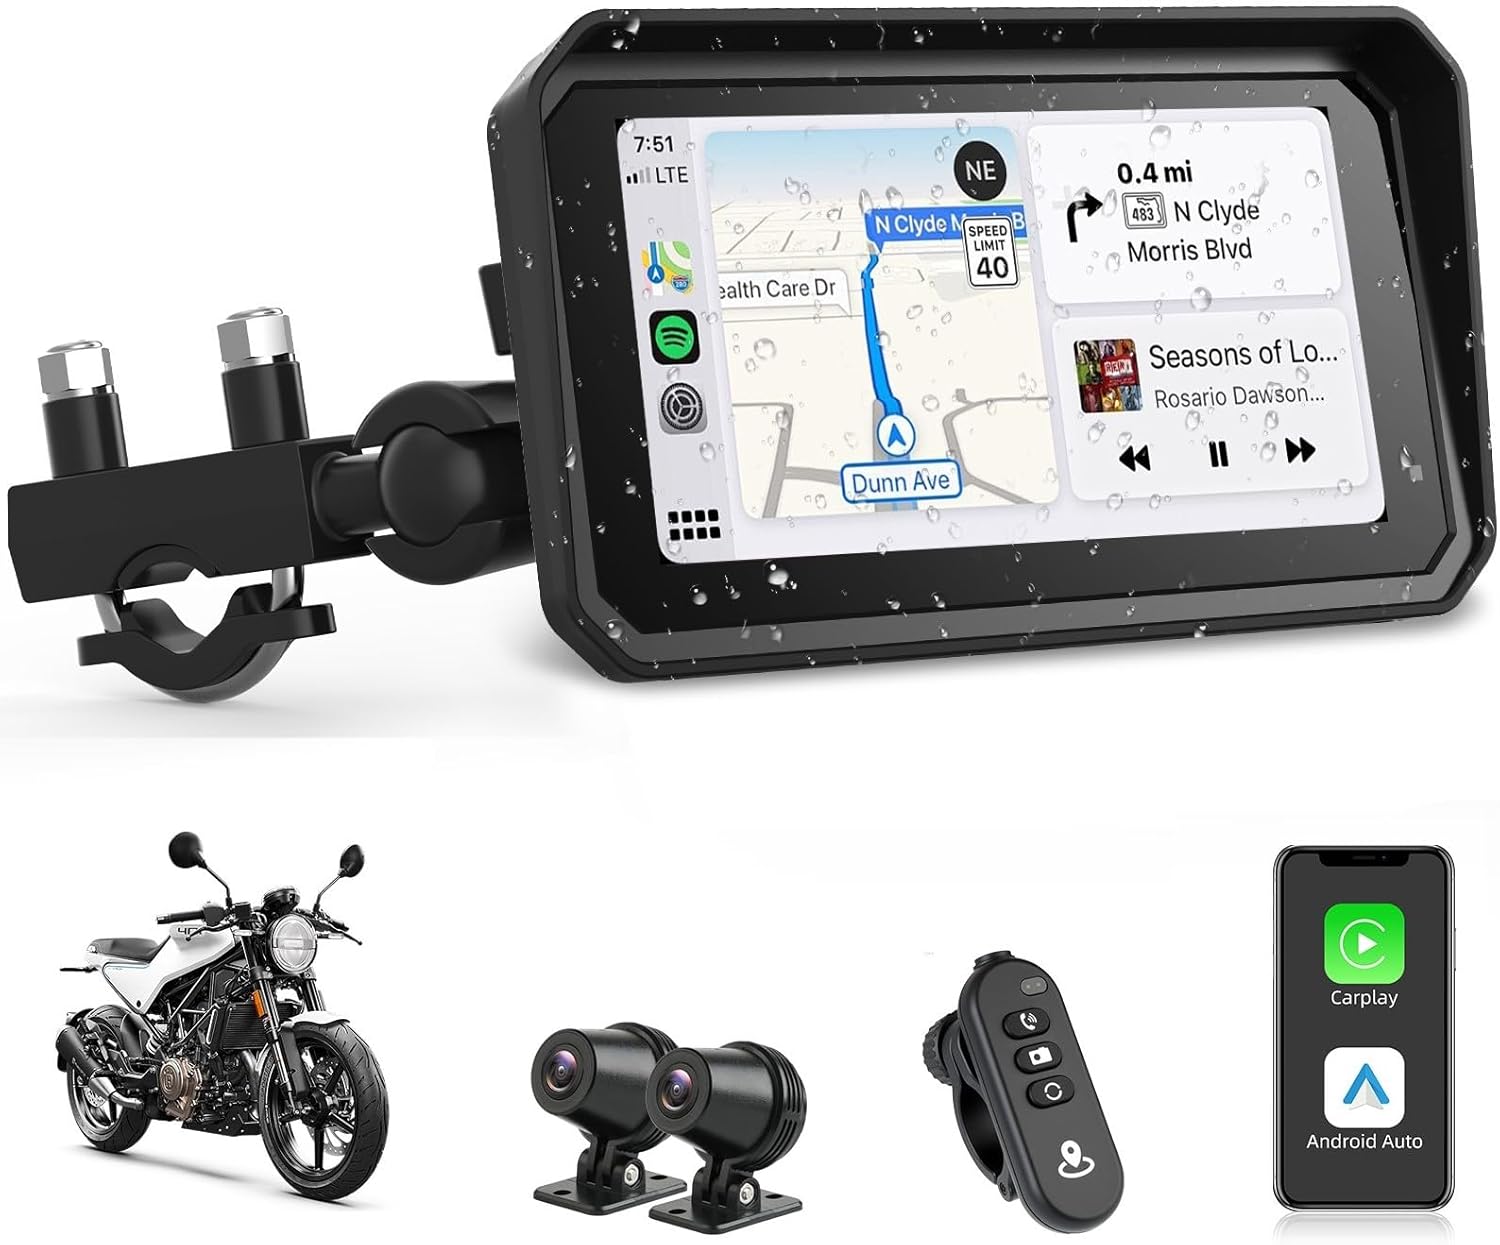
Image 1.1: Jansite MT52 Motorcycle Display, showing the main unit, dual cameras, remote control, and smartphone integration.
2. Package Contents
Please verify that all items listed below are included in your package:
- Jansite MT52 CarPlay Display Unit
- Power Cable
- Camera (Front)
- Camera (Rear)
- Mounting Bracket
- Controller (Wired Remote)
- 64GB TF Card (Pre-installed or separate)
- User Manual
3. Setup and Installation
Proper installation is crucial for optimal performance and safety. It is recommended to have this device installed by a qualified professional if you are unsure about any steps.
3.1 Mounting the Display Unit
- Attach the mounting bracket to your motorcycle's handlebars or a suitable surface, ensuring a secure and stable fit. The robust U-shaped mount and stainless steel screw fittings are designed for reliable operation.
- Securely attach the MT52 display unit to the mounting bracket. Ensure it is positioned for clear visibility without obstructing your view of the road or motorcycle controls.

Image 3.1: Illustration of the display unit being attached to the mounting bracket.
3.2 Camera Installation
Install the front and rear cameras in positions that provide a clear, unobstructed view of the road. The cameras are designed to be durable and waterproof.
- Front Camera: Mount the front camera to capture the forward view of your motorcycle.
- Rear Camera: Mount the rear camera to capture the rear view.
3.3 Wiring Diagram
Follow the wiring diagram carefully to connect the display, cameras, power cable, and controller to your motorcycle's electrical system. Ensure all connections are secure and waterproof.

Image 3.2: Wiring diagram showing connections for the display, cameras, power, and controller.
- Connect the main display unit to the designated cable.
- Connect the ACC power supply and the negative terminal to your motorcycle's battery. The power cable is designed to be waterproof.
- Connect the wired controller cable.
- Connect the front camera cable.
- Connect the rear camera cable.
4. Operating Instructions
4.1 Powering On/Off
Once properly wired, the device will power on with your motorcycle's ignition. To power off, turn off your motorcycle's ignition.
4.2 Wireless CarPlay and Android Auto
The MT52 supports wireless Apple CarPlay and Android Auto, allowing seamless integration with your smartphone for navigation, calls, and music.

Image 4.1: Display showcasing wireless CarPlay and Android Auto functionality.
- Ensure your smartphone's Bluetooth and Wi-Fi are enabled.
- On the MT52 display, navigate to the CarPlay or Android Auto option.
- Follow the on-screen prompts to pair your smartphone via Bluetooth.
- Once paired, the system will automatically connect via Wi-Fi for CarPlay or Android Auto functionality.
- You can now access navigation, make calls, send messages, and play music directly from the display.
4.3 Dual Dashcam Operation
The integrated dual dashcam records footage from both front (4K) and rear (1080P) cameras, providing comprehensive coverage of your ride.

Image 4.2: Split-screen view demonstrating simultaneous front 4K and rear 1080P recording.
- Automatic Recording: The dashcam automatically begins recording when the device is powered on.
- Loop Recording: The system features loop recording, which automatically overwrites the oldest files when the 64GB TF card is full. This ensures continuous recording without manual intervention.
- Gravity Sensor (G-Sensor): In the event of a sudden impact or emergency, the built-in G-sensor will automatically trigger and lock the current video segment, preventing it from being overwritten.
4.4 Mobile App Control
Connect the MT52 to your smartphone via Wi-Fi to access recorded footage and device settings through a dedicated mobile application.

Image 4.3: Mobile app interface for viewing, downloading, and sharing recorded videos and photos.
- Download the official Jansite app to your smartphone.
- Connect your smartphone to the MT52's Wi-Fi network.
- Use the app to view live camera feeds, playback recorded videos, download files to your phone, and adjust dashcam settings.
4.5 Wired Remote Control
The included wired remote control allows for safe and convenient operation of key functions without taking your hands off the handlebars.
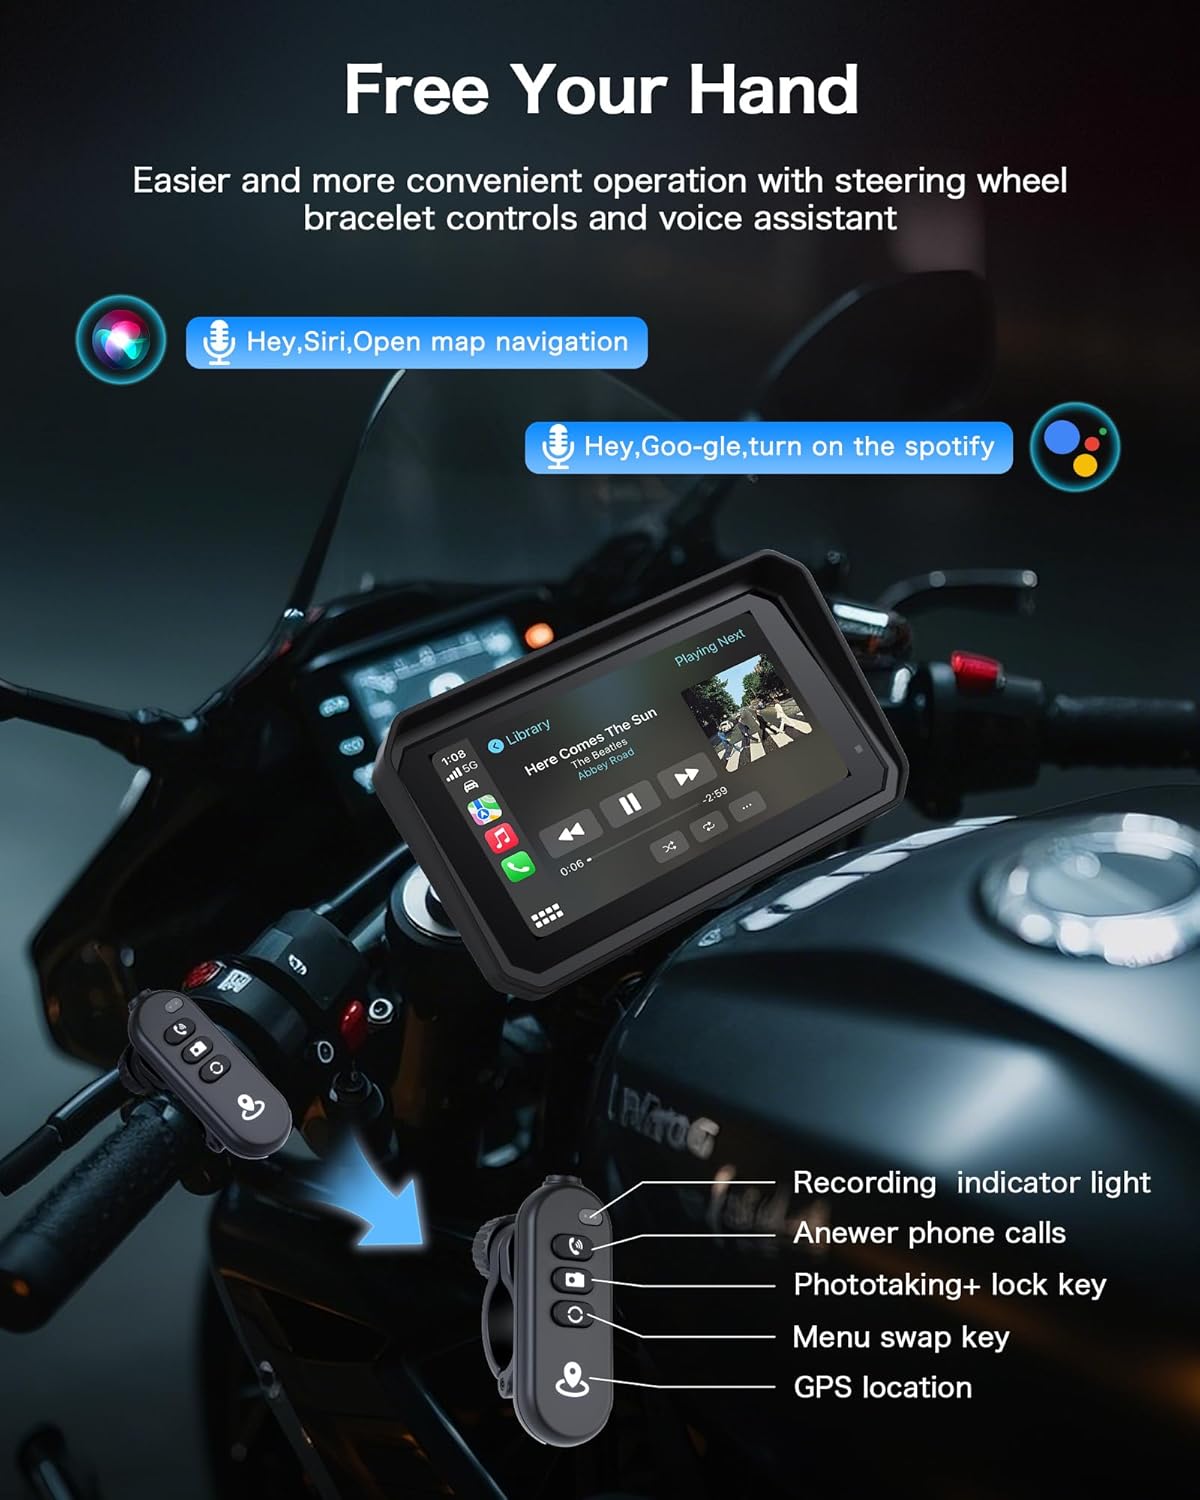
Image 4.4: Wired remote control for hands-free operation.
- Recording Indicator Light: Shows recording status.
- Answer Phone Calls: Press to answer incoming calls.
- Photo/Lock Key: Press to take a photo or lock the current video segment.
- Menu Swap Key: Switch between different display menus or views.
- GPS Location: Access GPS-related functions.
4.6 Voice Assistant
Utilize voice commands for hands-free control of navigation, calls, and music through Siri or Google Assistant.
- Activate Siri or Google Assistant by saying the wake phrase (e.g., "Hey Siri" or "Hey Google").
- Issue commands such as "Open map navigation," "Play music," or "Call [Contact Name]."
4.7 Dual Bluetooth Connectivity
The MT52 features dual Bluetooth, allowing simultaneous connection to your smartphone and a Bluetooth headset or helmet communication system.
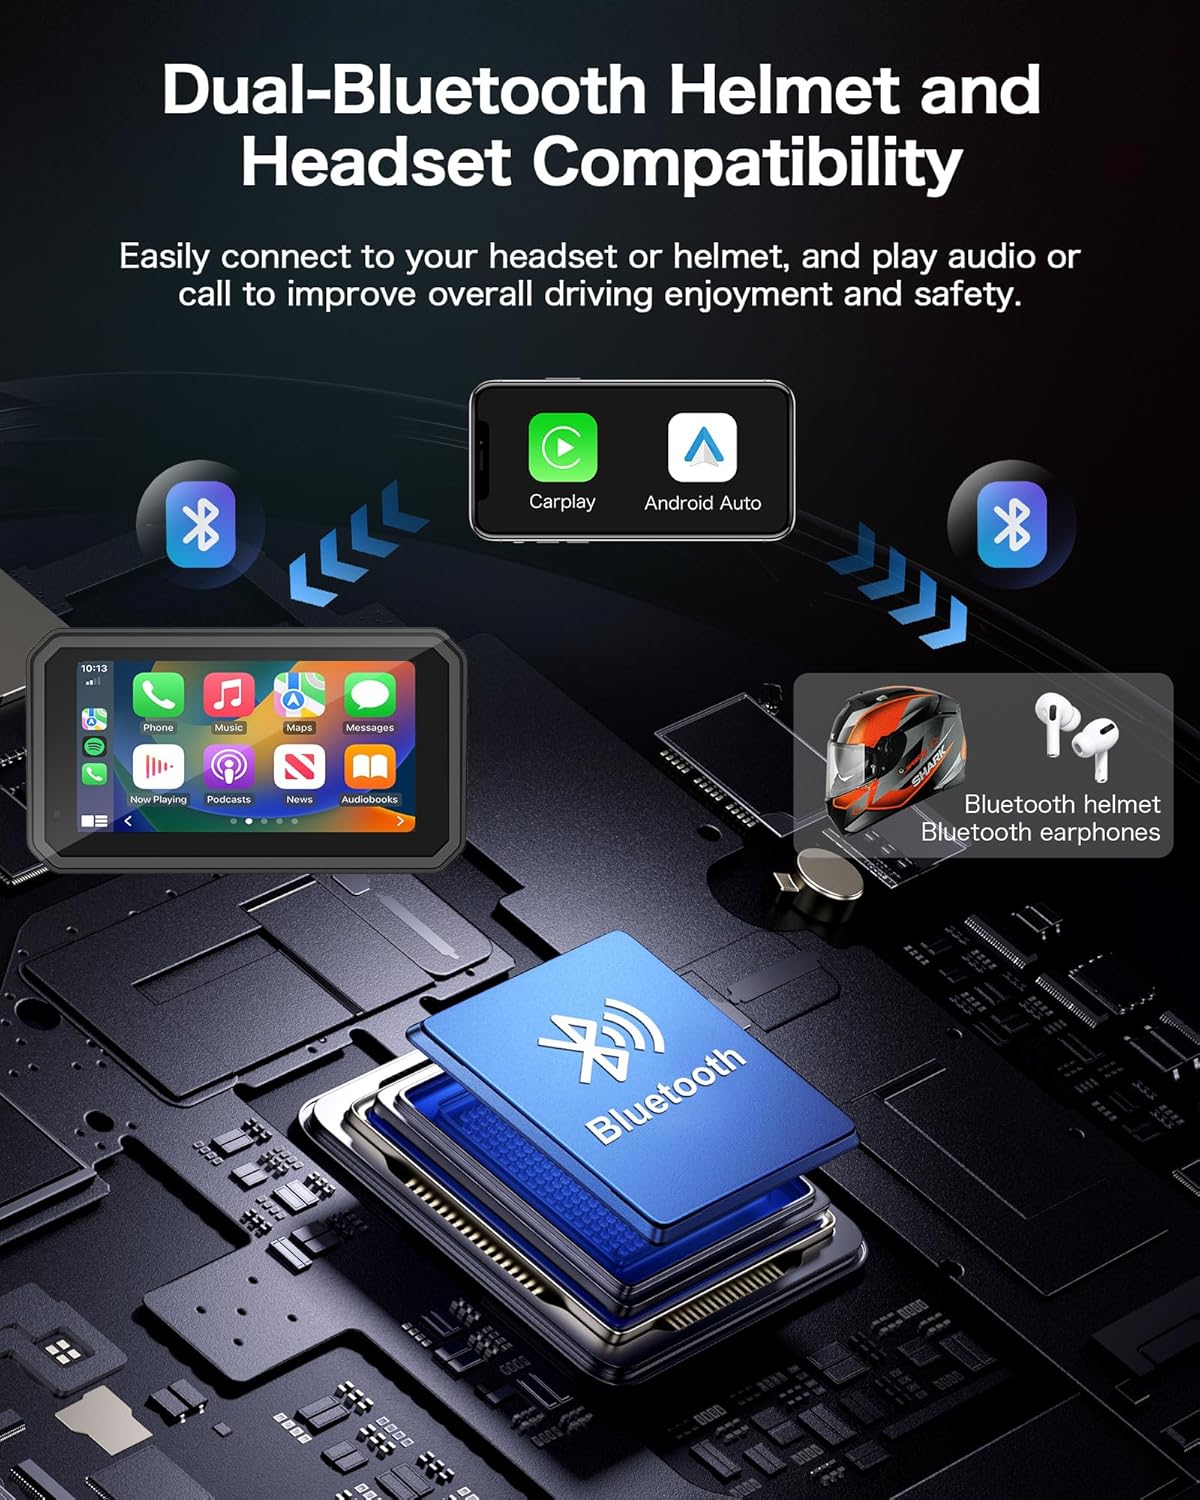
Image 4.5: Diagram illustrating dual Bluetooth connectivity for phone and headset.
- Pair your smartphone as described in section 4.2.
- Access the Bluetooth settings on the MT52 display to pair your Bluetooth headset or helmet.
- Audio from navigation, music, and calls will be routed to your connected headset.
4.8 Display Features
The 6.25-inch 2.5D AF IPS touchscreen offers clear visibility and responsive interaction.
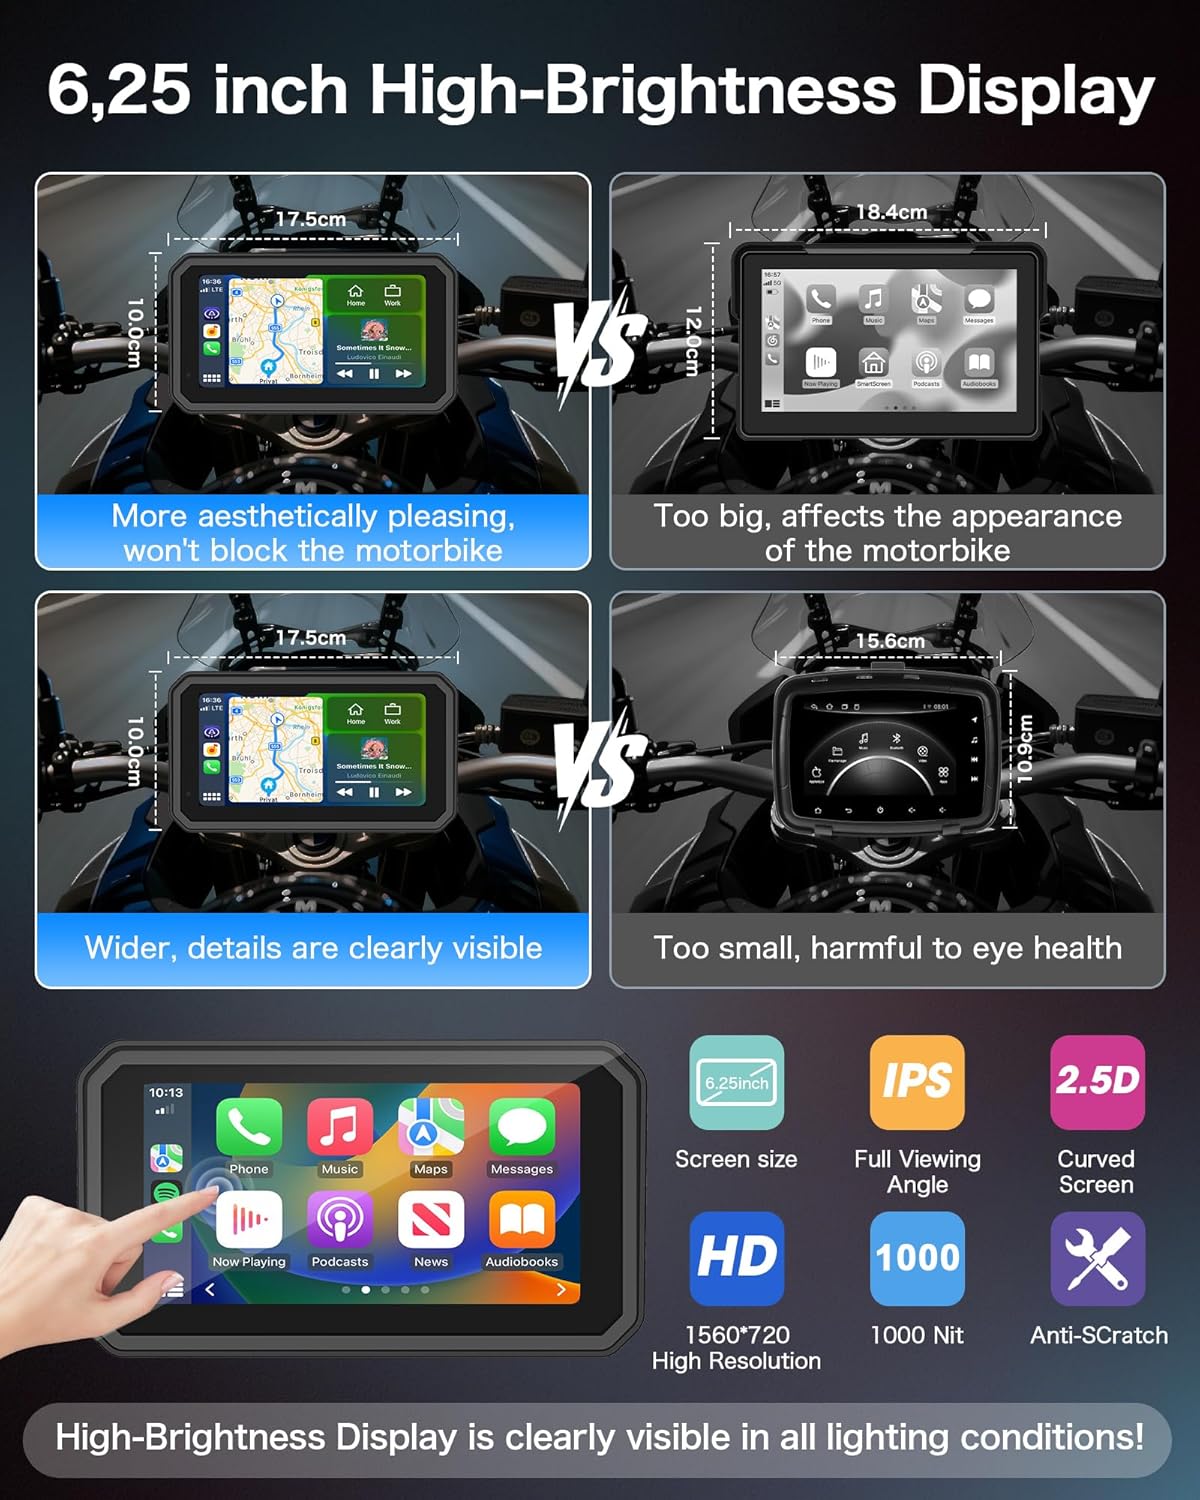
Image 4.6: Comparison of screen sizes and key display technologies (IPS, 2.5D, HD, High Brightness).
- High Brightness: The IPS high-brightness screen ensures clear visibility in various lighting conditions, including direct sunlight and low light.
- Touchscreen: The responsive 2.5D AF touchscreen allows for intuitive control.
- Resolution: 1560 x 720 pixels for sharp detail.
5. Maintenance
To ensure the longevity and optimal performance of your Jansite MT52, follow these maintenance guidelines:
5.1 Waterproof Design (IPX7)
The MT52 is designed with an IPX7 waterproof rating, meaning it can withstand immersion in water up to 1 meter for 30 minutes. This ensures reliable operation in various weather conditions.

Image 5.1: The MT52 operating in various weather conditions, demonstrating its IPX7 waterproof capabilities.
- Ensure all cables and connectors are properly sealed and waterproofed during installation.
- Avoid intentionally submerging the device beyond its rated depth or duration.
5.2 Cleaning
- Use a soft, damp cloth to clean the display screen and exterior.
- Avoid using abrasive cleaners or solvents, as these can damage the screen or casing.
- Ensure the device is powered off before cleaning.
5.3 TF Card Management
- The included 64GB TF card is pre-formatted for loop recording.
- Periodically check the TF card for proper function. If you experience recording issues, try reformatting the card via the device settings or replacing it with a new, high-quality TF card.
6. Troubleshooting
If you encounter issues with your Jansite MT52, please refer to the following common solutions:
6.1 Connectivity Issues (CarPlay/Android Auto)
- Smartphone Compatibility: Ensure your smartphone supports wireless CarPlay (iOS 6 and above) or Android Auto (Android 11 and above). Note that compatibility may be limited with certain Samsung Note/S, Huawei, and Xiaomi models.
- Bluetooth/Wi-Fi: Verify that Bluetooth and Wi-Fi are enabled on both your smartphone and the MT52.
- Re-pairing: Try unpairing and re-pairing your smartphone with the MT52.
- Software Update: Ensure your smartphone's operating system is up to date.
6.2 Dashcam Recording Problems
- TF Card: Check if the 64GB TF card is properly inserted and not full. Although loop recording manages space, a corrupted card can cause issues. Try reformatting the card.
- Power Supply: Ensure the device is receiving stable power.
- Camera Connection: Verify that both front and rear cameras are securely connected.
6.3 Display Visibility
- The high-brightness IPS screen is designed for clear visibility. If you experience glare, adjust the screen angle or brightness settings.
6.4 Device Not Responding
- Restart: Turn off your motorcycle's ignition, wait a few seconds, and then restart it to power cycle the device.
- Check Connections: Ensure all power cables are securely connected.
7. Specifications
| Feature | Specification |
|---|---|
| Brand | Jansite |
| Model Number | MT52 |
| Screen Size | 6.25 inches |
| Screen Type | 2.5D AF IPS Touchscreen |
| Screen Resolution | 1560 x 720 |
| Front Camera Resolution | 4K |
| Rear Camera Resolution | 1080P AHD |
| Field of View | 150 degrees |
| Connectivity | Bluetooth, Wi-Fi |
| Special Features | Wireless Android Auto, Wireless Apple CarPlay, Dual Bluetooth, Touchscreen, G-Sensor, Loop Recording, Voice Control (Siri/Google) |
| Waterproof Rating | IPX7 |
| Included Storage | 64GB TF Card |
| Mapping | Europe (via connected smartphone) |
| Package Dimensions | 22.5 x 15.5 x 11 cm |
| Weight | 1 kilogram |
8. Warranty and Support
Your Jansite MT52 comes with a 1-year manufacturer's warranty. We are committed to your satisfaction and provide comprehensive technical assistance.
- For any issues or inquiries, please contact our support team. We aim to provide solutions within 24 hours.
- Please retain your proof of purchase for warranty claims.


