Introduction
This manual provides essential instructions for the proper setup, operation, and maintenance of your ROLLEI Compactline Mini Digital Compact Camera. Please read this manual thoroughly before using the camera to ensure optimal performance and longevity of the device. Keep this manual for future reference.
Camera Overview
The ROLLEI Compactline Mini is a compact digital camera designed for capturing stills and video. Its small form factor makes it convenient for everyday use.

Figure 1: Front view of the ROLLEI Compactline Mini Digital Camera, showing the lens and Rollei branding.
Setup
1. Battery Installation
The camera uses a Lithium Ion battery (not included). Ensure you purchase a compatible battery. To install:
- Locate the battery compartment cover on the bottom of the camera.
- Slide the cover latch to open the compartment.
- Insert the Lithium Ion battery according to the polarity indicators inside the compartment.
- Close the battery compartment cover securely until it latches.
2. Memory Card Insertion
The camera requires a memory card (not included) to store photos and videos. To insert a memory card:
- Open the battery compartment cover, as the memory card slot is typically located within or adjacent to it.
- Insert the memory card into the designated slot with the contacts facing the correct direction, usually indicated by a small icon.
- Push the card gently until it clicks into place.
- Close the battery compartment cover.

Figure 2: Bottom view of the camera, illustrating the battery and memory card compartment.
3. Powering On/Off
To power on the camera, press and hold the power button located on the top of the camera. To power off, press and hold the power button again.

Figure 3: Top view of the camera, highlighting the power button (left) and shutter button (right).
Operating the Camera
The camera features a rear display and control buttons for navigation and function selection.
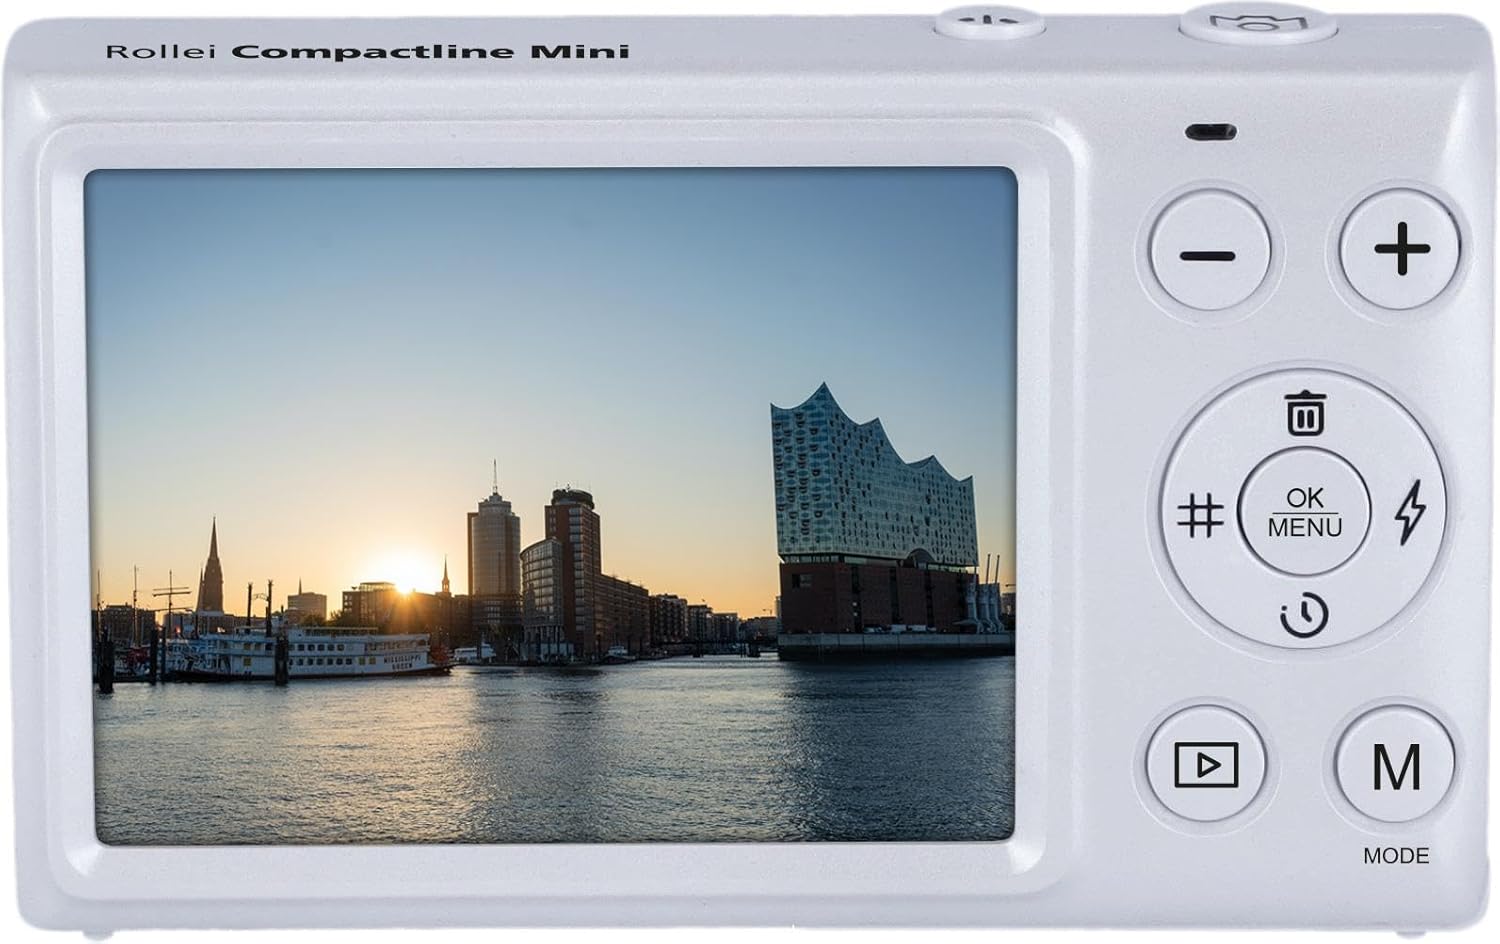
Figure 4: Rear view of the camera, displaying the screen and control panel.
1. Taking Photos
- Ensure the camera is in photo mode. Press the 'M' (Mode) button to cycle through available modes until the photo icon is displayed.
- Frame your shot using the display screen.
- Press the shutter button (located on the top of the camera) fully to capture the image. The camera uses automatic exposure control.
2. Recording Videos
- Press the 'M' (Mode) button to select video recording mode (indicated by a movie camera icon).
- Press the shutter button to start recording. A recording indicator will appear on the screen.
- Press the shutter button again to stop recording.
3. Menu Navigation and Settings
Use the control buttons on the back of the camera to navigate menus and adjust settings:
- OK/MENU Button: Press to access the main menu or confirm selections.
- Up/Down Buttons (+/-): Use to scroll through menu options or adjust values.
- Left/Right Buttons (#/Flash): Use for specific shortcuts or navigation within menus. The button marked with a flash symbol may control the self-timer or other functions, as the camera does not have a built-in flash.
White Balance Settings
To adjust white balance, navigate to the white balance setting in the menu. Available options include: Auto, Cloudy, Daylight, Fluorescent, Incandescent. Select the setting that best matches your lighting conditions for accurate color reproduction.
4. Playback Mode
To view your captured photos and videos:
- Press the Playback button (often indicated by a triangle symbol).
- Use the Up/Down buttons to scroll through your media.
- Press the OK button to view a video or a larger image.
5. Deleting Files
In Playback mode, select the image or video you wish to delete. Press the Delete button (often indicated by a trash can icon) and confirm your selection when prompted.
Maintenance
1. Cleaning the Camera
- Camera Body: Use a soft, dry cloth to wipe the camera body. For stubborn dirt, slightly dampen the cloth with water. Avoid harsh chemicals.
- Lens: Use a lens brush or a blower to remove dust. For smudges, use a specialized lens cleaning cloth and lens cleaning solution. Do not touch the lens surface with your fingers.
- Screen: Use a soft, lint-free cloth to gently wipe the display screen.
2. Storage
When not in use, store the camera in a cool, dry place away from direct sunlight and extreme temperatures. Remove the battery if the camera will not be used for an extended period to prevent leakage.
Troubleshooting
- Camera does not power on:
- Ensure the battery is correctly inserted and fully charged.
- Check if the battery compartment cover is securely closed.
- If using a new battery, ensure it is compatible and charged. - Images are blurry:
- Ensure the lens is clean and free from smudges or dust.
- Hold the camera steady when taking photos.
- Ensure sufficient lighting for the scene. - Memory card error:
- Ensure the memory card is correctly inserted.
- Try formatting the memory card (this will erase all data, so back up important files first).
- Try a different, compatible memory card. - Camera freezes or is unresponsive:
- Remove the battery, wait a few seconds, and reinsert it to perform a soft reset.
- If the issue persists, contact customer support.
Specifications
| Feature | Specification |
|---|---|
| Model Name | Compactline Mini |
| Model Number | 10854 |
| Photo Sensor Technology | CMOS |
| Supported File Formats | JPEG, MP4 |
| Aspect Ratio | 4:3 |
| Minimum Shutter Speed | 1/2 seconds |
| Exposure Control Type | Automatic |
| Form Factor | Compact |
| Camera Flash | No built-in flash |
| Shooting Modes | Movie, Stills |
| Viewfinder | Optical |
| White Balance Settings | Auto, Cloudy, Daylight, Fluorescent, Incandescent |
| Compatible Devices | Computers (for data transfer) |
| Battery Type | Lithium Ion (not included) |
| Water Resistance Level | Not Water Resistant |
| Light Sensitivity | ISO 100-800 |
| Audio Recording | No |
| Has Color Screen | No |
| Display Maximum Resolution | 12 MP |
| Lens Type | Fixed |
| Auto Focus Technology | Contrast Detection |
| Focus Type | Fixed Focus |
| Focus Mode | Automatic AF (AF-A) |
Warranty and Support
For warranty information, please refer to the warranty card included with your product or visit the official Rollei website. For technical support, troubleshooting assistance beyond this manual, or service inquiries, please contact Rollei customer service through their official channels.


