Introduction
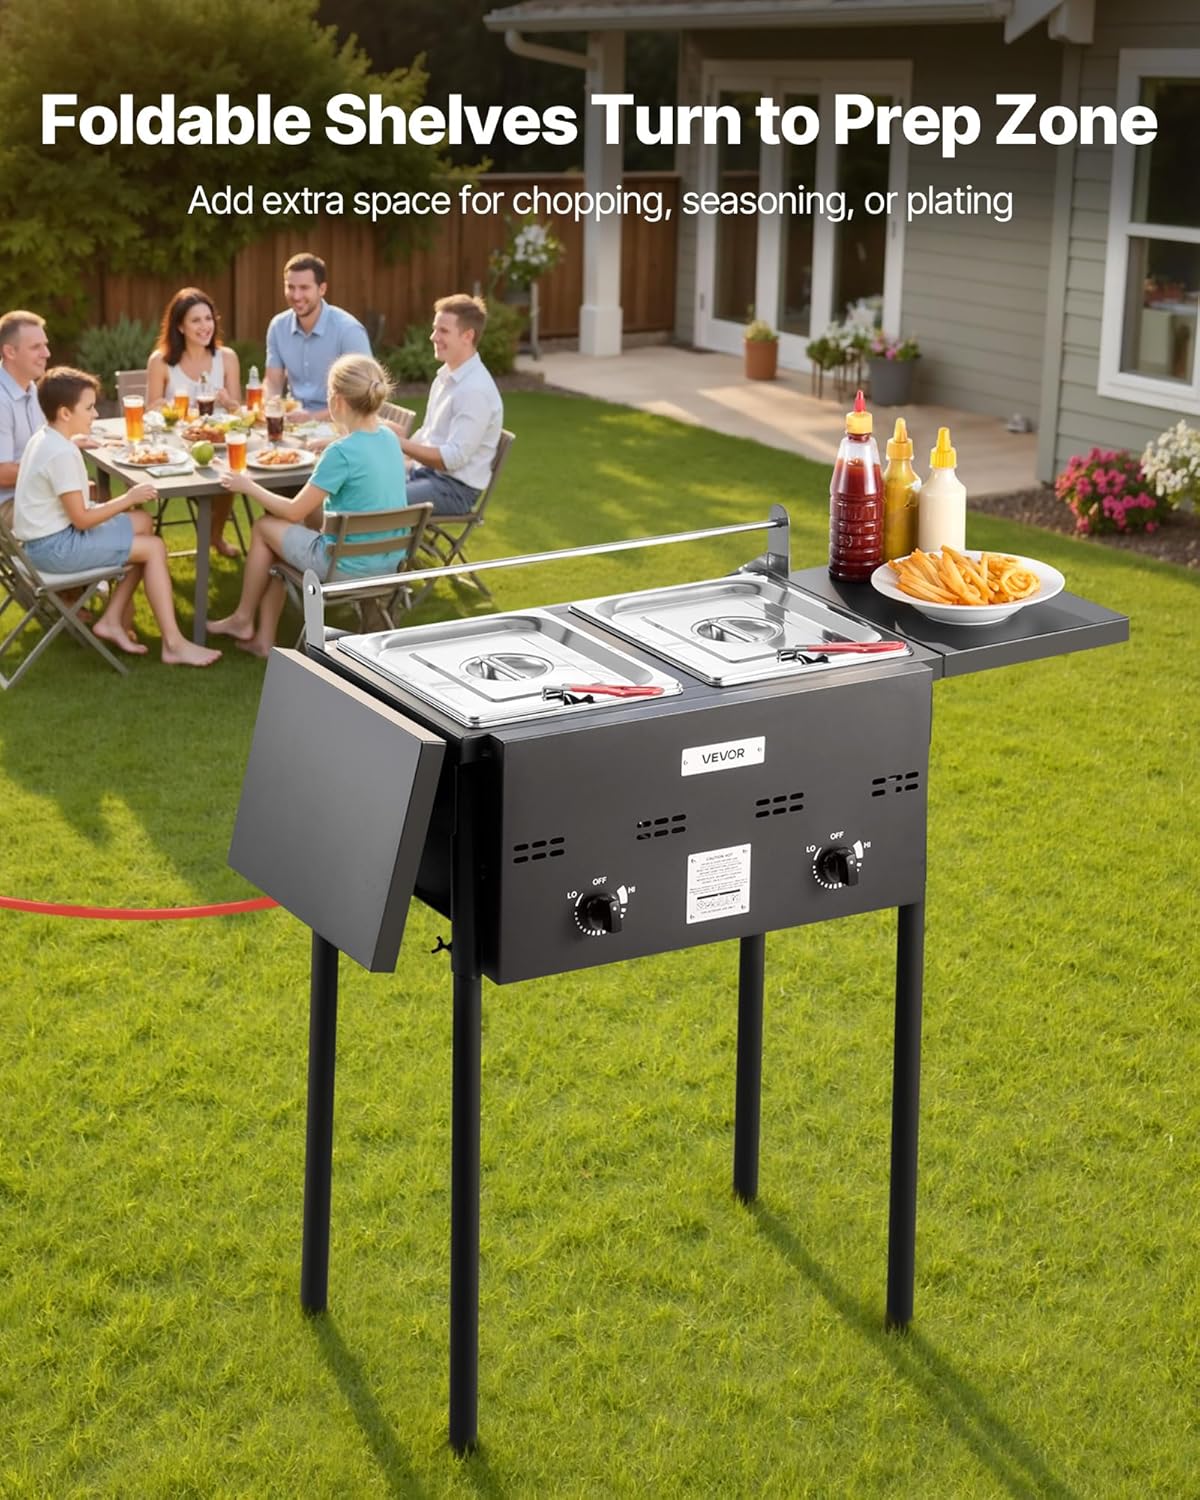
This manual provides essential information for the safe and efficient operation of your VEVOR Outdoor Dual-Tank Propane Deep Fryer, Model DBFY01. Designed for outdoor use, this fryer features two 8-quart stainless steel tanks, independent heat controls, and convenient foldable side tables, making it suitable for various outdoor cooking needs.
Please read this manual thoroughly before assembly, operation, or maintenance to ensure proper usage and prevent potential hazards. Keep this manual for future reference.
Important Safety Information
- FOR OUTDOOR USE ONLY: This appliance is designed exclusively for outdoor use. Ensure adequate ventilation and never operate indoors or in enclosed spaces.
- PROPANE GAS ONLY: Use only propane gas with a CSA certified pressure regulator. Ensure all gas connections are tight and leak-free before each use.
- OIL LEVEL: Do not overfill the fry tanks beyond the maximum fill line to prevent spills and potential fire hazards.
- EMPTY COOKING VESSEL: Never place an empty cooking vessel on a lit burner. This can cause damage to the fryer and pose a fire risk.
- PROTECTIVE GEAR: Always wear heat-resistant gloves and appropriate protective clothing when operating the fryer.
- STABLE SURFACE: Place the fryer on a flat, stable, non-combustible surface away from flammable materials.
- CHILDREN AND PETS: Keep children and pets away from the fryer during operation and while it is cooling down.
- FIRE EXTINGUISHER: Have a fire extinguisher (Class K for cooking oils) readily available.
Package Contents
Verify that all components are present and undamaged before assembly.
- 1x Fryer Main Body with 2 Burners
- 2x Stainless Steel Fry Tanks (8QT each)
- 2x Fry Baskets with Heat-Resistant Handles
- 1x Basket Hanging Rod
- 1x Thermometer
- 2x Foldable Side Tables
- 4x Support Legs
- 1x Propane Hose with CSA Certified Pressure Regulator
- Necessary Assembly Hardware (screws, wing nuts)
Setup & Assembly
Follow these steps to assemble your VEVOR Outdoor Dual-Tank Propane Deep Fryer.
- Attach Support Legs: Securely attach the four support legs to the main fryer body using the provided hardware. Ensure they are firmly tightened for stability.
- Install Side Tables: Mount the two foldable side tables to the designated slots on the fryer body. These tables provide additional prep space and can be folded down for compact storage.
- Insert Fry Tanks: Place the two stainless steel fry tanks into the openings on the top of the fryer body. Ensure they sit flush and are stable.
- Position Basket Hanging Rod: Install the basket hanging rod above the fry tanks. This rod allows you to hang the baskets for draining excess oil or keeping food warm.
- Connect Propane Supply: Connect the propane hose with the CSA certified pressure regulator to the fryer's gas inlet and to your propane tank. Ensure all connections are tight to prevent leaks. Perform a leak test with soapy water before first use.
- Place Fry Baskets and Thermometer: Insert the fry baskets into the tanks. Attach the thermometer to the side of one of the tanks, ensuring the probe is submerged in the oil for accurate temperature readings.

Operating Instructions
- Fill with Oil: Pour cooking oil into each stainless steel fry tank. Ensure the oil level is between the MIN and MAX fill lines indicated on the tank. Do not overfill.
- Ignition: Turn on the propane supply at the tank. Rotate the control knob for the desired burner to the 'HI' position and ignite the burner using a long lighter or igniter. Observe the flame through the visible vent design to confirm ignition.
- Temperature Control: Use the independent control knobs to adjust the flame intensity and regulate the oil temperature. Monitor the temperature using the integrated thermometer to reach the desired frying temperature.
- Frying: Carefully place food into the fry baskets and slowly lower them into the hot oil. Avoid overcrowding the baskets to maintain oil temperature and ensure even cooking.
- Draining: Once food is cooked, lift the baskets and hang them on the basket hanging rod to allow excess oil to drain back into the tank. This also helps keep food warm.
- Shut Down: After use, turn off the control knobs for both burners, then turn off the propane supply at the tank. Allow the oil to cool completely before handling.


Maintenance & Care
Regular cleaning and maintenance will extend the life of your deep fryer.
- Cool Down: Always allow the fryer and oil to cool completely before cleaning.
- Drain Oil: Carefully drain used oil from the tanks. Dispose of oil responsibly according to local regulations.
- Clean Tanks and Baskets: Wash the stainless steel tanks and fry baskets with warm, soapy water. Use a non-abrasive sponge or cloth to prevent scratching. Rinse thoroughly and dry completely.
- Clean Exterior: Wipe down the exterior of the fryer body and side tables with a damp cloth. Avoid using harsh chemicals or abrasive cleaners.
- Storage: Store the fryer in a dry, protected area when not in use. Ensure all components are clean and dry before storage to prevent rust or corrosion.
Troubleshooting
If you encounter issues with your fryer, refer to the following common troubleshooting tips:
- Burner Not Lighting:
- Check if the propane tank is open and has sufficient fuel.
- Ensure all gas connections are tight.
- Verify the control knob is in the 'HI' position during ignition.
- Low Flame/Insufficient Heat:
- Check propane tank level.
- Ensure the regulator is functioning correctly and not in bypass mode.
- Clean burner ports if they appear clogged.
- Oil Splatter:
- Do not overfill oil tanks.
- Ensure food is dry before placing it in hot oil.
- Avoid dropping food into the oil from a height.
If problems persist, contact VEVOR customer support for assistance.
Specifications
| Feature | Specification |
|---|---|
| Model Number | DBFY01 |
| Brand | VEVOR |
| Tank Capacity | 16 QT / 4 Gal (total, 8QT per tank) |
| Fuel Type | Propane |
| Number of Burners | 2 |
| Burner Heat Output | 40,000 BTU/HOUR (total) |
| Heat Adjustment Method | Knob Adjustment |
| Main Materials | Stainless Steel / Nickel-Plated / Cast Iron |
| Product Dimensions | 17.13"D x 44.88"W x 35.9"H |
| Item Weight | 43.21 Pounds |
| UPC | 197988885733 |

Warranty & Support
VEVOR products are designed for durability and performance. For warranty information, product registration, or technical support, please refer to the official VEVOR website or contact their customer service directly. Keep your purchase receipt as proof of purchase for any warranty claims.


