xTool F2 Ultra 60W MOPA Fiber Laser Engraver User Manual
Model: F2 Ultra
1. Product Overview
The xTool F2 Ultra is a single 60W MOPA fiber laser engraver designed for precision metal engraving and cutting. It features advanced capabilities such as 3D embossing, deep engraving, and color engraving on various metals. Equipped with dual 48MP cameras and AI-powered systems, it offers enhanced positioning accuracy and streamlined operation for both individual projects and batch processing.
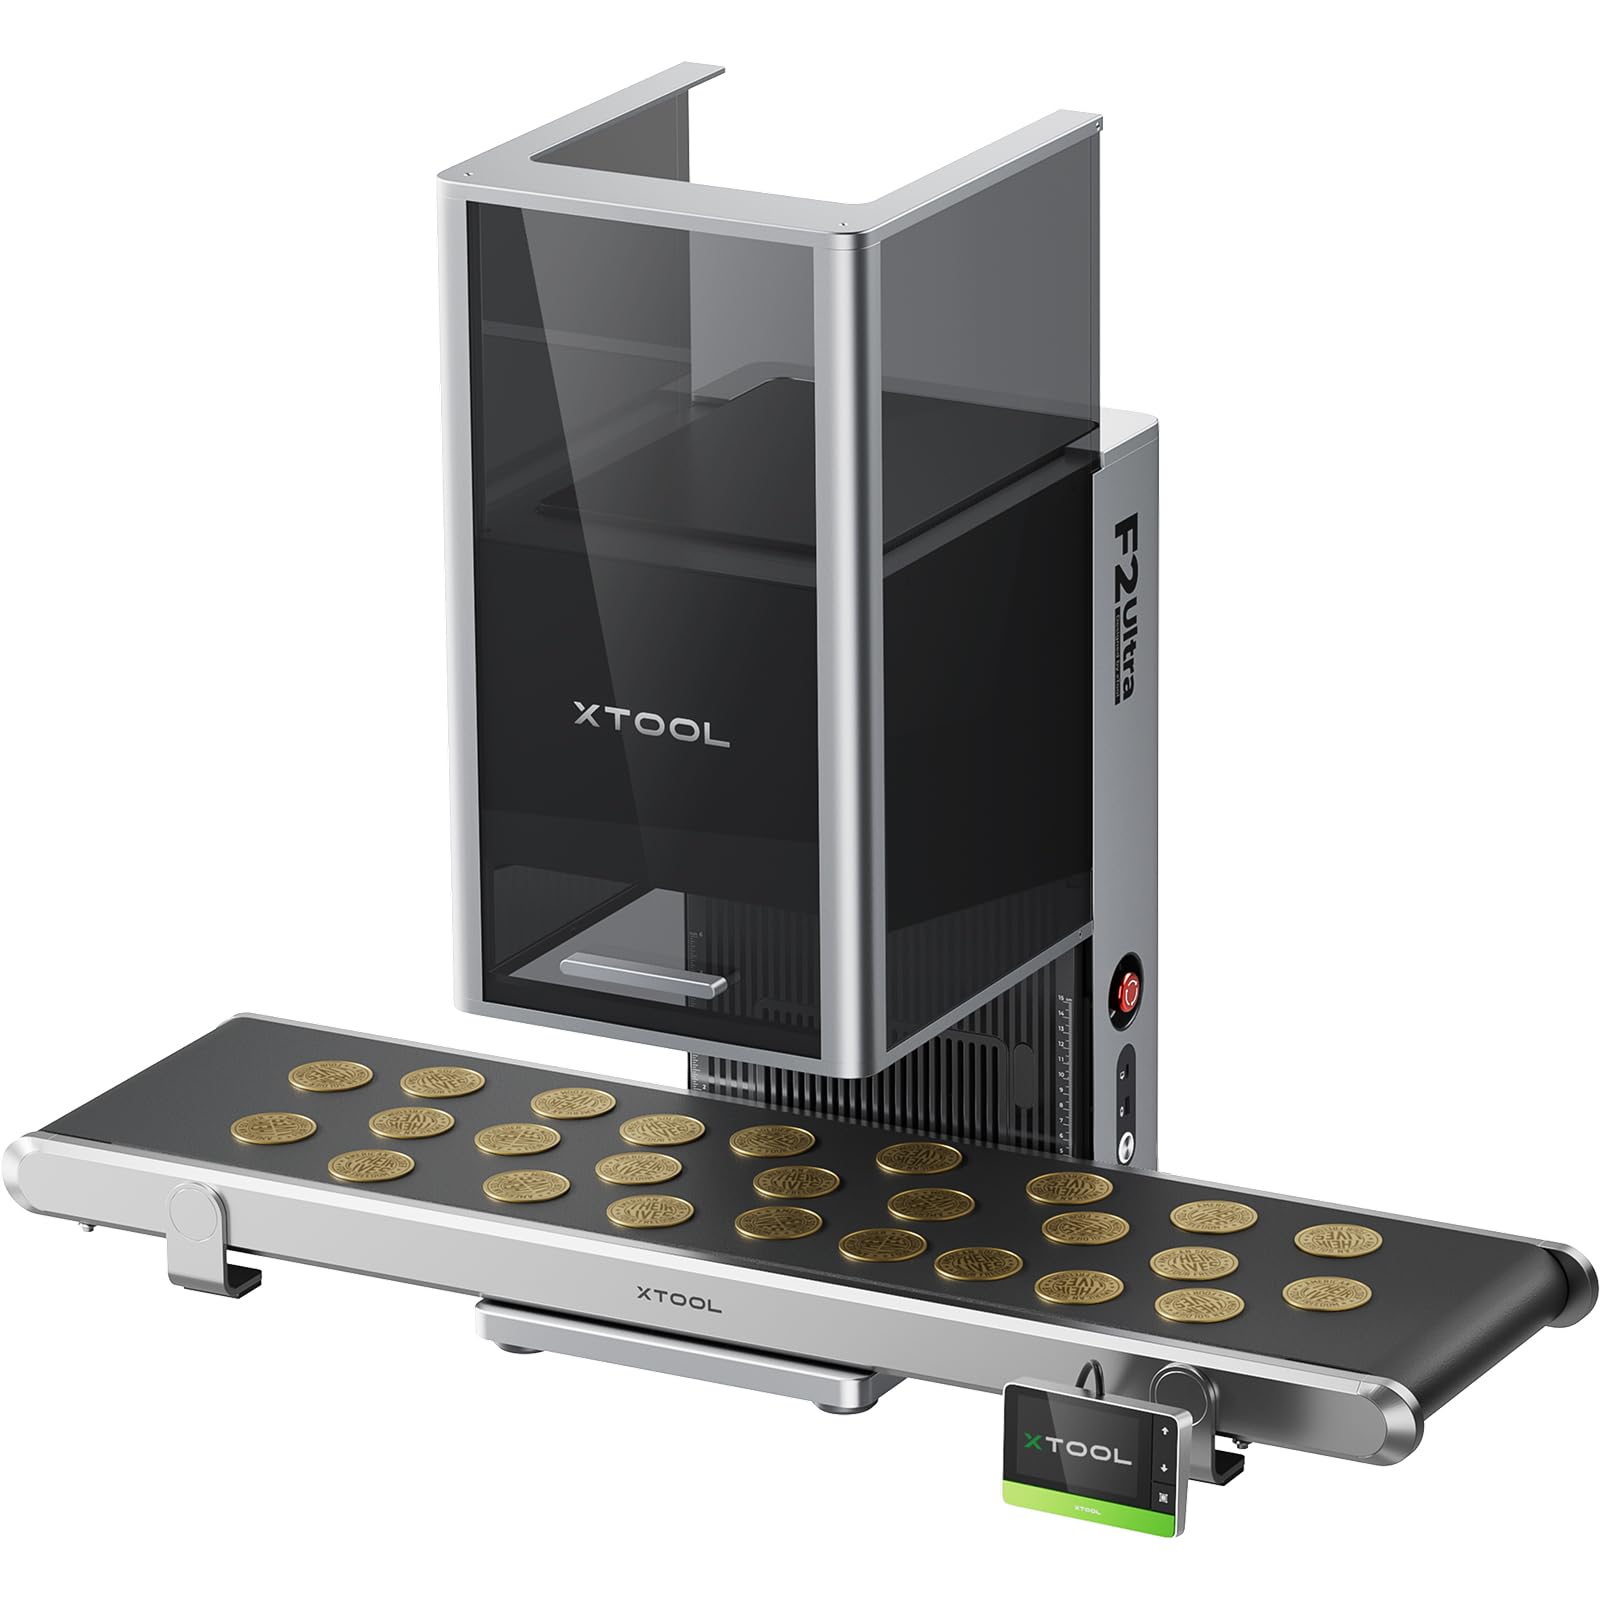
Figure 1: The xTool F2 Ultra laser engraver.
Key Features:
- All-Metal Capability: Performs 3D embossing, deep engraving, color engraving, and cuts up to 2mm metal. Supports black marking on aluminum, laser cleaning, and thin metal welding.
- 100+ Consistent Colors: Achieves over 100 vibrant and consistent colors on metals using a precisely calibrated structure and premium optical system. Pre-set color files are available for simplified color matrix engraving.
- AI-Powered Precision: Dual 48MP cameras and an AI system provide 0.2mm positioning accuracy. AI auto-detects materials, suggests optimal settings, and enables one-click focus and preview.
- Industrial-Grade Productivity: Operates at speeds up to 15,000mm/s, reducing 3D embossing time by up to 80% compared to 20W fiber lasers.
- Largest Desktop Working Space: Standard 8.7"x 8.7" (220x220mm), expandable to 8.7" x 19.7" (220x500mm) with the auto conveyor (sold separately) for automated batch processing.
- Safety: Class 4 laser engraver with 60000mW fiber laser output power. Features an enclosed design for enhanced safety.
2. Setup Guide
2.1 Unboxing and Placement
- Carefully remove the xTool F2 Ultra from its packaging. Retain all packaging materials for future transport or storage.
- Place the machine on a stable, level surface in a well-ventilated area, away from flammable materials. Ensure adequate space around the machine for operation and maintenance.
- Remove any protective films or shipping restraints from the laser engraver.
2.2 Power Connection
- Connect the power adapter to the machine's power input port.
- Plug the power adapter into a grounded electrical outlet.
2.3 Software Installation
- Download the latest xTool software from the official xTool website: https://s.xtool.com/mt/985.
- Install the software on your computer following the on-screen instructions.
- Connect the xTool F2 Ultra to your computer via USB cable or Wi-Fi as prompted by the software.

Figure 2: xTool software interface for design and control.
3. Operating Instructions
3.1 Basic Engraving Process
- Prepare Material: Place your material (e.g., metal, wood) securely on the working platform inside the machine.
- Software Setup: Open the xTool software. Import or create your design.
- Material Recognition & Settings: The AI system can auto-detect materials and suggest optimal laser settings. Confirm or adjust settings such as power, speed, and passes based on your material and desired effect.
- Focus & Preview: Use the one-click focus feature to ensure proper laser focus. Utilize the preview function to verify the engraving area and alignment.
- Start Engraving: Close the machine lid and initiate the engraving process from the software. Monitor the process through the transparent cover.
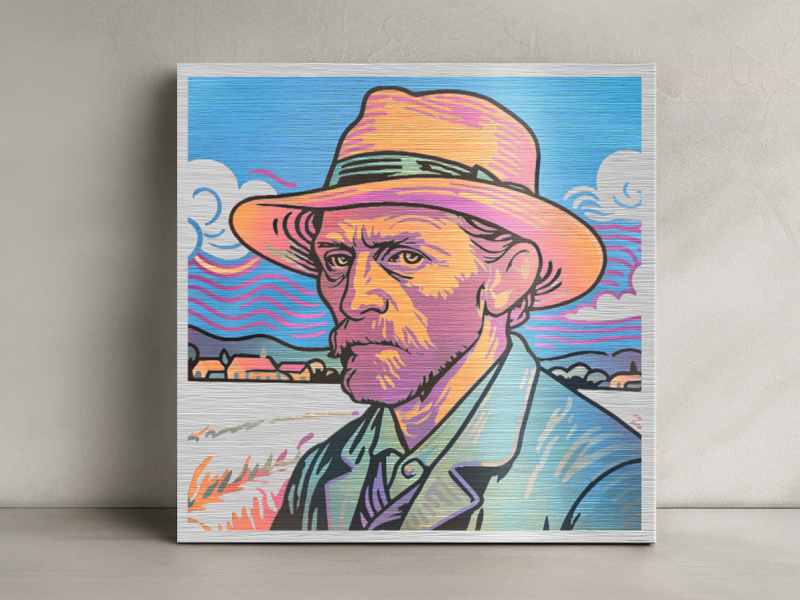
Figure 3: Example of 100+ color engraving on metal.
3.2 Advanced Engraving Techniques
- Color Engraving: Utilize the pre-set color files in the software to achieve specific color outcomes on metal. Experiment with different settings to expand your color palette.
- 3D Embossing: For creating raised or recessed designs, adjust the laser power and passes to achieve the desired depth and texture.
- Deep Engraving & Cutting: The 60W MOPA laser can cut up to 2mm metal. Adjust power and speed settings for deep engraving or cutting tasks.

Figure 4: Examples of color engraved products.

Figure 5: Example of 3D embossing on metal.
3.3 Using the Auto Conveyor (Optional Accessory)
The auto conveyor expands the working area to 220x500mm, enabling automated batch processing for high-volume orders.
- Install the auto conveyor according to its separate instruction manual.
- Place multiple items on the conveyor belt.
- In the xTool software, activate the 'Auto Streamline' feature for continuous processing.

Figure 6: xTool F2 Ultra with Auto Conveyor for batch processing.
3.4 AI-Powered Features
- AI Color Recognition & Auto Segmentation: The software can automatically recognize colors in your design and segment them for easier parameter setup.
- AI Design: Input text to generate designs in over 70 unique image styles.
- AI Modeling: Enables smart modeling for engraving curved surfaces as easily as flat ones.

Figure 7: AI-powered features in xTool software.
4. Maintenance
4.1 Cleaning the Machine
- Regularly clean the interior of the machine, especially the working platform and lens, to prevent debris buildup.
- Use a soft, lint-free cloth and appropriate cleaning solutions recommended by xTool for optical components.
- Ensure the machine is powered off and unplugged before cleaning.
4.2 Laser Lens Care
- Inspect the laser lens for dust or residue before each use.
- Clean the lens gently with a lens cleaning wipe or cotton swab moistened with isopropyl alcohol. Avoid touching the lens directly with bare hands.
5. Troubleshooting
5.1 Common Issues and Solutions
| Issue | Possible Cause | Solution |
|---|---|---|
| Laser not firing | Power cable loose, emergency stop engaged, software error. | Check power connections, release emergency stop button, restart software and machine. |
| Poor engraving quality | Incorrect focus, dirty lens, unsuitable material settings. | Perform one-click focus, clean the laser lens, adjust power/speed settings in software. |
| Machine not connecting to computer | USB cable issue, Wi-Fi problem, driver not installed. | Try a different USB port/cable, check Wi-Fi connection, reinstall software drivers. |
If you encounter issues not listed here or require further assistance, please contact xTool customer support.
6. Specifications
| Feature | Specification |
|---|---|
| Laser Type | 60W MOPA Fiber Laser |
| Laser Output Power | 60000mW |
| Engraving Speed | Up to 15,000mm/s |
| Camera System | Dual 48MP Cameras |
| Positioning Accuracy | 0.2mm |
| Standard Working Area | 8.7" x 8.7" (220mm x 220mm) |
| Expanded Working Area (with Auto Conveyor) | 8.7" x 19.7" (220mm x 500mm) |
| Metal Cutting Capability | Up to 2mm |
| Safety Class | Class 4 Laser Engraver |
| Date First Available | August 6, 2025 |
xTool F2 Ultra vs. Other Laser Engravers:
| Feature | xTool F2 Ultra | Others |
|---|---|---|
| Speed | 15,000 mm/s | 10,000 mm/s |
| Camera | 48MP Camera x2, Auto Positioning | No / Single Camera |
| Metal Cutting | Up to 2mm | Up to 1.5mm |
| Exclusive Tech | Auto-ID Materials, Auto Streamline™ Production | None |
| Working Area | 8.66" x 8.66" (8.66" x 19.69" with conveyor) | 6.89" x 6.89" |
| Safety | Enclosed Design | Unprotected |
7. Safety Information
The xTool F2 Ultra is a Class 4 laser engraver. Adherence to safety guidelines is crucial to prevent injury and damage.
- Always operate the machine in a well-ventilated area to dissipate fumes and smoke.
- Never look directly into the laser beam or at the laser spot without appropriate laser safety glasses.
- Ensure the machine's lid is closed during operation to contain the laser and any emitted light.
- Keep flammable materials away from the working area.
- Do not leave the machine unattended during operation.
- Familiarize yourself with the emergency stop procedure.
8. Warranty and Support
8.1 Warranty Information
This product is covered by a 30-day return policy for refund or replacement. For detailed warranty terms and conditions, please refer to the official xTool website or contact customer service.
8.2 Customer Support
xTool provides multi-channel support including email, live chat, phone, and a Facebook community group. A dedicated technical service team is available to assist with any product-related inquiries.
Video 1: This video from xTool Official highlights 5 reasons to upgrade to the F2 Ultra, showcasing its stable color engraving, AI simplification, metal crafting capabilities, speed, and enclosed safety features.