
1. Introduction
This manual provides detailed instructions for the installation, operation, and maintenance of your AVSIILE Shower Faucet Set, Model AV-STS-BN. This system features a durable all-metal construction with a SpotShield Stainless finish, offering a rainfall shower head, a handheld spray, and a tub spout. The single handle design allows for precise control of water temperature and volume, while the diverter enables switching between the three functions.
2. Product Components
Before beginning installation, verify that all components listed below are present and undamaged. Refer to the diagram for visual identification of each part.

Figure 2.1: Exploded view of the AVSIILE Shower Faucet Set components. This image displays all parts included in the kit, numbered for easy identification, such as the shower bar, decoration cover, shower head, handheld hose, working gloves, shower valve, handheld holder, handheld shower, tub spout, installation manual, hexagonal key, wall screw, expanded rubber particles, shower handle, diverter, PTFE tape, and panel.
- Shower Bar
- Decoration Cover
- Shower Head (Rainfall)
- Handheld Hose
- Working Gloves
- Shower Valve (Rough-in)
- Handheld Holder
- Handheld Shower
- Tub Spout
- Installation Manual (this document)
- Hexagonal Key
- Wall Screw
- Expanded Rubber Particles
- Shower Handle
- Diverter
- PTFE Tape
- Panel (Trim Plate)
3. Specifications
| Feature | Specification |
|---|---|
| Brand | AVSIILE |
| Model Number | AV-STS-BN |
| Color | SpotShield Stainless |
| Material | Brass (main construction), Stainless Steel (handle) |
| Finish Type | Brushed |
| Number of Handles | 1 |
| Mounting Type | Wall Mount |
| Rainfall Shower Head Size | 10 inches |
| Flow Rate | 1.8 gallons per minute at 80 PSI pressure |
| Included Components | Rainfall Shower Head, Shower Arm, Handheld Shower, Handheld Holder, Tub Spout, Rough-in Valve, Trim Kit |
| Product Dimensions | 15.98 x 10 x 86.61 inches |
| Item Weight | 11.5 Pounds |
4. Setup and Installation
Professional installation is recommended. Ensure the main water supply is turned off before beginning any plumbing work. This system is designed for wall-mount installation.
4.1 Rough-in Valve Installation
The brass rough-in valve is the core of the shower system, controlling water flow and temperature. It must be securely installed within the wall according to local plumbing codes.

Figure 4.1.1: Brass Rough-in Valve. This image shows the internal brass rough-in valve with clearly labeled connections for hot water (NPT 1/2"), cold water (NPT 1/2"), fixed shower head (NPT 1/2"), hand shower head, and tub spout (NPT 1/2"). It also highlights the ceramic valve core and brass water separator.

Figure 4.1.2: Shower Mixer Valve Control Diagram. This diagram illustrates the rough-in valve's internal structure and its connection points, along with the corresponding trim plate showing the diverter knob for shower head, handheld shower, and bathtub spout, and the single handle for temperature and water flow control.
- Prepare Wall Opening: Create an opening in the wall suitable for the rough-in valve, ensuring sufficient depth for the valve body and plumbing connections.
- Connect Water Lines: Connect the hot and cold water supply lines to the designated NPT 1/2" inlets on the rough-in valve. Use PTFE tape on threaded connections to ensure a watertight seal.
- Connect Outlets: Connect the shower head, handheld shower, and tub spout lines to their respective NPT 1/2" outlets on the valve.
- Secure Valve: Mount the rough-in valve securely to the wall studs using appropriate fasteners. Ensure the valve is level and at the correct depth relative to the finished wall surface.
4.2 Trim Kit and Fixture Installation
Once the rough-in valve is installed and tested, proceed with installing the visible trim and fixtures.
- Install Shower Arm and Head: Secure the shower arm to the wall outlet. Attach the 10-inch rainfall shower head to the shower arm. Ensure all connections are tight and sealed with PTFE tape.
- Install Handheld Shower and Holder: Mount the handheld shower holder at a desired height. Connect the handheld hose to the wall outlet and then to the handheld shower.
- Install Tub Spout: Attach the tub spout to its wall connection. This tub spout features a 180-degree rotation for convenience.
- Install Trim Plate and Handles: Secure the trim plate (panel) over the rough-in valve. Install the shower handle and diverter knob onto their respective stems, ensuring they operate smoothly.

Figure 4.2.1: Rainfall Shower Head. This image highlights the 10-inch rainfall shower head, demonstrating its 360-degree rotation capability and the air injection technology that enhances water pressure for a full body spray.

Figure 4.2.2: Handheld Shower Head. This image displays the handheld shower head, its 360-degree rotation, soft water outlet, 59-inch/150cm steel shower hose, easy-clean spray holes, and the brass shower holder.

Figure 4.2.3: 180-Degree Rotating Bathtub Spout. This image highlights the tub spout's ability to rotate 180 degrees, its cellular design aerator, brass construction, and 1/2 NPT connection.
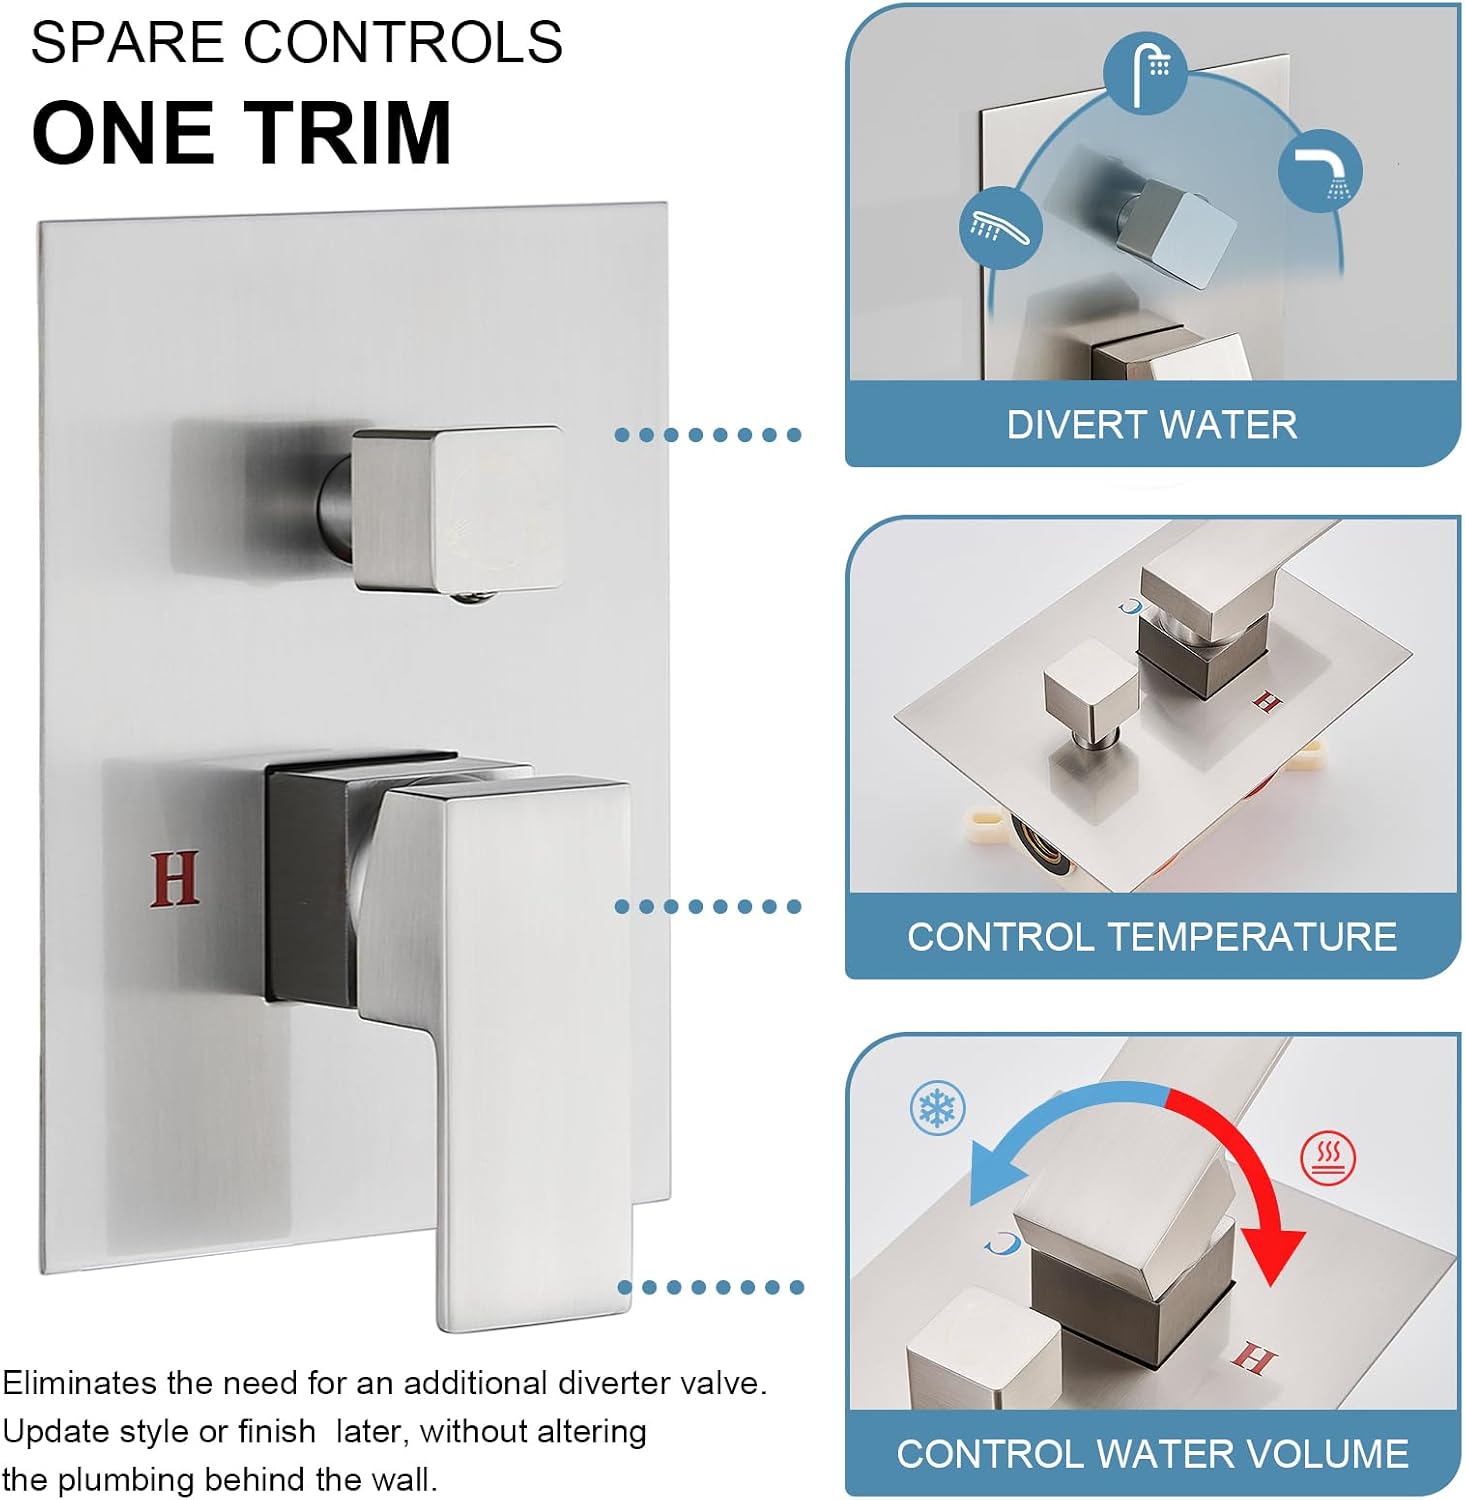
Figure 4.2.4: Shower Control Panel. This image shows the single trim panel with two controls: a diverter knob at the top to switch water flow between the shower head, handheld shower, and tub spout, and a single handle below to control water temperature (Hot/Cold) and volume.
5. Operating Instructions
The AVSIILE Shower Faucet Set is designed for intuitive operation with a single handle for water control and a diverter knob for selecting the water outlet.
- Water Flow and Temperature Control: The lower handle controls both water flow and temperature.
- To turn on the water and adjust flow, rotate the handle away from the wall.
- To adjust temperature, rotate the handle left for hotter water (marked 'H') and right for colder water (marked 'C').
- Function Diverter: The upper knob is the diverter, allowing you to switch between the three shower functions. Rotate the knob to select your desired output:
- Rainfall Shower Head: Provides a wide, gentle rainfall experience.
- Handheld Shower: Offers a focused spray for rinsing or targeted cleaning.
- Tub Spout: Directs water into the bathtub.
6. Maintenance
Regular cleaning and proper care will ensure the longevity and optimal performance of your AVSIILE Shower Faucet Set.
- Cleaning the Finish: Clean the SpotShield Stainless finish with a soft, damp cloth. Avoid abrasive cleaners, harsh chemicals, or scouring pads, as these can damage the finish.
- Cleaning Spray Holes: The rainfall shower head and handheld shower feature "Touch-Clean" spray holes. Mineral build-up can be easily wiped away with a finger or soft cloth.
- Aerator Cleaning (Tub Spout): If water flow from the tub spout decreases, the aerator may need cleaning. Unscrew the aerator, rinse out any debris, and reattach.
- Winterization: In areas prone to freezing temperatures, ensure all water lines are properly drained to prevent damage to the valve and fixtures.

Figure 6.1: Touch-Clean Spray Holes. This image demonstrates how easily mineral residue can be wiped away from the soft rubber spray holes of the shower head, ensuring consistent water flow.
7. Troubleshooting
This section addresses common issues you might encounter with your shower faucet set.
| Problem | Possible Cause | Solution |
|---|---|---|
| Low Water Pressure | Clogged spray holes; partially closed shut-off valve; mineral buildup in aerator. | Clean spray holes (Section 6.2); ensure shut-off valves are fully open; clean tub spout aerator (Section 6.3). |
| Leaking from Fixtures | Loose connections; damaged O-rings or seals; faulty cartridge. | Check and tighten all connections; inspect and replace O-rings/seals if damaged; contact customer support for cartridge replacement. |
| Water Temperature Fluctuations | Issues with water heater; pressure imbalance in water supply; faulty thermostatic cartridge. | Consult a plumber to check water heater settings and home's water pressure; contact customer support if cartridge is suspected. |
| Diverter Not Switching Properly | Debris in diverter mechanism; worn diverter cartridge. | Flush the system; if issue persists, contact customer support for diverter cartridge replacement. |
8. Warranty and Support
AVSIILE products are manufactured to high-quality standards. For specific warranty information, please refer to the warranty card included with your purchase or contact AVSIILE customer support. If you require assistance with installation, troubleshooting, or replacement parts, please reach out to our customer service team.
Customer Support: Please refer to the contact information provided on your purchase receipt or the AVSIILE official website.