1. Introduction
This manual provides comprehensive instructions for the safe and efficient operation of your TechniSat Viola under-cabinet kitchen radio. Please read this manual thoroughly before using the device and retain it for future reference. This device combines modern design with practical features for your kitchen or bedroom.
2. Safety Information
Always follow basic safety precautions when using this product to reduce the risk of fire, electric shock, and injury.
- Do not expose the device to rain or moisture.
- Do not open the casing. Refer all servicing to qualified personnel.
- Ensure the power supply voltage matches the requirements specified on the device.
- Avoid placing the device near heat sources or in direct sunlight.
- Keep out of reach of children.
3. Package Contents
The TechniSat Viola kitchen radio package includes the following items:
- TechniSat Viola Kitchen Radio (Anthracite)
- Loop Antenna
- Power Adapter
- Mounting Accessories
- User Manual
4. Product Overview
Familiarize yourself with the components and controls of your TechniSat Viola radio.
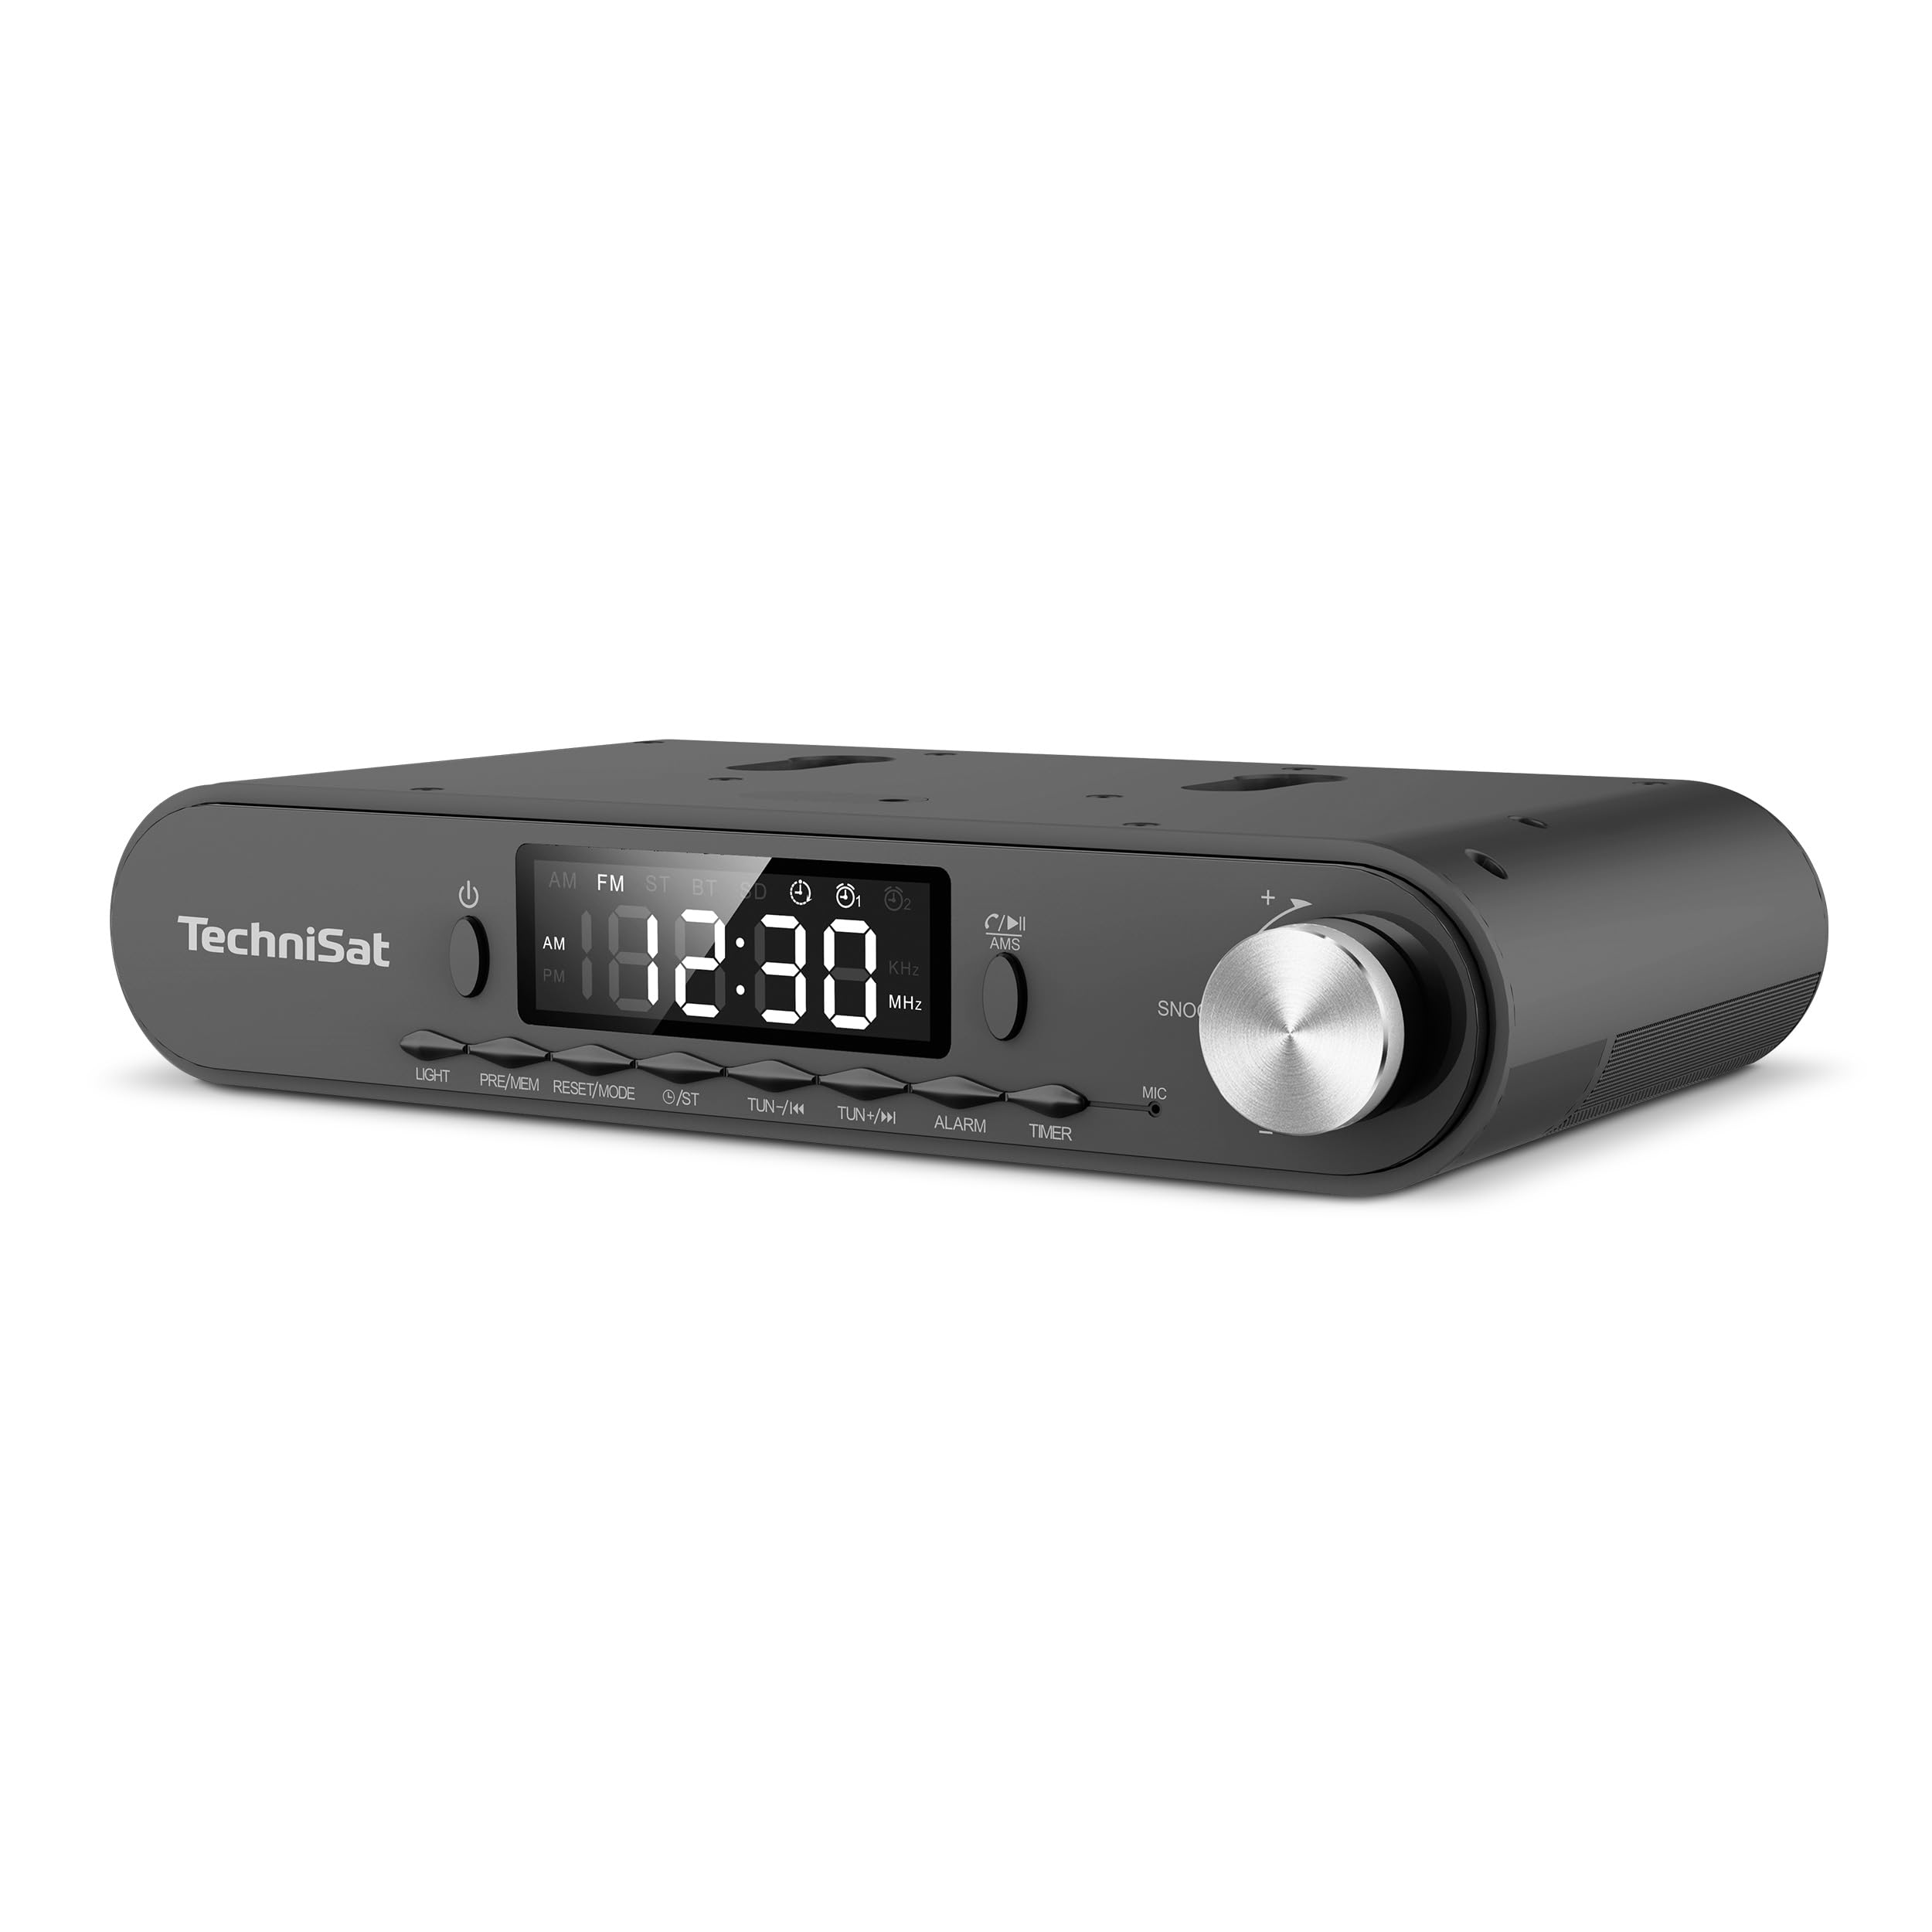
Figure 1: Front panel of the TechniSat Viola radio. This image displays the front panel of the TechniSat Viola radio, showing the LED display, control buttons (LIGHT, MODE/RESET, MEM/PRE, TUN-/K, TUN+/I, ALARM, TIMER), power button, and the volume/snooze knob. The TechniSat logo is visible on the left.
Control Panel Layout:
- Power Button: Turns the device on or off.
- LED Display: Shows time, frequency, and mode information.
- LIGHT Button: Activates the integrated LED work light.
- MODE/RESET Button: Switches between operating modes and resets settings.
- MEM/PRE Button: Stores and recalls radio station presets.
- TUN-/K and TUN+/I Buttons: Adjusts tuning frequency or navigates tracks.
- ALARM Button: Sets and manages alarm functions.
- TIMER Button: Accesses and controls the cooking timer.
- Volume/Snooze Knob: Adjusts volume; press for snooze function.
- MIC: Microphone for hands-free function.
5. Setup
Follow these steps to set up your TechniSat Viola radio:
- Unpack: Carefully remove all components from the packaging.
- Antenna Connection: Connect the provided loop antenna to the external antenna port on the back of the radio. Position the antenna for optimal reception.
- Power Connection: Connect the power adapter to the DC input port on the radio and then plug the adapter into a standard electrical outlet.
- Placement/Mounting: Decide whether to use the radio as a standalone unit on a flat surface or mount it under a cabinet. Use the provided mounting accessories for under-cabinet installation, ensuring it is securely fastened.
- Initial Power On: Press the Power button to turn on the radio. The LED display will illuminate.
6. Operating Instructions
6.1. Radio Operation (FM)
- Select FM Mode: Press the MODE/RESET button until 'FM' is displayed.
- Manual Tuning: Use the TUN-/K or TUN+/I buttons to manually adjust the frequency.
- Automatic Scan (AMS): Press and hold the MEM/PRE button to automatically scan and store available FM stations. The radio supports up to 40 favorite memory slots.
- Recall Presets: Briefly press the MEM/PRE button to cycle through stored stations.
6.2. Bluetooth Functionality
The integrated Bluetooth receiver allows you to stream audio wirelessly from your smartphone or tablet.
- Enter Bluetooth Mode: Press the MODE/RESET button until 'BT' is displayed. The radio will enter pairing mode, indicated by a flashing Bluetooth icon.
- Pairing: On your smartphone or tablet, enable Bluetooth and search for available devices. Select 'TechniSat Viola' from the list.
- Audio Streaming: Once paired, you can play music from your device, and the audio will be streamed through the radio's speakers.
- Hands-Free Calling: When a call comes in while connected via Bluetooth, you can answer it using the radio's controls and speak through the built-in microphone (MIC).
6.3. Timer Function
The radio features a convenient cooking timer.
- Set Timer: Press the TIMER button to access the timer settings. Use the TUN-/K or TUN+/I buttons to adjust the desired countdown time.
- Start/Stop Timer: Press the TIMER button again to start or pause the countdown.
6.4. Alarm and Snooze
Utilize the alarm functions for daily reminders or wake-up calls.
- Set Alarm: Press the ALARM button to enter alarm setup. Use the TUN-/K or TUN+/I buttons to set the alarm time and select the alarm source (e.g., radio or buzzer).
- Activate/Deactivate Alarm: Press the ALARM button repeatedly to toggle the alarm on or off.
- Snooze Function: When the alarm sounds, press the Volume/Snooze Knob to activate the snooze function, pausing the alarm for a short period.
6.5. LED Work/Night Light
The integrated LED lighting can serve as a work light or a subtle night light.
- Activate Light: Press the LIGHT button to turn on the LED light.
- Adjust/Deactivate Light: Press the LIGHT button again to cycle through brightness levels or turn off the light.
7. Maintenance
Proper care ensures the longevity of your TechniSat Viola radio.
- Cleaning: Clean the radio with a soft, dry cloth. Do not use abrasive cleaners, solvents, or chemical sprays, as these can damage the surface.
- Power Disconnection: Always unplug the device from the power outlet before cleaning or if it will not be used for an extended period.
- Ventilation: Ensure that the ventilation openings are not blocked to prevent overheating.
8. Troubleshooting
If you encounter issues with your radio, refer to the following common problems and solutions:
| Problem | Possible Cause | Solution |
|---|---|---|
| No power / Device does not turn on | Power adapter not connected or faulty outlet. | Check if the power adapter is securely plugged into the radio and a working electrical outlet. Try a different outlet. |
| No sound | Volume too low; incorrect audio source selected. | Increase the volume using the knob. Ensure the correct mode (FM, Bluetooth) is selected. |
| Poor radio reception | Antenna not properly positioned or connected; weak signal. | Adjust the position of the loop antenna. Ensure it is fully connected. Try moving the radio to a different location. |
| Bluetooth not connecting | Radio not in pairing mode; device too far; Bluetooth off on smartphone. | Ensure the radio is in Bluetooth pairing mode. Keep your smartphone within range. Check Bluetooth settings on your smartphone. |
9. Specifications
Key technical specifications for the TechniSat Viola 0000/2932 radio:
| Feature | Detail |
|---|---|
| Brand | TechniSat |
| Model Number | 0000/2932 |
| Color | Anthracite |
| Connectivity Technology | Bluetooth |
| Special Features | Timer control via direct selection button, External antenna connection, Under-cabinet or standalone use, Aluminum volume/selection control, Bluetooth audio streaming, Alarm, Sleep, Snooze, LED work/night light |
| Compatible Devices | Smartphone |
| Power Source | Electric cable |
| Supported Radio Bands | FM |
| Tuning Technology | FM |
| Product Dimensions (L x W x H) | 21.2 cm x 12.1 cm x 4.2 cm |
| Manufacturer | TechniSat |
| Country of Origin | China |
10. Warranty and Support
For warranty information and technical support, please refer to the documentation provided with your purchase or contact TechniSat customer service directly. Specific details regarding spare parts availability and software updates are not provided in this manual.


