
Introduction
The maXpeedingrods Zero Turn Mower Chute Blocker is designed to provide enhanced control over grass discharge from your zero-turn mower. This accessory helps prevent debris from scattering into unwanted areas such as flower beds, sidewalks, or vehicles, improving safety and maintaining a cleaner mowing environment. It is compatible with most zero-turn mowers, including models from Ferris, Exmark, Gravely, Hustler, and Toro, particularly those with 52", 60", and 72" decks that feature a square flat opening.
Safety Information
Always prioritize safety when installing, operating, or maintaining your mower and its accessories. Read and understand all instructions before use. Wear appropriate personal protective equipment (PPE), including safety glasses, gloves, and hearing protection. Ensure the mower engine is off and the spark plug wire is disconnected before performing any installation or maintenance. Keep hands and feet clear of moving parts. This chute blocker is designed for use in high-density areas where flying debris could cause damage or injury. Proper installation is crucial for safe operation.
Package Contents
Verify that all components are present and undamaged before beginning installation.

Image: All components of the maXpeedingrods Chute Blocker laid out for inspection.
- Chute Blocker Plate
- Control Handle Assembly
- Fixed Connecting Component
- Limit Stop Plate
- Long Hook Tension Spring
- Various Bolts, Nuts, Washers, and Spacers (as shown in the image)
Installation Instructions
This chute blocker is designed for use only on prefabricated decks with a square flat opening. Installation requires drilling three holes into the mower deck. Please refer to the video for a visual guide.
Step 1: Assemble the Limit Stop Plate
Attach the limit stop plate to the main chute blocker plate using the provided bolt, washer, and nut. Ensure it is securely fastened but allows for movement.
Video: ACS6000ULS Mower Chute Blocker Assembly Video. This video demonstrates the assembly process of the chute blocker components.
Step 2: Assemble the Fixed Connecting Component
Secure the fixed connecting component to the chute blocker plate using the designated bolts, washers, and nuts. This component forms the pivot point for the control handle.
Step 3: Insert Copper Tube and Assemble Control Handle
Insert the copper tube with a washer into the designated hole. Then, attach the control handle to the assembly, ensuring it slides smoothly and is secured with the appropriate hardware.
Step 4: Attach Spring and Adjust Handle
Hook one end of the tension spring onto the upper bolt and the other end into the hole in the lower part of the assembly. Adjust the handle so it slides between the two tabs on the shield. Secure it with a white washer and nut. Insert the thin black bolts through the tabs and handle, ensuring the threads are exposed on the spring side. Place a nut on the bolt and tighten.
Step 5: Mounting to Mower Deck
Position the assembled chute blocker onto your mower deck. Mark the locations for drilling three holes. Drill the holes and then use the provided spacers and bolts to securely mount the chute blocker to the mower deck. Ensure the installation is firm but allows the chute blocker to operate freely.
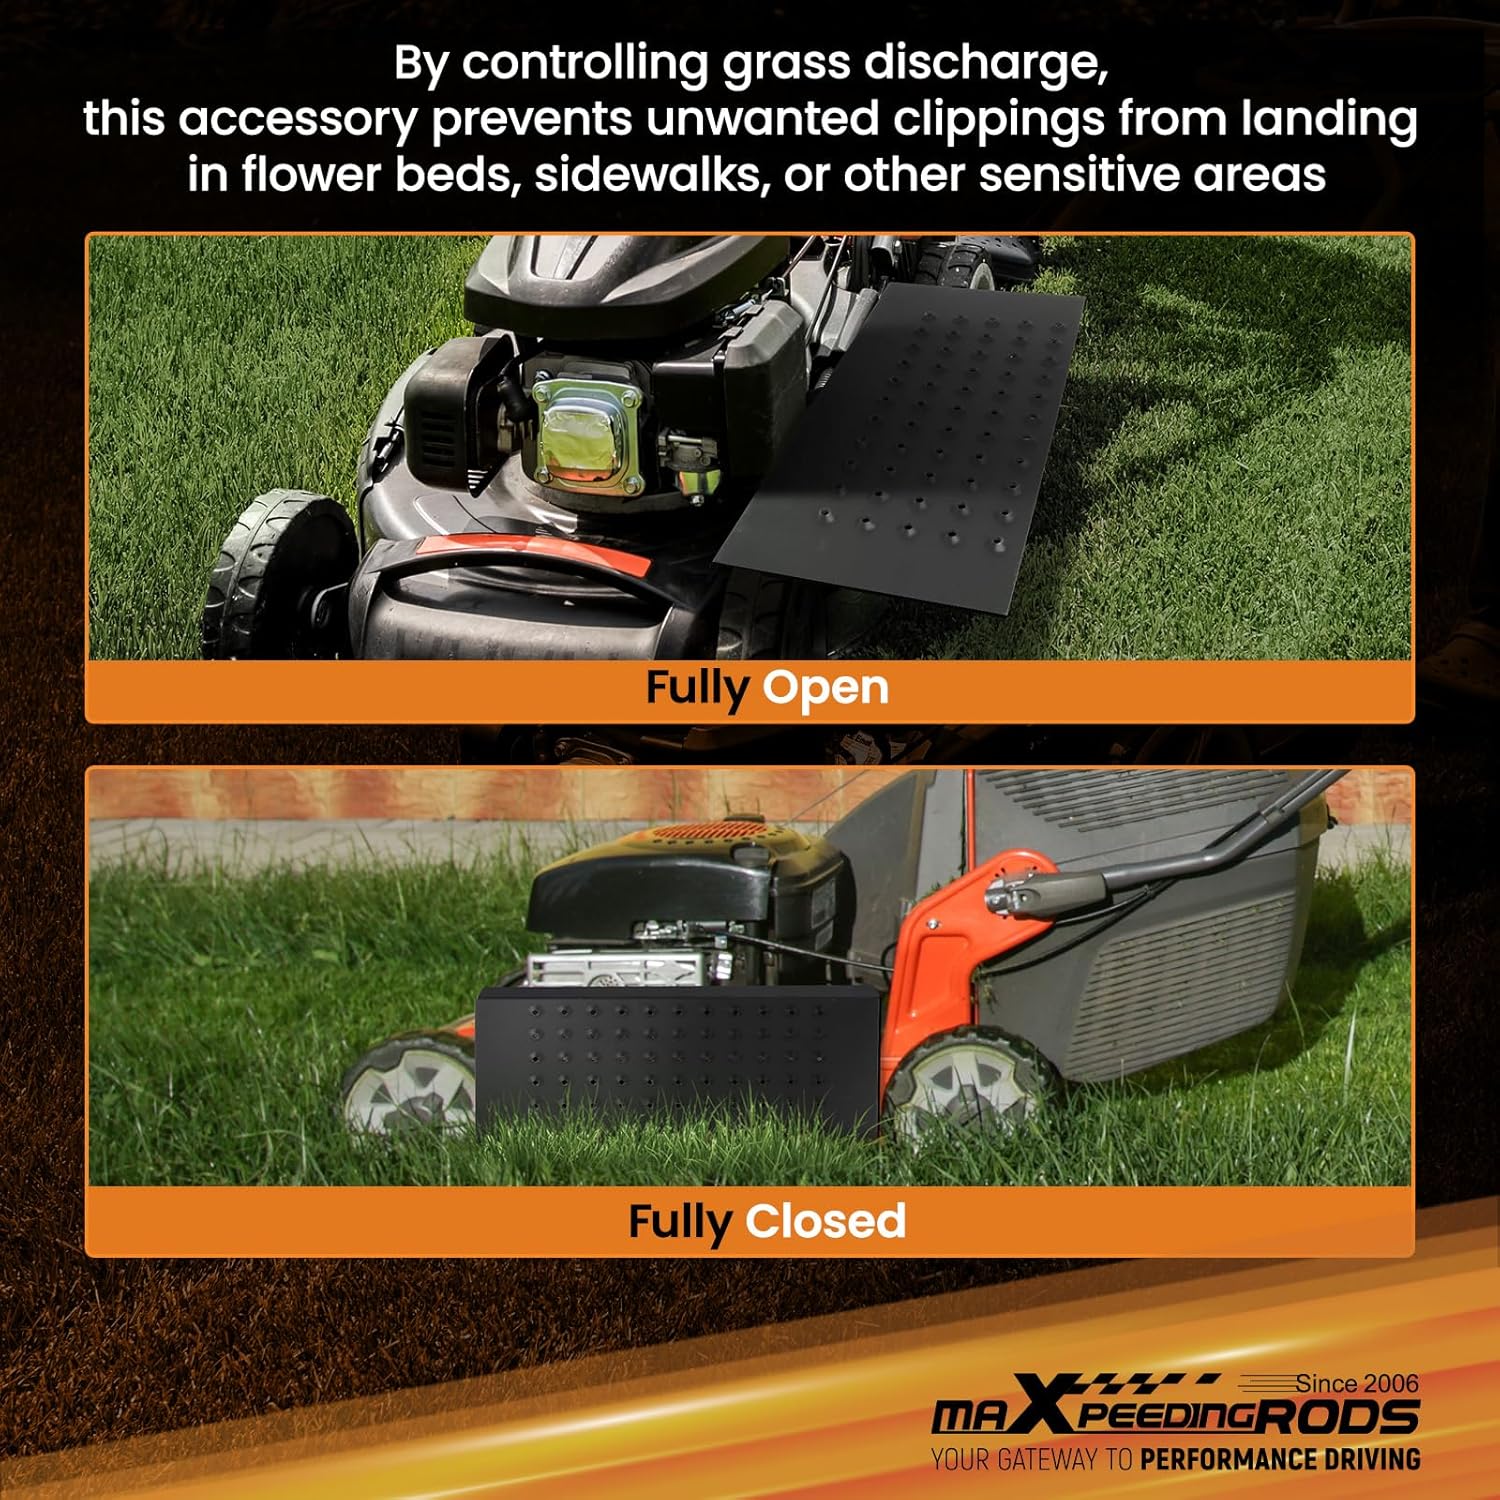
Image: The chute blocker shown in both fully open and fully closed positions on a mower.
Note: Hole locations may vary by mower model. If the pre-drilled holes on the chute blocker do not align with your mower's deck, new mounting holes may need to be drilled into the deck for proper fitment. Contact customer support for installation instructions specific to your mower model if needed.
Operating Instructions
The chute blocker is operated manually using the control handle. To adjust the grass discharge, simply move the handle to the desired position. The advanced chute system allows for a semi-closed position, forcing debris to fall instantly and preventing high-speed discharge, which is ideal for sensitive areas. For full discharge, move the handle to the fully open position.
Maintenance
- Cleaning: Regularly clean the chute blocker and its moving parts to prevent grass and debris buildup, which can hinder operation.
- Lubrication: Apply grease to moving joints and pivot points periodically to ensure smooth operation and prevent corrosion.
- Inspection: Before each use, inspect all bolts, nuts, and connections to ensure they are tight and secure. Check the spring for any signs of wear or damage.
- Storage: Store the mower and chute blocker in a dry, protected area when not in use to prolong its lifespan.
Troubleshooting
- Stiff Operation: If the control handle is stiff, check for debris buildup in the pivot points or around the spring. Clean and lubricate as necessary.
- Loose Components: If any bolts or nuts become loose, tighten them immediately to prevent damage or unsafe operation.
- Ineffective Debris Blocking: Ensure the chute blocker is fully closing when in the semi-closed position. Adjust the handle or inspect for obstructions if it is not.
Specifications
| Brand | maXpeedingrods |
| Model Numbers | ACS6000ULS, 088-6003-00 |
| Material | Alloy Steel |
| Color | Black |
| Operation Mode | Manual |
| Product Dimensions | 25.08 x 12.09 x 7.6 inches |
| Item Weight | 16.61 pounds |
Warranty and Customer Support
maXpeedingrods offers lifetime technical support and a 1-year limited warranty for quality-related issues from the date of purchase. For any questions or assistance, please contact maXpeedingrods customer support.