
1. Introduction & Product Overview
The K KERNOWO Epoxy Resin Kit is designed for beginners and experienced crafters alike, offering a complete set of tools and materials to create beautiful resin art. This comprehensive kit allows you to craft luminous sculptures, decorative vases, and unique keepsakes with ease.
The high-quality A+B epoxy resin ensures crystal-clear results with minimal bubbles, preserving the vibrant colors of your inclusions. The included wooden LED base transforms your creations into dynamic display pieces, perfect for any desk, shelf, or nightstand.
2. Package Contents
Your K KERNOWO Epoxy Resin Kit includes the following components:
- 20 oz Crystal-Clear Epoxy Resin (Part A & Part B)
- 1 Wooden LED Display Base with USB cable and warm light switch
- 4 Premium Silicone Molds: Vase (Hexagon with Test Tube), Pyramid, Sphere, and Cube
- 3D Dried Flowers (Assorted)
- 3-Color Gold Foil Paper
- 12-Color Glitter
- 9-Color Cellophane
- Measuring Cups (various sizes)
- Wooden Stirring Sticks
- Disposable Gloves
- Disposable Pipettes
- Tweezers

Figure 2.1: Overview of the K KERNOWO Epoxy Resin Kit components.
3. Safety Guidelines
Working with epoxy resin requires adherence to safety precautions. Please read and follow these guidelines carefully:
- Ventilation: Always work in a well-ventilated area to avoid inhaling fumes. Open windows and doors, or use a fan.
- Personal Protective Equipment (PPE): Wear the provided disposable gloves to protect your skin. Consider wearing eye protection (safety glasses or goggles) to prevent accidental splashes.
- Workspace Protection: Cover your work surface with a disposable plastic sheet or newspaper to protect it from spills.
- Avoid Contact: Do not allow resin to come into contact with skin or eyes. If contact occurs, wash immediately with soap and water. Seek medical attention if irritation persists or if resin gets into eyes.
- Keep Out of Reach: Store all components out of reach of children and pets.
- Proper Disposal: Dispose of any unused resin or contaminated materials according to local regulations. Do not pour resin down drains.
4. Setup & Preparation
- Prepare Your Workspace: Choose a clean, level, and well-ventilated area. Cover your work surface to protect it from spills.
- Gather Materials: Lay out all components of your kit, including resin bottles, molds, measuring cups, stirring sticks, gloves, and desired decorative inclusions (dried flowers, glitter, foil).
- Wear Gloves: Put on the provided disposable gloves before handling any resin components.
- Open Resin Bottles: Carefully open the caps of both Part A (Epoxy Resin) and Part B (Epoxy Hardener). Note that there may be an inner seal that requires a small tool (like a flat-head screwdriver) to pry open.

Figure 4.1: Epoxy Resin Part A and Part B bottles.
5. Operating Instructions
5.1. Resin Mixing
- Measure Accurately: Using the provided measuring cups, measure Part A (Epoxy Resin) and Part B (Epoxy Hardener) in a 1:1 volume ratio. Accuracy is crucial for proper curing.
- Combine & Stir Slowly: Pour both Part A and Part B into a clean mixing cup. Using a wooden stirring stick, stir the mixture thoroughly for 3-5 minutes. Stir slowly and consistently, scraping the sides and bottom of the cup to ensure all components are fully incorporated. Slow stirring helps minimize air bubbles.

Figure 5.1: Measuring and mixing epoxy resin.
5.2. Adding Inclusions & Pouring
- Inclusion Placement: If desired, add your decorative elements such as dried flowers, glitter, or gold foil paper into the mixed resin. Arrange them as desired within the mold.
- Pour into Molds: Slowly pour the mixed resin into your chosen silicone mold. Pour along the side of the mold rather than directly into the center to minimize air bubbles. For thicker pieces, pour in layers, allowing each layer to partially cure before adding the next. Do not exceed 1/3 of the total mold height per layer.

Figure 5.2: Adding inclusions and pouring resin into molds.
5.3. Curing
Allow the resin to cure in a dust-free environment. The resin will typically be tack-free within 6-8 hours and fully cured within 24 hours. For thicker castings, complete curing may take longer. Avoid disturbing the piece during the curing process.
6. Demolding & Finishing
- Demolding: Once the resin is completely cured (hard to the touch and no longer tacky), carefully demold your creation by gently peeling the silicone mold away from the hardened resin. Silicone molds are flexible, making demolding easy.
- Finishing (Optional): If there are any rough edges or imperfections, you can sand them down using fine-grit sandpaper (e.g., 800-1500 grit for medium sanding, 2000-3000 grit for fine sanding). For a high-gloss finish, polish the resin using a soft cloth and a small amount of compound or white toothpaste in circular motions.
7. Creative Projects & Mold Usage
The kit provides diverse molds and accessories to inspire your creativity:
- Vase Mold: Use the unique hexagon mold with the included test tube to create a functional and decorative vase for fresh or dried flowers.
- Geometric Molds: Craft stunning pyramid, sphere, and cube shapes. These are ideal for embedding dried flowers, glitter, or other small objects.
- LED Display Base: Place your cured pyramid, sphere, or cube creations on the wooden LED base to illuminate them from below, creating a captivating glow and enhancing their visual appeal.
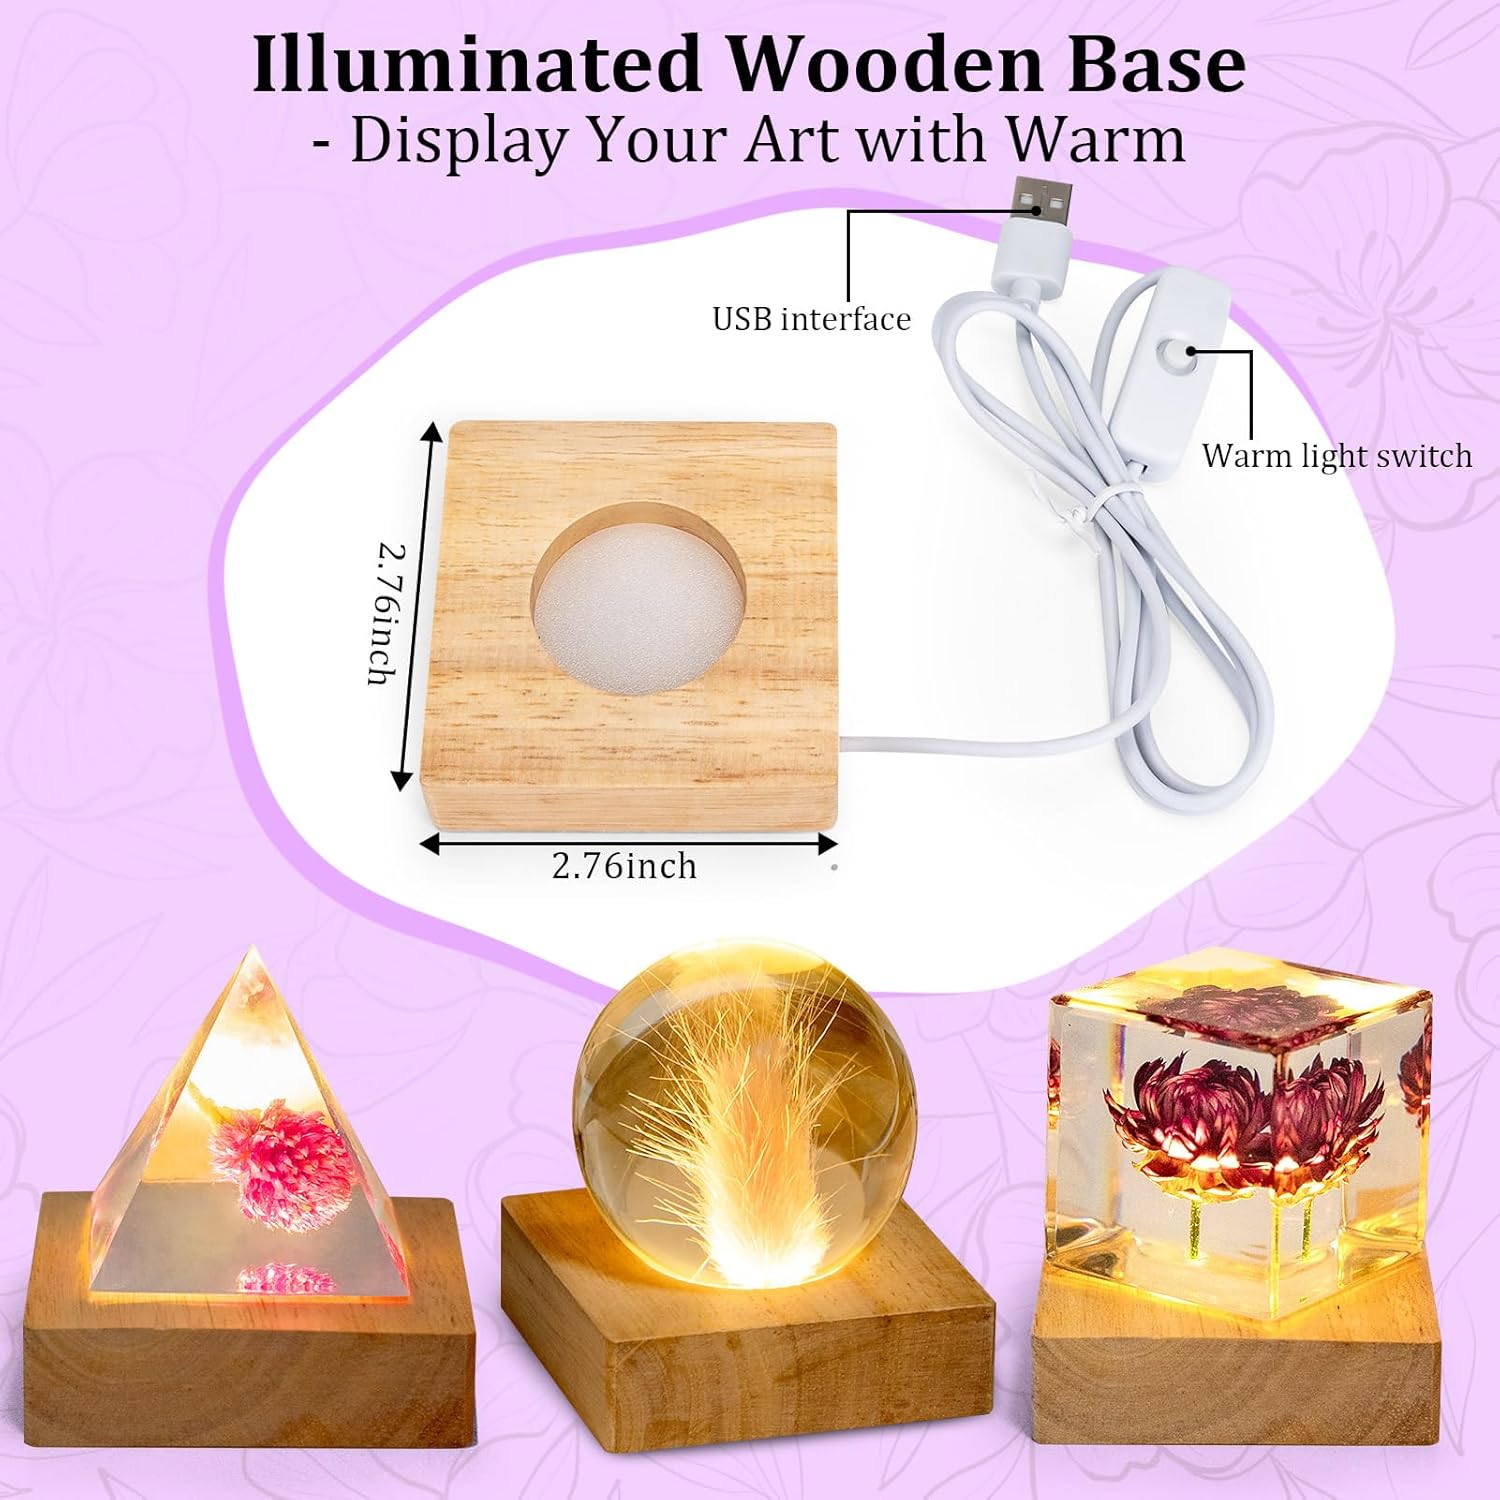
Figure 7.1: Resin art pieces illuminated by the wooden LED base.

Figure 7.2: Unique Hexagon Vase Mold.
8. Maintenance & Storage
- Mold Cleaning: After each use, clean silicone molds with mild soap and water. Ensure they are completely dry before storing.
- Resin Storage: Store unused Part A and Part B resin in their original sealed containers in a cool, dry, and dark place away from direct sunlight and extreme temperatures. Proper storage extends shelf life.
- Finished Pieces: Keep finished resin art pieces away from prolonged direct sunlight to prevent yellowing over time. Clean with a soft, damp cloth.
9. Troubleshooting
- Bubbles in Resin:
- Stir resin slowly and consistently to minimize air incorporation.
- After mixing, let the resin sit for 2-3 minutes to allow bubbles to rise.
- Use a heat gun or torch on a low setting and sweep evenly across the surface of the poured resin to pop surface bubbles.
- Use a pipette to remove stubborn bubbles.
- Resin Not Curing/Sticky:
- Ensure accurate 1:1 mixing ratio of Part A and Part B.
- Mix thoroughly for the recommended 3-5 minutes, scraping sides and bottom.
- Ensure the working temperature is within the recommended range (typically 70-75°F or 21-24°C). Colder temperatures can inhibit curing.

Figure 9.1: Epoxy Resin Defoaming Methods.
10. Specifications
- Brand: K KERNOWO
- Model Name: Epoxy Resin Kit
- Item Weight: 1.35 Kilograms
- Material Type: Silicone (molds)
- Age Range: Adult
- Included Components: 20oz resin (A+B), LED wooden base, silicone molds (Vase, Pyramid, Sphere, Cube)
11. Warranty & Support
This product does not come with a manufacturer's warranty. For any questions or support regarding your K KERNOWO Epoxy Resin Kit, please refer to the seller's contact information on the platform where you purchased the product or visit the official K KERNOWO store page.
K KERNOWO Store: https://www.amazon.com/stores/KKERNOWO/page/5EBF37E6-6D54-4C86-AED7-4F34FC6FE61B