1. Product Overview
The Machenike G6V2PE is a versatile wireless controller designed for a wide range of gaming platforms, including PC, Nintendo Switch, iOS, and Android devices. It features advanced TMR joysticks and triggers, a 1000Hz polling rate, customizable RGB lighting, remappable buttons, and voice coil motors for enhanced haptic feedback.
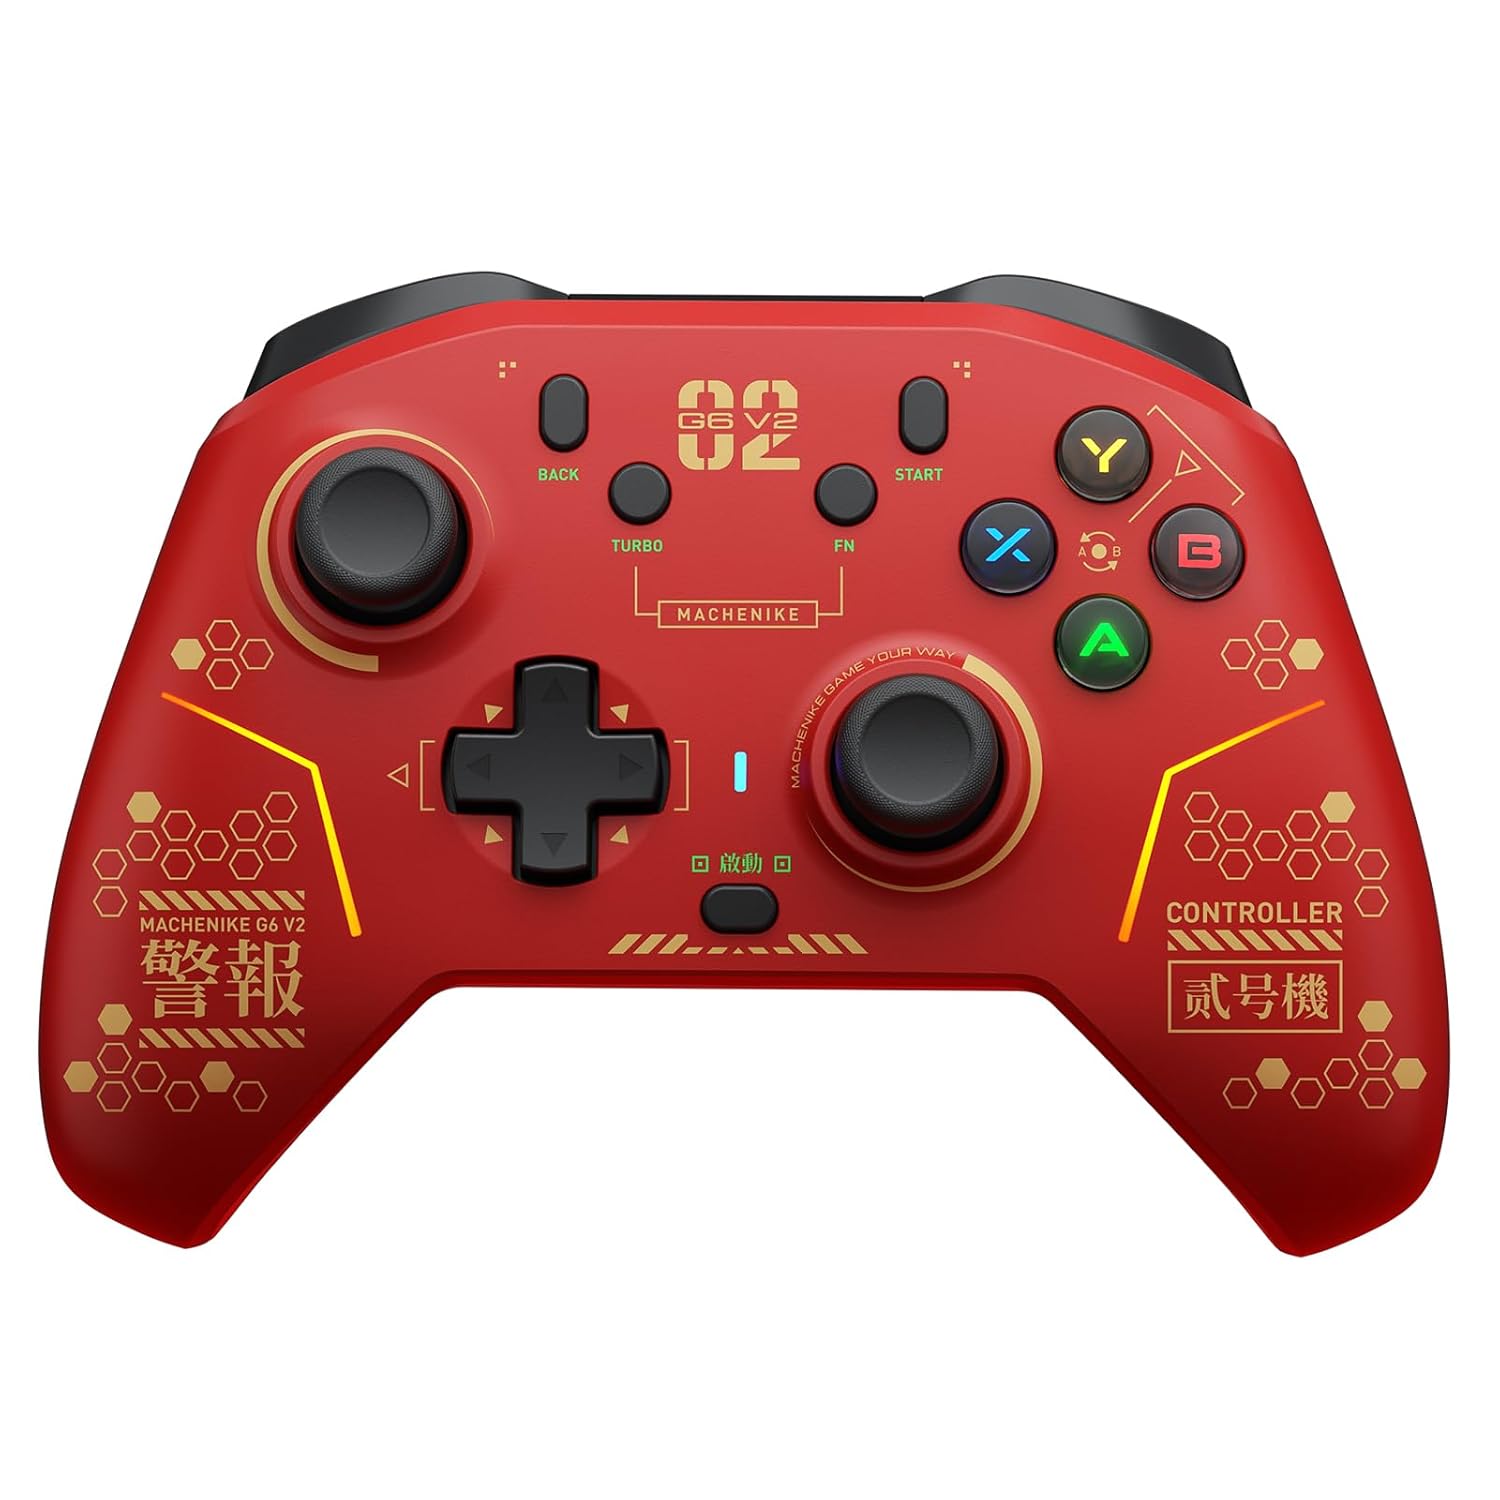
Image 1.1: Front view of the Machenike G6V2PE Wireless Controller. The controller is red with black accents, featuring two analog sticks, a D-pad, ABXY buttons, and various function buttons.
Key Features:
- Multi-Platform Compatibility: Supports PC, Nintendo Switch, iOS, and Android.
- TMR Joysticks: Adjustable torque (40-80gf) for precise control and durability.
- Dual TMR Triggers: 255-step linear actuation with 30° travel and two-stage trigger lock.
- Voice Coil Motors: Dual HD motors provide detailed and precise vibration feedback.
- ABXY Easy Swap: Innovative button layout switching for Xbox and Switch platforms.
- Programmable Macro Keys: Four customizable macro keys for complex actions.
- TURBO Function: 30-speed adjustable continuous firing.
- 1200mAh Battery: High-capacity battery for extended playtime.
- 6-Axis Motion Control: Native HD haptic replication (exclusive to Switch mode).
- 1000Hz Polling Rate: Ultra-low latency for responsive gameplay.
2. Package Contents
Please verify that all items are present in your package:
- Machenike G6V2PE Wireless Controller
- USB-C Charging/Data Cable
- 2.4G Wireless Receiver (Dongle)
- User Manual
3. Controller Layout
Familiarize yourself with the buttons and ports on your Machenike G6V2PE controller.

Image 3.1: Close-up of the Machenike G6V2PE controller's face buttons, highlighting the ABXY layout and the quick-swap mechanism.
- Left Analog Stick: Movement and camera control.
- Right Analog Stick: Camera control and aiming.
- D-Pad: Directional input.
- ABXY Buttons: Action buttons, with quick-swap functionality.
- L1/R1 (Shoulder Buttons): Top-mounted action buttons.
- L2/R2 (Triggers): Analog triggers with TMR technology and two-stage lock.
- BACK/SELECT Button: Function button.
- START/PLUS Button: Function button.
- TURBO Button: Activates/deactivates turbo function.
- FN Button: Function button for advanced settings.
- HOME Button: System menu access.
- M1, M2, M3, M4 Buttons: Rear-mounted programmable macro keys.
- USB-C Port: For charging and wired connection.
4. Setup
4.1 Charging the Controller
- Connect the supplied USB-C cable to the controller's USB-C port.
- Connect the other end of the cable to a USB power source (e.g., PC, USB wall adapter).
- The LED indicator will show charging status and turn off when fully charged.

Image 4.1: Rear view of the Machenike G6V2PE controller, illustrating the 1200mAh high-capacity battery and charging port.
4.2 Connecting to PC (Windows)
The controller supports both 2.4G wireless and wired connections to a PC.
4.2.1 2.4G Wireless Connection
- Insert the 2.4G wireless receiver into an available USB port on your PC.
- Press and hold the HOME button on the controller to power it on.
- The controller will automatically connect to the receiver. The LED indicator will stabilize when connected.
4.2.2 Wired Connection
- Connect the controller to your PC using the USB-C cable.
- The PC will automatically detect and install the necessary drivers. The controller will be ready for use.
4.3 Connecting to Nintendo Switch
- On your Nintendo Switch, navigate to 'System Settings' > 'Controllers and Sensors' > 'Change Grip/Order'.
- Press and hold the HOME button on the Machenike G6V2PE controller until the LED indicators begin to flash rapidly.
- Once connected, the LED indicator corresponding to the player number will remain solid.
4.4 Connecting to iOS/Android Devices (Bluetooth)
- Ensure Bluetooth is enabled on your iOS or Android device.
- Press and hold the HOME button on the controller until the LED indicators flash rapidly, indicating pairing mode.
- On your device, go to Bluetooth settings and select 'Machenike G6V2PE' from the list of available devices.
- Once paired, the LED indicator on the controller will stabilize.
5. Operating Instructions
5.1 Power On/Off
- Power On: Press the HOME button.
- Power Off: Press and hold the HOME button for 3-5 seconds, or the controller will automatically power off after a period of inactivity.
5.2 Mode Switching
The controller automatically detects the connection type (2.4G, Bluetooth, Wired). Specific mode switching might be available via FN key combinations or the mobile app.
5.3 ABXY Button Swap
The G6V2PE features an innovative ABXY button swap mechanism to switch between Xbox and Switch layouts.
- Locate the small dial or switch near the ABXY buttons.
- Rotate the dial or flip the switch to instantly change the button mapping between Xbox (A/B/X/Y) and Switch (B/A/Y/X) layouts.
- No software configuration is required after switching.
5.4 TMR Joysticks Adjustment
The TMR joysticks offer an adjustable force range from 40gf to 80gf.

Image 5.1: Diagram illustrating the internal mechanism of the TMR joystick and its adjustable force range (40-80gf).
- Use the included tool (if any) or refer to the mobile app for precise adjustment of joystick tension.
- A lighter force (e.g., 40gf) is suitable for smooth, continuous movements, while a heavier force (e.g., 80gf) provides more resistance for fine, precise aiming.
5.5 Dual TMR Triggers & Two-Stage Lock
The triggers provide linear input and can be adjusted for different gaming scenarios.

Image 5.2: Cutaway view of the Machenike G6V2PE controller's dual TMR triggers, highlighting their linear actuation and stability.
- Linear Actuation: The triggers offer 255 steps of linear input, ideal for racing games or precise acceleration/braking.
- Two-Stage Trigger Lock: Engage the physical switches on the underside of the controller to reduce trigger travel.
- 9mm TMR Linear: Full travel for realistic driving simulation.
- 2mm Short-Throw: Reduced travel for rapid-fire actions in competitive games.
5.6 Macro Keys (M1-M4)
The four rear macro keys (M1, M2, M3, M4) can be programmed to execute complex sequences of button presses.
- Refer to the mobile app or the detailed instructions in the full manual for programming macro sequences.
- Macros can include up to 32 actions and are released with a single press of the assigned macro key.
5.7 TURBO Function
The TURBO function allows for continuous rapid input of a selected button.
- Press and hold the TURBO button, then press the desired action button (e.g., A, B, X, Y, L1, R1). The button will now continuously repeat its input when held.
- To adjust the TURBO speed (30 gears), use the FN button in combination with specific directional inputs (refer to the full manual for exact combinations).
- To deactivate TURBO for a specific button, repeat step 1.
5.8 RGB Lighting
The controller features customizable RGB flow lighting.
- Use the mobile app to customize lighting effects, colors, and brightness.
- Specific button combinations may also cycle through preset lighting modes (refer to the full manual).
5.9 Motion Control
The 6-axis motion control functionality is available when connected to a Nintendo Switch.
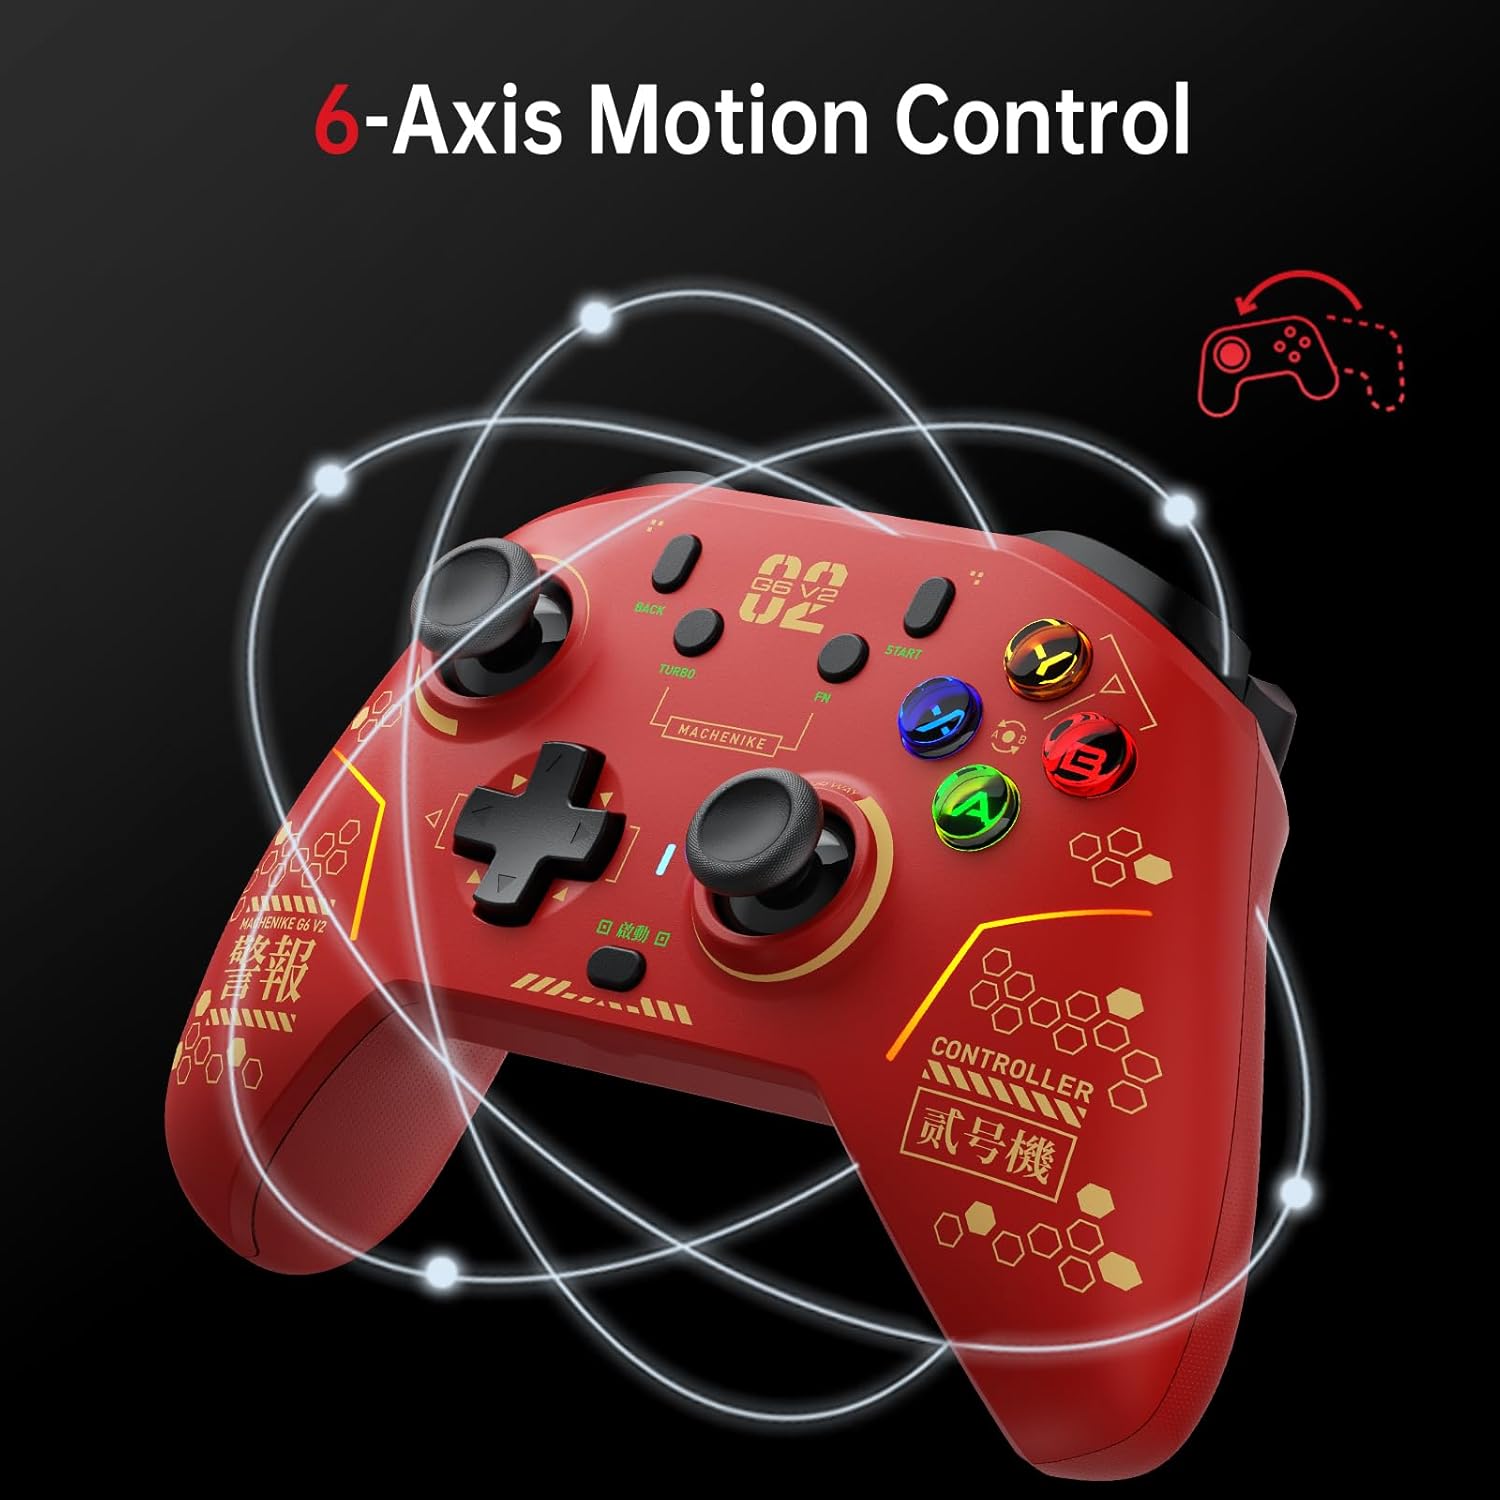
Image 5.3: The Machenike G6V2PE controller demonstrating 6-axis motion control, with circular lines indicating movement.
- This feature allows for intuitive control in games that utilize gyroscope or accelerometer input.
- Ensure the controller is properly calibrated if motion control feels inaccurate (refer to Switch system settings or the mobile app).
5.10 Mobile App Customization (KeyLinker)
For advanced customization, download the KeyLinker mobile app.
- The app allows for detailed adjustments of buttons, joysticks, triggers, calibration, macro keys, lighting, vibration, and other settings.
- Search for 'KeyLinker' on your device's app store.
6. Maintenance
- Cleaning: Use a soft, dry cloth to clean the controller. For stubborn dirt, slightly dampen the cloth with water. Avoid harsh chemicals or abrasive materials.
- Storage: Store the controller in a cool, dry place away from direct sunlight and extreme temperatures.
- Battery Care: To prolong battery life, avoid fully discharging the controller frequently. Charge it regularly, even if not in use for extended periods.
- Avoid Drops: Protect the controller from physical impact, as this can damage internal components.
7. Troubleshooting
7.1 Controller Not Connecting
- Check Battery: Ensure the controller is sufficiently charged.
- Re-pair: Try re-pairing the controller with your device (PC, Switch, iOS/Android) according to the setup instructions.
- 2.4G Receiver: For PC, ensure the 2.4G receiver is securely plugged into a working USB port. Try a different USB port.
- Bluetooth Interference: Move away from other wireless devices that might cause interference.
- Wired Connection: Test with a wired connection to rule out wireless issues.
7.2 Buttons/Joysticks Not Responding
- Recalibrate: Use the mobile app or system settings on your device to recalibrate joysticks and triggers.
- Firmware Update: Check the Machenike official website or mobile app for any available firmware updates for the controller.
- Reset Controller: Locate the small reset button (often a pinhole) on the controller and press it with a thin object (e.g., paperclip) to perform a factory reset.
7.3 Vibration Not Working
- Game Settings: Ensure vibration is enabled in the game's settings.
- Controller Settings: Check vibration settings in the mobile app or your device's controller settings.
8. Specifications
| Feature | Detail |
|---|---|
| Model Number | MC-G3V2PE-W |
| Connectivity | 2.4G Wireless, Bluetooth, USB-C Wired |
| Compatible Platforms | PC (Windows), Nintendo Switch, iOS, Android |
| Joysticks | GuliKit Adjustable Torque TMR Rocker (40-80gf) |
| Triggers | Dual TMR Triggers (255-step linear, 30° travel, two-stage lock) |
| Vibration | Dual HD Voice Coil Motors |
| Polling Rate | 1000Hz |
| Battery Capacity | 1200mAh Lithium Polymer |
| Dimensions | 4.17 x 3.15 x 6.14 inches |
| Weight | 1.43 pounds |
9. Warranty and Support
Machenike products are designed and manufactured to the highest quality standards. This product is covered by a limited warranty from the date of purchase. Please refer to the official Machenike website or your purchase documentation for specific warranty terms and conditions.
Customer Support:
For technical assistance, troubleshooting, or warranty claims, please contact Machenike customer support through their official website or the contact information provided with your purchase. When contacting support, please have your product model number (G6V2PE) and proof of purchase readily available.
Online Resources: Visit the official Machenike website for FAQs, driver downloads, firmware updates, and additional support resources.


