1. Product Overview
This manual provides instructions for the WORKPRO 12-in-1 Ratcheting Multi-Bit Screwdriver Set and the accompanying 4-piece Collapsible Magnetic Parts Tray Set. This versatile tool combination is designed to assist with various fastening tasks and component organization in automotive repairs, DIY projects, and workshop environments.

Image 1.1: The WORKPRO 12-in-1 Ratcheting Multi-Bit Screwdriver and the 4-piece Collapsible Magnetic Parts Tray Set.
2. Screwdriver Features
The WORKPRO 12-in-1 Ratcheting Multi-Bit Screwdriver features a comfortable handle and a robust ratcheting mechanism. It includes six double-ended, 1/4 inch hex shank S2 steel bits, each 3-1/2 inches in length. These bits are conveniently stored within the screwdriver handle for easy access and portability.
2.1 Included Bits
- Slotted: SL4, SL5
- Phillips: PH1, PH2, PH3
- Square (Robertson): SQ1, SQ2, SQ3
- Torx: T10, T15, T20, T25
2.2 Ratcheting Mechanism
The screwdriver incorporates a flexible ratcheting mechanism allowing for clockwise, counter-clockwise, or locked operation. This enhances efficiency and reduces wrist strain during repetitive tasks.

Image 2.1: Visual guide to the flexible ratcheting mechanism, indicating left, right, and locked positions.
2.3 Integrated Bit Storage
The screwdriver handle is designed with integrated storage for all included double-ended bits, ensuring they are always available when needed.
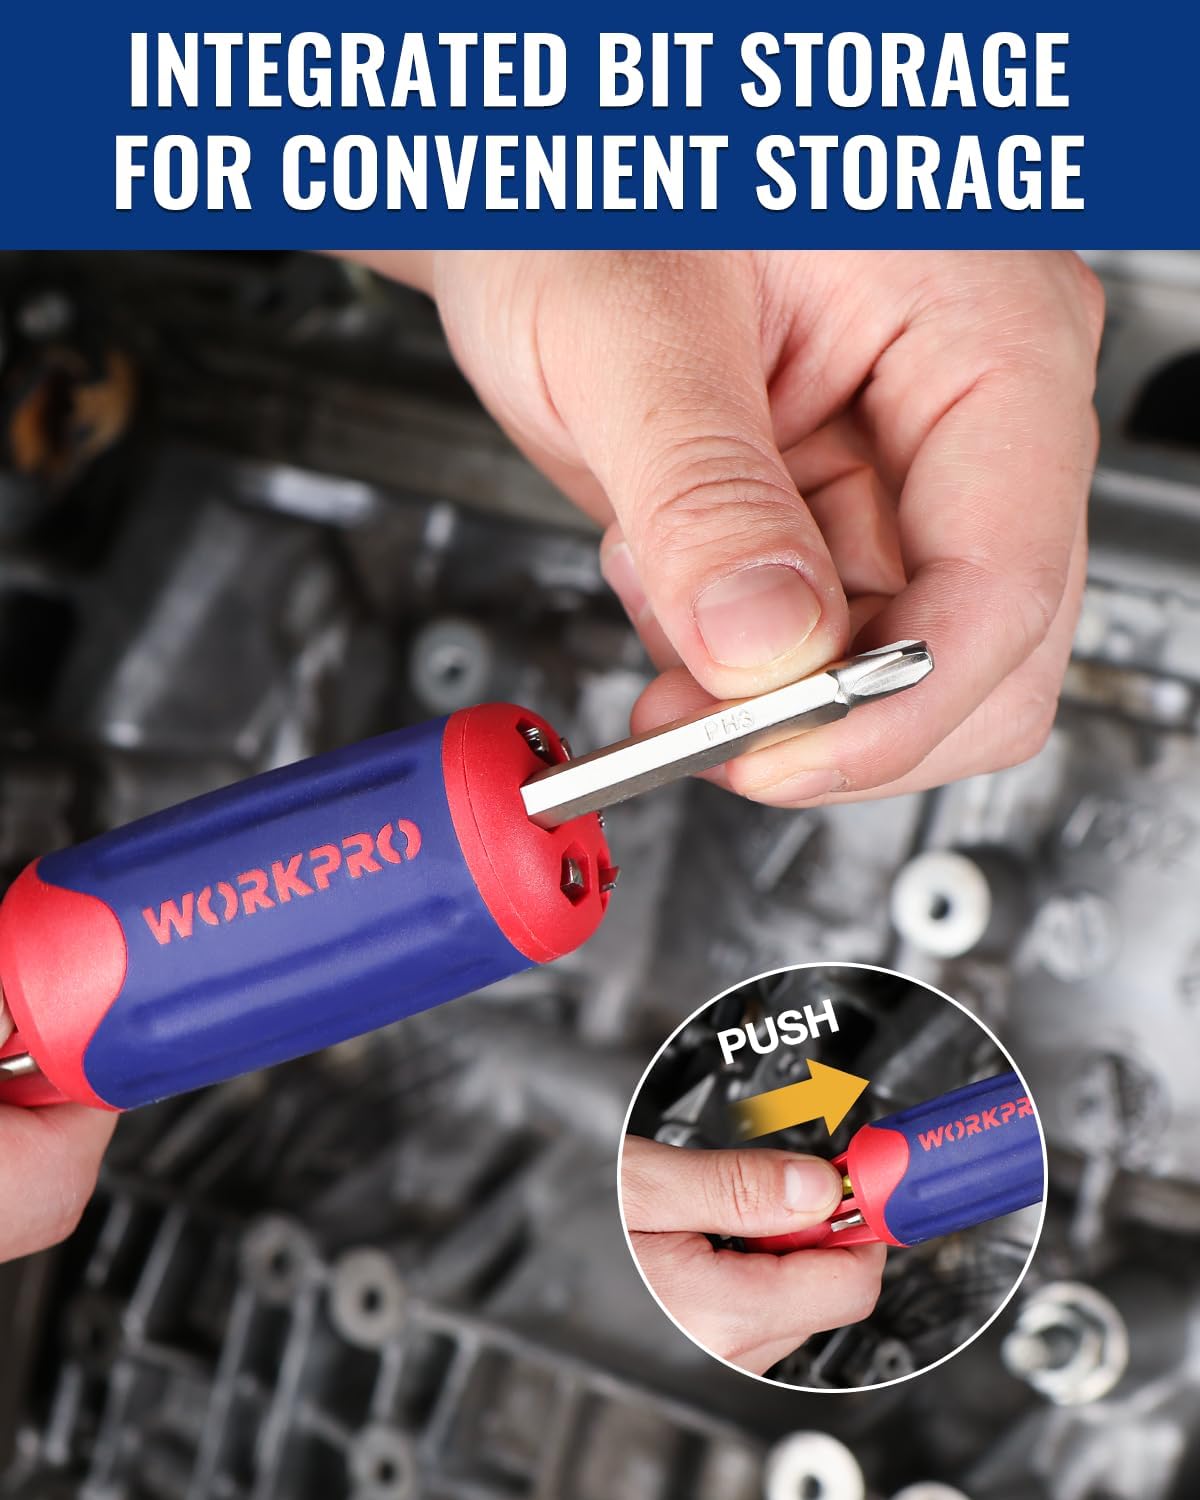
Image 2.2: Integrated bit storage within the screwdriver handle for convenient access.
3. Collapsible Magnetic Parts Tray Set Features
The 4-piece Collapsible Magnetic Parts Tray Set provides a solution for organizing small components during work. These trays are designed to prevent the loss of bolts, nuts, washers, and other small parts.
3.1 Collapsible Design
The trays feature a collapsible design, allowing them to be folded flat for compact storage and portability when not in use.

Image 3.1: Collapsible trays in use, demonstrating their ability to organize small parts and their compact storage.
3.2 Strong Magnetic Base
Each tray is equipped with a double-sided strong magnetic base, allowing it to adhere securely to most metal surfaces. This prevents parts from scattering and keeps them within reach.

Image 3.2: Magnetic trays securely attached to a metal surface, holding small parts.

Image 3.3: Illustration of the magnetic force capabilities of the trays.
4. Setup
4.1 Inserting and Removing Screwdriver Bits
- To insert a bit: Select the desired double-ended bit. Push the bit firmly into the bit holder at the end of the screwdriver handle until it clicks into place. The 3x ball bearing lock mechanism ensures a secure fit.
- To remove a bit: Pull back the blue collar on the bit holder. The bit will release, allowing you to pull it out.

Image 4.1: Demonstrating the one-handed bit loading and patented auto-locking mechanism.
4.2 Adjusting the Ratcheting Mechanism
The ratcheting mechanism can be adjusted using the selector switch located near the bit holder:
- Clockwise (Right): For tightening screws. The screwdriver will only turn clockwise.
- Counter-clockwise (Left): For loosening screws. The screwdriver will only turn counter-clockwise.
- Locked (Middle): For fixed operation, acting as a standard screwdriver.
5. Operating Instructions
5.1 Using the Screwdriver
- Select the appropriate bit for your fastener and insert it securely.
- Adjust the ratcheting mechanism to the desired direction (tighten, loosen, or locked).
- Place the bit onto the fastener head and apply firm, steady pressure while turning the handle. The ratcheting action will allow you to maintain continuous contact with the fastener.
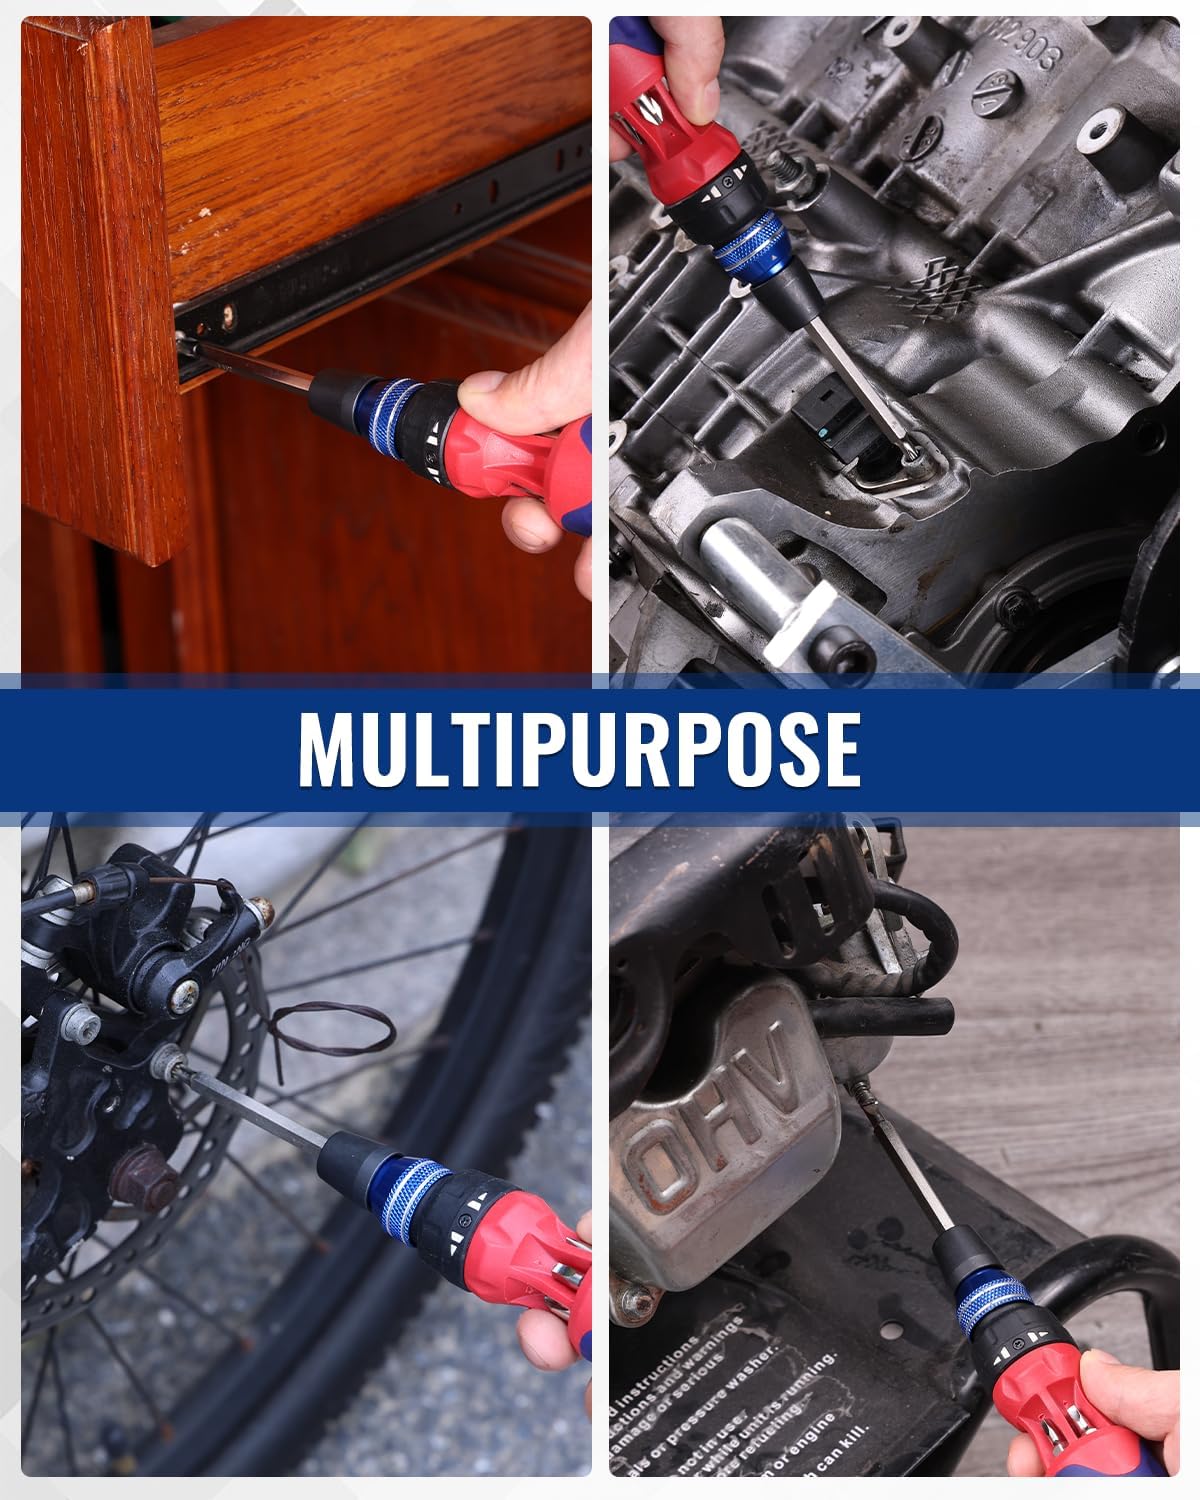
Image 5.1: Examples of the screwdriver's multipurpose applications.
5.2 Using the Magnetic Parts Trays
- To expand a tray: Gently push on the bottom of the collapsed tray until the sides pop up and lock into place.
- To collapse a tray: Push down on the sides of the tray until it folds flat.
- Placement: Place the expanded tray on a flat surface or attach it to any suitable metal surface using its magnetic base.
- Organization: Place small metal parts (screws, nuts, bolts, etc.) into the tray to keep them organized and prevent loss.
6. Maintenance
To ensure the longevity and optimal performance of your WORKPRO tools, follow these maintenance guidelines:
- Cleaning: Wipe down the screwdriver handle and bits with a clean, dry cloth after each use. For the magnetic trays, wipe with a damp cloth and dry thoroughly.
- Storage: Store the screwdriver with all bits securely in its handle. Keep the magnetic trays collapsed when not in use to save space. Store all tools in a dry environment to prevent rust and corrosion.
- Inspection: Periodically inspect bits for wear or damage. Replace worn bits to maintain optimal performance and prevent damage to fasteners.
7. Troubleshooting
- Bit Slippage: If a bit slips during use, ensure it is fully inserted and locked into the bit holder. Verify that the bit size matches the fastener head.
- Ratcheting Issues: If the ratcheting mechanism does not engage or locks incorrectly, check the selector switch to ensure it is set to the desired position (clockwise, counter-clockwise, or locked).
- Parts Not Sticking to Tray: Ensure the magnetic base of the tray is clean and free of debris. Confirm that the parts are made of a ferromagnetic material.
8. Specifications
| Feature | Detail |
|---|---|
| Screwdriver Type | Ratcheting Multi-Bit |
| Number of Bits | 6 double-ended bits (12 sizes) |
| Bit Material | S2 Steel |
| Bit Shank Size | 1/4 inch hex |
| Bit Length | 3-1/2 inch |
| Parts Tray Quantity | 4 pieces |
| Parts Tray Feature | Collapsible, Double-Sided Magnetic Base |
| ASIN | B0FL23P7SR |
| Date First Available | July 30, 2025 |
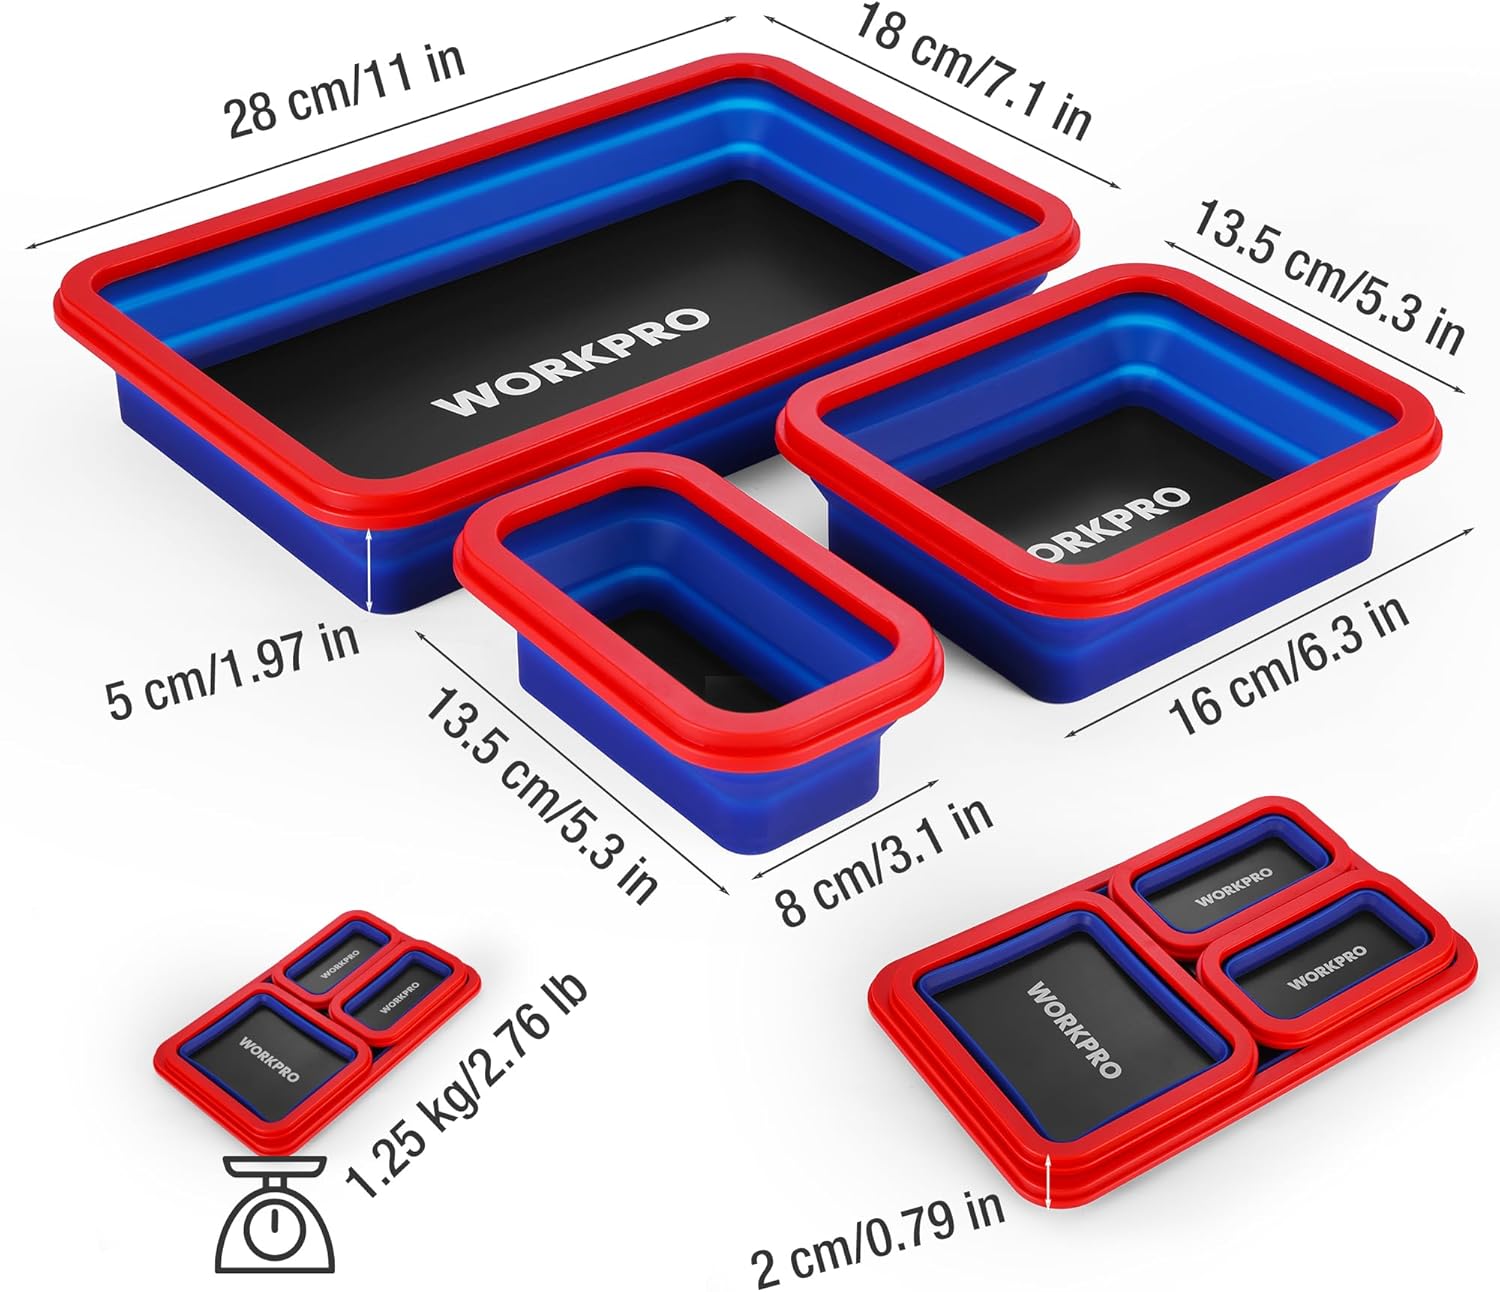
Image 8.1: Dimensions of the 4-piece Collapsible Magnetic Parts Tray Set.
9. Product Demonstration Video
Watch this video for a demonstration of the WORKPRO 12-in-1 Ratcheting Multi-Bit Screwdriver, showcasing its features and ease of use.
Video 9.1: A user demonstrating the features and functionality of the WORKPRO 12-in-1 Ratcheting Multi-Bit Screwdriver, including bit changes and ratcheting action.
10. Warranty and Support
For information regarding warranty coverage, product support, or to purchase replacement parts, please refer to the official WORKPRO website or contact their customer service department. Contact details can typically be found on the product packaging or the manufacturer's official website.


