
Introduction
This manual provides detailed instructions for the setup, operation, maintenance, and troubleshooting of your MASHI W870 Wireless Weather Station. This device offers comprehensive weather information including indoor and outdoor temperature and humidity, a 12-24 hour weather forecast, atomic clock functionality, barometric pressure readings, and moon phase display. Please read this manual thoroughly before use to ensure optimal performance and longevity of your device.
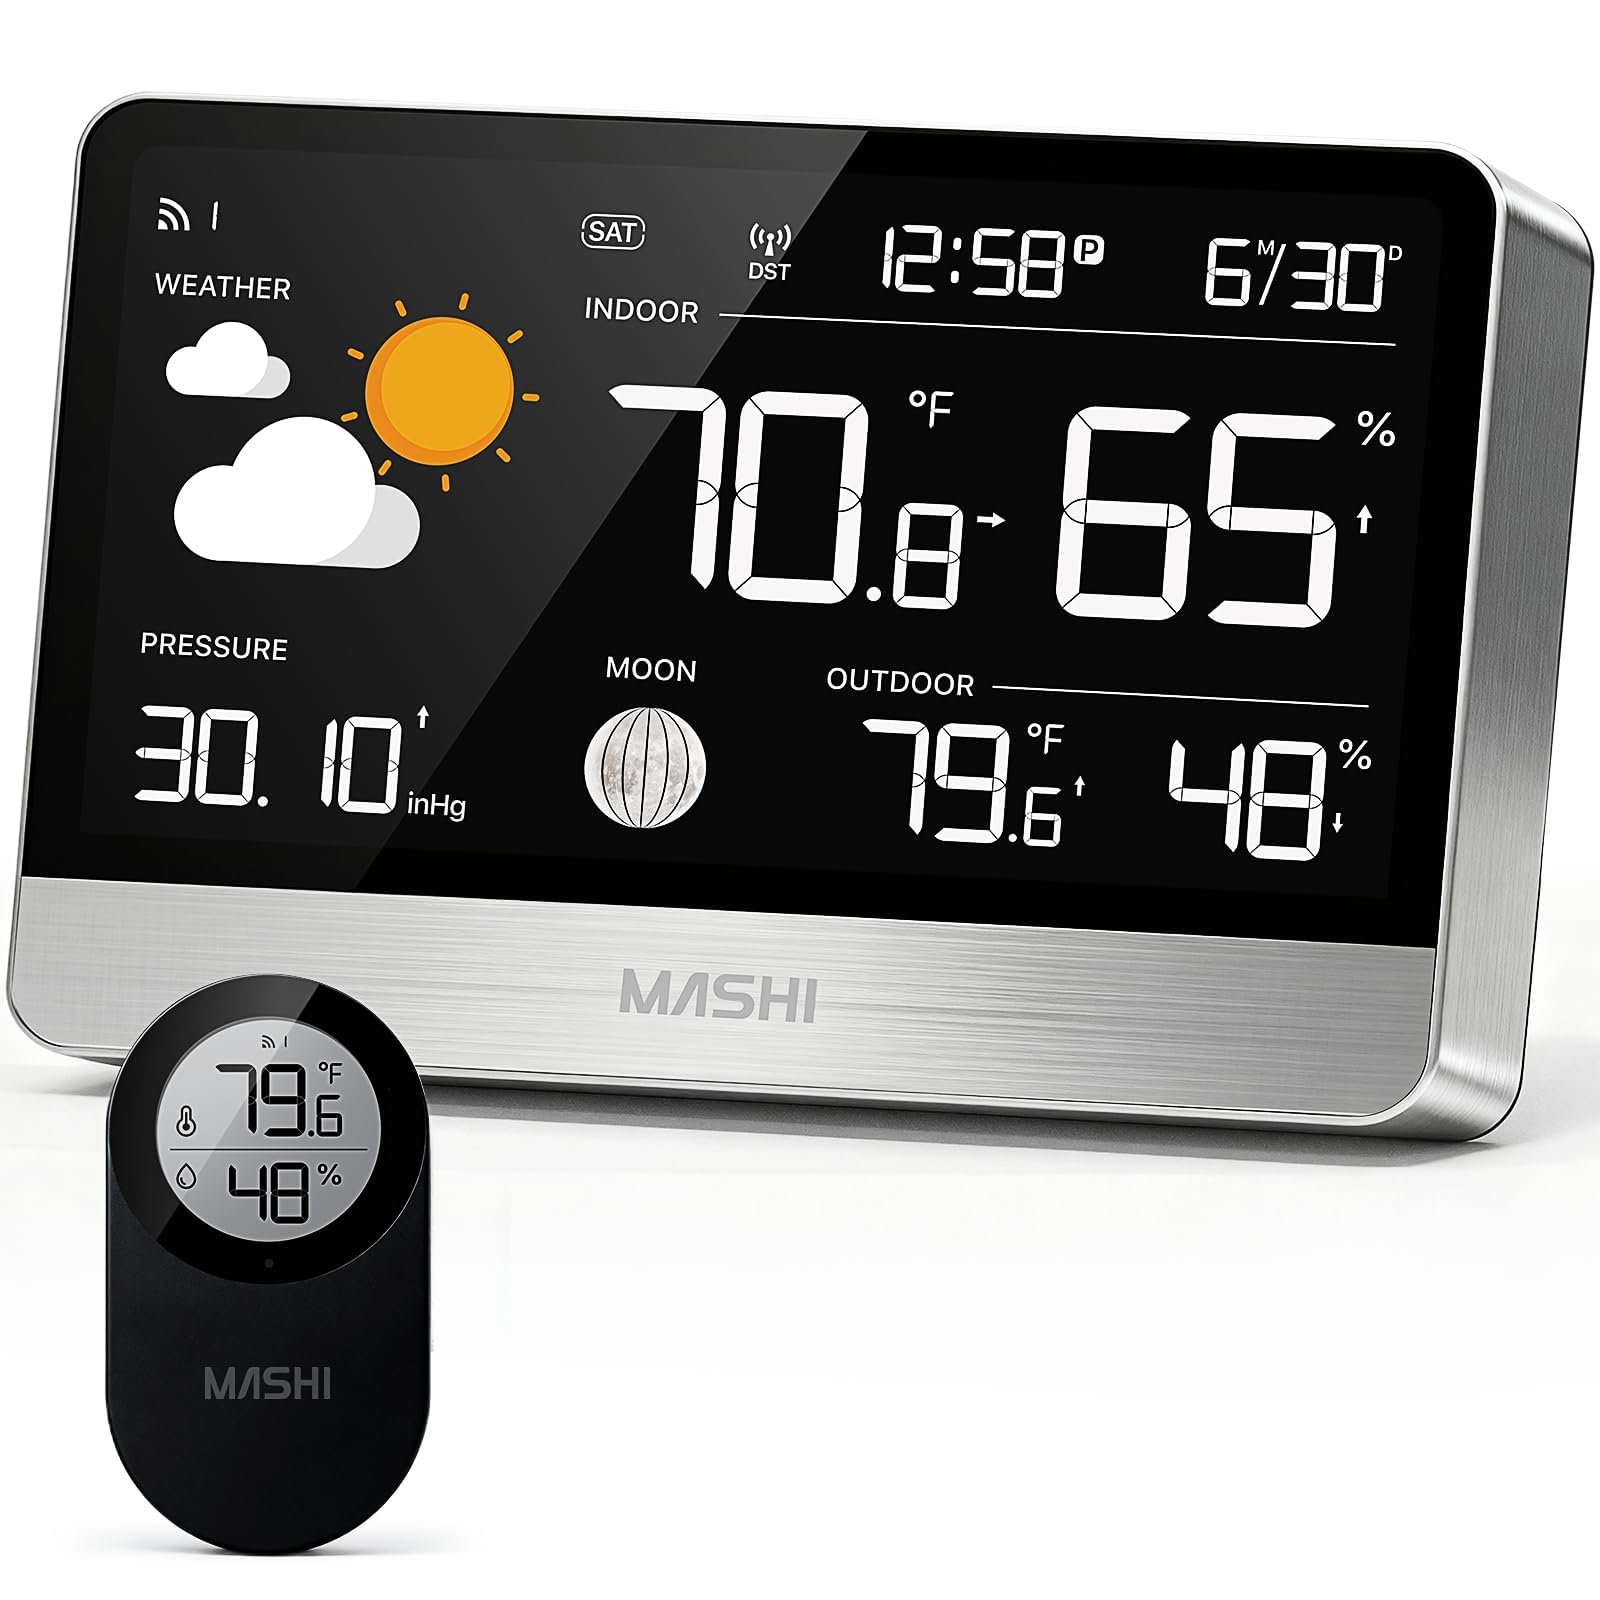
Figure 1: MASHI W870 Wireless Weather Station Main Unit
What's in the Box
Verify that all components are present upon unpacking:
- 1 x MASHI Weather Station Clock (Main Unit)
- 1 x Outdoor Sensor
- 1 x Lanyard (for outdoor sensor)
- 1 x Charging Adapter (5V/1A)
- 1 x Type-C Power Cable
- 1 x User Manual (this document)

Figure 2: Package Contents
Setup
Follow these steps to set up your MASHI W870 Weather Station:
- Power the Main Unit: Connect the Type-C power cable to the weather station clock and plug the charging adapter into a power outlet. The display will turn on.
- Prepare the Outdoor Sensor: Open the battery compartment of the outdoor sensor. Insert 2 x AAA batteries (not included), ensuring correct polarity. Select a channel (CH1, CH2, or CH3) using the switch inside the compartment, then press the 'TX' button to transmit data.
- Pairing: The main unit will automatically search for the outdoor sensor. Ensure the sensor is within range (up to 330ft/100m in open areas). Once paired, the weather station will display outdoor temperature, humidity, and barometric pressure.
- Atomic Clock Synchronization: The built-in WWVB function will automatically search for and update the time daily between 1:00 AM and 5:00 AM. This process may take some time. During RCC signal reception, the backlight may temporarily turn off. Manual time setting is also available if needed. The device supports EST, CST, MST, and PST time zones.

Figure 3: Quick Setup Guide
Outdoor Sensor Placement
For accurate readings and optimal signal transmission:
- Mount the sensor vertically.
- Place it at least 3 feet (1 meter) away from electronic devices that may cause interference.
- Avoid direct sunlight and rain exposure to prevent inaccurate readings and damage.

Figure 4: Outdoor Sensor Placement Guidelines
Operating Instructions
Display and Controls
The 8.8-inch HD display shows various information clearly. The main unit features buttons for settings and adjustments, typically located on the back or top edge.
Adjusting Brightness and Night Mode
The display offers 5 levels of brightness. Press the "Light" button to cycle through brightness levels (100%, 70%, 40%, 20%, 0%). Long-press the "Light" button for 3 seconds to activate Night Mode. In Night Mode, the backlight automatically turns off from 10:00 PM to 7:00 AM to prevent sleep disturbance.

Figure 5: Brightness Adjustment and Night Mode
Time Format (12/24H)
Easily switch between 12-hour and 24-hour time formats with a dedicated button (refer to the main unit's controls for specific button location, usually labeled '12/24H' or similar).

Figure 6: 12/24 Hour Time Format Switch
Temperature Units (°C/°F)
The temperature display can be switched between Celsius (°C) and Fahrenheit (°F). Consult the user manual for the specific button or setting to change this unit.
Features Overview
- 8.8" Large Multifunctional Display: The weather station features an 8.8-inch HD display for clear visibility of all data. It can be placed on a tabletop using its stand or wall-mounted.
- 3-Channel Wireless Sensors Supported: The system supports up to three remote sensors (one is included). This allows monitoring of temperature and humidity in various locations such as a baby room, storage area, garden, or garage. The transmission range is up to 330ft (100m) in open areas.
- Accurate Weather Forecast: Utilizing advanced technology, the station calculates a 12-24 hour weather forecast based on collected temperature, humidity, and barometric pressure data. It requires 7-10 days for initial calibration to achieve higher accuracy. Six dynamic icons (sunny, partly cloudy, cloudy, rainy, heavy rain, snowy) provide visual weather updates.
- Atomic Clock with RCC Signal: The integrated WWVB function automatically synchronizes and updates the time daily, ensuring precise timekeeping without manual adjustments. It supports four time zones: EST, CST, MST, and PST.
- 5-Level Brightness & Night Mode: Adjust the display brightness to your preference with five available levels. Night Mode automatically dims the display during nighttime hours (10:00 PM to 7:00 AM) to avoid disturbance.
- Stable Power Supply & Low Battery Alert: The main unit operates via the included 5V/1A adapter. The outdoor sensor uses 2xAA batteries (not included) and features a low battery indicator to prompt timely replacement.

Figure 7: Multi-Functional Display Overview

Figure 8: Multiple Sensor Support

Figure 9: Weather Forecast Icons

Figure 10: Atomic Clock Functionality
Maintenance
- Cleaning: Use a soft, dry cloth to clean the display and main unit. Do not use abrasive cleaners or solvents.
- Sensor Care: Periodically check the outdoor sensor for debris or obstructions. Ensure its battery compartment is sealed to prevent moisture ingress. Replace batteries when the low battery indicator appears on the main unit.
- Power Supply: Always use the provided 5V/1A adapter for the main unit.
Troubleshooting
| Problem | Possible Cause | Solution |
|---|---|---|
| No display on main unit | Power adapter not connected or faulty. | Ensure the power cable is securely connected and the adapter is plugged into a working outlet. |
| Outdoor temperature/humidity not displayed | Outdoor sensor not paired, out of range, or low battery. | Check sensor batteries. Ensure sensor is within 330ft (100m) of the main unit. Re-pair the sensor if necessary (refer to setup section). |
| Inaccurate weather forecast | Initial calibration period not complete. | Allow 7-10 days for the station to calibrate for accurate forecasts. |
| Atomic clock not synchronizing | Weak RCC signal or interference. | Place the main unit near a window, away from electronic devices that may cause interference. Allow time for daily synchronization (1:00-5:00 AM). Manual time setting is an alternative. |
| Display too dim or bright | Brightness level needs adjustment. | Press the 'Light' button to adjust brightness levels. Check if Night Mode is active. |
Official Product Video
Video 1: Overview of the MASHI Weather Station with 8.8" Color Display, demonstrating its features and functionality.
Specifications
| Feature | Detail |
|---|---|
| Brand | MASHI |
| Model Number | W870 |
| Display Type | LED |
| Display Size | 8.8 inches |
| Product Dimensions | 1.16"D x 7.9"W x 5.35"H |
| Item Weight | 0.81 kg |
| Power Source (Main Unit) | Corded Electric (5V/1A adapter) |
| Power Source (Outdoor Sensor) | 2 x AA Batteries (not included) |
| Connectivity Technology | Wireless (Radio Frequency) |
| Sensor Transmission Range | Up to 330ft / 100m (open areas) |
| Temperature Accuracy | ±1 °C |
| Recommended Uses | Home, Office (Indoor, Outdoor) |
| Material | Glass, Metal |
| Special Feature | Weather Resistant |
Warranty and Support
MASHI products are designed for reliability and performance. For specific warranty details, please refer to the warranty card included with your product or contact MASHI customer support directly. Keep your purchase receipt as proof of purchase for any warranty claims.
For technical assistance, troubleshooting not covered in this manual, or to inquire about replacement parts, please contact MASHI customer support through their official website or the contact information provided in your product packaging. When contacting support, please have your model number (W870) and purchase date available.